How to Shorten a Dishwasher Drain Hose Safely: Step-by-Step Guide
To safely shorten a dishwasher drain hose, start by measuring the desired length and marking it. Disconnect the power and water supply, then cut the hose squarely with a sharp cutter. Attach a properly sized hose barb or coupling, securing the joint with a stainless-steel worm-drive clamp. Once everything is reconnected, run a water test to check for leaks and proper drainage. Be sure to follow local codes, maintain the high-loop or air gap, and consult a plumber if you have any uncertainties.
What You Need to Know Before Shortening a Dishwasher Drain Hose
Homeowners often shorten dishwasher drain hoses to improve fit, reduce kinking, or tidy installations during renovations.
Before cutting, codes, manufacturer instructions, and basic safety—such as power and water isolation—must be verified to guarantee a compliant, leak-free result.
The choice of tools, replacement fittings, and the hose type (rubber, corrugated, or reinforced PVC) determines the cutting and reconnection method.
Why homeowners shorten dishwasher drain hoses
Because improperly routed or oversized drain lines can cause leaks, clogs, and poor drainage, many people shorten a dishwasher drain hose to improve fit and function.
Homeowners also trim hoses to eliminate kinks, reduce standing water, and simplify installation in tight cabinets.
Proper shortening improves flow, prevents odor, and minimizes strain on fittings, so learning how to shorten dishwasher drain hose saves time and avoids repeats.
Safety and code considerations to check first
Having established why shortening a dishwasher drain hose can improve performance and fit, attention must turn to safety and local plumbing codes before cutting or rerouting any line.
Confirm appliance warranty implications, guarantee compliance with local codes regarding trap arms, air gaps, and high-loop requirements, and verify electrical disconnects and water shutoffs.
When in doubt, consult a licensed plumber to avoid violations or hazards.
Tools and materials required
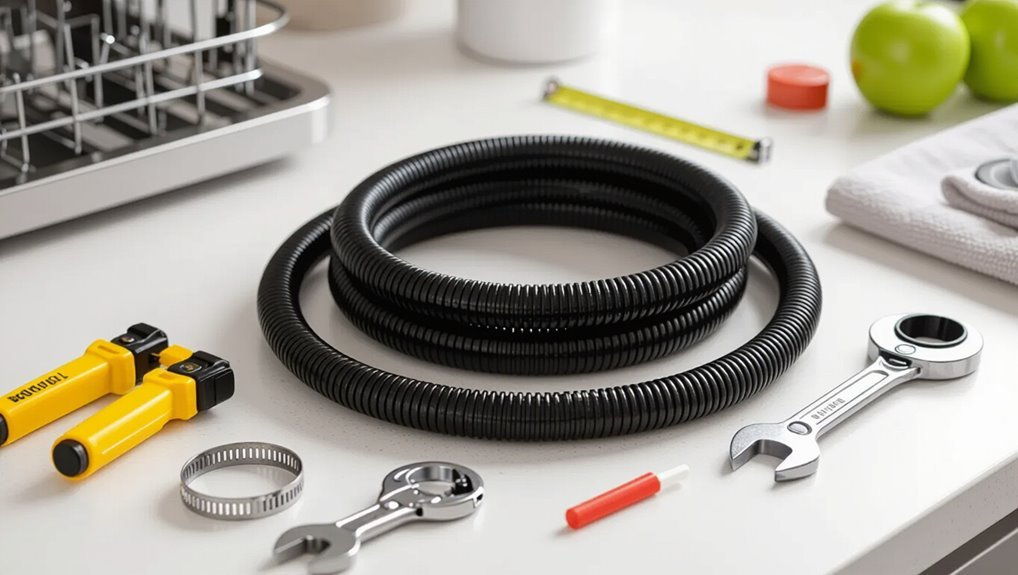
A small set of basic tools and a few specific parts are required before shortening a dishwasher drain hose to guarantee a clean, code-compliant job: hose clamps (stainless steel worm-drive or approved crimp types), a replacement length of dishwasher-grade drain hose (if removing a damaged section), a sharp utility knife or hose cutter, a pair of pliers, screwdrivers for clamp or connection removal, a bucket and towels for water catchment, and optional hose adapters or fittings if mating to different diameters—plus gloves and safety glasses.
- Clamps, hose section, adapters
- Cutting tool, pliers, screwdrivers
- Bucket, towels, gloves, glasses
- Optional crimp tool or spare fittings
Types of dishwasher drain hoses and fittings
After gathering the tools and parts, the next step is to identify the specific type of dishwasher drain hose and its fittings, since material, diameter, and connection style determine how it can be shortened and reconnected.
Common hoses: corrugated plastic, smooth PVC, and reinforced rubber.
Fittings include clamped barbed, threaded swivel, and quick-connect.
Match replacement fittings and clamps to guarantee leak-free, code-compliant repairs.
Assessing Whether Your Drain Hose Can Be Shortened
Before cutting, the current hose length should be measured against the required final length and the hose inspected for cracks, brittleness, or other wear that could warrant replacement.
The installer must identify the hose type—corrugated or smooth, plastic or rubber—as material and construction affect how cleanly it can be shortened and reattached.
If damage is present or the hose material is unsuitable for a secure shortened connection, replacement is the safer option.
Measuring current hose length and required final length
Measuring the existing drain hose and determining the needed final length are essential first steps to decide whether shortening is feasible. This requires recording the hose end-to-end length, noting the distance from the dishwasher outlet to the disposal or sink connection, and allowing for bends and service access.
Then subtract required slack, mark cut location, and verify connector reach and overlap for a secure reattachment.
Inspecting hose condition for damage or wear
With the cut location confirmed and slack accounted for, the next step is to inspect the drain hose for damage or wear to determine if shortening is advisable.
Visually examine the entire length for cracks, splits, bulges, soft spots, abrasions, or oil/chemical degradation.
Check connection ends for corrosion or fraying.
If defects exist near the proposed cut, replacement rather than shortening is recommended.
Determining hose type: corrugated vs smooth, plastic vs rubber
Identifying the drain hose type is essential to deciding whether it can be shortened safely.
Corrugated hoses are flexible but may deform when trimmed; smooth hoses cut cleanly and maintain flow.
Determine material—plastic (PVC) is stiffer, rubber is more pliable.
Measure wall thickness and fittings; note manufacturer markings.
If uncertain, document type before attempting any shortening.
When replacement is better than shortening
After noting hose construction and markings, assess whether shortening is appropriate or if a replacement is safer.
If the hose shows cracks, brittle sections, kinks, previous splice repairs, or lacks sufficient smooth length for a reliable clamp, replacement is recommended.
Also replace if fittings are integral, material is incompatible with couplers, or local codes demand new assemblies rather than field-modified hoses.
Preparing the Dishwasher and Workspace
Before any hose work begins, power should be switched off at the breaker and the water supply disconnected to prevent shocks and leaks.
The dishwasher must be moved slightly forward with adequate support and leveling to keep it stable while accessing the hose.
Cabinets and flooring should be protected with drop cloths or cardboard to catch drips and prevent scratches.
Shutting off power and disconnecting water supply
Power to the dishwasher should be cut and the water supply closed before any work begins.
Electricity is isolated at the breaker and the dishwasher’s power plug removed.
The water shutoff valve under the sink or at the home’s supply line is turned off, and the feed line is drained into a towel or bucket.
Verify no power or water flow before proceeding.
Positioning and supporting the dishwasher safely
Slide the dishwasher out slowly until the front feet clear the cabinet opening, keeping it level and supported to prevent tipping.
Place sturdy blocks or adjustable support under the base and secure the appliance with straps to immobilize it.
Confirm access to connections and hose routing.
Verify adequate lighting and a clear work area; keep tools within reach and avoid placing weight on the door.
Protecting cabinets and flooring
Place protective materials—such as cardboard, drop cloths, or thick towels—along cabinet edges and on the floor to shield surfaces from scratches, dents, and water damage while the dishwasher is worked on.
Follow these concise precautions:
- Tape edges to prevent shifting.
- Use waterproof layers near connections.
- Pad exposed corners.
- Keep tools on a tray to avoid gouges and spills.
Step-by-Step Procedure to Shorten a Dishwasher Drain Hose
The procedure begins with detaching the drain hose from both the dishwasher and the drain connection to provide clear access.
Next, the technician measures and marks the cut point allowing for any fittings, makes a clean cut with the appropriate tool, and installs a suitable coupling or hose barb.
Finally, all connections are secured with clamps and the system is tested for proper fit and leaks.
Step 1: Detach the hose from the dishwasher and drain connection
Begin by turning off power to the dishwasher at the circuit breaker and shutting off the water supply to prevent leaks or electrical hazards.
Then, place towels and a bucket under connections.
Loosen the clamp at the dishwasher inlet, detach the hose, and disconnect the other end at the drain or garbage disposal.
Inspect fittings and hose ends for damage before proceeding.
Step 2: Mark and measure the cut point with allowance for fittings
Measure the hose twice before cutting to determine the exact length needed, accounting for the space required by clamps and any fittings at both ends.
Using a tape measure and a straight edge, mark the cut point with a fine marker. Allow a few extra millimeters for insertion into fittings and overlap for clamps.
Recheck measurements and marks before proceeding.
Step 3: Cut the hose cleanly using the proper tool
Use a sharp PVC or hose-cutting tool to make a single clean cut at the marked point; a tubing cutter or fine-toothed hack saw held steady will produce the best, burr-free edge.
Support the hose to prevent crushing, cut perpendicular to its axis, and remove any debris or frayed material.
Inspect the end for roundness and smoothness before proceeding.
Step 4: Reattach or install a new coupling or hose barb
With the cut end verified for roundness and smoothness, the next step is to prepare and attach the mating fitting—either the existing coupling or a new hose barb—so the hose can be secured to the dishwasher or drain stub.
Select a correctly sized barb or coupling, push the hose fully onto the fitting, orient it for proper routing, and guarantee the fitting seats evenly without twisting.
Step 5: Secure connections with clamps and test for fit
Clamp the hose firmly to the coupling or barb and then verify the connection for alignment and security.
A stainless-steel or worm-gear clamp is recommended; tighten evenly until snug but avoid overcompressing the hose.
Trim excess clamp tail and position clamps near the barb shoulder.
Gently pull and rotate the hose to confirm a stable seal, then run a brief water test for leaks.
Step 6: Reinstall the dishwasher and reconnect power and water
After confirming the hose is secure and leak-free, the dishwasher can be moved back into position for final reconnection.
The installer slides the unit carefully, avoiding kinking the hose or stressing fittings.
Water supply and electrical connections are restored per local codes: reconnect the water line, tighten fittings, restore power, and check for operation.
Run a short cycle to verify no leaks and proper drainage.
Alternative Methods: Using an Inline Connector or New Hose
When a minor length adjustment is needed, an inline connector can be used to splice two hose ends securely, provided both sections are undamaged and compatible.
Replacing the entire hose is advantageous when wear, kinks, or uncertain material compatibility exist, offering a longer-term, leak-resistant solution.
The correct replacement is selected by matching hose diameter, material (heat- and chemical-resistant), and a length that allows a smooth, loop-free run without excess.
When to splice with an inline connector
An inline connector is appropriate when the existing hose has a localized damage or excess length but the fittings and internal bore remain intact; it allows a short, secure splice without replacing the entire hose.
Use it if cuts are small, hose material is pliable, and connections match size.
Avoid splicing if multiple abrasions, internal collapse, or corrosion compromise flow or seal integrity.
Advantages of installing a replacement hose
Choosing a replacement hose offers a reliable, long-term solution that eliminates uncertainty about hidden damage or wear. A new hose restores full integrity, reduces leak risk, and avoids joint-related clogs.
Installation simplifies routing, often improves flow with modern materials, and provides warranty coverage. Replacement also guarantees compatibility with current fittings and standards, enhancing overall dishwasher performance and safety.
How to choose the correct replacement hose length and type
Having settled on replacement to guarantee reliability, attention turns to selecting the proper hose length and type or deciding whether an inline connector will suffice.
Measure run with appliance and cabinet positions, allow slack for movement, and prefer smooth-bore, dishwasher-rated PVC or reinforced rubber.
Choose length avoiding kinks; use an inline connector only for minor adjustments. Match fittings and clamp type to existing connections.
Testing and Verifying a Proper Seal
After reinstalling the shortened hose, a full test wash should be run while observing all connections for any signs of leaking.
Attention should focus on common leak points such as the hose clamps, the hose-to-disposal or sink fitting, and any splice or connector used.
If leaks are found, fittings should be tightened or remounted and the test repeated until the seal remains dry.
Running a test wash and checking for leaks
Begin a short test cycle to confirm the shortened drain hose holds a watertight connection and the dishwasher functions normally.
Observe the unit through the entire cycle, focusing on fill, wash, drain, and pump operation.
Inspect visible hose sections, clamps, and connection points for moisture.
After completion, open the cabinet and check for drips or pooling; tighten fittings if any seepage appears.
Common leak points to inspect
When verifying a proper seal, attention should focus on a few predictable weak spots where leaks most often originate: the hose-to-disposer or sink tailpiece connection, the clamp or crimp at the pump outlet, the point where the hose passes through the cabinet or anti-siphon loop, and any splice or repaired section of hose.
Inspect for wetness, drips, corrosion, loose fittings, abrasions, and soft or swollen hose material.
How to tighten or remount fittings if leaks appear
Noting the common leak points guides the next step: confirming which fitting is the source and then tightening or remounting it to restore a watertight seal.
Once identified, power and water are shut off, fittings are hand-tightened, then nudged with pliers or a wrench—avoiding overtorque.
Replace damaged clamps, use proper hose barb orientation, test with brief cycles, and recheck for drips.
Common Problems and How to Fix Them
Common issues after shortening a dishwasher drain hose include leaks at the dishwasher outlet or sink connection, kinks or clogs that cause poor drainage, and hose collapse or deformation.
Each problem has specific fixes—re-tightening or replacing fittings, re-routing or trimming to remove kinks, snaking or flushing to clear blockages, and replacing a collapsed hose with a reinforced model.
If leaks persist, drainage remains poor despite basic repairs, or the hose shows structural failure, a professional plumber should be consulted.
Leaks at the dishwasher outlet or sink connection
Several typical leaks occur at the dishwasher outlet or sink connection, usually caused by loose fittings, deteriorated hose ends, or misaligned clamps.
Inspect connections, tighten fittings evenly, and replace cracked hose ends or worn gaskets.
Verify the hose seats fully on barb fittings and use a properly sized clamp.
Test for leaks after running a short cycle and recheck torque and seal integrity.
Kinks, clogs, or poor drainage after shortening
After shortening a dishwasher drain hose, users may encounter kinks, partial blockages, or slow drainage that impede proper flow. These issues typically stem from improper bending, trapped debris, or crushed inner walls formed during cutting.
Inspect the hose visually and flex it to reveal kinks. Flush it with water to dislodge debris, trim and reseal any ragged ends, and restore a smooth, gradual routing.
Hose collapse or deformation issues
If visual inspection and flushing fail to restore proper flow, the hose itself may have collapsed or become deformed during cutting or tightening, reducing internal diameter and impeding drainage.
Inspect for flattened sections, bulges, or crushed corrugations. Replace damaged hose or trim back to undamaged area and install a new clamp.
Confirm gentle routing and correct clamp tension to prevent recurrence.
When to call a professional plumber
When should a professional plumber be called?
A plumber is warranted if leaks persist after hose replacement, if fittings or garbage disposal connections are damaged, if hard-to-reach routing is required, or if electrical components near the hose are involved.
Also call one when local codes must be met, odors suggest sewer issues, or intermittent drainage problems continue despite correct hose length and installation.
Maintenance Tips After Shortening the Hose
A concise maintenance routine helps guarantee the shortened dishwasher drain hose remains functional and leak-free.
The article recommends a regular inspection schedule, simple steps to prevent clogs and extend hose life, and measures for winterizing and protecting the hose from environmental damage.
Practical tips and timing guidelines follow to make upkeep straightforward.
Regular inspection schedule
Because a shortened dishwasher drain hose alters stress points and fitting tension, establishing a regular inspection schedule is essential to catch wear, leaks, or kinks early.
A concise routine helps maintain reliability:
- Inspect connections monthly for tightness and signs of seepage.
- Check hose routing and clamps every three months.
- Look for cracks or bulges quarterly.
- Replace hardware or hose at first visible deterioration.
How to prevent clogs and prolong hose life
After establishing a regular inspection schedule, attention should shift to everyday practices that prevent clogs and extend the shortened hose’s lifespan.
Rinse dishes before loading, avoid fibrous or starchy debris, and run periodic hot-water and vinegar cycles to dissolve buildup.
Ascertain the air gap or high loop remains clear.
Replace clamps and hose when signs of wear or persistent odor appear.
Winterizing and protecting hoses from damage
When temperatures drop below freezing, the shortened dishwasher drain hose becomes more vulnerable to cracking and ice blockages.
It should be drained, insulated, and secured against movement. The installer should flush residual water, fit foam or heat-trace tape, elevate or slope the hose for drainage, and clamp or fasten it to prevent rubbing and vibration.
Inspect periodically and replace if brittleness or damage appears.
Quick Safety Checklist Before Finishing Work
Before finishing work, a quick safety checklist assures all connections are secure, tools are stowed, and potential leaks or electrical hazards are identified.
A technician verifies hose clamps, inspects for kinks or splits, confirms proper drain routing, and guarantees power is off before restoring power.
- Tighten clamps and fittings
- Check for visible leaks
- Verify hose routing and support
- Confirm electrical safety
Cost and Time Estimates
Typical DIY shortening of a dishwasher drain hose generally takes 30–90 minutes and requires basic tools, making it a low- to moderate-difficulty task for someone with simple plumbing experience.
Parts such as a replacement hose clamp or connector and common tools may cost $10–40, while a new hose runs $20–60.
Hiring a professional typically raises the total to $100–250 including labor, so readers should weigh time, skill, and peace-of-mind against out-of-pocket savings.
Typical DIY time and difficulty
Expect most homeowners with basic tools to complete shortening a dishwasher drain hose in about 30–90 minutes.
Difficulty is low to moderate: basic plumbing familiarity, a utility knife, pliers, and hose clamps suffice. Time varies with access, hose routing, and workspace.
Complications—tight connections, rusted fittings, or awkward cabinet layouts—add time and may require patience or minor problem-solving to finish correctly.
Estimated costs for parts and tools versus hiring a pro
A short dishwasher drain hose can usually be trimmed and reinstalled for a modest outlay: parts like replacement hose clamps ($2–$8), a length of replacement hose if needed ($10–$25), and basic hand tools—utility knife, pliers, screwdriver—if not already owned (roughly $10–$30) bring DIY costs to about $0–$60 in most cases; hiring a professional plumber or appliance technician, by contrast, typically runs $75–$200 for a simple hose shortening or $150–$350 if parts and travel are included, with higher rates for emergency or same-day service.
| Option | Typical cost | Notes |
|---|---|---|
| DIY | $0–$60 | Low cost if tools owned |
| Pro (standard) | $75–$200 | Labor only |
| Pro (with parts/travel) | $150–$350 | Includes parts, travel |
Conclusion
The guide leaves the reader with clear, practical steps so shortening a dishwasher drain hose feels like trimming a wayward vine—precise, careful, and controlled. They are reminded to verify compatibility, maintain proper slope and connections, and test for leaks. If uncertainty remains, calling a professional avoids costly mistakes. With attention to safety, proper tools, and simple checks, the job finishes cleanly, saving time and protecting the appliance’s performance.