
How to Replace a Water Meter Pressure Regulator: Step-by-Step DIY Guide
To replace a water meter pressure regulator, first verify local codes and ensure the water supply is shut off and depressurized. Then, take a photo of the existing assembly for reference. You’ll need wrenches, a pressure gauge, Teflon tape, and a compatible replacement regulator that matches your pipe sizes and materials.
- Remove the old regulator by disconnecting it at the unions.
- Install the new unit, ensuring the correct flow direction.
- Slowly re-pressurize the system and adjust the set screw while checking for leaks.
For detailed step-by-step instructions and troubleshooting tips, continue reading.
Overview of Replacing a Water Meter Pressure Regulator
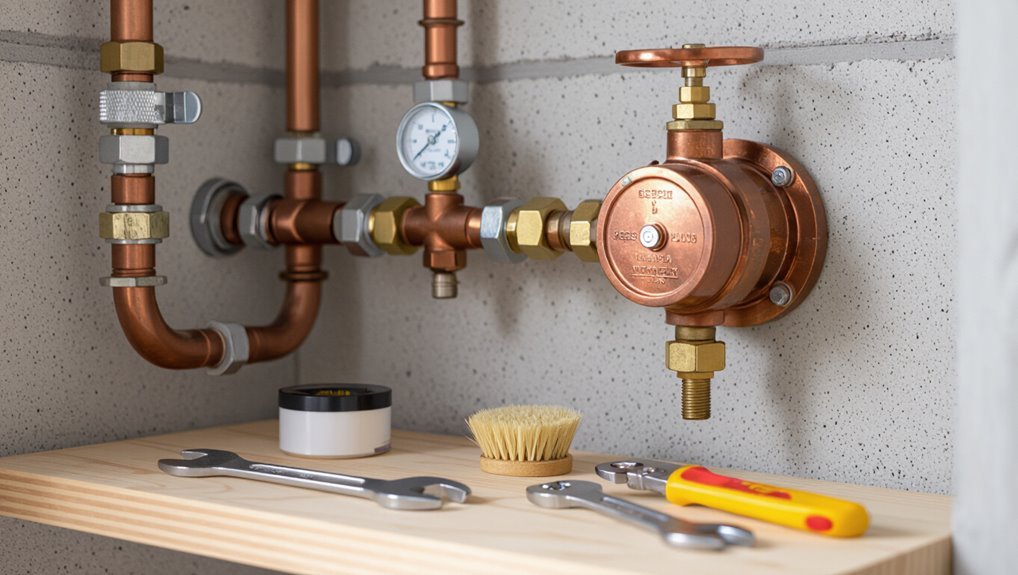
A water meter pressure regulator maintains steady downstream pressure despite varying supply conditions, protecting plumbing and fixtures.
Replacement is recommended when pressure becomes erratic, leaks appear, or the unit reaches the end of its typical 10–20 year service life.
Recognizable signs of failure include fluctuating water pressure, constant meter noise, and visible corrosion or leakage.
What a water meter pressure regulator does
The water meter pressure regulator reduces and stabilizes incoming mains pressure to a safe, consistent level for the building’s plumbing system.
It protects fixtures, prevents pipe stress, and guarantees steady flow despite supply fluctuations.
Understanding its role aids in planning maintenance and informs how to replace a water meter pressure regulator safely and effectively, focusing on isolation, decommissioning, and correct reinstallation.
Why and when you should replace it
When pressure readings drift, leaks develop, or household fixtures experience inconsistent flow, replacing the water meter pressure regulator becomes necessary to restore safe, reliable plumbing performance.
Replacement is warranted when corrective adjustments fail, municipal supply changes alter inlet pressure, or renovations demand different delivery settings.
Proactive replacement avoids repeated repairs, guarantees compliance with local codes, and maintains consistent water pressure for appliances and fixtures.
Typical lifespan and signs of failure
Several factors determine how long a water meter pressure regulator will function reliably, but most units last between 10 and 20 years under normal conditions.
Corrosion, sediment, hard water, and frequent pressure spikes shorten life.
Common signs of failure include fluctuating pressure, constant downstream hammering, persistent leaks, reduced flow, and noisy operation.
Regular inspection and testing detect issues before catastrophic failure.
Safety, Code, and Permit Considerations
Before beginning work, the installer should verify local plumbing codes and obtain any required permits for modifying the water meter pressure regulator.
Basic safety steps—shutting off the supply, depressurizing the line, and using appropriate PPE—must be followed to prevent injury and property damage.
If the job involves complex piping, nonstandard fittings, or uncertainty about code compliance, a licensed plumber should be engaged.
Local plumbing codes and permit requirements
Because water pressure regulation affects public safety, property, and utility infrastructure, adherence to local plumbing codes and permit requirements is essential when replacing a water meter pressure regulator.
Homeowners must verify jurisdictional rules, required permits, approved materials, and licensed installer mandates.
Inspectors may require documentation and testing.
Failure to comply can incur fines, void warranties, or create liability for damages.
Safety precautions before starting (shutting off supply, depressurizing, PPE)
Shut off the main supply, fully depressurize the system, and don appropriate personal protective equipment before any work on a water meter pressure regulator begins.
Verify isolation by opening a downstream tap. Release trapped pressure slowly, watch for residual flow.
Wear safety glasses, gloves, and hearing protection if using power tools.
Confirm adequate lighting and a dry, stable workspace to prevent slips and electrical hazards.
When to call a licensed plumber instead
Having completed isolation and PPE checks, homeowners should recognize situations where a licensed plumber is the safer, lawful choice.
Call a pro for complex or corroded meter assemblies, suspected gas or sewer interaction, inaccessible or buried piping, high-pressure anomalies, backflow device issues, or unclear local code and permit requirements.
Also hire one when insurance, warranty, or municipal inspection mandates certified work and documentation.
Tools and Materials Needed
A concise inventory of essential tools—adjustable wrenches, pipe wrenches, channel locks, a pressure gauge, and thread sealant tools—prepares the installer for the job.
The discussion will cover common replacement regulator types (direct-acting, pilot-operated, and adjustable models) and selection criteria such as inlet size, pressure range, and flow capacity.
Finally, required consumables and fittings—new gaskets, thread tape or compound, couplings, and any isolation fittings—will be listed to guarantee a complete, leak-free installation.
Essential tools list
Before starting the replacement, assemble a concise set of tools and materials specifically chosen for working on a water meter pressure regulator:
- adjustable wrench or two
- pipe wrench
- pressure gauge
- Teflon tape or pipe thread sealant
- replacement regulator
- pipe dope
- plumber’s putty or thread sealant for fittings
- bucket and rags
- safety gloves and eye protection
- any required adapters or fittings to match the existing piping.
- Wrenches and fittings
- Sealing materials
- Safety and cleanup supplies
Replacement regulator types and how to choose the right one
When selecting a replacement regulator, focus first on compatibility with the meter and system requirements: line size, inlet pressure range, desired downstream pressure, and connection type determine the correct model and materials.
Choose between integral or remote-sensing types, brass or stainless bodies for corrosion resistance, and adjustable versus preset units.
Verify flow capacity (Cv) and manufacturer ratings to match peak demand and local code.
Additional materials and consumables (gaskets, thread tape, fittings)
Several small but essential consumables accompany a regulator replacement and must be on hand: correctly sized gaskets or O-rings for meter/regulator flanges, PTFE thread tape or pipe dope rated for potable water on threaded connections, and any adapter fittings or unions required to match differing thread types or sizes.
- Neoprene or rubber gaskets sized to flange faces
- Food-grade PTFE tape or NSF-approved sealant
- Brass or stainless adapters/unions to match threads
Preparing for the Job
Before starting work, the technician inspects the existing regulator and meter assembly for wear, corrosion, and installation details.
They measure inlet and outlet diameters and record system pressure to verify compatibility.
With those data, the technician sources the correct replacement part and confirms fittings and pressure range.
Inspecting the existing regulator and meter assembly
Begin by visually examining the meter and regulator assembly for corrosion, leaks, loose fittings, or signs of previous repairs. Note the orientation and connection types to guarantee replacement components will match.
Check mounting brackets, shutoff valves, relief ports, and visible seals. Photograph the setup for reference.
Identify any debris, mineral buildup, or damaged gaskets that will affect removal or sealing during replacement.
Measuring inlet/outlet sizes and system pressure
Measure the inlet and outlet diameters and record the static and dynamic pressures to guarantee replacement parts match the system and that the regulator can be set within safe operating limits.
Use calipers or a tape to confirm pipe OD and thread type. Measure static pressure with a gauge at a closed tap and dynamic pressure under typical flow.
Note temperature and elevation effects.
Sourcing the correct replacement part
When sourcing the correct replacement regulator, the technician should match pipe diameter, thread type, pressure range, and flow capacity to the recorded inlet/outlet measurements and system pressures.
Verify material compatibility (brass, bronze, stainless) with water chemistry, service temperature, and code requirements.
Confirm inlet screen, union or flanged connections, and factory set or adjustable models.
Purchase from reputable suppliers with warranty and return policies.
Step-by-Step Replacement Procedure
The replacement procedure proceeds through a clear sequence of safety and installation steps.
First, the water supply is shut off, lines drained, and the meter/regulator assembly isolated and depressurized.
Next, the old regulator is removed, pipe ends and fittings prepared, and the new regulator installed and secured.
Step 1 Shut off water supply and drain lines
Begin by locating and closing the main shutoff valve that supplies the meter.
Then confirm the downstream faucets are open to relieve pressure and drain residual water from the lines.
Verify flow has stopped at several fixtures.
Use a hose bib or bucket to capture remaining discharge.
Wear gloves and eye protection.
Note any unexpected leaks or abnormal sounds before proceeding to the next step.
Step 2 Isolate and depressurize the meter/regulator assembly
Isolate the meter/regulator assembly by closing its dedicated service valves and confirming all downstream pressure has bled off.
Next, open a downstream faucet or test port to verify zero pressure.
Close any bypass valves and secure lockout/tagout if present.
Wear gloves and eye protection.
Place a drip pan beneath fittings and keep tools ready to prevent sudden water release when components are loosened.
Step 3 Remove the old regulator safely
Loosen the unions or coupling nuts on the regulator assembly using the appropriate wrench, working from the outlet side toward the inlet to control any residual moisture.
Support the regulator to prevent strain, then fully disconnect fittings.
Remove retaining clips or bolts and lift the regulator straight out to avoid disturbing nearby tubing.
Inspect surrounding seals and mounting surfaces for damage or corrosion before disposal.
Step 4 Prepare pipe ends and fittings for installation
Prepare the pipe ends and fittings by cleaning, deburring, and confirming dimensions to guarantee a proper seal and alignment for the new regulator.
Remove burrs with a file or deburring tool, wipe surfaces free of debris, and inspect threads or copper ends for damage.
Measure diameters and lengths against regulator specifications.
Replace damaged fittings, apply appropriate primer or paste as required, and dry-fit components for alignment.
Step 5 Install the new regulator and secure connections
Position the new regulator so its flow direction arrow aligns with the supply line, then slide it onto the prepared pipe ends or threads, ensuring the body sits squarely and the outlet aligns with downstream piping.
Tighten compression nuts or thread seals evenly, using a wrench to secure fittings without over-torquing.
Reinstall any mounting brackets and verify all connections are properly seated and supported.
Step 6 Re-pressurize system and check for leaks
Restore water supply slowly and monitor pressure gauges and fittings as the system repressurizes.
Observe for immediate leaks at joints, seals, and valve stems. Tighten fittings incrementally if minor seepage appears, then retest.
Check downstream fixtures for steady flow and air pockets; bleed trapped air at faucets.
Confirm no persistent dripping before leaving the system under normal pressure.
Step 7 Adjust regulator to desired downstream pressure
Begin by confirming the main shutoff is open and the regulator’s gauge is readable; then loosen the locknut on the adjustment screw to allow movement.
Turn the screw clockwise to increase downstream pressure or counterclockwise to decrease it.
Make small increments, allow pressure to stabilize, and monitor the gauge.
Once the desired pressure is reached, retighten the locknut to secure the setting.
Step 8 Final inspection and documentation
Inspect the regulator assembly and surrounding piping for leaks, proper orientation, and secure fastenings, checking the inlet and outlet joints, relief ports, and any service valves.
Verify downstream pressure under typical load, confirm relief operation, and guarantee no vibration or noise.
Record manufacturer, model, set pressure, test readings, date, and installer.
Store documentation and photos for future maintenance.
Troubleshooting Common Problems
After replacement, common issues include leaks at fittings, a regulator that fails to reduce or holds unstable pressure, absence of water flow, and new noises or water hammer.
The guide outlines checks for loose connections, trapped debris or misadjustment, closed shutoffs or clogged lines, and causes of vibration or hammering.
Each problem is paired with targeted diagnostics and corrective steps.
Leaks at connections after installation
Leaks at connections after installing a water meter pressure regulator are a common issue that usually stems from improper sealing, misaligned fittings, or uneven thread engagement.
Inspect joints for loose nuts, damaged threads, or missing tape/compound.
Tighten fittings incrementally, reseal threads with appropriate plumber’s tape or joint compound, and realign components.
If leaks persist, disassemble and inspect washers or replace defective fittings before retesting.
Regulator not reducing pressure or pressure fluctuates
Begin troubleshooting when the regulator fails to lower downstream pressure or the gauge needle jumps erratically, as these symptoms indicate issues with spring settings, diaphragms, or internal obstruction.
Inspect inlet debris, verify spring adjustment and set screw position, and check diaphragm integrity.
Clean or replace clogged screens and cartridges.
If internal parts are damaged or sticking, replace the regulator to restore stable, regulated pressure.
No water flow after replacement
Confirm that isolation valves are fully open and that inlet shutoffs, service cock, and any downstream stop valves were reinstalled correctly; a closed or partially closed valve is the most common cause of no flow after replacing a pressure regulator.
Check for debris or packing material trapped in the regulator or pipework, verify correct regulator orientation, and guarantee supply meter and main are active before contacting the utility.
Noise or hammering after installation
Inspect the system for common causes of noise or hammering after installing a pressure regulator: rapid pressure changes, loose fittings, or improper pipe support can produce banging, vibration, or water hammer.
Verify regulator adjustment, confirm inlet/outlet shutoffs are fully open, tighten or replace loose fittings, add pipe straps, and install an arrestor or air chamber if needed.
Recheck pressure with a gauge.
Comparison of Regulator Types and Installation Methods
The section compares connection methods and regulator styles to clarify selection criteria and installation trade-offs. It outlines pros and cons for threaded, soldered, and compression fittings alongside guidance on when fixed-set or adjustable regulators are preferable. A concise table summarizes typical attributes and common use cases for quick reference.
| Feature | Connection Type | Regulator Style |
|---|---|---|
| Ease of installation | Threaded: moderate; Soldered: requires skill; Compression: easiest | Fixed-set: simple; Adjustable: more complex |
| Leak risk & maintenance | Threaded: moderate leak risk; Soldered: low if done well; Compression: higher if disturbed | Fixed-set: low maintenance; Adjustable: requires occasional adjustment |
| Best use case | Threaded: repairs/metal pipes; Soldered: permanent copper installs; Compression: retrofit/no-heat situations | Fixed-set: stable pressure needs; Adjustable: variable household or testing situations |
Pros and cons of threaded vs. soldered vs. compression connections
When choosing how to join a pressure regulator to the water line, three common methods—threaded, soldered (sweat), and compression—each offer distinct trade-offs in durability, leak resistance, ease of installation, and suitability for different pipe materials.
Understanding these differences helps determine the best option for a given skill level, toolset, and plumbing scenario.
Threaded is simple and reusable but can leak; soldered is permanent and robust yet requires skill and flame; compression is tool-light and serviceable but sensitive to tube condition and overtightening.
Fixed-set vs. adjustable regulators: when to use each
Choosing the connection method informs, but does not determine, the choice between fixed-set and adjustable pressure regulators. Pipe material and access constraints that favored threaded, soldered, or compression fittings often also shape which regulator type is practical.
Fixed-set units suit simple systems requiring stable pressure without tuning. Adjustable regulators fit variable demand, fine-tuning, or troubleshooting needs, but require accessible adjustment and occasional re-checks for ideal performance.
Maintenance and Long-Term Care
A regular inspection schedule—typically annual checks and after major weather events—helps catch wear, debris buildup, and pressure drift before they cause problems.
Cleaning and servicing can often be performed in place by flushing, replacing seals or diaphragms, and removing sediment without a full regulator swap.
Clear signs of imminent failure include persistent pressure fluctuations, loud or unusual noises, visible leaks, and sudden loss of downstream pressure.
Routine inspection schedule
Establishing a routine inspection schedule guarantees consistent performance and early detection of issues with a water meter pressure regulator. Inspections should occur at defined intervals tied to manufacturer recommendations, system age, and local water conditions.
Inspectors should record pressure readings, valve function, visible leaks, and corrosion. Increase frequency after pressure spikes, work near the meter, or following infrastructure changes.
Maintain a dated log for trend analysis.
How to clean and service a regulator without full replacement
Routine inspections identify when a regulator can be serviced rather than replaced; cleaning and servicing extend life and restore proper function for many common issues.
Shut water, relieve pressure, remove regulator cap and diaphragm. Inspect for debris, mineral buildup, or worn seals.
Clean with soft brush, mild vinegar solution, and compressed air. Replace seals, reassemble, test for correct pressure and leaks.
Signs that indicate imminent failure
When a pressure regulator approaches failure, distinct changes in system behavior and physical condition typically appear; recognizing these signs early enables timely maintenance or replacement.
Indicators include fluctuating or excessive downstream pressure, persistent hammering or noise, visible corrosion or leakage at joints, sluggish water flow despite normal supply, and repeated automatic valve cycling.
Immediate inspection prevents broader system damage.
Cost Estimates and Time Requirements
The section outlines a typical DIY cost breakdown for parts and tools, followed by average completion times categorized by novice, intermediate, and experienced skill levels.
It then compares repair versus full replacement to identify when replacement offers better long-term value.
Readers are guided to evaluate both upfront expenses and labor time when deciding how to proceed.
Typical DIY cost breakdown
A clear cost and time estimate helps homeowners decide whether to tackle replacing a water meter pressure regulator themselves.
Typical DIY expenses and durations are summarized concisely:
- Parts: regulator $40–$200, fittings and seals $10–$50.
- Tools: basic set or rental $0–$50.
- Contingency: allow 10–20% for unexpected items or minor repairs.
Average time to complete by skill level
Skill level markedly influences how long replacing a water meter pressure regulator will take, with novices, intermediate DIYers, and experienced plumbers each facing distinct time ranges.
Novices should budget 3–6 hours, allowing for reading instructions and troubleshooting.
Intermediate DIYers typically complete the job in 1.5–3 hours.
Experienced plumbers generally finish in 30–90 minutes, excluding unexpected complications or parts procurement.
When replacement is a better value than repair
Consider replacement when recurring leaks, multiple failing components, or obsolete parts make repairs costly or unreliable; comparing a one-time replacement cost against recurring repair bills and downtime clarifies value.
Replacement typically costs more upfront but reduces long-term labor, parts sourcing, and repeated service calls.
Calculate break-even by totaling past repair expenses, expected future repairs, and lost water service time versus replacement price and installation time.
Common Mistakes to Avoid
The most frequent errors include selecting an incorrectly sized regulator or purchasing the wrong model for the system.
Improper sealing or over-tightening fittings often leads to leaks or damaged components.
Skipping pressure testing and final adjustments can leave the system operating outside safe or efficient parameters.
Incorrect sizing or buying the wrong regulator
Many homeowners underestimate how critical proper sizing is when replacing a water meter pressure regulator, leading to poor performance or premature failure.
Selecting a regulator with the wrong flow capacity, pressure range, or connection size can cause reduced water pressure, excessive cycling, or leaks.
A correct match guarantees stable delivery and longevity—verify household demand, inlet pressure, and pipe fittings before purchase.
Improper sealing and over-tightening fittings
Avoiding leaks requires attention to sealant choice and tightening technique: using the wrong tape or paste, failing to clean threads, or overtightening fittings can strip threads, crush seals, and create paths for leaks that worsen under pressure cycles.
The installer should use appropriate PTFE tape or thread compound, clean mating surfaces, hand-start threads, and tighten to manufacturer torque to protect seals and fittings.
Skipping pressure testing and adjustments
Failing to perform pressure testing and proper regulator adjustments can leave hidden faults that only appear under real-use conditions.
Technicians who skip testing risk inconsistent delivery, premature regulator failure, and water damage.
Post-installation checks confirm setpoint accuracy, detect leaks, and validate system response under varied flow.
Calibrate to manufacturer specs, record readings, and recheck after system stabilization to guarantee reliable performance.
Quick Reference Checklist
A concise pre-job checklist guarantees tools, replacement parts, and safety gear are verified before work begins.
On replacement day, a step-by-step quick checklist guides shutdown, regulator removal, installation, and pressure testing to minimize downtime.
The checklist serves as a final reminder of critical safety and functional checks before restoring service.
Pre-job checklist
Before beginning work on replacing a water meter pressure regulator, personnel must complete a focused pre-job checklist that verifies tools, safety gear, permits, and utility locates are in place. This quick reference guarantees required parts (new regulator, seals, fittings), isolation valves are operable, appropriate personal protective equipment is available, and any site-specific hazards or access constraints have been identified and communicated.
- Confirm permits and utility locates.
- Verify parts, tools, and spare seals.
- Assess access, PPE, and emergency procedures.
Step-by-step quick checklist for the replacement day
With permits, locates, parts, and PPE confirmed, the replacement day checklist outlines the specific sequential actions to complete the regulator swap safely and efficiently.
The technician follows a concise sequence to isolate, remove, install, and test, documenting observations and pressures.
- Shut main, drain, and verify zero pressure.
- Replace regulator, secure fittings, and restore flow slowly.
- Test pressure, check leaks, record results.
Conclusion
Like a seasoned gardener replacing a wilting gate in an irrigation hedge, the homeowner removes the old regulator and sets a new guardian to steady the flow. Through careful preparation, respect for rules, and steady hands, the system returns to balance. Small efforts now spare future floods and droughts of trouble; tending the regulator becomes a quiet stewardship that keeps the household’s water life running calmly and predictably for seasons to come.

