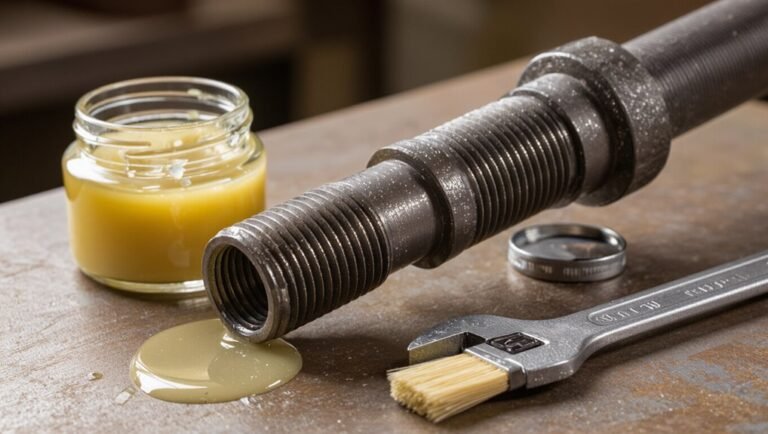
How to Flush an Air Conditioning System: Step-by-Step Guide to Clean, Protect, and Restore Performance
Flushing an air conditioning system is essential for removing oil, debris, and contaminants, which helps restore refrigerant flow and protects system components. The process starts with recovering refrigerant, inspecting for damage, and isolating affected parts. Use compatible solvents for cleaning, along with circulation or pressurized flushing, and replace filter-driers and seals. Afterward, re-evacuate the system, conduct leak testing, and recharge with the correct oil and refrigerant. Always wear proper PPE and follow certified procedures to minimize risks. For detailed steps, troubleshooting advice, and maintenance tips, continue reading to ensure optimal performance and longevity of your system.
What “flushing an air conditioning system” means and why it matters
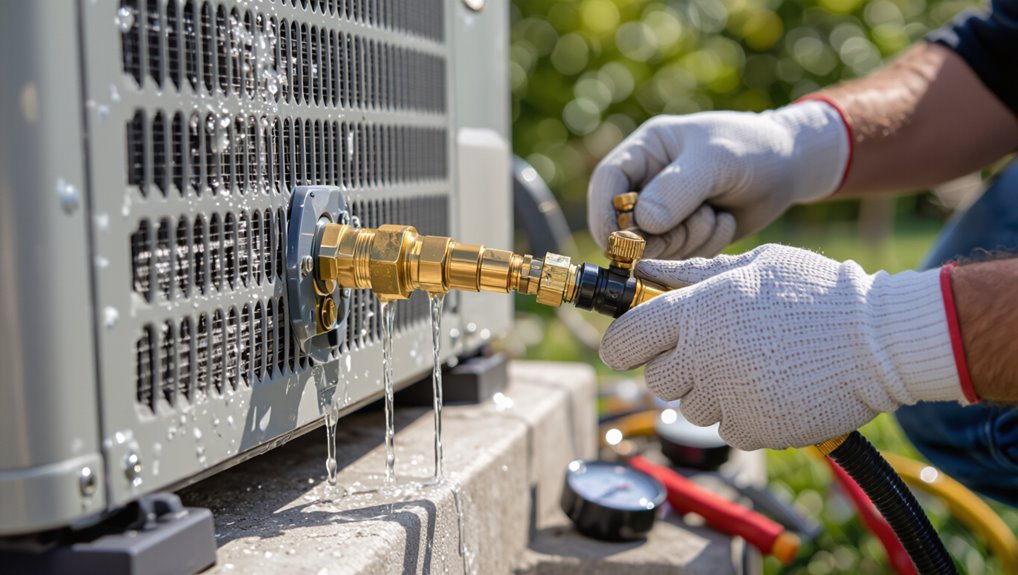
Flushing an air conditioning system refers to the controlled removal and cleaning of oils, debris, and contaminants from HVAC or automotive A/C circuits to restore proper refrigerant flow and component function.
It is typically required after compressor failure, system contamination, moisture ingress, or when switching lubricant or refrigerant types.
Proper flushing improves cooling performance, extends component life, and prevents future contamination-related breakdowns.
Definition and goals of flushing HVAC and automotive A/C systems
Removing contaminants and stagnant oil from an air conditioning system restores proper refrigerant flow and component function.
Flushing an HVAC or automotive A/C system involves circulating compatible solvent or flush agents to remove debris, sludge, moisture, and old lubricant.
Goals include preventing compressor failure, restoring heat exchange efficiency, eliminating blockages, and ensuring correct refrigerant oil balance—core steps when learning how to flush an air conditioning system.
Common causes that make flushing necessary
Because contaminants and degraded oil can quickly compromise airflow and lubrication, flushing an air conditioning system becomes necessary whenever blockages, sludge, or moisture are present.
Common causes include compressor failure that spreads debris, refrigerant breakdown, system corrosion introducing particulates, contaminated replacement oil or refrigerant, and prolonged inactivity allowing residue buildup.
Detecting pressure anomalies, reduced cooling, or visible contamination indicates flushing is required.
Benefits: performance, longevity, contamination prevention
A thorough system flush clears accumulated debris, degraded oil, and moisture from an air conditioning circuit, restoring unobstructed refrigerant flow and proper lubrication.
This improves cooling efficiency and reduces compressor workload, lowering energy use. It prevents corrosion, acid formation, and valve or orifice blockages that cause failures.
Regular flushing extends component life, minimizes costly repairs, and protects system reliability and warranty compliance.
Safety precautions and required permits
Before beginning a flush, the technician should wear appropriate personal protective equipment and guarantee the work area is ventilated and free of ignition sources.
National and local regulations governing refrigerant handling, recovery, and disposal must be followed to avoid environmental harm and legal penalties.
If recovery equipment, refrigerant leaks, or system contamination exceed basic home‑owner capabilities, a certified HVAC/R technician should be contacted.
Personal protective equipment and workshop safety
Wear appropriate personal protective equipment (PPE) and maintain a controlled workshop environment to reduce risk when flushing an air conditioning system.
Technicians should use chemical-resistant gloves, eye protection, long sleeves, and respiratory protection when solvents or aerosols are present.
Guarantee adequate ventilation, spill containment, fire extinguishers, and clear egress.
Lockout/tagout procedures and tool inspection prevent accidents; keep a first-aid kit accessible.
Legal and environmental rules for refrigerant handling and disposal
Because refrigerants are regulated as both hazardous materials and controlled substances, technicians must comply with federal, state, and local laws governing their handling, recovery, transport, and disposal.
Proper certification, documented recovery using approved equipment, accurate leak reporting, and permitted waste transfers are mandatory.
Unauthorized venting, improper storage, or illegal disposal can incur fines, license loss, and environmental liability; follow recordkeeping and labeling requirements.
When to call a certified HVAC/R technician
Recognize that tasks involving refrigerant recovery, major system repairs, electrical work, or suspected leaks require a certified HVAC/R technician; these situations pose legal, safety, and environmental risks beyond typical homeowner maintenance.
A technician is also needed for permit-linked work, complex diagnostics, compressor replacement, or when contamination extends into evaporator or condenser coils.
Hire certified professionals to guarantee compliance, safe refrigerant handling, and correct documentation.
Tools, materials, and products needed
To perform a proper AC system flush, the technician must assemble the correct tools, including pumps, hoses, adapters, and gauges.
Appropriate cleaning agents and solvents should be selected based on compatibility and effectiveness, weighing their advantages and limitations.
A supply of replacement parts and consumables—filters, O-rings, gaskets, and sealants—should be kept on hand for prompt repair.
Essential tools for flushing (pumps, hoses, adapters, gauges)
A concise kit of reliable tools and compatible consumables is essential before beginning an AC flush, including a vacuum pump, recovery machine or flushing pump, high-pressure hoses, a full set of adapters and manifold gauges, and approved flushing solvent and filter driers.
Also include torque wrenches, service port caps, inline filters, compatible fittings, leak detectors, and secure mounting or support brackets for safe, controlled operation.
Cleaning agents and solvents: types, pros, and cons
When selecting cleaning agents and solvents for an AC flush, technicians should weigh chemical compatibility, cleaning effectiveness, and safety hazards to match the product to the system’s materials and contamination type.
Common options include:
- Petroleum-based solvents: fast degreasing, flammable, may swell some seals.
- Aqueous cleaners: nonflammable, good for salts, require thorough drying.
- Refrigerant-soluble flushes: compatible, effective on oil residues, costlier.
Replacement parts and consumables to have on hand
Technicians should stock a concise kit of replacement parts and consumables tailored to common failure points and the specific refrigerant and oil in use, ensuring a flush can be completed without costly delays.
Essential items include:
- O-rings, gaskets, and service port caps sized for the system
- Filter-driers and inline screens compatible with refrigerant type
- Refrigerant-grade oil, recovery cylinder fittings, and purge/charging hoses
Preparing the system for flushing
Before flushing, the technician identifies the system type—split, packaged, or automotive—to determine appropriate procedures and solvents.
A thorough inspection follows to locate leaks, physical damage, or issues that flushing will not resolve, and all refrigerant is recovered safely per regulations.
Components to be flushed (compressor, condenser, evaporator, and lines) are then isolated and tagged to prevent contamination and guarantee proper flow during service.
Identifying system type: split, packaged, or automotive A/C
How can the system type be determined quickly and accurately to guide flushing procedures?
Technicians verify configuration by observing equipment layout: split systems have separate indoor coils and outdoor condensing units; packaged units combine components in one cabinet, usually rooftop or ground-level; automotive A/C is compact, engine-mounted with hoses, condenser, evaporator and compressor.
Identification dictates access points, service ports, and compatible flushing methods.
Inspecting for leaks, damage, and non-flushing issues
Having identified the system type and its access points, the next step is a systematic inspection for leaks, mechanical damage, and conditions that would prevent effective flushing.
Examine hoses, fittings, evaporator and condenser coils, and service ports for oil stains, corrosion, or punctures.
Check valve operation, filter-drier integrity, and blockages.
Document findings; isolate non-flushable components for repair or replacement.
Recovering refrigerant safely before service
Prepare to recover all refrigerant from the system using certified recovery equipment and proper personal protective equipment (PPE), ensuring compliance with applicable regulations and refrigerant-specific procedures.
Technicians verify refrigerant type and charge, connect recovery unit per manufacturer instructions, evacuate to required low pressure, monitor for leaks, document recovered quantities, and store or transfer refrigerant to approved containers for recycling or disposal before initiating any flushing or repairs.
Isolating components to be flushed (compressor, condenser, evaporator, lines)
Before flushing, the technician isolates the specific components—compressor, condenser, evaporator, and connecting lines—to confine cleaning agents and debris and to protect nonserviced parts.
Valves, service ports, and temporary caps are applied; electrical isolation prevents motor damage.
Targeted flushing sequences follow system diagrams, ensuring trapped contaminants are expelled from each section.
Pressure and flow are monitored to verify cleanliness before reassembly.
Step-by-step flushing procedure for automotive A/C systems
The procedure begins with removal and replacement of the receiver/drier or accumulator to prevent contamination of the recharged system.
Technicians then flush refrigerant lines, condenser, and—where accessible—the evaporator and heater core with an approved solvent, followed by compressed air and a vacuum to remove solvent and moisture.
Reassembly includes installing a new desiccant, replacing the orifice tube or expansion valve as required, and confirming system integrity before recharge.
Removing and replacing the receiver/drier or accumulator
Removing and replacing the receiver/drier or accumulator is a critical step in flushing an automotive A/C system, as these components trap moisture and contaminants that can compromise system performance and damage new refrigerant and oil.
Technicians depressurize, recover refrigerant, disconnect fittings, remove the old unit, inspect adjacent lines and O-rings, install a new desiccant element, replace seals, torque fittings, and vacuum-test before recharging.
Flushing refrigerant lines and condenser with approved solvent
With the receiver/drier or accumulator replaced and the system depressurized, attention shifts to flushing the refrigerant lines and condenser with an approved solvent to remove oil, debris, and acid residues.
Technicians isolate components, apply solvent with a pressurized flushing kit, push contaminants toward the condenser outlet, repeat until clear, then purge with dry nitrogen.
Inspect for stains or corrosion, and allow full drying before reassembly.
Flushing evaporator and heater core considerations
Begin by isolating the evaporator and heater core from the rest of the system and confirming the system is fully depressurized and the receiver/drier or accumulator has been removed.
Inspect access ports, fittings, and soft lines for contamination. Use compatible solvent and low-pressure flow to avoid damage.
Protect cabin air pathways and seals.
Verify internal passages are clear and dry before reassembly and component replacement.
Using compressed air and vacuum to clear solvent and moisture
After solvent has circulated and drained from the isolated evaporator and heater core, use a sequence of low-pressure compressed air bursts followed by a deep vacuum to purge residual solvent and entrained moisture.
This alternating process accelerates evaporation, forces trapped fluid from crevices, and confirms the lines are dry before reassembly.
Repeat cycles until vacuum holds; monitor moisture indicator and inspect fittings for fluid or debris.
Reassembly, replacing orifice tube/expansion valve, and installing new desiccant
Reinstall the cleaned lines and components in the reverse order of disassembly, paying close attention to torque specs, O-ring condition, and correct routing to prevent kinks or chafing.
Replace the orifice tube or expansion valve with OEM parts, ensuring proper orientation.
Install a new receiver-drier or accumulator with fresh desiccant.
Leak-test, vacuum, and charge system to specified refrigerant and oil quantities before final inspection.
Step-by-step flushing procedure for residential and commercial HVAC systems
The procedure for residential and commercial HVAC systems begins with isolating the outdoor unit and condenser coils before flushing to prevent contamination of other components.
Technicians then flush liquid and suction lines, filter driers, and metering devices using circulation pumps or solvent circulation methods, followed by evacuation and moisture verification with vacuum gauges.
The final steps cover proper recharging with the specified refrigerant and oil quantities and verifying system operation.
Isolating and flushing the outdoor unit and condenser coils
Begin by isolating power and refrigerant lines to guarantee a safe, pressure-controlled work area before any cleaning begins.
Technicians disconnect electrical supply, lockout/tagout, and close service valves.
Remove debris, access condenser fins, and apply coil cleaner or mild detergent.
Rinse thoroughly with low-pressure water to avoid fin damage.
Inspect for leaks, straighten fins, and verify fan operation prior to restoring power.
Flushing liquid and suction lines, filter driers, and metering devices
Start by depressurizing and purging the system to create a safe, controlled environment for flushing liquid and suction lines, filter driers, and metering devices. This involves recovering refrigerant per regulations, closing service valves, and verifying zero pressure on both high- and low-side gauges.
Inspect and remove clogged filter driers. Flush lines from service ports toward removed components, repeating until clear. Then vacuum-test and replace new driers and metering devices.
Use of circulation pumps and solvent circulation method
When employing circulation pumps and the solvent circulation method, technicians should first select a pump and solvent compatible with the system materials and refrigerant history.
Connect isolation valves, hoses, and solvent reservoir, then circulate solvent at recommended flow and pressure, monitoring return clarity.
Flush until solvent exits clear, then purge lines of solvent with dry nitrogen and replace contaminated filter driers before reassembly.
Performing evacuation and moisture verification with vacuum gauges
After flushing lines and replacing contaminated filter driers, the technician proceeds to evacuation and moisture verification using calibrated vacuum gauges to guarantee the system reaches and holds the required deep vacuum.
The technician isolates ports, starts a two-stage vacuum pump, monitors micron readings until target vacuum is stable, and performs a standing vacuum test to confirm absence of leaks and residual moisture before final service steps.
Recharging with refrigerant and oil recommendations
With the system confirmed dry and leak-free, the technician proceeds to recharge using the manufacturer-specified refrigerant and precise oil recommendations, matching lubricant type and charge to the compressor and retrofit requirements.
Charging follows weight- or pressure-temperature methods, observing ambient conditions. Oil is metered to restore correct crankcase volume; compatibility checks prevent seal or performance issues.
Final checks verify pressures, temperatures, and oil level.
Verifying system cleanliness and performance after flushing
After flushing, the technician verifies cleanliness and performance through targeted leak testing, with clear thresholds for acceptable leak rates and methods such as electronic detectors, bubble testing, or pressure decay.
System pressures, temperatures, and calculated superheat/subcooling are then monitored and compared to manufacturer specifications to confirm proper charge and heat transfer.
Finally, a concise test-run checklist — including compressor behavior, airflow, thermostat response, and safety controls — is completed before returning the system to service.
Leak testing methods and acceptable leak thresholds
Several simple, reliable leak-testing methods exist to confirm system integrity and cleanliness following a flush.
Visual dye inspection, electronic refrigerant detectors, and bubble/soap tests each identify leaks of varying sizes.
Pressure decay tests with dry nitrogen verify tightness; acceptable leakage typically falls below 2–5 psi over 10–15 minutes for service intervals.
Any measurable leak mandates repair and reflush before recharge.
Monitoring pressures, temperatures, and superheat/subcooling
Having confirmed system tightness, the next step is to verify operational cleanliness and performance by monitoring pressures, temperatures, and calculated superheat/subcooling values during a controlled startup.
Technicians record suction/discharge pressures, evaporator and condenser temperatures, and inlet/outlet line temps.
Calculated superheat and subcooling indicate charge accuracy and heat-exchanger cleanliness; deviations prompt targeted inspection, filter/drier checks, or additional flushing.
Test run checklist for proper operation
A concise test run checklist guides the technician through a controlled startup to confirm system cleanliness and operational performance following a flush.
Verify proper refrigerant charge, inspect for leaks, monitor suction/discharge pressures, record evaporator and condenser temperatures, check superheat/subcooling, confirm compressor current and vibration norms, guarantee correct airflow and thermostat response, and document results for follow-up or corrective actions.
Common problems, troubleshooting, and when flushing fails
If symptoms persist after flushing—such as continued oil discoloration, pressure anomalies, or poor cooling—this indicates contamination was not fully removed.
The guide outlines troubleshooting steps for acid contamination and signs of compressor burnout that require immediate attention.
It also explains when parts must be replaced rather than attempting further flushing.
Signs flushing did not remove contamination
How can one tell when a flush has failed to remove contamination?
Persistent symptoms include cloudy or discolored oil, recurring blockages, reduced cooling capacity, erratic system pressures, and repeated filter/dryer clogging.
Metallic particles or sludge seen in returned fluid, abnormal valve sticking, and continued odors indicate residual contamination.
These signs warrant further inspection, possible repeat flushing, component replacement, or laboratory fluid analysis.
Dealing with compressor burnout and acid contamination
Recognize that compressor burnout and acid contamination are serious, often interrelated failures requiring prompt diagnostic and remedial action.
Technicians should test oil for acidity, inspect system debris, trace electrical faults and measure pressure anomalies.
If flushing does not remove varnish or neutralize acid, isolate affected components, document findings, and consider targeted chemical neutralization or controlled evacuation.
Record results and advise owner on risks and next steps.
When component replacement is required instead of flushing
Replace components when flushing cannot restore functionality or when damage is definitive.
Technicians should assess system pressure, contamination levels, and component integrity; visible scoring, melted windings, seized bearings, or persistent acid indicate replacement.
Critical parts include compressor, expansion valve, drier/accumulator, and tubing with irreparable corrosion.
Choose OEM-equivalent parts, verify compatibility, evacuate and leak-test before recharge to guarantee reliable operation.
Maintenance schedule and preventive measures to avoid future flushes
Regular inspections and timely replacement of filters and driers at manufacturer-recommended intervals form the foundation of preventing contamination and reducing the need for future flushes.
Proper charging procedures, controlled oil management, and rigorous moisture control during service help maintain system integrity and extend component life.
Consideration of upgrades—such as improved filter/drier media, suction-line filters, or retrofit options—can further lower contamination risk and simplify maintenance.
Recommended inspection and filter/drier replacement intervals
Although often overlooked, a proactive inspection and scheduled filter/drier replacement program is essential to prevent moisture, acid buildup, and particulate contamination that lead to system flushes.
Technicians should inspect annually, replace filter/driers every 1–3 years or after major repairs, and immediately replace following compressor failure or contamination events.
Record intervals, monitor pressure/visibility, and adjust frequency for heavy-duty or high-humidity applications.
Best practices for charging, oil management, and moisture control
Building on scheduled inspections and timely filter/drier changes, proper charging, oil management, and moisture control form the operational backbone that prevents contamination and the need for future flushes.
Recommended practices include:
- Verify refrigerant charge with manifold gauges and superheat/subcooling targets.
- Match oil type/volume to compressor specifications; replace contaminated oil after failures.
- Maintain vacuum to <500 microns and use desiccant filter/driers to control moisture.
Upgrades and retrofit options to reduce contamination risk
When upgrading an HVAC system to reduce contamination risk, owners should prioritize targeted retrofits—such as modern filter-driers, liquid-line solenoid valves, and oil separators—that address known failure modes and contamination pathways.
These components, combined with improved access for sampling and service ports, simplify routine maintenance and greatly lower the likelihood of moisture, acid, and particulate ingress that necessitates full system flushes.
Scheduled inspections, timely filter changes, and leak monitoring complete the approach.
Cost considerations and choosing professional services
Cost differences between a DIY flush and hiring a professional depend on parts, tools, and the complexity of the system, while professional pricing is also influenced by labor, diagnostics, and warranty coverage.
Homeowners should ask technicians about certifications, insurance, experience with similar systems, and written estimates before work begins.
They should also consider how a DIY attempt might void equipment warranties or shift liability compared with documented professional service.
Typical DIY costs vs. professional service pricing factors
Although homeowners can sometimes save money by flushing an air conditioning system themselves, the decision depends on a clear comparison of DIY expenses—tools, parts, time, and the risk of mistakes—against professional fees that factor in labor, diagnostic equipment, warranty protection, and liability.
DIY costs often include cleaners, flush kits, seals, and potential replacement parts; professionals add inspection, refrigerant handling, and guaranteed repairs, raising total price.
Questions to ask and credentials to verify for technicians
Why hire a particular technician rather than another? Evaluators should verify licensing, insurance, and specialized refrigerant-handling certification.
Ask about experience with flushes, provided guarantees, and estimated total cost.
- Confirm state HVAC license and liability insurance.
- Check EPA Section 608 or equivalent refrigerant certification.
- Request references, written estimates, and scope of work.
Warranty and liability implications of DIY flushing
How does attempting a DIY flush affect a system’s warranty and the homeowner’s liability?
DIY flushing can void manufacturer warranties if unauthorized work alters sealed components.
Incorrect procedures risk refrigerant leaks, component damage, and potential property or injury liabilities.
Professionals carry certification, insurance, and documented service records; their fees may prevent expensive repairs and protect warranty status and homeowner legal exposure.
Quick-reference checklists and troubleshooting flowcharts
The section provides compact, task-focused checklists for pre-flush preparation and post-flush validation to guarantee safety and system integrity.
It also presents a clear decision flowchart that guides technicians through options to flush, repair, or replace based on observed conditions and test results.
These tools aim to speed consistent, correct actions and reduce diagnostic errors.
Pre-flush preparation checklist
Before initiating fluid circulation, technicians should complete a concise pre-flush preparation checklist that verifies system isolation, identifies contaminants, confirms required tools and safety gear, and documents baseline system conditions to secure a safe, effective flush.
The checklist assures readiness and minimizes risk:
- Verify isolation valves, service ports, and lockout/tagout.
- Identify refrigerant type, visible contamination, and oil condition.
- Confirm pump, filter drier, solvent, PPE, and waste capture.
Post-flush validation checklist
Following completion of circulation and solvent removal, technicians should proceed with a concise post-flush validation checklist that confirms system integrity, cleanliness, and readiness for refrigerant recharge.
Verify no residual solvent or debris, confirm dry nitrogen purges and vacuum hold, and inspect seals, filters, and access ports for damage.
Quick checks:
- Pressure/vacuum stability
- Visual and chemical cleanliness indicators
- Component integrity and leak-free fittings
Decision flow: flush, repair, or replace
Assess system condition using a structured decision flow that guides whether to flush, repair, or replace components based on measurable criteria and observable faults. The flow prioritizes safety, cost, longevity, and environmental impact, offering clear pass/fail thresholds and escalation steps for technicians.
| Prompt | Action |
|---|---|
| Minor clog | Flush |
| Compressor failure | Replace |
| Leak, minor | Repair |
Conclusion
Flushing an air conditioning system restores efficiency, prevents compressor failure, and prolongs equipment life. Studies show contaminated refrigerant or oil causes roughly 40% of premature automotive A/C compressor failures, underscoring the value of timely flushing and proper filtration. By following safety protocols, using correct products, and scheduling routine maintenance, owners can minimize costly repairs and environmental risks. Professional service is recommended when contamination is severe or symptoms persist despite basic flushing.