How to Install an Electric Furnace: Step-by-Step Guide for Safe DIY or Pro HVAC Installation
Installing an electric furnace involves several key steps to ensure safe and efficient operation. First, size the unit appropriately for your space and secure any necessary permits. Prepare the installation site by removing the old unit, then position and level the new furnace. Seal all duct connections and anchor the unit according to manufacturer clearances.
Next, have a licensed electrician verify the electrical service capacity, install circuit breakers, route conduit, and fit a local disconnect. Once the power is connected, perform essential checks, including grounding, continuity, airflow, thermostat calibration, and testing safety devices. Finally, adhere to local codes and complete any required inspections. This guide will provide further details on procedures, troubleshooting tips, and estimated costs.
Overview of Electric Furnace Installation
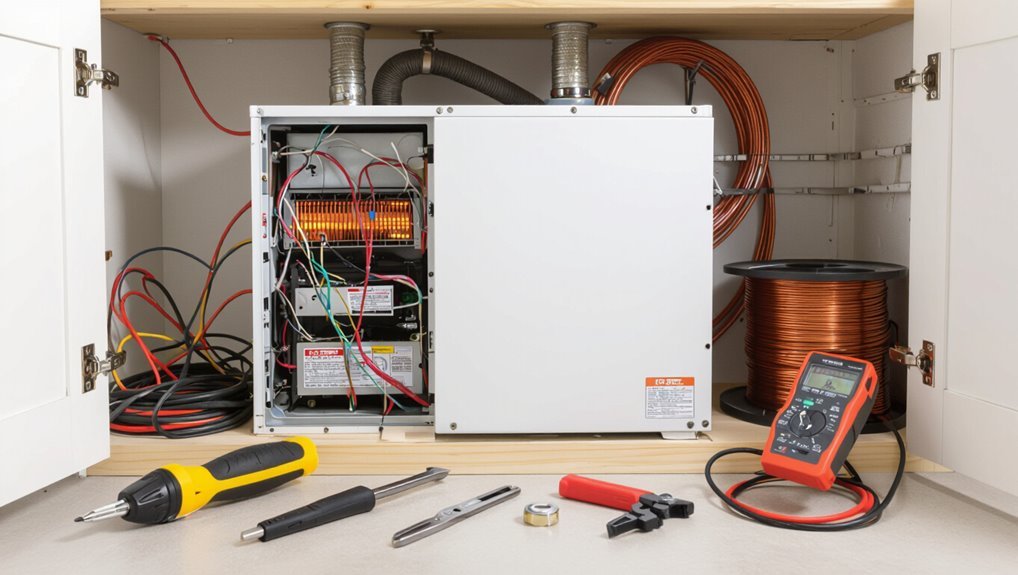
An electric furnace uses resistance heating elements and a blower to warm air circulated through ductwork, converting electrical energy directly into heat.
The decision between DIY and professional installation depends on the homeowner’s electrical knowledge, local code requirements, and comfort with high-voltage wiring.
Typical installations take several hours to a day, cost from a few hundred to several thousand dollars depending on unit and labor, and require at least intermediate electrical and HVAC skills for safe, code-compliant work.
What an electric furnace is and how it works
A household electric furnace converts electrical energy into heat and distributes it through a home’s ductwork using a blower fan.
It contains resistive heating elements, limit controls, and a blower motor; thermostats regulate cycles.
Understanding components, airflow, wiring, and safety interlocks is essential when planning how to install electric furnace systems safely.
Proper sizing and clearances guarantee efficient, reliable operation and code compliance.
Who should consider DIY vs. professional installation
Who should tackle an electric furnace installation themselves and who should hire a professional depends primarily on skill level, local code requirements, and the scope of work involved.
DIY suits experienced homeowners comfortable with electrical wiring, basic HVAC hookups, and permit navigation.
Hire a licensed HVAC electrician for complex wiring, panel upgrades, duct modifications, warranty compliance, or where local codes or safety risks mandate certified installation.
Estimated time, cost range, and required skill level
Estimate labor and materials carefully: a straightforward electric furnace replacement typically takes 4–8 hours for a single installer, while installations requiring new breakers, panel upgrades, duct modifications, or multi-zone work can span one to three days and sometimes longer.
Typical costs range $800–$4,500 depending on unit, labor, and electrical upgrades.
Moderate electrical and HVAC skills are required; complex jobs need licensed professionals.
Safety Requirements and Legal Considerations
Before beginning work, the installer must confirm compliance with local codes, obtain required permits, and schedule any mandated inspections.
Accurate electrical service assessment and load calculations determine whether panel upgrades or dedicated circuits are necessary.
A strict on-site safety checklist and appropriate personal protective equipment protect workers during installation.
Local codes, permits, and inspection requirements
Although requirements vary by municipality, compliance with local building codes, permits, and inspection schedules is mandatory when installing an electric furnace.
Installers must verify zoning, mechanical, and safety code provisions, obtain required permits before work begins, and schedule inspections at designated milestones.
Documentation of approvals, adherence to approved plans, and corrective actions for any violations guarantee legal occupancy and warranty validity.
Electrical service requirements and load calculations
Adequate electrical service capacity and correctly sized circuits are essential for safe, code-compliant electric furnace installation.
A qualified electrician should perform load calculations per NEC to confirm panel capacity, required amperage, and dedicated circuit sizing.
Grounding, overcurrent protection, disconnects, and conductor ampacity must match furnace nameplate and local code.
Documentation and permit approval guarantee legal compliance and safe operation.
Personal protective equipment and on-site safety checklist
Having verified electrical capacity and circuit requirements, attention shifts to personal protective equipment (PPE) and an on-site safety checklist to protect workers and satisfy legal obligations.
PPE includes insulated gloves, eye protection, hearing protection, flame-resistant clothing, and steel-toe footwear.
The checklist covers lockout/tagout, fire extinguisher, ventilation, clearance, ladder safety, tool inspection, permit confirmations, and emergency contact information.
Tools, Materials, and Preparations
Before beginning work, a concise checklist of required tools and materials—including consumables like screws, wiring, and sealant—should be assembled.
The installer must perform a site assessment with precise measurements and confirm the furnace will mate to existing ductwork and the thermostat.
These preparations reduce surprises and guarantee the installation proceeds efficiently and safely.
Required tools list
A concise list of tools and materials sets the stage for a safe, efficient electric furnace installation; technicians should assemble these items and verify condition and compatibility before starting work.
- Multimeter, clamp meter, insulated hand tools
- Drill, hole saws, reciprocating saw
- Level, tape measure, straightedge
- Conduit benders, wire strippers, fish tape
Materials and consumables list
With the tool list confirmed, attention turns to the materials and consumables that will be consumed or incorporated during installation.
Essential items include furnace unit components, ducting sections, fasteners, wiring, breakers, and sealants. Stock appropriate sizes and ratings, plus safety gear.
Plan for minor replacements and spares to avoid delays.
- Furnace parts and filters
- Ductwork and tape
- Electrical supplies
- Sealants and fasteners
Pre-installation site assessment and measurements
Although the site may appear straightforward, a systematic pre-installation assessment and precise measurements are essential to guarantee the electric furnace fits, vents correctly, and meets electrical and code requirements.
Inspect clearances, floor level, and structural support. Measure cabinet footprint, access panels, and service clearances.
Locate breaker panel, planned conduit path, and ventilation termination. Note combustible materials, moisture sources, and required condensate routing.
Verifying compatibility with existing ductwork and thermostat
Following the site assessment, attention shifts to confirming the furnace will integrate properly with the home’s ductwork and thermostat.
Verify duct dimensions, airflow capacity, and register locations match furnace specifications; assess required adapters or modifications.
Confirm thermostat type (line-voltage vs low-voltage) and wiring compatibility; plan for control upgrades or transformer installation if needed.
Document discrepancies and required parts before ordering.
Step-by-Step Electric Furnace Installation
The installation sequence begins with shutting off power and preparing a clear, safe workspace.
If an existing unit remains, it must be removed before the new furnace is positioned and securely mounted.
Final steps cover electrical hookup—wiring, breakers, and disconnects—and connection to ductwork and any required venting.
Shutting off power and preparing the workspace
Before any work begins, power to the furnace must be cut and the area cleared to guarantee safety and access; this prevents electrical shock and allows unobstructed movement around the unit.
Confirm breaker/amperage off, lockout/tagout the panel, and test for voltage at the furnace.
Remove debris and obstructions, provide adequate lighting and ventilation, and stage tools and materials for efficient, safe workflow.
Removing the old furnace (if applicable)
With power verified off and the workspace cleared, attention shifts to removing the existing furnace.
The technician labels and disconnects electrical, duct, and condensate connections, then detaches mounting fasteners. Components designated for reuse are set aside; the obsolete unit is lifted or slid out with appropriate lifting assistance.
All removed parts and debris are disposed of per local regulations, leaving a clean, accessible area.
Positioning and securing the new furnace
Place the new furnace into position using two technicians or a mechanical lift to prevent strain and guarantee precise alignment with the existing ductwork and service clearances.
Level the unit, verify plenum and flue mating, and align intake/exhaust openings.
Anchor to the floor or pad with approved fasteners, maintain manufacturer clearance specifications, and seal duct connections with foil tape or mastic for airtight joins.
Electrical hookup: wiring, breakers, and disconnects
After the furnace is anchored and duct connections are sealed, attention shifts to the electrical hookup: wiring, breakers, and disconnects.
A licensed electrician verifies supply capacity, installs correctly sized breakers, routes conduit, and makes secure wire terminations per code.
A local-code-compliant disconnect is mounted near the unit for service isolation.
All connections are inspected and labeled before energizing the furnace.
Connecting to ductwork and flue/venting (if applicable)
Begin by aligning the furnace cabinet with the home’s duct layout so supply and return connections meet without twisting or compressing ducts.
Secure flanges with sheet metal screws and seal seams with foil HVAC tape or mastic.
Install connector collars and flexible connectors to absorb vibration.
If a vent or flue is required, follow manufacturer clearances and use approved materials, fastening and sealing penetrations.
Thermostat wiring and configuration
When the furnace and ductwork are in place, thermostat wiring and configuration guarantee the control system communicates correctly with the unit.
Technicians route low-voltage cable from furnace control board to thermostat, label terminals, and match colors to R, W, Y, G, C.
Configure thermostat settings for system type, stage count, and fan control.
Test commands and verify responsiveness before restoring normal operation.
Installing safety devices and access panels
A few essential safety devices and access panels must be installed before energizing the electric furnace to guarantee protection, maintenance access, and code compliance.
Install disconnect switches, overcurrent protection, and properly rated fuses per electrical code.
Fit access panels for heating elements, controls, and blower with secure fasteners and gasketing where required.
Label panels and devices clearly for service and emergency shutoff.
First startup: procedures and initial checks
With safety devices secured and access panels labeled, the initial startup focuses on systematic verification before energizing the unit.
Technicians confirm correct wiring, tight electrical connections, and proper grounding. Blower, filters, and duct dampers are inspected for clearance and alignment.
Thermostat settings and voltage at terminals are measured. A controlled energize checks for correct fan operation, heating element sequencing, and abnormal noises or odors.
Testing, Commissioning, and System Balancing
Following installation, the system must undergo electrical and safety tests, including continuity and grounding verification.
Airflow should be measured and ducts inspected and sealed as needed, while the thermostat is calibrated and heating cycles are tested for proper response.
A final post-installation inspection checklist guarantees all items are documented and compliant before handover.
Electrical and safety tests (continuity, grounding)
Begin by verifying electrical continuity and grounding integrity before energizing the furnace: technicians measure circuit continuity, confirm correct polarity, and test protective earth connections to secure low-resistance paths and proper bonding to the building grounding system.
Afterward, insulation resistance tests, breaker and fuse verification, and functional safety-device checks (limits, thermostats, disconnects) guarantee reliable operation and compliance with electrical codes.
Airflow measurement and duct sealing checks
After confirming electrical continuity and grounding, attention turns to airflow measurement and duct sealing to affirm the furnace delivers planned heating capacity and efficiency.
Technicians measure static pressure, register airflow (CFM), and verify fan speeds against design. Leaks are located with smoke, pressure pan, or blower door tests and sealed with mastic or UL-rated tape.
Final balancing guarantees zone distribution and system performance.
Thermostat calibration and cycle testing
Verify thermostat calibration and perform cycle testing to guarantee the control system accurately senses temperature and commands the furnace through complete, reliable on/off sequences.
Check setpoint accuracy with a calibrated thermometer, adjust differential or anticipator settings, and confirm wiring and sensor placement.
Run multiple heat cycles, observe cycle duration, recovery time, and safety interlock responses, documenting anomalies for corrective action.
Post-installation inspection checklist
Following thermostat calibration and cycle testing, a structured post-installation inspection checklist guides the final testing, commissioning, and system balancing to guarantee safe, efficient operation.
- Verify electrical connections, breaker sizing, and grounding continuity.
- Confirm airflow, filter fit, and duct integrity; measure static pressure.
- Validate temperature rise, staging, and safety cutoff responses.
- Document settings, label components, and review homeowner operation and maintenance guidance.
Common Problems During Installation and How to Fix Them
During installation, technicians commonly encounter issues such as incompatible electrical service or tripped breakers, poor airflow accompanied by noises or vibration, thermostat communication failures, and duct leaks causing uneven heating.
Each problem has specific diagnostic steps and corrective actions to restore safe, efficient operation. The following sections outline practical checks and fixes for these common faults.
Incompatible electrical service or tripped breakers
Electrical service incompatibility or repeatedly tripped breakers is a common electrical obstacle when installing an electric furnace. This issue occurs when the home’s panel, wiring, or breaker capacity cannot support the unit’s load.
Technicians assess panel amperage, circuit configuration, and conductor sizing. Solutions include upgrading the breaker, installing a dedicated multi-pole circuit, replacing undersized wiring, or consulting a licensed electrician to guarantee code compliance and safe operation.
Poor airflow, noises, and vibration
Poor airflow and unusual noises or vibration often indicate installation issues that compromise furnace performance and comfort; diagnosing these symptoms quickly helps prevent damage and inefficiency.
Technicians should inspect ductwork for restrictions, guarantee proper blower wheel alignment and mounting, check fasteners and isolation pads for looseness, confirm filter size and placement, and verify fan speed settings.
Correcting these restores airflow and quiet operation.
Thermostat communication and control issues
When thermostat signals fail or respond inconsistently, the furnace can cycle improperly, run continuously, or ignore user inputs, undermining comfort and energy efficiency.
Inspect wiring connections, verify correct thermostat type (line-voltage vs. low-voltage), confirm proper C-wire or power source, and test relay or control board response.
Replace faulty thermostats, repair damaged wires, and calibrate settings to restore reliable communication and safe operation.
Duct leaks and uneven heating
Many installations reveal leaks or imbalances in the ductwork that cause room-to-room temperature differences and wasted energy.
Technicians should inspect seams, joints and flex connections, sealing with UL-rated mastic or foil tape.
Balance airflow by adjusting dampers and verifying register output.
Add insulation where ducts run through unconditioned spaces.
Re-test temperatures and static pressure to confirm even distribution and efficiency.
Maintenance After Installation
After installation, a clear routine maintenance schedule outlines monthly and annual tasks to keep the furnace operating efficiently.
Proper filter selection and timely replacement at manufacturer-recommended intervals prevent airflow restriction and component strain.
Seasonal inspections and professional tune-ups before winter guarantee safe operation and catch wear or wiring issues early.
Routine maintenance schedule and tasks
A clear, regular maintenance schedule keeps an electric furnace operating safely and efficiently while extending its service life.
Routine tasks should be performed seasonally and annually to prevent failures.
- Inspect electrical connections and tighten as needed.
- Clean blower, coils, and accessible components.
- Test safety controls, thermostats, and limit switches.
- Verify airflow, inspect ducts, and check for unusual noises or odors.
Filter selection and replacement intervals
Following inspection of electrical and mechanical components, attention should shift to filter selection and replacement intervals to maintain airflow and indoor air quality.
Choose filters by MERV rating balancing particle capture and system resistance; typical disposable fiberglass 1–4 week or pleated 3–6 month intervals vary by occupancy, pets, and allergies.
Inspect monthly, replace when visibly soiled or when manufacturer’s pressure-drop limit is approached.
Seasonal checks and professional tune-ups
When seasons change, scheduled checks and professional tune-ups guarantee the furnace operates safely and efficiently year-round.
Technicians inspect wiring, thermostats, breakers, elements, and airflow, adjust controls, and test safety interlocks. Homeowners should schedule biannual inspections—preheating and preseason cooling—replace filters, clear vents, and document service.
Prompt professional attention prevents failures, extends lifespan, and maintains warranty compliance.
When to Call a Professional
Complex electrical upgrades or jobs that trigger permits typically warrant a licensed electrician or HVAC contractor.
Visible signs of improper installation—exposed wiring, frequent tripping, unusual odors, or persistent uneven heating—should prompt professional inspection.
Homeowners should weigh the upfront cost of hiring a pro against potential repair, safety, and code-violation expenses from a DIY attempt.
Complex electrical upgrades and permit triggers
If significant changes to a home’s electrical system are required—such as adding a new 240V circuit, upgrading the service panel, or increasing amperage—the task should be evaluated by a licensed electrician before proceeding.
Complex upgrades often trigger local permits, inspections, and utility coordination.
A professional guarantees code compliance, proper load calculations, correct wiring, and safe connections, reducing liability and preventing costly rework.
Signs of improper installation or safety hazards
Although some installation issues are subtle, certain signs clearly indicate unsafe or improper furnace wiring and warrant immediate professional evaluation.
Indicators include burning smells, scorch marks, frequent breaker trips, persistent arcing or sparking, uneven heating, excessive noise, loose or overheated connections, and visible code violations.
Any doubt, repeated faults, or inability to verify proper grounding and circuit sizing should prompt a licensed technician.
Cost comparison: DIY vs. professional hiring
When weighing whether to tackle an electric furnace installation personally or hire a pro, the primary consideration is total cost—not just the price of parts. DIY saves on labor but risks permits, tool purchases, extended time, and potential repair costs. Professionals add labor fees yet guarantee code compliance, warranties, and faster, safer completion.
| Item | DIY | Professional |
|---|---|---|
| Labor cost | Low | High |
| Risk/extras | High | Low |
| Warranty | None | Included |
Cost Breakdown and Energy Efficiency Considerations
A clear understanding of cost components—equipment, labor, permits, and electrical upgrades—helps set realistic installation budgets.
Ongoing operating costs and efficiency ratings (such as COP or AFUE-equivalents for electric systems) determine long-term expenses and should be compared when selecting a unit.
Available rebates, tax credits, and financing programs can considerably offset upfront costs and should be reviewed before purchase.
Typical installation cost components
Several key cost components typically make up an electric furnace installation: equipment, labor, permits and inspections, ductwork modifications, electrical upgrades, and disposal of the old unit.
Typical budgeting also accounts for materials, travel, and warranty. Homeowners should obtain multiple quotes and itemized estimates to compare scope and contingencies.
- Unit and materials
- Labor and permits
- Electrical work
- Ductwork and disposal
Operating costs and efficiency ratings to compare
Beyond upfront installation expenses, ongoing operating costs and equipment efficiency determine a furnace’s long-term value.
Compare annual energy consumption (kWh), heat output (BTU), and the unit’s AFUE-equivalent or COP ratings for electric systems.
Factor in local electricity rates, expected runtime, and maintenance frequency.
Higher-efficiency models cost more initially but typically lower monthly bills; calculate payback periods before selecting.
Rebates, incentives, and financing options
When evaluating total installation costs and lifecycle savings, homeowners should investigate available rebates, incentives, and financing programs that can substantially lower upfront expenses and improve project payback.
Local utility rebates, state tax credits, and federal incentives for energy-efficient electric furnaces reduce net cost.
Low-interest loans, PACE programs, and manufacturer promotions can aid cash flow; verify eligibility, application deadlines, and combined benefit limits before committing.
Real-World Installation Scenarios and Examples
The article presents three practical scenarios to illustrate common challenges and choices: a single-family home retrofit, a new-construction installation, and installations in tight utility rooms.
Each example outlines site-specific planning, required permits, and typical wiring and ducting solutions.
Readers are guided to compare trade-offs in cost, accessibility, and long-term efficiency for each case.
Single-family home retrofit example
A homeowner replaces a decades-old gas furnace with a modern electric unit to improve efficiency and eliminate combustion risks. This retrofit example outlines key steps, typical challenges, and decisions encountered in a standard single-family installation, including duct compatibility, electrical service upgrades, and permit requirements.
The narrative covers load calculations, circuit sizing, panel capacity checks, duct sealing or resizing, thermostat integration, and inspection coordination.
New construction installation example
Shifting from retrofit challenges, new construction installations allow planners to integrate an electric furnace from the ground up, simplifying routing, electrical coordination, and duct layout.
Designers can position the unit for ideal airflow, specify dedicated feeders and disconnects, and coordinate with framing, insulation, and mechanical rough‑in.
Commissioning proceeds smoothly with accessible panels, labeled circuits, and preplanned condensate and service clearances.
Tight-space or utility-room solutions
When space constraints dictate placement, installers must prioritize compact layouts, service access, and code-required clearances to guarantee safe, maintainable electric furnace installations in tight utility rooms.
They select narrow-profile units, plan removable panels, and route ductwork and wiring for accessible maintenance.
Venting, condensate management, and electrical service must meet code; clearances, airflow, and heat dissipation are verified before final commissioning.
Practical Tips and Best Practices for a Smooth Installation
The section outlines practical, time-saving tips and highlights common installer shortcuts to avoid to guarantee safety and code compliance.
It also provides a concise checklist for final handover to the homeowner, covering documentation, system testing, and user orientation.
Finally, it points to trusted resources for additional guidance and troubleshooting.
Time-saving tips and common installer shortcuts to avoid
Prioritizing safety and long-term performance, experienced installers rely on specific time-saving techniques while avoiding shortcuts that compromise code compliance or equipment longevity.
They pre-plan material lists, stage components, and use proper tools to reduce downtime. They never skip permit checks, undersize wiring, bypass grounding, or ignore clearances.
Documentation, measured layouts, and calibrated testing replace rushed improvisation for reliable, code-compliant installations.
Checklist for final handover to homeowner
After documenting measurements, testing results, and code verifications, installers should follow a concise handover checklist to guarantee the homeowner receives a safe, functional, and well-explained system.
- Verify thermostat operation, voltage, and safety interlocks.
- Confirm airflow, filter placement, and clearances.
- Provide labeled disconnects, manuals, and warranty paperwork.
- Demonstrate basic operation, maintenance steps, and emergency shutoff.
Resources for additional guidance and troubleshooting
Where can installers turn when a tricky wiring issue or unexpected fitment problem arises? Reliable resources streamline solutions, guarantee code compliance, and prevent costly mistakes.
Recommended references include technical manuals, manufacturer support, industry forums, and local inspectors.
Practical use: consult documentation first, contact factory tech support, search vetted forums, and schedule inspections when uncertain.
- Manufacturer tech support
- Installation manuals
- Pro HVAC forums
- Local code inspectors
Conclusion
The guide concludes by likening proper electric furnace installation to tuning an orchestra: each safety check, wire connection, and airflow adjustment must harmonize to prevent discord. Investigating the theory that meticulous preparation averts failure, readers envision circuits aligned like sheet music and ducts breathing evenly. Whether handled by a diligent homeowner or seasoned technician, the image of a quietly efficient system reinforces that disciplined, informed work yields reliable warmth and long-term peace of mind.