
How to Clean RV Sewer Hose Quickly and Safely: Step-by-Step Guide
To clean your RV sewer hose quickly and safely, start by wearing gloves, goggles, and an apron. Position the hose on a slight slope away from foot traffic. Fully drain the tanks and clamp the fittings. Use a high-flow nozzle from the downstream end to dislodge any solids by gently rocking and rotating the hose. Next, apply a biodegradable enzyme cleaner briefly, then rinse vigorously until the water runs clear. Finally, drain the hose and let it air-dry before capping. For additional tips on products, safety, and replacement, continue reading.
Quick Overview: Fast, Safe RV Sewer Hose Cleaning
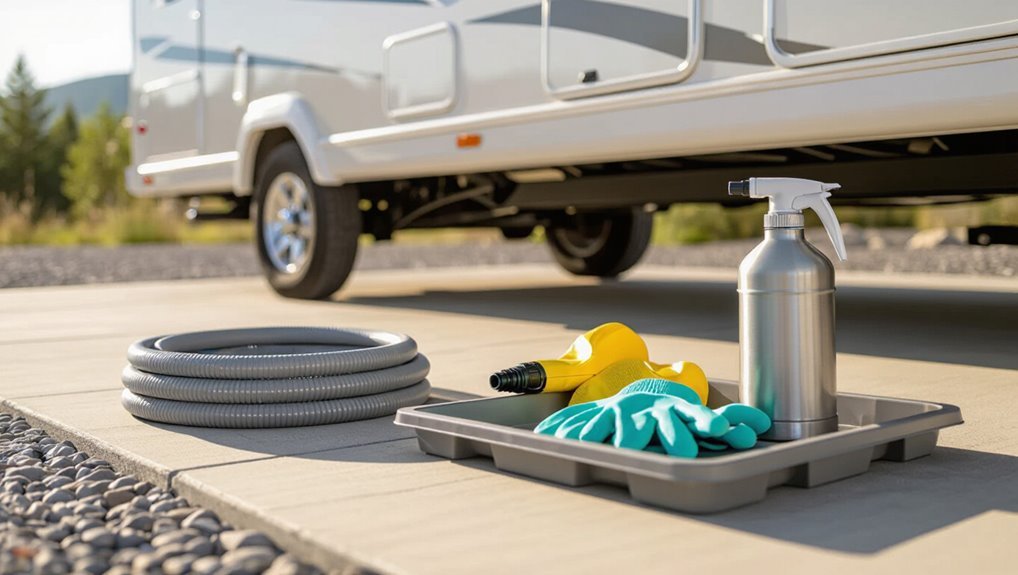
This guide outlines essential steps, safety precautions, and recommended tools for cleaning an RV sewer hose efficiently.
It then summarizes a one-paragraph quick method that includes draining, rinsing, and sanitizing with minimal equipment.
The overview emphasizes safety, odor control, and practical tips to complete the task quickly.
What this guide covers
A concise, practical roadmap outlines the steps, tools, safety precautions, and cleanup tips needed to clean an RV sewer hose quickly and without contamination.
It specifies required equipment, personal protective gear, stepwise decontamination, flushing and drying techniques, odor control, and storage.
Safety protocols minimize exposure; troubleshooting and maintenance recommendations extend hose life.
Readers learn how to clean RV sewer hose efficiently and safely.
One-paragraph quick method summary
Empty, rinse, sanitize: wearing gloves and eye protection, an RV owner disconnects the hose, drains it into the dump station, then attaches a water source to backflush the line until clear;
next they apply a diluted bleach or specialized RV disinfectant, let it contact briefly, rinse thoroughly, air-dry with the caps removed, and store the hose off the ground to prevent contamination and odor.
Afterward, inspect fittings and reseal.
Why Regular Cleaning Matters for RV Sewer Hoses
Neglected RV sewer hoses pose health and sanitation risks by harboring bacteria, odors, and biofilm that can contaminate living areas.
Regular cleaning helps maintain flow, prevents clogs and odors, and extends hose life by reducing corrosive buildup.
Common problems from dirty hoses include blockages, foul smells, leaks, and premature material degradation.
Health and sanitation risks of neglect
Neglecting regular cleaning of an RV sewer hose invites bacterial growth, foul odors, and blockages that pose real health and sanitation risks.
Harmful microbes can contaminate surfaces and air, increasing illness risk for occupants. Stagnant waste encourages flies and pests, spreading pathogens.
Undetected leaks or backups create unsanitary conditions requiring intensive remediation and possible exposure to sewage-borne diseases.
Performance and longevity benefits
Regularly flushing and sanitizing an RV sewer hose preserves flow efficiency and prevents buildup that restricts drainage, keeping the cassette or sewer connection functioning as designed.
Routine maintenance reduces abrasive deposits and corrosion, extends hose and fitting lifespan, and maintains seal integrity.
Consistent cleaning minimizes odor retention and helps prevent premature replacements, saving time and cost over the vehicle’s service life.
Common problems caused by dirty hoses
Clogging, odors, and leaks are common outcomes when RV sewer hoses accumulate waste, biofilm, and mineral deposits.
Blockages restrict flow, forcing backups and increasing sanitary risks. Persistent odors attract pests and create unpleasant campsite conditions.
Corrosion and weakened fittings raise leak likelihood, causing environmental contamination and costly repairs.
Regular cleaning prevents buildup, preserves seal integrity, and reduces maintenance frequency.
Tools, Materials, and Safety Gear Needed
Before beginning hose maintenance, a clear list of essential tools and supplies sets expectations for the task.
The discussion will cover recommended cleaning chemicals with eco-friendly alternatives and how to choose them.
It will also outline necessary personal protective equipment and an efficient setup to minimize exposure and mess.
Essential tools and supplies
A compact kit of tools, cleaning agents, and safety gear guarantees an efficient, sanitary RV sewer hose cleaning process.
Essential items include a durable sewer hose, elbow fittings, rinsing nozzle, and seal caps. Personal protective equipment and containment accessories are also necessary.
- Hose and fittings
- Rinse nozzle
- PPE (gloves, goggles)
- Containment caps and straps
Recommended cleaning chemicals and eco-friendly alternatives
Select cleaning chemicals that balance effectiveness with safety for people, RV components, and the environment.
Recommended options include biodegradable enzyme cleaners, diluted bleach for stubborn stains (use sparingly), and white vinegar for odor control.
Avoid caustic drain cleaners. Consider eco-friendly alternatives and proper dilution.
Key choices to prioritize:
- Enzyme-based cleaner
- White vinegar
- Diluted bleach
- Mild detergent
Personal protective equipment and setup
Several essential items and protective measures are required to clean an RV sewer hose safely and efficiently: heavy-duty nitrile or chemical-resistant gloves, splash-proof safety glasses, a disposable or washable apron, and sturdy footwear with good traction.
Additionally, use a face mask if odors are strong, have paper towels and disinfectant wipes, a dedicated bucket, hose attachment, and guarantee adequate ventilation and stable footing before beginning.
Preparing for a Quick, Safe Cleaning
Before beginning, the operator selects a level, well-ventilated spot and a time when the campground is quiet to minimize disruption.
All hose connections are double-checked and clamped as needed to prevent leaks or spills during handling.
A quick inspection of fittings, seals, and the hose exterior confirms there are no cracks, loose clamps, or blockages that would complicate cleaning.
Choosing the right location and time
Choosing an appropriate spot and time for cleaning the RV sewer hose minimizes smells, reduces risk, and speeds the process.
Select a well-ventilated, level area away from foot traffic and water sources. Prefer daylight and mild weather to improve visibility and drying.
Avoid crowded campgrounds and peak hours; choose a location with proper waste station access and discreet disposal options.
Securing connections and preventing spills
Secure all hose connections and valve handles firmly to prevent leaks and accidental disconnections during cleaning.
Use threaded or quick-connect fittings tightened by hand then slightly snug with a tool; avoid overtightening.
Position hose downhill from the RV, support low points with blocks, and clamp or tape joints where needed.
Keep spare caps and a tight-fitting adapter ready to seal openings quickly if a disconnection occurs.
Pre-clean inspection checklist
A quick visual and functional check guarantees a safe, efficient cleaning session: inspect the hose and fittings for cracks, the dump valve for smooth operation, and the holding-tank vent for obstructions; confirm the campground’s sewer connection is compatible and that fresh water, appropriate gloves, and an approved disinfectant are on hand.
- Verify hose integrity
- Test dump valve
- Check vent and connections
- Gather supplies and PPE
Step-by-Step Fast Cleaning Method (Under 20 Minutes)
The following rapid procedure outlines five concise steps to clean an RV sewer hose in under 20 minutes.
It begins with safe disconnection and draining, followed by an initial rinse using a nozzle technique.
Then a thorough flush with hose-mounted flushers or common home tools is performed.
A biodegradable cleaner or enzyme treatment is applied before a final rinse and inspection to confirm cleanliness.
Step 1 Disconnecting and draining the hose safely
Begin by shutting off the RV’s black and gray tank valves and letting gravity do the initial work: open the dump outlet and allow waste to flow into the sewer connection until the line runs clear.
Wear gloves and eye protection, cap the sewer inlet, unclip the hose from fittings, keep it downhill to drain fully, then seal both ends before moving to a cleaning area.
Step 2 Initial rinse and nozzle technique
Start by positioning the sealed sewer hose on a slight slope near a water source.
Then attach a garden hose to a high-flow nozzle and insert it into the downstream end until resistance is met.
Open water steadily to dislodge solids, rocking the hose gently.
Rotate the nozzle slightly to reach inner surfaces.
Close flow, vent, and prepare for the dedicated flushing step.
Step 3 Flushing with hose-mounted flushers or home tools
Proceed to flush the hose using either a hose-mounted flusher or readily available home tools, focusing on targeted, high-pressure rinses to remove remaining residue.
Attach the flusher or a pressure nozzle, run water at moderate pressure, and work from valve end toward the elbow.
Rotate and flex the hose to dislodge buildup. Inspect clear flow and repeat brief bursts until water runs clean.
Step 4 Using a biodegradable cleaner or enzyme treatment
Apply a biodegradable cleaner or enzyme treatment to break down remaining organic residue and neutralize odors without harming plumbing or the environment.
The cleaner is introduced into the hose and left briefly per manufacturer instructions, allowing enzymes to digest solids and biofilm.
Select products labeled for septic systems and safe for rubber.
Avoid harsh acids or bleach that degrade hose materials and seals.
Step 5 Final rinse and inspection
Flush the hose thoroughly with clean water, directing flow from the camper end toward the sewer connection to push loosened residue out.
While water runs, rotate and squeeze the hose to dislodge trapped material.
Inspect both ends, fittings, and the interior visually and by touch for remaining debris or damage.
Repeat flushing until clear, then cap fittings to contain any residual odor.
Step 6 Drying, storing, and odor prevention
Once the hose is visibly clear and fittings are capped, attention turns to drying, storing, and preventing odors.
The hose is drained, then hung or propped with slight slope for airflow until surface dampness is gone.
Store in a ventilated, labeled container away from heat and chemicals.
For odor control, use baking soda sachets or activated charcoal; replace periodically.
Deep Cleaning Method for Heavy Build-Up
For persistent odors or visible residue that resists quick cleaning, a deep clean is recommended.
The process typically involves partial disassembly for manual scrubbing, extended soaking in a diluted disinfectant or enzyme solution, and careful use of a sewer snake or purpose-built brush to dislodge compacted waste.
Safety precautions and proper reassembly are emphasized to prevent damage and contamination.
When to choose deep cleaning
When is deep cleaning necessary? It is warranted when persistent odors, visible encrustation, slow drainage, or repeated clogs occur despite routine flushing.
Choose deep cleaning after prolonged storage, extended boondocking, or following septic-system issues. It targets internal residue and bacterial buildup that surface rinses cannot remove.
Schedule it proactively every few seasons if heavy usage or problematic waste types are common.
Disassembly and manual scrubbing techniques
After deciding that deep cleaning is necessary, the hose and its fittings should be disassembled to expose all surfaces with heavy buildup.
Using gloves and eyewear, inspect seals, clamps, and elbows. Scrub interior and exterior with a stiff-bristle brush and a narrow tube brush for corrugations.
Rinse debris into a contained area and repeat mechanical scrubbing until obvious residue is removed.
Soaking protocols and effective solutions
Soak components in a targeted cleaning solution that balances degreasing power with material safety: a mixture of warm water and a concentrated RV-safe enzymatic cleaner or a diluted household bleach solution (no more than 1 cup bleach per 5 gallons water) breaks down organic buildup, while commercial hose descalers remove mineral deposits.
Agitate periodically, soak 1–4 hours, rinse thoroughly and air-dry before reassembly.
Using a sewer snake or specialized brush safely
Employ a sewer snake or a specialized hose brush with controlled, steady motions to dislodge compacted waste and scale without damaging the hose material.
Wear gloves and eye protection, anchor the hose, and feed the tool slowly.
Retract and flush frequently to remove loosened debris.
Inspect for tears or soft spots, replace if compromised, and sanitize after mechanical cleaning to eliminate residual bacteria.
Quick Maintenance Routine to Avoid Future Clogs
A concise routine prevents most blockages before they form: simple after-every-use steps under five minutes, a clear weekly and monthly checklist, and proper storage practices all contribute.
The after-use steps focus on flushing, closing valves, and rinsing fittings.
Weekly checks inspect seals and hose condition.
Monthly actions include enzyme treatments, and storage follows clean, dry, odor-controlled methods to avoid contamination.
After-every-use steps that take under 5 minutes
Rinse the hose briefly, then flush the fittings and cap to remove solids and residue before they dry.
Then perform these quick steps to minimize odor and buildup:
- Open and flush dump valve briefly.
- Spray internal hose with water while elevated.
- Dry fittings and cap with a paper towel.
- Stow hose loosely to allow airflow and prevent kinks.
Weekly and monthly maintenance checklist
After the quick after-use steps, a short weekly and monthly checklist helps catch early buildup and prevent odors or clogs.
Perform these quick tasks to maintain flow and detect issues:
- Inspect hose for soft spots, cracks, or leaks.
- Flush with water and RV-safe cleaner.
- Check fittings and gate valve operation.
- Apply enzymatic treatment monthly to break down solids.
Best storage practices to prevent contamination
Store the sewer hose dry, clean, and sealed to minimize contamination and odor transfer.
After flushing and drying, coil the hose loosely to avoid kinks.
Use a dedicated, labeled storage bag or compartment with ventilation and a removable liner for washing.
Keep fittings capped and separate.
Inspect before reuse and replace worn seals to prevent leaks, pests, and future clogs.
Troubleshooting Common Problems
The section outlines common issues encountered with RV sewer hoses and practical ways to address them.
It covers persistent odors and effective elimination methods, quick fixes for slow flow or partial clogs, and guidance on identifying leaks or cracks and when replacement is necessary.
Readers will find concise troubleshooting steps to restore function and sanitation.
Persistent odors and how to eliminate them
Persistent odors from an RV sewer hose signal trapped waste, bacterial buildup, or failing seals and require targeted steps to diagnose and eliminate the source.
Inspect connections and gaskets for leaks, flush hose with hot water and enzyme cleaner, scrub accessible sections with a long brush, sanitize with diluted bleach or specialized deodorizer, and air-dry completely.
Replace worn seals or hoses to prevent recurrence.
Slow flow or partial clogs quick fixes
Address slow flow in an RV sewer hose by checking for kinks, partial blockages, or compressed sections that restrict drainage.
Start by straightening the hose, inspecting couplings and gaskets, and feeling along its length for softened or collapsed areas.
Use a garden hose or low-pressure water from the dump inlet to flush obstructions. Reverse-flush if possible, and remove debris with a flexible sewer brush or gloved hands.
Leaks, cracks, and when to replace the hose
Inspect the sewer hose carefully for hairline cracks, splits at fittings, or soft spots that signal material fatigue—any visible damage can lead to leaks, odors, and contamination.
Small punctures may be temporarily patched with waterproof tape or a repair sleeve, but recurring issues, brittleness, or multiple defects warrant replacement.
Replace hoses showing significant wear, persistent leaks, or compromised seals to guarantee sanitary operation.
Products and Accessories Comparison
The section compares common sewer hose materials and their trade-offs, helping readers choose between flexibility, durability, and cost.
It also reviews flusher units, adapters, and fittings that speed and simplify the cleaning process.
Finally, top enzyme cleaners and safe disinfectants are evaluated for effectiveness and RV-safe use.
Sewer hoses: materials and pros/cons
Choosing the right sewer hose involves balancing material, durability, and ease of use: common options include rigid PVC, flexible vinyl, reinforced rubber, and expandable polymers, each with distinct strengths and weaknesses. The table summarizes key traits for quick comparison.
| Material | Durability | Ease of Use |
|---|---|---|
| PVC | High | Moderate |
| Vinyl | Low | High |
| Rubber | High | Moderate |
Flusher units, adapters, and fittings to speed cleaning
Several compact flusher units, adapters, and fittings exist to streamline RV sewer-hose cleaning by directing high-flow water through the line, creating turbulence that dislodges buildup and rinses waste toward the dump inlet. Choices vary by flow rate, connection type, and material. Match fittings to hose diameter and dump inlet to prevent leaks and backflow.
| Feature | Benefit | Note |
|---|---|---|
| Flow rate | Faster rinsing | PSI limits |
| Connection | Secure seal | Thread type |
| Material | Durability | Corrosion resistance |
Top enzyme cleaners and safe disinfectants
After using flusher units and fittings to dislodge bulk waste, attention turns to enzyme-based cleaners and gentle disinfectants that finish the job by breaking down organic residue and controlling odors without damaging hoses or septic systems.
Recommended options include biological enzyme powders, concentrated liquid enzymes, oxygen-based sanitizers, and mild quaternary ammonium sprays.
- Enzyme powders
- Liquid enzymes
- Oxygen sanitizers
- QAC sprays
Safety, Environmental, and Legal Considerations
When cleaning an RV sewer hose, attention must be given to proper disposal of wastewater and adherence to local regulations to avoid fines and contamination.
The environmental effects of cleaning chemicals should be weighed, with preference given to biodegradable or non-toxic alternatives when possible.
Hand and pet safety require protective gear and careful handling to prevent exposure and spread of contaminants.
Proper disposal of wastewater and local regulations
Although RV waste is treated on-site, responsible disposal remains essential to protect public health and local ecosystems. Owners must follow campground rules, municipal sewer guidelines, and state regulations that dictate where and how greywater and blackwater can be released.
Failure to use designated dump stations or approved sewer connections can incur fines, contamination, and liability. Document compliance and report unclear local rules to authorities.
Environmental impact of chemicals and greener choices
Because many common RV cleaning products contain harsh disinfectants, solvents, and surfactants that persist in sewage systems and waterways, choosing safer alternatives reduces harm to septic systems, municipal treatment plants, and aquatic life.
Opt for biodegradable, phosphate-free formulations, enzyme-based or oxygenated cleaners, and minimal doses.
Rinse hoses thoroughly at approved dump sites and prefer mechanical scrubbing over heavy chemicals to limit environmental load.
Safe handling to protect people and pets
Handle sewer hoses with caution to minimize risk to people and pets: wear gloves and eye protection, keep children and animals away from the work area, and avoid inhaling fumes from cleaners.
Sanitize tools and dispose of wastewater per local rules. Use leak-proof connections and inspect hose integrity before use.
Report spills promptly, wash hands thoroughly, and store hoses sealed away from living spaces.
Quick Checklist Before Your Next Trip
Before leaving, a concise checklist guarantees the sewer hose and repair kit are ready and legal requirements are met.
Recommended items include a cleaning brush, gloves, repair clamps, and spare seals:
- Cleaning brush
- Disposable gloves
- Repair clamps
- Spare seals
A quick visual and pressure inspection of the hose and fittings should follow the checklist.
Packing checklist for cleaning and emergency repairs
A concise packing checklist guarantees that cleaning and emergency-repair items are accessible and organized for any RV trip, reducing downtime and preventing sanitation issues.
Include: sealed sewer-hose bag, extra hose sections and clamps, heavy-duty gloves, biohazard-safe disinfectant, scrub brush, spare caps and donut seals, adjustable wrench, hose-support straps, leak-detection tape, disposal bags, and a compact flashlight.
Store labeled and reachable.
Pre-departure hose inspection items
Inspecting the RV sewer hose before departure guarantees safe, leak-free connections and prevents roadside repairs.
Check for cracks, abrasions, soft spots, and damaged fittings. Verify clamps, seals, and bayonet locks operate smoothly.
Ascertain correct length and secure storage to avoid kinks. Confirm odor-tight caps and clear swivel joints.
Replace worn components and carry a spare emergency section.
Signs It’s Time to Replace Your RV Sewer Hose
Visible wear indicators, cracking, or hoses beyond their expected lifespan signal the need for replacement.
Decision-making should weigh the modest cost of a new hose against the safety and sanitation risks of continued use.
A brief cost-versus-safety comparison helps prioritize timely replacement.
Wear indicators and lifespan expectations
Cracks, soft spots, and persistent odors serve as clear wear indicators that an RV sewer hose is nearing the end of its useful life.
Fading flexibility, brittle fittings, and leaks under pressure confirm degradation.
Typical lifespan ranges from 3–7 years depending on material, use frequency, and storage.
Regular inspections after each season and immediate replacement upon observable damage reduce failure risk and sanitation issues.
Cost vs. safety analysis for replacement decisions
When evaluating whether to replace an RV sewer hose, owners should weigh the upfront cost of a new hose against the potential expense and health risks of a failure—replacement prices are modest compared with repairs, cleanup, or medical bills from exposure to sewage.
Decision factors include age, visible wear, frequent leaks, and reduced flexibility; investing in replacement prevents costly emergency repairs and contamination risks.
Conclusion
Regular, efficient cleaning preserves function and prevents odor, yet many neglect it until problems arise. Could a few disciplined minutes now save hours of mess and expense later? The guide stresses safety, proper gear, quick methods, and lawful disposal so users maintain hygiene and the environment. By following steps and recognizing wear signs, RV owners guarantee reliable waste handling, extend hose life, and travel without worry—preparedness pays off on every trip.

