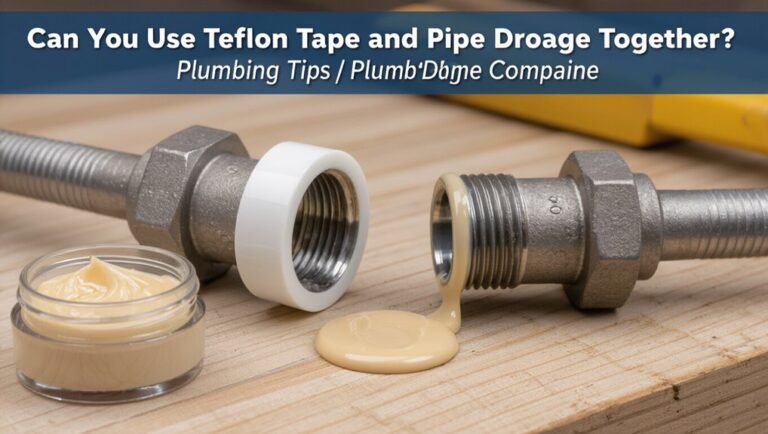
How to Install a Bathtub Faucet: Step-by-Step Guide for Beginners
To install a bathtub faucet, start by shutting off the water supply and draining the lines. Next, remove the trim and the old valve, then dry-fit the new valve and spout. Seal threaded joints with plumber’s tape, tighten the fittings, and mount the trim and escutcheon. Apply mildew-resistant silicone, restore the water supply, and test for leaks and temperature balance. Basic tools and safety precautions are essential, and you may need to service the cartridge or diverter occasionally. For detailed steps, tips, and troubleshooting, continue reading.
What You’ll Achieve by the End of This Project
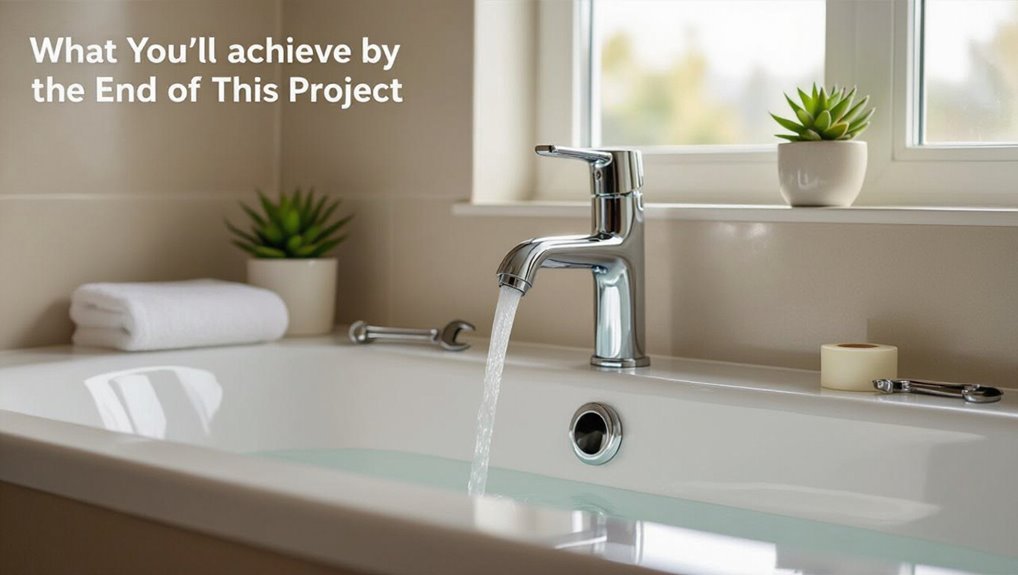
By the end of this project, the reader will have a fully functioning bathtub faucet properly sealed and tested for leaks.
The section will outline typical outcomes, an estimated time frame, and the skill level required. It will also list essential tools and materials needed to complete the job safely and efficiently.
Typical outcomes of installing a bathtub faucet
Completing this bathtub faucet installation results in a properly sealed, functioning fixture that delivers controlled water flow and temperature, fits securely to the tub or wall, and meets basic plumbing codes.
The homeowner gains a leak-free spout, reliable cartridge or valve operation, neat escutcheon alignment, and improved water efficiency.
This guide clarifies how to install bathtub faucet with predictable, durable results and minimal callbacks.
Time, skill level, and tools required
Estimate a half-day to a full day for most homeowners, depending on familiarity with plumbing and whether any unforeseen issues (corroded fittings, nonstandard valve types, or access panel limitations) arise.
Basic skills include comfort with shutoff valves, pipe fittings, and measuring.
Required tools: adjustable wrench, basin wrench, plumber’s tape, silicone sealant, screwdriver, tubing cutter, and possibly a hacksaw or valve-specific tool.
Types of Bathtub Faucets and How They Differ
Different bathtub faucet styles and their operating systems affect installation steps, plumbing connections, and user experience.
The main options to take into account include:
- Deck-mounted vs. wall-mounted faucets
- Single-handle, double-handle, and thermostatic valves
- Tub-shower combo faucets and diverters
- Common materials and finishes
- Spout types and reach
Each of these factors will influence tools needed and mounting or rough-in requirements.
Deck-mounted vs. wall-mounted faucets
How a faucet is mounted fundamentally affects installation, appearance, and user experience:
Deck-mounted faucets sit on the tub rim or a surrounding platform and simplify access for deck-mounted spouts and controls, while wall-mounted faucets attach to the wall above the tub, freeing the rim and often requiring in-wall plumbing and precise placement.
Deck mounts suit tubs with wide ledges; wall mounts favor clean lines and easier cleaning.
Single-handle, double-handle, and thermostatic valves
Whether mounted on the deck or the wall, the choice of valve type determines operation, temperature control, and complexity of installation.
Single-handle valves mix hot and cold with one control for simplicity and space savings.
Double-handle valves separate hot and cold controls, offering finer adjustment but more plumbing.
Thermostatic valves maintain preset temperatures, enhancing safety and comfort while requiring more complex installation and cartridge replacement.
Tub-shower combo faucets and diverters
When a tub is paired with a shower, the faucet assembly includes a diverter that routes water either to the tub spout or the showerhead.
Diverters come in several styles—integrated spouts, three-valve diverters, and pull-up or push-button mechanisms—and their placement and design affect ease of use, maintenance, and flow performance.
Selection depends on installation type, user preference, repair accessibility, and compatibility with existing valves.
Common materials and finishes
After considering diverter types and placement for tub-shower assemblies, attention turns to the materials and finishes that determine a faucet’s durability, corrosion resistance, and appearance.
Common materials include brass (durable, corrosion-resistant), stainless steel (modern, low-maintenance), and zinc alloy (economical).
Finishes—chrome, brushed nickel, oil-rubbed bronze, polished brass—affect maintenance and style; choose based on water chemistry, budget, and desired look.
Parts and Tools You’ll Need
Before beginning the installation, the necessary parts and tools should be identified and organized to guarantee a smooth process.
Key items include both faucet components and plumbing fittings, along with the essential and optional tools plus safety gear needed for a secure fit.
The following list outlines what to check and gather before starting:
- Spout, valve, cartridge, and trim
- Adapters, escutcheons, and supply lines
- Adjustable wrenches and basin wrench
- Plumber’s tape and silicone sealant
- Optional: socket set, flashlight, gloves, and safety glasses
Faucet components to check (spout, valve, cartridge, trim)
Inspect each faucet component carefully to guarantee compatibility and proper function: examine the spout for corrosion or worn threads, check the valve body for cracks or mineral buildup, verify the cartridge moves smoothly and seals without leaks, and confirm trim pieces match the finish and mounting hardware.
Replace damaged parts, note manufacturer model numbers, and keep O-rings, screws, and escutcheon spacing consistent for correct assembly.
Plumbing parts and fittings (adapters, escutcheons, supply lines)
A concise set of plumbing parts and fittings guarantees a smooth bathtub faucet installation: adapters that match existing pipe threads and materials, escutcheons sized to cover wall openings and conceal rough-in gaps, and flexible supply lines that meet length and pressure ratings.
Additional necessary fittings include proper-threaded nipples, union couplings, and dielectric connectors to prevent corrosion.
Verify all seals and mating surfaces are compatible to avoid leaks.
Essential tools (wrenches, basin wrench, plumber’s tape, silicone)
With the right adapters, escutcheons, and supply lines in place, the next focus shifts to the tools that make the installation precise and leak-free.
Essential items include an adjustable wrench and channel-lock pliers for fittings, a basin wrench for hard-to-reach nuts, PTFE plumber’s tape to seal threaded joints, and silicone sealant for watertight escutcheon and trim installation.
Optional helpful tools and safety gear
Gathering a few optional tools and basic safety gear can streamline the bathtub faucet installation and reduce the risk of injury or damage.
Recommended extras include a cordless drill with bits, adjustable basin wrench, tubing cutter, rechargeable inspection light, and a magnetic tray for fasteners.
Safety items: safety glasses, work gloves, knee pads, and a dust mask. These improve efficiency and protect the installer.
Preparing the Work Area and Safety Precautions
Before beginning work, the article explains how to shut off the main and local water valves and open nearby faucets to relieve line pressure.
Surfaces and adjacent fixtures should be covered with towels or protective film to prevent scratches and water damage.
The section also identifies common hazards—sharp edges, electrical outlets, and slippery floors—and outlines simple steps to avoid them.
How to shut off water and relieve pressure
Shut off the water supply at the home’s main valve or the dedicated bathroom shutoff to prevent flow into the bathtub lines.
Open the faucet and any nearby taps to drain residual water.
Locate and close the shower valve if present.
Use a bucket to catch remaining drips and check the supply lines for pressure relief.
Verify zero flow before starting work.
Protecting tub surfaces and nearby fixtures
Lay down a soft drop cloth or foam protectors over the tub and surrounding surfaces to prevent scratches, chips, and tool dings during the faucet replacement.
Remove loose items and cover nearby fixtures—showerheads, handles, and trim—with painter’s tape or plastic to block dust and accidental contact.
Keep small parts in a magnetic tray and wipe spills promptly to protect finishes.
Identifying and avoiding common hazards
Identify potential hazards in the work area and address them proactively to reduce injury and damage:
locate electrical outlets and wiring, note water shutoff locations, check for slippery surfaces, and remove trip hazards such as loose rugs or tools.
Ascertain proper ventilation when using solvents, wear eye and hand protection, use grounded tools, isolate water and power before starting, and keep a dry, well-lit workspace free of clutter.
Step-by-Step Installation: Removing the Old Faucet
The technician begins by inspecting the existing installation and taking precise measurements to guarantee the replacement parts will fit.
Next, the water supply is turned off and the lines are drained before handles, trim, and the spout are removed in sequence.
Finally, the valve body or old fittings are carefully extracted with methods that protect the surrounding plumbing.
Inspecting the existing installation and taking measurements
Before removing any components, inspect the existing installation to determine faucet type, mounting configuration, and visible wear. Record measurements of inlet spacing, wall thickness, and escutcheon diameter to guarantee replacement compatibility.
Note pipe material, threads, and any adapters. Photograph connections and mark orientation. Measure spout reach and trim clearance.
List required parts and confirm new faucet dimensions against recorded measurements before proceeding.
Turning off water and draining the lines
Shut off the water supply at the fixture’s local shutoff valves or, if none are present, at the main house supply.
Then open nearby taps to relieve pressure.
Close the tub drain, loosen a faucet connection or use a bucket under accessible supply lines and open valves slightly to drain residual water.
Verify no flow, dry visible pipes, and clear the work area before proceeding.
Removing handles, trim, and spout
With water off and lines drained, access to the faucet assembly is clear and dry.
The technician removes handle caps, unscrews set screws with an appropriate Allen or Phillips driver, and pulls handles free.
Escutcheons and trim plates are unscrewed or pried gently to avoid finish damage.
The spout is rotated or loosened from its threads or retention clip and withdrawn straight off the stub.
Extracting the valve body or old fittings without damaging plumbing
Begin by confirming the supply is off and any residual water has been drained from the lines.
Then clear an access area beneath the tub or behind the wall panel to reach the valve body.
Inspect connections, note orientation, and photograph for reference.
Loosen retaining nuts or screws, support the valve, and gently pry or cut soldered joints with appropriate tools.
Protect surrounding pipes and seal openings after removal.
Step-by-Step Installation: Installing the New Faucet
The installer first verifies that the new faucet and trim align with existing openings and performs a dry-fit of components.
Valve bodies and mounting hardware are set and secured before supply lines are connected and sealed with appropriate methods.
Finally, the spout, trim, handles, and any diverter or shower connections are mounted and tested for proper operation and leaks.
Verifying fit and dry-fitting components
Before tightening any connections, the installer verifies fit by dry-fitting each component to confirm alignment and clearance: spout, handles, escutcheons, and divergence valves are placed in position to check thread engagement, gasket seating, and that decorative trim will sit flush against the tub or wall.
Adjustments are made for inlet spacing, handle rotation, and outlet direction, ensuring smooth operation and no interference before final assembly.
Installing valve bodies and securing mounting hardware
Installers position the valve bodies into the prepped openings, aligning inlet and outlet ports with supply lines and the spout outlet while ensuring gasket surfaces sit flush.
They level and plumb bodies, then fasten mounting brackets or collars using specified screws or nuts, torquing evenly to prevent distortion.
Trim excess shank or mounting material and verify stationary alignment before proceeding to trim and handle installation.
Connecting supply lines and applying proper sealing methods
With valve bodies secured and aligned, attention shifts to linking the supply lines and ensuring watertight seals.
The installer fits supply tubing or flexible connectors to inlet threads, tightening to manufacturer torque.
Threaded joints receive plumber’s tape; compression fittings use ferrules and nuts.
Soldered connections are fluxed and brazed.
After assembly, the system is pressure-tested and checked for leaks before finishing.
Mounting the spout, trim, and handles
Begin by positioning the spout, trim plate, and handles to verify fit and alignment with the secured valve bodies; this dry-fit guarantees escutcheons sit flush against the finished wall and that handle splines or cartridges engage smoothly.
Tighten spout retaining screws or set screw.
Seat trim plate, apply gasket or sealant if provided, then secure handles, checking rotation and stop settings for correct operation.
Installing diverter and shower connections (if applicable)
After confirming the trim and handles are seated and operating correctly, attention turns to the diverter and any shower connections.
The installer connects the diverter to the valve per manufacturer directions, ensuring proper orientation and seal with plumber’s tape or gasket.
Shower arm and hose threads receive tape, then are tightened hand‑firm plus quarter turns with a wrench.
Test for correct diversion and leaks.
Final Checks and Adjustments
Once water is restored, the installer checks all connections and fixtures for leaks under normal pressure.
They verify handle alignment and cartridge seating, confirm hot/cold balance and smooth diverter operation, and make any necessary mechanical adjustments.
Finally, the installer applies sealing where required and completes cosmetic finishing touches.
Restoring water and checking for leaks
Turn the main water supply on slowly and observe the faucet and connections closely for any signs of leakage.
Inspect supply lines, fittings, and the spout base while running both hot and cold.
Check for drips, weeping seams, or dampness on surrounding surfaces.
Tighten any leaking nuts gently, shut water off to re-seal if needed, then retest until fully dry and secure.
Adjusting handle alignment and cartridge seating
Verify that the faucet handle moves smoothly and centers correctly over the spout before finishing.
If misaligned, loosen the retaining screw, reposition the handle, then retighten while holding alignment.
Confirm the cartridge is fully seated by removing the handle, applying a gentle push to the cartridge, and reattaching retaining hardware.
Cycle the handle through its range to guarantee consistent resistance and secure seating without binding or play.
Testing hot/cold balance and diverter operation
With handle alignment and cartridge seating confirmed, the next step is to check temperature balance and diverter function under pressurized conditions.
Turn on hot and cold separately, verify stable temperatures and full-range mixing without sputtering.
Operate the diverter repeatedly, confirming solid engagement, smooth travel, and clear redirection between spout and shower.
Note any leaks or irregularities for immediate adjustment.
Finishing touches and silicone sealing where needed
Complete the installation by performing final checks and applying silicone where gaps or potential leaks remain.
The installer inspects all connections, confirms trim alignment, and tightens loose fasteners.
After cleaning surfaces, a bead of mildew-resistant silicone is applied to joints and escutcheons.
Excess is smoothed, curing time observed, and water tested again to guarantee no seepage and proper operation before regular use.
Troubleshooting Common Problems
After final checks, common problems can still appear and should be diagnosed methodically to avoid repeat work.
The following quick checklist highlights typical issues and targeted fixes for fast troubleshooting:
- Leaks at spout, handles, or connections — inspect seals, tighten fittings, replace washers or O-rings
- Low water pressure — check supply valves, aerators, and clogged lines or cartridges
- Dripping after installation — replace or service cartridge and check valve seating
- Diverter malfunction — clean or replace diverter to restore consistent tub/shower flow
- Inconsistent hot/cold balance — verify mixing valve adjustment and supply pressure balance
Leaks at the spout, handles, or connections causes and fixes
Leaks at the spout, handles, or connections are among the most common issues homeowners encounter after installing a bathtub faucet and typically indicate worn seals, loose fittings, or improper assembly.
Inspect and tighten mounting nuts and supply connections, replace O-rings or cartridge seals, re-seat valve components, and apply plumber’s tape to threaded joints.
Test thoroughly and repeat steps if leakage persists.
Low water pressure diagnosis and remedies
A persistent drip may be resolved by tightening or replacing seals, but weak flow requires a different set of checks and fixes.
Inspect aerators and showerheads for mineral buildup; clean or soak in vinegar.
Verify supply valves are fully open and check for kinked or clogged supply lines.
Test both hot and cold separately, and consider pressure-reducing valve adjustment or contacting municipal supply if household-wide low pressure persists.
Dripping faucet after installation cartridge and valve fixes
Check the cartridge and valve assembly methodically when a newly installed bathtub faucet continues to drip despite prior repairs.
Inspect cartridge seals, O-rings and retaining clip for damage or incorrect seating.
Verify valve body for debris, mineral buildup or cross-threading.
Confirm proper torque on mounting hardware and correct cartridge model.
Replace faulty components, flush lines, and retest to guarantee leak elimination.
Diverter issues and inconsistent shower/tub flow
After verifying cartridge and valve components, attention shifts to the diverter when water alternates unpredictably between tub spout and showerhead or fails to hold a selected flow.
Inspect for mineral buildup, worn seals, or misaligned plungers. Clean or replace the diverter cartridge, lubricate O-rings with silicone grease, and guarantee proper reassembly and seat alignment.
Test under full pressure for consistent diversion.
When to Call a Professional
If leaks, corroded pipes, irregular water pressure, or hidden damage appear, the situation likely exceeds routine DIY repairs and warrants professional assessment.
Additionally, local plumbing codes, permit requirements, and manufacturer warranty terms can mandate licensed work to keep installations compliant and covered.
Homeowners should weigh safety, legal, and warranty implications before proceeding without a qualified plumber.
Signs of complex plumbing issues beyond DIY
When should a homeowner stop troubleshooting and call a professional plumber?
Persistent leaks, water damage, mold, low water pressure affecting multiple fixtures, visible corrosion or damaged supply lines, recurring clogged drains despite snaking, unusual noises from pipes, or gas/venting concerns indicate complex issues.
Also call a professional if pipe replacement, hidden access panels, or potential structural repair is required beyond basic faucet work.
Local code, permits, and warranty considerations
Having reached the limit of safe DIY troubleshooting, homeowners should next consider local building codes, permit requirements, and how professional involvement affects product warranties.
Verify municipal rules for plumbing alterations; permits may be mandatory.
Licensed installers guarantee code compliance, inspections, and often preserve manufacturer warranties.
When permits, complex rerouting, or warranty transfer are unclear, hiring a licensed plumber reduces risk of fines, failed inspections, or voided guarantees.
Maintenance Tips to Keep Your Faucet Working Longer
Proper maintenance extends a faucet’s life and reduces the need for repairs. Recommended practices include routine cleaning and finish care, regular preventative checks with cartridge replacement when worn, and winterization for climates with freezing temperatures.
Useful actions to contemplate include:
- Wiping mineral deposits and using nonabrasive cleaners
- Inspecting for leaks and testing water pressure monthly
- Keeping a spare cartridge and basic tools on hand
- Draining and insulating exposed pipes before frost
- Following manufacturer care instructions for finishes
Routine cleaning and finish care
Maintain the faucet regularly to preserve finish and prevent mineral buildup that impairs performance.
Use mild, nonabrasive cleaners and a soft cloth; avoid bleach, scouring pads, and harsh acids. Rinse thoroughly and dry to prevent water spots.
Wipe aerators and exposed trim weekly, polish with a manufacturer-recommended product occasionally, and address surface corrosion or scratches promptly to limit cosmetic damage.
Preventative checks and how to replace cartridges
Inspect faucets monthly for leaks, loose handles, or changes in water flow, since early detection prevents larger failures and costly repairs.
Check escutcheons, supply connections, and diverter operation.
If dripping or stiff handles persist, shut off water, remove handle and trim, extract the cartridge, inspect O-rings and sediment, replace with manufacturer-matched cartridge, reassemble, and test for proper operation and leaks.
Winterization and seasonal precautions
During colder months, homeowners should take specific winterization steps to protect bathtub faucets and associated plumbing from freezing, corrosion, and mineral buildup.
Drain exterior lines, insulate exposed pipes and valve bodies, and shut off/bleed rarely used fixtures.
Apply anti-corrosion lubricant to stems, clean aerators and screens to reduce deposits, and schedule an inspection before and after winter to catch leaks or damage early.
Quick Comparison: Cost, Difficulty, and Time for Common Faucet Types
When choosing a bathtub faucet, homeowners should weigh cost, installation difficulty, and required time together, since these factors determine both upfront expense and the likelihood of needing a professional. A concise comparison highlights trade-offs for common types, guiding decisions based on budget, skill, and schedule.
| Type | Cost | Difficulty |
|---|---|---|
| Single-handle | Low | Easy |
| Two-handle | Moderate | Moderate |
| Tub-shower | High | Hard |
Conclusion
By project’s end, the bathroom will sing with renewed function, as a new bathtub faucet becomes the small crown jewel of the tub. Like a clockmaker fitting gears, the installer aligns parts, seals, and tests until water flows true. Although surprises may lurk beneath old tiles and corroded valves, patience and proper tools turn frustration to craft. When challenges exceed confidence, calling a professional keeps the peace and protects the investment.