How to Recharge Sump Pump Battery: Step-by-Step Guide for Fast, Safe Power Recovery
To recharge your sump pump battery effectively, follow these steps for a fast and safe power recovery. First, locate the battery and check for any damage, corrosion, and ensure it has the correct voltage. Always wear gloves and goggles for safety. Disconnect the AC power before proceeding. Clean the battery terminals to ensure a good connection.
Next, select a compatible smart charger or fast recovery charger that matches the battery’s chemistry and amp-hour rating. Connect the charger, starting with the positive terminal followed by the negative. Monitor the charging process for voltage, current, and temperature to ensure everything is functioning properly.
Once charging is complete, disconnect the charger and test both the pump and float switch to confirm they are operating correctly. More detailed steps can be followed for any specific issues encountered.
How to Quickly Restore Power to a Sump Pump Battery
When evaluating a dead sump pump battery, the article explains how to decide whether a quick recharge is practical or if replacement is necessary.
It outlines essential safety steps to take before handling the battery, including power isolation and protective gear.
Finally, it summarizes the typical tools and the estimated time required for a rapid recharge so readers can plan the procedure.
When to attempt recharging versus replacing the battery
Deciding whether to recharge or replace a sump pump battery depends on its age, condition, and how deep the discharge is.
Inspection shows terminal corrosion, bulging, or capacity below rated amp-hours—replace.
If the battery is recent, physically sound, and only deeply discharged, attempt how to recharge sump pump battery using a compatible charger and follow manufacturer recovery recommendations.
Test capacity afterward; replace if inadequate.
Safety precautions before handling a sump pump battery
After determining that recharging is appropriate, safety precautions must be observed before handling a sump pump battery to prevent injury, equipment damage, or electrical faults.
The technician should wear insulated gloves and eye protection, work in a well-ventilated area, disconnect power and isolate terminals, avoid metal tools, inspect for cracks or leaks, and keep sparks, flames, and children away until the battery is secure.
Estimated time and tools needed for a fast recharge
A rapid top-up of a sump pump battery typically requires 30–90 minutes depending on battery capacity and charger output; preparing the right tools and estimating time beforehand guarantees the fastest, safest result.
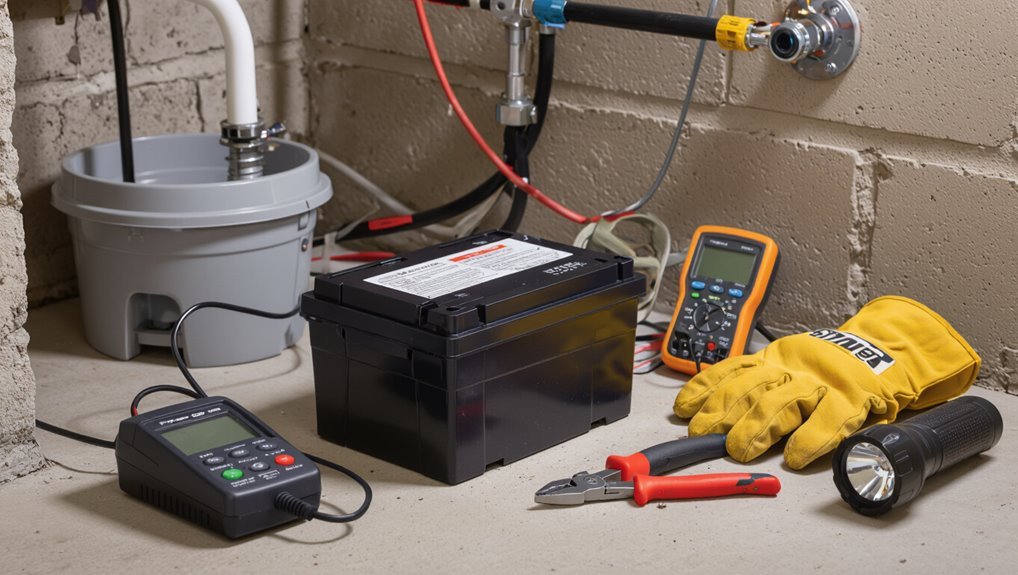
Essential tools include a compatible smart charger, insulated gloves, safety goggles, wire brush, multimeter, and short jumper cables.
Allocate 15 minutes for inspection, 5–10 for connections, and the remainder for charging and verification.
Understand Your Sump Pump Battery System
A basic understanding of the sump pump battery system helps users choose the right replacement and maintain reliable backup power.
Common battery types include sealed lead-acid, AGM, and increasingly, lithium, each with different lifespans and charging needs.
Typical systems specify voltages (often 12V) and capacities in amp-hours, and batteries are usually mounted near the pump or in a dedicated compartment with accessible connection points.
Common battery types used with sump pumps (sealed lead-acid, AGM, lithium)
Choosing the right battery type affects reliability, run time, and maintenance demands for a sump pump backup system.
Sealed lead-acid (SLA) are affordable and robust but require periodic checks.
Absorbent glass mat (AGM) offer spill-proof, lower self-discharge and better cold performance.
Lithium batteries are lighter, longer-lasting, and faster-charging, but cost more and need compatible chargers and battery management systems.
Typical voltage and capacity ratings explained
Voltage and capacity ratings define how long and how effectively a sump pump backup can run: voltage (commonly 12V or 24V) determines compatibility with the pump and charger, while capacity—measured in amp-hours (Ah)—indicates stored energy and approximate run time under load.
Higher Ah yields longer runtime; larger systems may use 24V for efficiency.
Match charger output to battery voltage and Ah for safe charging.
Battery location and connection points on popular backup systems
Following the discussion of voltage and capacity, attention turns to where batteries sit and how they connect in common backup setups.
Batteries typically reside in basements near the pump, inside plastic trays or ventilated enclosures.
Connections use quick-disconnect terminals, ring terminals, or insulated spade connectors to a control module or charger.
Proper routing, secure mounts, and corrosion-free terminals guarantee reliable operation.
Step-by-Step Fast Recharge Procedure
Before beginning a fast recharge, one should inspect the battery and sump pump system for damage or terminal corrosion and, where applicable, check electrolyte levels.
The battery requires cleaning and proper preparation, then selection of a charger and settings that match the battery chemistry and capacity.
The charger must be connected safely, the recovery charge started, and voltage, current, and temperature monitored throughout the process.
Inspecting the battery and system for damage or corrosion
Carefully examine the battery and surrounding components for physical damage, loose connections, and signs of corrosion; these issues are the most common causes of poor charge acceptance and premature failure.
Inspect terminals, cable insulation, hold-downs, and vent caps for cracks, swelling, or leakage.
Verify enclosure integrity and wiring routing.
Note any burnt smells or discoloration and document defects for repair or replacement before recharging.
Preparing the battery: cleaning terminals and checking fluid (if applicable)
With defects documented and any damaged components earmarked for repair, the next step is to prepare the battery for recharging by cleaning the terminals and checking electrolyte levels (for flooded cells).
Disconnect negative first, remove corrosion with a baking soda paste and nylon brush, rinse and dry.
Inspect vent caps, add distilled water only to visible plates if low, and ascertain tight, clean connections before charging.
Choosing the correct charger and settings for battery type
Select a charger that matches the sump pump battery’s chemistry and capacity, then set charge parameters accordingly:
The technician verifies battery type—flooded lead‑acid, AGM, gel or sealed—then chooses a compatible charger.
Set voltage, charge rate (C/10 to C/3 for standard recharge), and float mode.
Enable temperature compensation if available and disable incompatible modes (e.g., desulfation for sealed gels) to prevent damage.
Connecting the charger safely and initiating a fast/recovery charge
Begin by positioning the charger and battery on a stable, nonconductive surface near a grounded outlet, ensuring adequate ventilation and clear access to battery terminals.
Confirm all power switches are off before making connections.
Attach positive clamp to the positive terminal, negative clamp to the negative terminal, verify firm contacts, select the fast/recovery mode and appropriate amperage, then power on the charger to start the recharge.
Monitoring voltage, current, and temperature during recharge
Monitor voltage, current, and temperature continuously throughout the fast recharge to guarantee the battery accepts charge safely and efficiently.
Observers should note voltage rise, current tapering, and any temperature increase. Use a digital multimeter and a thermal probe placed on the case; record readings at regular intervals.
Stop or reduce charge if temperature exceeds safe limits, current remains abnormally high, or voltage behaves erratically.
Determining when the battery is sufficiently recharged for use
Determine readiness by verifying that voltage, specific gravity (for flooded cells), and charge acceptance metrics meet predefined thresholds and have stabilized over a short observation window.
Confirm resting voltage under no-load equals target value, specific gravity readings across cells are balanced and at nominal levels, and charge current has tapered to float or cutoff rates.
Record results and mark battery as ready for safe reintegration.
Reconnecting the battery to the sump pump and testing operation
Reconnect the battery to the sump pump using the correct polarity and secure, corrosion-free terminals. Then run a controlled operational test to confirm proper function.
Verify charger is disconnected, attach positive then negative, tighten clamps, and inspect for sparks.
Activate pump manually or simulate high water; observe startup, float switch response, and steady current draw.
Log voltage and runtime for safety.
Alternative Quick Power Recovery Options
The section outlines fast alternatives for restoring sump pump power when the battery is down. Options include using a portable jump starter or power pack, a temporary generator hookup with clear connection steps and safety precautions, or manual pump and overflow workarounds to manage water until the battery is functional.
Each option will describe required equipment, basic procedures, and key safety notes.
Using a portable jump starter or power pack
Consider a portable jump starter or power pack when rapid, temporary power is needed to keep a sump pump running during an outage.
Select a unit with sufficient wattage and a built-in inverter for AC pumps. Observe polarity and secure connections. Test briefly before leaving unattended.
- Check capacity and inverter rating
- Use correct cables and clamps
- Monitor runtime and recharge plan
Temporary generator hookup: what to connect and precautions
Many homeowners turn to a portable generator for temporary power to a sump pump, but correct connections and safety precautions are essential to prevent equipment damage and hazards.
Use a heavy-duty extension cord rated for outdoor use and match generator output to pump wattage.
Never backfeed into house wiring; use a transfer switch or plug directly into the pump.
Ground the generator, run it outdoors, and monitor fuel.
Manual or pump-overflow workarounds until battery is fully functional
When a sump pump battery is dead and immediate replacement or charging isn’t possible, simple manual or passive measures can limit basement flooding until full power is restored.
A bucket-and-siphon, hand-crank pump, or gravity-fed diversion can lower water temporarily.
Seal gaps, elevate belongings, and create temporary overflow channels to safe drains.
Monitor water level frequently and prioritize safety around electrical hazards.
Diagnosing Why the Battery Drained
The reader is prompted to contemplate common causes of rapid battery depletion, such as a malfunctioning float switch or a parasitic electrical draw.
They are then advised to test the backup system and charger for faults using basic voltmeter checks and load tests.
Finally, it is noted that recharging will not resolve underlying hardware or wiring failures, which may require repair or battery replacement.
Common causes of rapid battery depletion (float switch issues, parasitic draw)
Investigate two frequent culprits behind rapid sump pump battery drain: malfunctioning float switches and parasitic electrical draws.
A stuck or improperly adjusted float keeps the pump running continuously, rapidly exhausting the battery.
Parasitic draws—faulty wiring, corroded connections, or auxiliary components—consume current when the system is idle.
Visual inspection and tightening connections often reveal these issues before battery replacement is needed.
How to test the backup system and charger for faults
After checking for stuck float switches and visible parasitic draws, attention should turn to the backup system and charger to determine if they contributed to the drained battery.
Inspect charger LED indicators, verify output voltage with a multimeter, and confirm float/override settings.
Test backup inverter/transfer operation under load and check for corroded connections.
Replace faulty chargers or modules to prevent repeat drains.
When a recharge will not fix the root cause
If a simple recharge fails to prevent recurring depletion, deeper diagnostics are required to identify the underlying cause.
Inspect for parasitic drains, faulty charger regulation, corroded terminals, or improper battery sizing.
Verify float switch operation, pump draw, and control panel behavior during simulated power loss.
Replace any defective components and retest; recurring failure may indicate chronic overload or aged battery needing permanent replacement.
When to Replace the Battery or Backup System
The article outlines clear indicators that a sump pump battery is beyond recovery, such as visible damage, failure to hold charge, or repeated rapid discharge.
It then summarizes recommended replacement intervals for common battery types (flooded lead‑acid, AGM, and lithium) and explains how to choose a replacement matched to the pump’s voltage, capacity, and connector type.
Practical guidance on selecting compatible backup systems and verifying fitment and runtime concludes the discussion.
Signs the battery is beyond recovery
When a sump pump battery shows persistent failure signs despite proper charging and maintenance, replacement is warranted rather than continued repair.
Indicators include swollen or leaking casing, inability to hold charge after controlled load testing, severely corroded terminals, repeated sudden voltage drops, and visible plate damage or bulging.
Frequent alarm activations with verified charger function also signal end-of-life and need for replacement.
Recommended replacement intervals by battery type
Having identified clear end‑of‑life signs, attention shifts to recommended replacement intervals by battery type to guide timely swaps and system upgrades.
Lead‑acid flooded: replace every 2–3 years.
Sealed AGM and gel: replace every 3–5 years.
Lithium iron phosphate (LiFePO4): replace every 7–10 years.
Replace sooner with heavy cycling, high temperatures, or frequent deep discharges.
Backup systems may require earlier full replacement.
Matching replacement batteries to your sump pump system
Because mismatch can shorten runtime and stress system components, choosing a replacement battery requires matching voltage, capacity, and chemistry to the sump pump and its charger/transfer switch.
Confirm terminal type and physical dimensions for fit. Match amp-hour rating to desired runtime while ensuring the charger supports the battery chemistry (lead‑acid, AGM, gel, or lithium).
When in doubt, consult manufacturer specifications or a qualified technician.
Maintenance and Prevention to Avoid Future Failures
A concise maintenance routine helps prevent sump pump battery failures before they occur. This includes a checklist for visual inspections, terminal cleaning, and scheduled load testing, along with guidance on proper charger settings and float switch checks.
Seasonal storage and simple care practices further extend battery life and reliability.
Routine battery maintenance checklist
When maintaining a sump pump battery, a concise checklist guarantees consistent performance and reduces the risk of unexpected failure.
Inspect terminals for corrosion, verify secure connections, and clean as needed.
Check fluid levels if applicable and top with distilled water.
Confirm voltage and charge status monthly; replace batteries nearing end-of-life per manufacturer recommendations.
- Visual inspection and cleaning
- Fluid and voltage checks
- Scheduled replacement
Best practices for charger use and float switch testing
Building on routine inspections and timely replacements, proper charger use and regular float switch testing greatly reduce the risk of sump pump failure.
Use a smart, automatic charger sized to the battery, avoid overcharging, and follow manufacturer settings.
Test the float switch monthly by lifting and releasing it to confirm smooth activation and deactivation.
Record results and address sticking, corrosion, or wiring faults promptly.
Storage and seasonal care tips for battery longevity
Seasonal storage and care prolong battery life and reduce failure risk by minimizing corrosion, sulfation, and capacity loss.
Store batteries in a cool, dry place above freezing, away from direct sunlight and chemicals. Keep terminals clean and apply anti-corrosion grease.
Maintain a partial charge (50–80%) for long storage; use a smart float charger for extended periods.
Inspect monthly and recharge as needed.
Troubleshooting Common Problems During Recharge
When recharge issues occur, common symptoms include the charger failing to recognize the battery or displaying error codes, the battery overheating or emitting gas during charging, and persistent low voltage even after a full charge.
The article will outline likely causes for each symptom and the steps to verify whether the battery, charger, or connections are at fault.
Recommended safety precautions and when to replace components or seek professional help will be noted.
Charger won’t recognize the battery or shows error codes
If a charger fails to recognize a sump pump battery or displays error codes, it signals a communication or electrical issue that prevents proper charging; the next steps are to identify whether the problem lies with the charger, the battery, or the connection between them. Test leads, connectors, and voltage; swap chargers or batteries to isolate fault; consult manual for code meanings.
| Item | Action |
|---|---|
| Charger | Inspect fuse, LEDs |
| Battery | Measure voltage, terminals |
| Connection | Clean, tighten clamps |
Battery overheating or gassing during charge
Several indicators point to a battery overheating or gassing during recharge, including excessive warmth at the case, visible vapor or bubbles at the terminals, and a distinct sulfurous odor.
These signs suggest overcharge, high internal resistance, or a failing cell that requires immediate attention.
Stop charging, disconnect and ventilate the area, inspect for deformation or corrosion, and replace the battery if symptoms persist.
Low voltage persists after a full charge
Detecting persistently low voltage after a full recharge signals that the battery, charger, or connected system may not be restoring or holding charge properly.
Measure open-circuit voltage and under-load voltage to differentiate weak cells from poor connections. Inspect terminals, cables, and charger settings.
Load-test or replace the battery if results remain low.
Verify sump pump draw and float switch for parasitic drains.
Tools, Supplies, and Recommended Chargers
This section lists the tools, safety gear, and supplies needed for safe battery handling and recharge.
It then outlines charger types and key features—such as automatic smart charging, temperature compensation, and appropriate amperage—for fast, safe recharging.
Finally, it covers replacement battery brands and the specifications (voltage, capacity, terminal type) homeowners should match to their sump pump.
Essential tools and safety gear
Proper preparation requires a compact set of tools and safety gear to recharge a sump pump battery efficiently and without injury.
Essential items include insulated hand tools, battery clamps, and a voltmeter; PPE like safety glasses and acid-resistant gloves; and a clean workspace with a fire extinguisher.
Follow manufacturer instructions and isolate power before handling batteries.
- Insulated tools
- PPE (glasses, gloves)
- Voltmeter and clamps
Recommended charger types and features for fast, safe recharging
Choose a charger that matches the battery type and capacity while prioritizing safety features such as automatic shutoff, temperature compensation, and spark‑proof connections.
Opt for smart multi‑stage chargers with selectable AGM/lead‑acid modes, adjustable amperage for fast or trickle charging, and reverse‑polarity protection.
Look for LED/status indicators, thermal regulation, and a reliable manufacturer warranty to guarantee efficient, safe recharging.
Replacement battery brands and specifications to consider
Batteries for sump pumps should be selected based on form factor, capacity, chemistry, and compatibility with the pump and charger.
Recommended brands include Interstate, Trojan, Renogy, and Universal Power Group for reliability.
Choose sealed AGM or gel VRLA lead‑acid batteries, 12V deep‑cycle types, matching amp‑hour ratings (e.g., 75–125 Ah) and terminal layouts.
Verify manufacturer warranty and OEM cross‑references.
Quick Checklist: Fast, Safe Sump Pump Battery Recovery
A concise step-by-step checklist guides responders through rapid, safe battery recovery during an outage.
It lists immediate actions—confirm power loss, switch to backup, check battery charge and connections, and isolate hazards—followed by short-term charging or replacement steps.
Each item is written for quick reference and safe execution under pressure.
Step-by-step actionable checklist to follow in an outage
Begin by stopping the pump’s power at the breaker or unplugging it, then confirm the outage and assess water levels to determine urgency.
A technician or homeowner follows clear steps: isolate, evaluate, and act.
Recommended checklist:
- Disconnect battery, inspect terminals, and remove corrosion.
- Measure battery voltage; recharge if ≥10.5V but <12.6V.
- Swap to a charged backup or transport battery for charging.
Conclusion
After a brisk tutorial on coaxing life back into a sump pump battery, the reader is left with the comforting irony that the very device meant to prevent household flooding often inspires the most frantic midnight DIY. Having learned the steps, alternatives, and preventive measures, one can now admire how simple routine care would have averted the drama. Still, it is reassuring that frantic recharges and clever hacks exist — and that humans remain inventively unprepared.