How to Fix a Leaking Shower Without Removing Tiles: Step-by-Step DIY Fixes and When to Call a Pro
If you’re dealing with a leaking shower and want to fix it without removing tiles, you can often resolve the issue by identifying the leak’s source, sealing joints, and repairing fixtures. Start by inspecting grout, caulk, the curb, and door seals for any cracks or gaps. Use dye tests or moisture meters to pinpoint leaks, and apply mildew-resistant silicone or grout repair to seal them effectively. Temporary patches can be useful while testing your repairs. If necessary, replace cartridges or valves. However, if you encounter structural damage, ongoing leaks, or hidden plumbing issues, it’s best to call a professional. For detailed step-by-step methods and guidance on when to seek expert help, continue reading.
How to Tell If Your Shower Is Leaking Without Removing Tiles
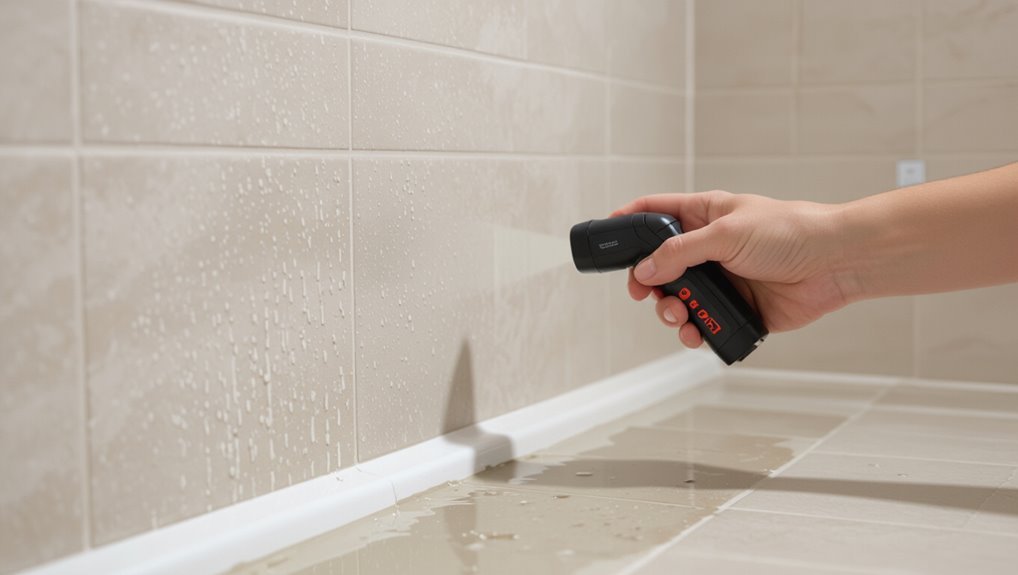
The homeowner should look for common signs of a hidden shower leak such as discoloration, soft or sagging grout, musty odors, and unexplained increases in water bills.
Simple visual and tactile checks — inspecting grout and caulk, feeling for dampness around joints and adjacent walls, and running a dye or toilet-paper test — can quickly confirm suspicious areas.
A basic diagnostic kit of a flashlight, screwdrivers, a moisture meter (or damp-detection pad), plumber’s dye or food coloring, and a towel can help isolate the problem without removing tiles.
Common signs of a hidden shower leak
How can a hidden shower leak be identified without tearing out tiles? Observable indicators include persistent musty odor, unexplained water stains on ceilings or floors below, warped baseboards, and recurring mold growth.
Reduced water pressure or unexplained utility bill spikes may point to concealed leaks. These signs prompt investigation into how to fix leaking shower without removing tiles or to consult a professional promptly.
Quick visual and tactile checks to perform
After noting the warning signs of a hidden shower leak, homeowners can perform a few straightforward visual and tactile checks that often reveal moisture problems without removing tiles.
Inspect grout and caulk lines for softening, gaps, discoloration, or mold.
Press and feel for spongy spots on walls and adjacent drywall.
Check baseboard and flooring for warping or dampness, and smell for musty odors.
Tools and materials to diagnose a leak (basic kit)
Before opening walls, assemble a basic diagnostic kit so small issues can be identified quickly and without demolition.
Include a flashlight, moisture meter or noncontact moisture sensor, small mirror, plumber’s tape, leak-detection dye or food coloring, adjustable wrench, screwdriver set, silicone sealant and caulking gun, towels, and a notebook with pen.
These items enable spotting leaks, testing seals, and documenting findings.
Immediate Safety and Preparation Steps Before Repair
Before starting repairs, one should shut off the water supply and consider turning off electricity to the bathroom to eliminate shock and water-damage risks.
Surfaces and fixtures should be protected with drop cloths, tape, and plastic to prevent further damage and contamination.
A concise materials and tools checklist—including wrenches, sealants, replacement parts, towels, and a flashlight—should be assembled before work begins.
Shutting off water and electricity considerations
When working on a leaking shower, the first priority is to isolate water and power to prevent injury and further damage.
Locate and turn off the shower shutoff valves or the home’s main water supply if necessary.
Switch off the bathroom circuit at the breaker panel and confirm power is off with a tester.
Notify household members before beginning work.
Protecting bathroom surfaces and fixtures
Many homeowners lay down waterproof drop cloths or heavy-duty plastic sheeting to shield tile, cabinetry, and fixtures from falling debris, sealant drips, and stray water during repairs.
Protective tape guards metal finishes and glass edges. Towels or absorbent pads catch splashes. Removable trim and shower accessories are loosened and stored safely.
Ventilation protects finishes from fumes while limiting dust spread.
Materials and tools checklist for DIY repairs
Although simple fixes often seem straightforward, a concise materials and tools checklist prevents delays and reduces hazards during shower repairs.
The homeowner should verify safety gear, sealants, basic plumbing tools, and cleaning supplies before starting. Pre-measurements and surface assessment help select correct parts.
Organize items within reach and label replacements to streamline work and avoid repeated trips.
- Safety goggles and gloves
- Caulk gun and silicone sealant
- Adjustable wrench and pliers
- Screwdrivers and utility knife
- Cleaner, rags, and primer
Quick Temporary Fixes to Stop a Shower Leak Without Tearing Out Tiles
A range of temporary measures can halt water intrusion without removing tiles.
Simple options include resealing grout and cracks with caulk, applying waterproof shower patch compounds, or covering defects with leak-stopping tape and silicone repair strips.
For larger gaps or structural breaches, plumbing putty or epoxy putty may provide a stronger short-term seal.
Resealing grout lines and cracks with caulk
Begin by identifying gaps and cracked grout where water can penetrate; resealing these with caulk offers a fast, noninvasive way to stop leaks without removing tiles.
Clean and dry surfaces, remove loose grout, and use painter’s tape for straight lines.
Apply mildew-resistant silicone caulk, smooth with a wetted finger or tool, let cure fully, then test for leaks.
Applying waterproof shower patch compounds
Reach for a waterproof shower patch compound when small leaks persist despite resealing grout and caulk, as these products provide a quick, surface-level barrier that adheres to tile, glass, and many plastics.
Clean and dry the area, apply per manufacturer directions, smooth to eliminate gaps, and allow full cure time.
These compounds are temporary fixes; inspect regularly and plan permanent repairs if leakage continues.
Using leak-stopping tape and silicone repair strips
Press a strip of leak-stopping tape or a silicone repair patch firmly over the wet area to create an immediate, watertight barrier that requires no tile removal.
Clean and dry the surface first, smoothing edges to guarantee adhesion. Trim to fit around fixtures, press firmly, and allow recommended cure time.
These solutions provide temporary containment while monitoring the leak and planning a permanent repair.
When to use plumbing putty or epoxy putty
Plumbing putty and epoxy putty serve as quick, localized fixes for small leaks around drains, joints, and cracks where removing tiles is impractical.
Plumbing putty is pliable and best for sealing non-structural gaps around fixtures, while epoxy putty hardens into a durable, water-resistant patch suitable for hairline cracks and small holes.
Use putty for immediate, temporary repairs; follow curing times and replace with proper repairs.
Step-by-Step Repairs for Common Leak Sources
The following section outlines concise, step-by-step repairs for the most common shower leak sources.
It covers fixing leaking joints and seams, replacing cracked or loose grout, and resealing or replacing a damaged curb or threshold.
Procedures for correcting leaks around fixtures, valves, and shower door frames and seals are also provided to allow targeted, tile-sparing repairs.
Fixing leaking shower joints and seams
When water appears around seams or where fixtures meet, leaking joints are a common culprit and can usually be traced to failed caulk, loose fittings, or deteriorated grout; addressing them promptly prevents further damage.
Inspect joints, remove old caulk, dry area, apply silicone sealant, tighten fittings, and test.
- Clean surface thoroughly
- Use 100% silicone caulk
- Tool for smooth bead
- Allow full cure time
- Retest for leaks
Repairing cracked or loose grout between tiles
Address cracked or loose grout between tiles promptly to stop water intrusion and tile damage.
Remove damaged grout with a grout saw, vacuum debris, and clean joints with rubbing alcohol. Allow drying, then apply matching grout, pressing firmly and smoothing joints.
After curing, seal grout with a penetrating sealer to repel moisture.
Inspect periodically and touch up small failures to prevent leaks.
Replacing or resealing a damaged shower curb or threshold
Repairing grout helps stop water from seeping between tiles, but leaks can still originate at the shower curb or threshold where surfaces meet the floor.
Inspect for cracks, loose cap stones, or failed caulk. Remove damaged caulk, clean and dry surfaces, then reseal with high-quality silicone.
Replace deteriorated curb caps or apply a waterproof membrane if structural damage is found. Test for leaks.
Repairing leaks around fixtures and valves without removing tiles
Although tiles may remain intact, leaks often originate at fixture penetrations and valve assemblies where seals, cartridges, or packing fail; these can usually be fixed without removing tile by isolating the water, accessing the trim and escutcheon, and replacing or sealing the faulty component.
Steps: shut main or localized supply, remove trim, inspect cartridge/packing, replace O‑rings or cartridge, apply plumber’s grease or silicone, test for leaks.
Addressing leaks from shower door frames and seals
Inspect the door frame and seals closely, because most shower-door leaks stem from gaps in the threshold, worn sweep seals, or failing corner/side gaskets.
Tighten loose frame screws, replace degraded sweeps and gaskets, and reseal seams with bathroom-grade silicone.
Check threshold drainage and adjust door alignment to prevent pooling.
Test after curing; call a pro for persistent leaks or structural frame damage.
How to Locate the Exact Leak Source Without Tile Removal
The guide outlines practical water test methods and pattern observations to isolate where a shower is leaking without removing tile.
It describes using dye, food coloring, or colored water to trace flow paths and confirm source locations.
It also notes when to deploy moisture meters, thermal cameras, or inspection cameras for noninvasive verification.
Water test methods and patterns to isolate the leak
Several simple water tests and flow patterns can pinpoint a shower leak without removing tile: controlled faucet runs, localized drips, and progressive zone flooding reveal whether water escapes at the valve, through the shower pan, or via wall penetrations.
Sequential tests include isolating hot/cold, running only the showerhead, directing flow to corners, and timing seepage onset.
Inspect adjacent ceilings and base for correlated wetting.
Using dye, food coloring, or colored water to trace leaks
One straightforward way to pinpoint a leak without removing tile is to introduce a visible tracer—food coloring, concentrated dye, or colored water—into specific shower flows or standing water and watch where the color appears outside the enclosure.
Apply dye near faucet, diverter, drain, and along seams.
Observe slowly, dry suspect areas, repeat tests in isolation, and document color emergence to map the leak path.
When to use moisture meters, thermal cameras, or inspection cameras
After tracing colored water to narrow likely leak zones, it becomes practical to bring in diagnostic tools that reveal hidden moisture paths and temperature differences without removing tile.
Moisture meters confirm dampness levels in grout, subfloor edges, and walls.
Thermal cameras detect cool bands indicating evaporative leaks.
Inspection cameras access narrow gaps and drain lines to visually pinpoint breaches before targeted repairs or professional referral.
When a Tile-Only Repair Won’t Work: Signs You Need Professional Help
Visible structural damage, persistent mold, or water stains beyond grout lines signal issues that simple tile repairs cannot address.
Recurrent leaks after multiple DIY attempts, evidence of failing valves or hidden plumbing faults, and the need for component replacements requiring access beneath finishes indicate professional intervention.
When repair costs, repair risks, or potential for worsening damage exceed the homeowner’s comfort or skill level, a licensed specialist should be called.
Structural damage indicators and mold concerns
Serious damage becomes apparent when tile issues are accompanied by soft, sagging subfloors, warped finishes, persistent musty odors, or discoloration spreading beyond grout lines—signs that water has breached the waterproofing and reached underlying structure.
Visible mold growth, especially in seams, behind trim, or inside access panels, and recurring dampness indicate hidden rot and health risks.
Professional assessment and remediation are required.
Recurrent leaks after multiple DIY fixes
Frequent leaks that persist despite repeated patchwork signal problems beyond surface tile and grout.
Recurrence suggests hidden deterioration: failing waterproof membranes, degraded substrate, or compromised drain seals.
Repeated DIY sealing masks underlying failure and risks worsening damage and mold.
When visible moisture returns after multiple attempts, a professional assessment is warranted to locate concealed sources and recommend repairs that go beyond tile-only fixes.
Complex plumbing or valve replacements requiring access
When leaks persist despite addressing tiles and membranes, the problem may lie behind the wall or under the floor in the plumbing itself.
Persistent dripping, loss of water pressure, visible water stains on adjacent walls or ceilings, and failed cartridge or valve repairs indicate internal pipe, solder, or valve-body issues.
These require access, diagnostic testing, and professional replacement or rerouting to guarantee a lasting, code-compliant repair.
Cost and risk thresholds for calling a professional
How much repair is too much for a DIYer depends on both the likely cost and the potential for unseen damage.
Visible clues like sustained dripping, mold growth, bulging drywall, or a sudden drop in water pressure typically push a repair past simple tile or grout fixes and into the professional domain.
If estimated repair, teardown, or mold remediation exceeds a homeowner’s budget or skill, hire a licensed plumber or water-damage specialist.
Choosing the Right Professional and What to Expect
Homeowners should prepare a brief list of questions for a plumber or restoration contractor about licensing, insurance, references, the diagnostic approach, and warranty coverage.
Professionals typically describe the diagnostic steps (visual inspection, moisture mapping, and pressure or dye testing), outline required repairs, and provide an estimated scope and timeline.
The contractor should also give a written cost estimate with labor, materials, and expected completion dates for common repairs like grout replacement, shower pan repair, or full waterproofing.
Questions to ask a plumber or restoration contractor
Which questions matter most depends on the scope of the leak and the experience of the contractor.
A homeowner should confirm licensing, insurance, estimated timeline, warranty specifics, and references.
Clarify responsibility for hidden damage and whether subcontractors are used.
Compare written estimates and payment terms before hiring.
- License and insurance
- Written estimate
- Warranty details
- References
- Liability for hidden damage
Typical diagnostic and repair processes professionals use
Begin by explaining the systematic steps a qualified professional takes to find and fix a shower leak, so homeowners know what to expect and can evaluate services.
The professional inspects fixtures, seals, grout, and drain; performs water tests; uses moisture meters or cameras if needed; isolates the source; proposes minimally invasive repairs such as re-sealing, replacing valves or drains, and verifies repair with follow-up testing.
Estimated costs and timelines for common repairs
When evaluating repair options, a clear estimate of costs and timelines helps clients compare bids and set expectations; professionals typically provide itemized quotes, expected durations, and warranty details. Below is a quick reference.
| Repair | Typical cost/time |
|---|---|
| Recaulk | $50–$200 / 1–2 hrs |
| Valve replacement | $150–$600 / 2–6 hrs |
| Tile grout repair | $100–$400 / 2–5 hrs |
| Leak diagnosis | $100–$300 / 1–3 hrs |
Preventive Maintenance to Avoid Future Leaks
Preventive maintenance focuses on routine care of grout and sealants, regular inspections, and selective upgrades to fixtures and materials that lower leak risk.
A seasonal and checklist-based inspection helps catch cracked grout, failing caulk, worn valves, or compromised barriers before they cause damage.
Installing modern valves, waterproof backer boards, and improved sealants reduces the likelihood of repeat leaks.
Best practices for grout and sealant care
Regular inspection and timely upkeep of grout and sealant are essential to stop small gaps from turning into significant leaks.
Clean grout with a pH-neutral cleaner, remove mold promptly, and reseal grout annually with a penetrating sealer.
Replace cracked or loose caulk, using silicone bathroom-grade sealant.
Verify surfaces are dry and joints are properly tooled for a continuous, watertight bead.
Seasonal and routine inspection checklist
Maintaining grout and sealant sets the foundation for a simple seasonal and routine inspection checklist that catches wear before it becomes a leak.
Inspect grout lines, seals, and corners for cracks or gaps. Check fixtures, shower door tracks, and drain connections. Test for soft spots behind tiles. Document findings and schedule minor repairs promptly.
- Look for cracks or missing grout
- Test seals near fixtures
- Inspect door tracks and thresholds
- Check drain fittings and flow
- Note soft or discolored tile areas
Upgrades that reduce leak risk (valves, barriers, materials)
Several targeted upgrades can greatly reduce the risk of shower leaks by addressing weak points in water control and containment.
Replacing old valves with pressure-balanced or thermostatic models prevents sudden pressure shifts and cartridge wear.
Install a quality membrane or linear drain for secondary water protection behind tiles.
Upgrade to mildew-resistant grout and silicone, and add a properly sloped pan or shower curb to direct water to drains.
Common DIY Mistakes and How to Avoid Them
Many DIYers rely on temporary fixes that mask symptoms instead of resolving causes.
Improper caulking and sealing techniques can worsen leaks by allowing water to bypass seals.
Ignoring underlying plumbing issues often leads to repeated repairs and higher costs over time.
Over-relying on temporary fixes
Relying on temporary patches like sealant tape, quick caulk, or silicone applied without addressing the underlying cause can mask a leak while allowing water damage to worsen.
Such stopgaps delay proper diagnosis, hide mold growth, and increase repair costs.
Professionals recommend locating the source, inspecting behind fixtures, and using temporary measures only for short-term containment until a durable repair or replacement is scheduled.
Incorrect caulking and sealing techniques
Mistakes in caulking and sealing often stem from improper surface preparation, wrong material choice, or poor application technique. These errors can lead to persistent leaks and accelerated material failure.
Using non-silicone sealants, applying over damp or dirty surfaces, and leaving gaps or uneven beads undermines performance.
Proper cleaning, selecting mold-resistant silicone, tooling joints smoothly, and allowing full cure time prevent failures and rework.
Ignoring underlying plumbing issues
Although a fresh bead of caulk can hide visible dampness, failing to investigate the pipes and fittings beneath the shower often leaves the real problem unaddressed.
DIYers who ignore loose connections, corroded valves, or cracked drain seals risk recurring leaks and structural damage.
Inspecting accessible plumbing, using diagnostic dyes, and calling a licensed plumber when internal faults appear prevents wasted effort and higher repair costs.
Resources, Materials, and Product Recommendations
This section lists recommended sealants, epoxies, and patch kits suited to common shower leaks, with notes on when each product is appropriate.
It also outlines helpful diagnostic and repair tools—such as leak detectors, wet/dry vacs, and basic plumbing hand tools—and explains their uses.
Finally, it points to reputable further reading and curated video tutorials for step-by-step guidance and safety precautions.
Recommended sealants, epoxies, and patch kits
When addressing a leaking shower, selecting the correct sealant, epoxy, or patch kit can determine whether a repair is temporary or long-lasting.
Recommended options include silicone caulk for joints, polyurethane for flexible waterproofing, two-part epoxy for structural cracks, waterproofing patch kits for linoleum or membrane tears, and plumber’s putty for small fixture gaps.
- Silicone caulk
- Polyurethane
- Two-part epoxy
- Waterproof patch kit
- Plumber’s putty
Helpful tools for diagnosis and repair
Before starting repairs, assemble a compact kit of diagnostic and repair tools tailored to the leak type:
- flashlight
- moisture meter or infrared thermometer
- leak detector dye
- screwdriver set
- adjustable wrench
- channel-lock pliers
- putty knife
- utility knife
- sealant gun
- silicone sealant
- plumber’s tape
- epoxy putty
- small brushes
- replacement gaskets
- caulk finishing tool.
Include gloves and protective eyewear.
Further reading and trustworthy video tutorials
Where to look for reliable guidance depends on the reader’s comfort level and the leak’s complexity. Trusted sources include manufacturer guides, trade association pages, and vetted DIY channels.
Prioritize videos showing full repairs, clear materials lists, and safety steps. Recommended references balance depth with practical demonstration.
- Manufacturer installation manuals
- Home improvement trade associations
- Accredited plumbing courses
- Vetted DIY YouTube channels
- Product review sites
Conclusion
Like a gardener tending roots beneath a paved path, the homeowner quietly probes, patches, and watches, coaxing hidden faults back to health without unsetting the surface. Small, timely interventions—sealant, valve adjustment, targeted replacement—nourish the system until professional hands are summoned for deeper decay. With vigilance and correct tools, routine care keeps the shower’s flow steady, transforming potential ruin into a well-tended garden where leaks are chances to learn and prevent.