How to Install Air Conditioning Ducts: Step-by-Step DIY Guide for Beginners
To install air conditioning ducts, start by familiarizing yourself with duct types, local codes, and necessary safety gear. Measure your rooms and calculate the required CFM (Cubic Feet per Minute) to effectively plan your main trunk and branch routes, minimizing duct runs. Gather essential tools such as snips, drills, sealant, and hangers. Begin by installing the main trunk, then add branches with collars, ensuring to insulate them properly. Slope condensate lines and seal seams using mastic or foil tape. After installation, test for leaks and static pressure, and balance the dampers and registers to achieve optimal airflow. Follow these steps for a thorough DIY duct installation.
What You Need to Know Before Installing Air Conditioning Ducts
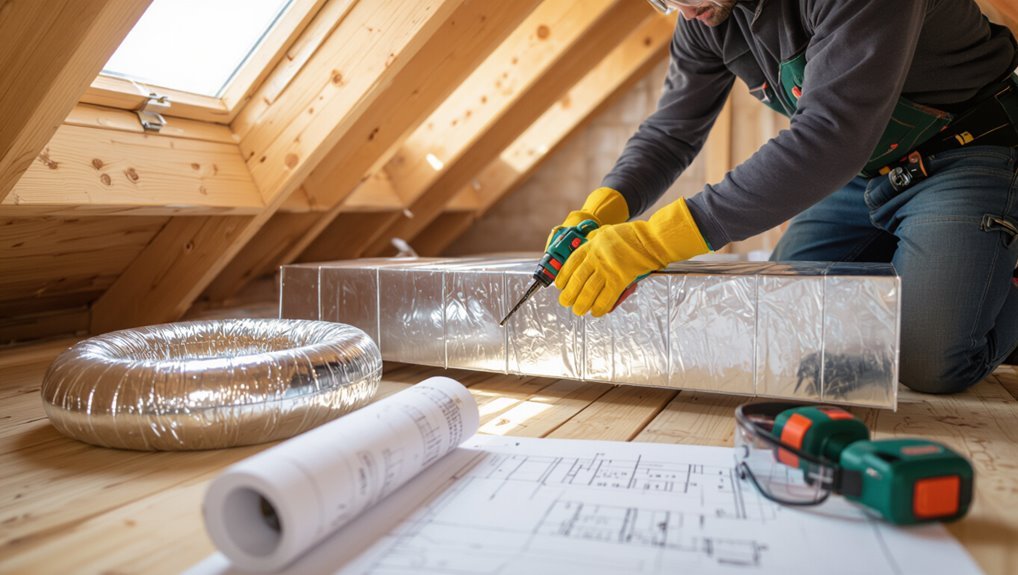
Before beginning ductwork, one should understand how central air ducts distribute conditioned air and why airtight, correctly sized installation affects system efficiency and comfort.
The main duct types—flexible, sheet metal, and fiberboard—have distinct costs, performance characteristics, and suitable applications that influence material choice.
Additionally, installers must confirm local codes, permits, and inspections and follow safety precautions and PPE requirements for any DIY work.
How central air ducts work and why proper installation matters
A central duct system distributes conditioned air from the HVAC unit through a network of insulated trunks and branching ducts to registers in each room, relying on balanced airflow, proper sizing, and sealed connections to maintain temperature consistency and indoor air quality.
Proper installation minimizes leaks, noise, and energy loss; correct layout and insulation guarantee efficiency and comfort, essential considerations when learning how to install air conditioning ducts.
Types of duct systems (flexible, sheet metal, fiberboard) and where each is appropriate
Consideration of duct material and construction is essential when planning an installation, since flexible, sheet metal, and fiberboard systems each offer distinct strengths and limitations for airflow, durability, cost, and noise.
Flexible ducts suit retrofit runs and irregular spaces but restrict airflow and tear easily.
Sheet metal provides low resistance and longevity for main trunks.
Fiberboard is economical and quieter, best for insulated interior branches.
Local codes, permits, and inspections to check before you begin
Although local building codes and permit requirements vary widely, homeowners and contractors must confirm applicable regulations and inspection schedules before installing air-conditioning ducts to avoid fines, work stoppages, or costly rework.
Research zoning, mechanical and energy codes, required permits, and licensed-contractor exemptions.
Verify mandatory rough-in and final inspections, documentation, and approved materials or sealing standards.
Contact the local building department for checklist and timelines.
Safety precautions and PPE required for DIY duct installation
Several essential safety precautions and personal protective equipment (PPE) items are required before beginning a DIY duct installation to prevent injury and secure a code-compliant job.
Workers should wear safety glasses, N95 respirators for dust and insulation fibers, heavy-duty gloves, hearing protection, and steel-toe boots.
Use fall protection when working at heights, confirm electrical circuits are locked out, and maintain clear ventilation and lighting.
Tools, Materials, and Estimated Costs
This section lists the essential tools and provides a materials checklist tailored to common duct types, including sheet metal, flexible, and insulated ductwork.
It outlines a typical project cost breakdown with the main factors that drive price—materials, labor, access difficulty, and system complexity.
Guidance is offered on when project scope or skill requirements indicate hiring a professional versus continuing DIY.
Essential tools list
Proper preparation requires assembling a compact set of hand and power tools, sealants, fasteners, and safety gear tailored to the ductwork type and installation scope.
The list focuses on core items, estimated costs vary by quality. Essential tools enable cutting, fitting, sealing, and fastening ducts efficiently while maintaining safety and airtightness.
- Metal snips, tin snips, or aviation shears
- Drill/driver with bits and hole saws
- Duct crimper, seamers, and pop rivet tool
- Mastic sealant, foil tape, gloves, and respirator
Materials checklist by duct type
Ductwork materials vary by type—sheet metal, flexible, or fiberboard—so a concise checklist helps match supplies, tools, and estimated costs to the chosen system.
The list focuses on essential materials, fasteners, sealants, and safety gear per duct type, enabling straightforward procurement and preparation without cost breakdowns.
- Sheet metal: duct sections, screws, sealant, metal snips
- Flexible: insulated runs, clamps, collars, support straps
- Fiberboard: preformed plenum, mastic, foil tape, fasteners
- Common tools: drill, crimper, tape measure, PPE
Typical project cost breakdown and factors that affect price
While costs vary widely by project scope and region, a typical residential duct installation breaks down into three main categories—tools, materials, and labor—with each influenced by system type, home layout, and local labor rates.
Typical tool expenses: $50–400; materials (sheet metal, flex duct, sealant, insulation, fasteners): $200–1,200; labor varies most, often 40–60% of total, affected by access complexity.
When to hire a professional vs. continue DIY
When is a homeowner better off hiring a pro instead of continuing a DIY duct run?
Complex layouts, structural modifications, code compliance, or HVAC sizing uncertainty warrant professional help.
Also hire a pro if specialized tools (duct bending machines, pressure testers) or permits are required.
For simple straight runs in accessible attics or basements, DIY can save labor costs; balance skill, time, and safety when deciding.
Assessing Your Home and Planning the Duct Layout
Before laying any ductwork, the homeowner should measure and map the floor plan to identify logical runs and obstacles.
Next, required airflow (CFM) is calculated and duct sizes chosen so each room receives proper supply and return capacity, with attention to balancing and exhaust where needed.
Finally, vents, registers, and grilles are placed on the plan to guarantee even distribution and accessibility for maintenance.
How to measure and map your space for duct runs
A careful assessment of the floor plan and existing construction is essential to accurately measure and map duct runs; this begins with sketching each room to scale, noting ceiling heights, wall locations, attic or crawlspace access, and the position of windows, doors, and major appliances that affect airflow.
Measure wall lengths, joist spacing, and obstruction locations; mark HVAC unit, supply and return register positions, and preferred run routes.
Calculating required airflow (CFM) and duct sizing basics
Because proper airflow determines comfort and system efficiency, calculating required CFM and selecting duct sizes must follow precise rules rather than guesswork.
The installer computes room CFM from heat load or rule-of-thumb per ton, sums branch requirements, then uses velocity and friction tables to choose rectangular or round duct dimensions.
Balance acceptable static pressure, minimize fittings, and allow future access.
Planning supply, return, and exhaust locations for balanced airflow
Planning supply, return, and exhaust locations begins with a systematic assessment of the home’s layout, thermal loads, and occupant patterns to guarantee balanced airflow and effective ventilation.
The installer maps zones, aligns supplies toward occupied areas, locates returns to promote circulation, and positions exhausts where moisture or contaminants accumulate.
Consider ceiling height, doors, and furniture; minimize long runs and avoid opposing registers that short-circuit airflow.
Integrating vents, registers, and grilles into the plan
Several key considerations determine ideal placement of vents, registers, and grilles: airflow patterns, room function, noise control, and aesthetic constraints.
The plan locates supply outlets near heat sources or occupancy zones, returns opposite supplies for circulation, and avoids obstructed areas.
Choose adjustable registers for directional control, low-noise grilles for quiet spaces, and coordinate sizes with duct capacity to maintain static pressure.
Preparing the Workspace
Before beginning duct installation, the workspace should be cleared to provide safe access to the attic, basement, or crawlspace.
Penetrations in the attic and crawlspace must be sealed to prevent heat loss and maintain system efficiency.
Finally, openings for duct boots and registers should be accurately marked and cut to match the planned layout.
Clearing attic, basement, or crawlspace access
Clearing attic, basement, or crawlspace access establishes a safe, unobstructed route for moving materials and performing ductwork.
The installer removes stored items, secures loose flooring or joists, and clears pathways of insulation debris.
Adequate lighting and stable temporary walkways are placed.
Access panels are widened if necessary, and tools staged nearby to minimize trips and reduce risk during duct installation.
Sealing attic and crawlspace penetrations to prevent heat loss
Seal attic and crawlspace penetrations to prevent conditioned air loss and moisture entry by identifying gaps around vents, pipes, wiring, and access panels and closing them with appropriate materials.
Inspect insulation continuity, remove debris, and use fire-rated caulk for small gaps, expanding foam for irregular voids, and metal flashing or gaskets for larger openings.
Label sealed areas for future inspection and maintenance.
Marking and cutting openings for duct boots and registers
Measure and map the planned locations for duct boots and registers on ceilings and walls, confirming they align with joists, framing, and finished-room layout.
Verify dimensions against boot templates, locate wiring, pipes, and studs, then mark cut lines.
Use appropriate saws and safety gear to cut openings, deburr edges, test-fit boots, and adjust as needed before sealing and fastening to prevent air leaks.
Step-by-Step Duct Installation Process
The installation sequence begins with laying out and installing the main trunk line.
It then progresses to branching runs and attaching takeoffs to serve individual zones.
A clear comparison of flexible duct and rigid sheet-metal methods highlights differing steps, tools, and sealing techniques.
Finally, ducts are secured with hangers and straps at specified spacing and connected to the air handler or furnace to complete the system.
Installing the main trunk line
Begin by positioning the main trunk line along the planned route, ensuring it aligns with the system layout and provides unobstructed access to branch connections.
Secure the trunk to structural supports at regular intervals, maintaining proper slope for condensate drainage.
Seal seams and joints with approved mastic or foil tape.
Insulate the trunk to prevent thermal loss and reduce noise transmission before final testing and airflow verification.
Branching runs and attaching takeoffs
Installers next lay out branch runs from the main trunk to each outlet, confirming routes, clearances, and required rises for condensate lines.
They mark takeoff locations, cut openings, and attach collars or boots using screws and sealant.
Supporting hangers are positioned for proper slope and vibration isolation.
Connections and dampers are fitted, joints sealed with mastic or foil tape before pressure testing.
Installing flexible duct vs. rigid sheet metal: step-by-step comparisons
When choosing between flexible duct and rigid sheet metal, technicians compare sequence, tools, and connection methods to guarantee airflow, sealing, and support meet code and performance requirements. Flexible ducts are faster to route; sealant and clamps finish connections. Sheet metal requires cutting, crimping, and screws for rigid joints and taped seams. Decision balances accessibility, airflow, and longevity.
| Flexible duct | Rigid sheet metal |
|---|---|
| Routing speed | Airflow efficiency |
| Connection: clamp/seal | Connection: crimp/screw |
Securing ducts: hangers, straps, and support spacing
Secure ducts using a systematic layout of hangers and straps spaced to control sag, prevent vibration, and maintain specified slope for drainage.
Use corrosion-resistant metal straps or approved plastic hangers; place supports at manufacturer-recommended intervals (typically every 4–6 feet for flexible, 10 feet for rigid, varying by size).
Anchor to structure, avoid overtightening, insulate around supports, and check alignment and pitch continuously.
Connecting to the air handler and furnace
Begin by shutting off power to the air handler and furnace and verifying that the unit is level and accessible; this confirms a safe, stable connection point for the ductwork.
Attach boot or collar to the supply and return openings, sealing with foil tape and mastic.
Fasten with sheet-metal screws or clamps, verify proper airflow path, and test for leaks and secure fit before restoring power.
Sealing, Insulating, and Testing the System
The installer evaluates sealing options—mastic, foil-backed tape, or specialized duct sealant—to guarantee airtight joints and long-term performance.
Attention then turns to insulating ducts in unconditioned spaces to the recommended R-values and protecting against condensation and heat loss.
Finally, the system is tested for leaks and airflow (static pressure and CFM) and balanced via dampers and register adjustments to achieve proper distribution.
Proper sealing methods: mastic vs. foil tape vs. duct sealant
When evaluating methods for sealing HVAC ducts, installers compare mastic, foil-backed tape, and pressure-sensitive duct sealants based on durability, application conditions, and code acceptance.
Mastic provides long-lasting, flexible seals for seams and fasteners but requires curing time.
Foil tape bonds quickly for smooth, clean surfaces.
Pressure-sensitive sealants suit irregular joints and quick repairs; selection depends on substrate, temperature, and local code requirements.
Insulating ducts in unconditioned spaces and recommended R-values
In many installations, ducts routed through unconditioned spaces—attics, crawlspaces, and garages—require continuous insulation to minimize thermal losses, prevent condensation, and maintain system efficiency.
Use insulation rated for HVAC: typically R-6 for ducts in conditioned basements, R-8 to R-11 in attics per local codes and climate.
Seal insulation edges, avoid compression, and protect vapor barriers to preserve R-value.
Testing for leaks and measuring airflow (static pressure, CFM)
After insulating and securing ducts in unconditioned spaces, verification of airtightness and proper airflow is required to confirm performance.
Use a smoke pencil or visual inspection plus mastic/tape to seal visible leaks.
Measure static pressure at supply and return ports with a manometer and calculate CFM using a vane anemometer or pitot tube at registers.
Record results and reseal if readings deviate from design.
Balancing the system: dampers, register adjustments, and airflow tuning
Begin balancing by establishing a baseline: technicians adjust zone and trunk dampers, fine-tune register vanes, and measure airflow to match design CFM for each room.
They systematically close or open dampers to correct over- or under-delivery, record readings, and retest static pressure.
Final tuning balances comfort, minimizes noise, and guarantees efficient system performance while documenting adjustments for future maintenance.
Common Problems and How to Fix Them
Common duct problems include poor airflow and uneven room temperatures, which require systematic diagnosis of registers, dampers, and blower performance.
Leaks, disconnected sections, and crushed flexible duct should be located and repaired or replaced, while noise, vibration, and condensation issues often stem from improper supports, fan imbalance, or inadequate insulation.
If repeated fixes fail or the layout cannot meet airflow needs, a duct retrofit or redesign may be necessary.
Diagnosing poor airflow and uneven room temperatures
How can a homeowner tell whether uneven temperatures stem from ductwork issues or other causes?
Inspect vents for weak airflow, compare temperatures with an IR thermometer or thermometers in multiple rooms, and check return-air grilles for restriction.
Note cycling patterns, filter condition, and register balancing.
If airflow is normal but temperatures vary, consider insulation, window gains, or thermostat placement before assuming duct faults.
Fixing leaks, disconnected ducts, and crushed flex duct
Addressing leaks, disconnected runs, and crushed flexible ducts restores airflow efficiency and comfort while reducing energy waste.
Technicians locate leaks with visual inspection and tape or mastic-seal joints, replacing torn sections.
Disconnected runs are reattached with proper fittings and sealed.
Crushed flex duct is straightened or replaced, ensuring correct support and minimum bends to prevent future collapse and pressure loss.
Addressing noise, vibration, and condensation issues
Reduce noise, vibration, and condensation in duct systems by identifying sources and applying targeted fixes that restore quiet, stable airflow and prevent moisture damage.
Inspect for loose panels, failing hangers, or blower imbalance; tighten, replace mounts, and balance fans.
Add duct lining, acoustic wrap, or vibration isolators.
Improve insulation on cold ducts, seal joints, and guarantee proper slope and drainage to prevent condensation buildup.
When a duct retrofit or redesign is necessary
When recurring airflow problems, excessive energy use, or persistent moisture and noise issues cannot be resolved by spot repairs, a duct retrofit or redesign becomes necessary to restore system efficiency and indoor comfort.
A professional assessment identifies undersized runs, poor layout, leaks, insulation deficits, and airflow imbalance.
Recommended actions include resizing ducts, rerouting branches, sealing, adding returns, and upgrading insulation to meet current load and code requirements.
Maintenance and Long-Term Care
Routine inspections and a clear cleaning schedule help preserve duct performance and prevent buildup.
Observing signs of deterioration—tears, corrosion, loose joints, or persistent odors—guides timely component replacement.
Attention to filters, UV light options, and proper air sealing further improves indoor air quality and system efficiency.
Routine inspection checklist and cleaning frequency
Although often overlooked, regular inspections are essential to guarantee ductwork remains efficient, safe, and free of contamination.
Inspect biannually for debris, mold, and loose joints; check filters monthly; verify airflow and grille cleanliness; schedule cleaning every 3–5 years or sooner if contamination appears.
- Visual check for dust, mold, pests
- Seal and joint integrity
- Filter condition and replacement
- Professional cleaning interval and triggers
Signs of duct deterioration and when to replace components
Signs of duct deterioration become evident through changes in performance, visible damage, and unusual odors or noises; recognizing these indicators early helps determine whether repair or replacement is needed.
Persistent leaks, sagging or crushed sections, corroded metal, torn flexible ducting, and loose or degraded connections warrant component replacement.
Minor gaps, isolated punctures, or removable insulation damage may be repaired if accessibility and material integrity allow.
Improving indoor air quality: filters, UV, and air sealing tips
Effective maintenance of ducts and HVAC equipment greatly improves indoor air quality by combining proper filtration, targeted UV germicidal treatment, and thorough air sealing.
Use MERV 8–13 filters matched to system capacity, schedule quarterly changes, and install UV-C near coil and drain pans to reduce microbial growth.
Seal leaks with mastic or metal tape, insulate ducts, and verify balanced airflow for consistent filtration performance.
Cost-Saving Tips and Best Practices for DIYers
The section outlines practical ways to reduce costs without compromising duct performance, including material substitutions that balance durability and price.
It also highlights time-saving installation methods and common shortcuts to avoid to prevent costly rework.
A concise checklist for final inspection and HVAC startup preparation is provided to guarantee efficiency and system readiness.
Efficient material substitutions without sacrificing performance
Consider substituting less expensive materials that match required thermal, airflow, and fire-resistance ratings to reduce costs without degrading performance.
Evaluate alternatives like sealed flexible ducting instead of rigid where code permits, aluminum over stainless for non-corrosive spaces, and fiberglass-backed insulation with proper vapor barrier.
Verify compatibility with fittings, sealing methods, and local codes.
Prioritize durability and tested equivalents to maintain system efficiency.
Time-saving installation techniques and common shortcuts to avoid
Begin by prioritizing tasks that save time without compromising system integrity: plan layout and measurements before cutting, stage tools and materials near work zones, and pre-assemble frequently used junctions and hangers.
Use templates and consistent panel sequencing, work in logical teams, and employ proper fasteners and sealants.
Avoid shortcuts like undersizing ducts, skipping supports, or neglecting sealing that create inefficiency and rework.
Checklist for final inspection and preparing for HVAC system startup
After completing layout, assembly, and sealing steps, attention shifts to a concise final inspection and startup checklist that prevents costly rework and inefficiencies.
Inspect joints, seals, and supports for gaps or sagging. Verify duct insulation, airflow paths, and register alignment.
Confirm condensate drain, filter access, and thermostat wiring.
Perform pressure test, measure static pressure and airflow, then document results before energizing the system.
Quick Reference: Step-by-Step Installation Checklist
Refer to this concise checklist to sequence the core tasks, from layout and material preparation through sealing and system testing, ensuring each step is completed before progressing.
A compact, practical guide lists essential actions, safety checks, and verification steps to streamline installation and prevent oversights.
- Verify layout and measure runs
- Cut and fit ducts; secure supports
- Seal joints; insulate ducts
- Pressure test and start system
Conclusion
Like a hometown carpenter tackling a cathedral, the DIYer approaches ductwork with humility and resolve. Having measured, sealed, and tested, they stand where invisible channels now guide cool air as rivers once did in Roman baths. This work summons patience, planning, and steady hands; success yields comfort, lower bills, and a quiet pride. If doubts remain, wiser counsel—professional or experienced neighbor—offers the final, reliable assurance.