How to Turn Off Sump Pump Alarm Quickly and Safely: Step-by-Step Guide
To quickly and safely turn off a sump pump alarm, start by confirming the source of the alarm and ensuring there’s no immediate risk of flooding. If it’s safe, cut power to the alarm panel or unplug the pump. Follow the manufacturer’s instructions to silence or reset the alarm. Next, check the float switch position, water level, and look for any visible clogs. Always wear insulated gloves and ensure circuits are protected by a GFCI. Test the pump by manually raising the float to see if the motor engages. For further assistance, refer to steps on troubleshooting, repairs, and prevention.
How to Stop a Sump Pump Alarm Immediately and Safely
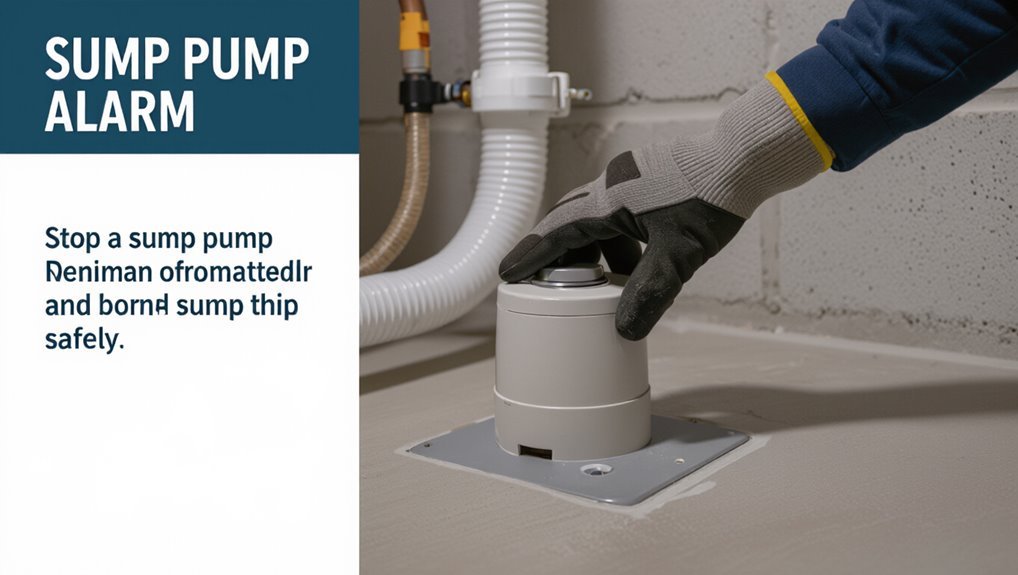
A concise checklist can guide a homeowner through the fastest steps to silence a sump pump alarm immediately.
Before touching the pump or alarm, basic safety precautions—power isolation, dry footing, and proper lighting—should be confirmed.
Keeping a few essential tools and items on hand, such as rubber gloves, a flashlight, and a multimeter, speeds safe resolution.
Quick checklist to silence the alarm right now
Silence the sump pump alarm quickly by following a concise checklist that prioritizes safety and prevents damage:
- confirm alarm source,
- check power and float switch position,
- silence audible alarm or reset panel per manufacturer,
- inspect for visible clog or water level,
- temporarily unplug only if safe,
- monitor pump operation, and
- call a professional if uncertainty remains about how to turn off sump pump alarm or restore normal function.
Safety precautions before touching the pump or alarm
Before touching the pump or alarm, confirm that it is safe to proceed by cutting power and evaluating the environment for electrical and slip hazards.
Verify circuit breakers or unplugging points, wear insulated gloves and rubber-soled shoes, guarantee adequate lighting and ventilation, and keep bystanders clear.
Inspect for standing water, exposed wiring, or chemical spills.
If unsure, contact a qualified technician.
Tools and items to have on hand
When preparing to stop a sump pump alarm, gather a concise set of tools and safety items to enable a quick, controlled response.
Recommended items: insulated gloves, safety goggles, rubber-soled boots, a flashlight, a multimeter, adjustable wrench, screwdriver set, replacement fuses, zip ties, a bucket, rags, and a wet/dry vacuum.
Keep phone and emergency contact list accessible.
What Triggers a Sump Pump Alarm
A sump pump alarm can be triggered by several common issues such as high water levels, jammed or stuck floats, and malfunctioning sensors.
The alarm system relies on float switches or electronic sensors that detect water rise or pump failure and will sound if those components indicate a problem.
Electrical faults—loose wiring, tripped breakers, or a failing pump motor—can also activate the alarm even if water levels are not critical.
Common causes of alarm activation
Sump pump alarms sound for specific, identifiable reasons tied to system performance and environmental conditions.
Common causes include high water inflow from heavy rain or groundwater, pump failure or motor burnout, clogged intake or discharge lines, power outages or tripped breakers, and alarm system faults.
Poor maintenance, frozen discharge pipes, and unusually rapid sump basin fill rates also frequently trigger alarms needing prompt attention.
How alarm sensors and float switches work
Detecting rising water levels and pump status relies on a few simple sensors—float switches, pressure sensors, and electronic probes—that monitor the sump basin and trigger alarms when predefined thresholds are crossed.
Float switches rise with water, completing a circuit to signal pump activation or high-water alerts. Pressure sensors detect hydrostatic changes, while probes sense conductivity; all send status to the alarm control.
Electrical issues that can set off alarms
Electrical faults and power interruptions often provoke false or persistent sump pump alarms following sensor descriptions.
Circuit issues, tripped breakers, loose wiring, corroded connections, or intermittent power can trigger alarms by disrupting pump operation or sensor signals.
Voltage drops and grounding faults cause erratic behavior.
Proper diagnosis includes inspecting breakers, testing outlets, tightening connections, and consulting a qualified electrician when uncertain.
Step-by-Step: Safely Turning Off the Alarm
First, the individual locates the alarm and control panel and inspects visual indicators and audible signals to determine the alarm’s cause.
Next, they silence the alarm using the mute/test button and, if necessary, disconnect power at the breaker or unplug the unit.
Finally, they may temporarily disable alarm circuits while keeping pump power intact to allow safe monitoring and diagnostics.
Step 1 Locate the alarm and control panel
Locating the alarm and control panel is the necessary initial step before interacting with a sump pump system.
The technician visually inspects the basement, utility closet, or near the pump basin for the alarm enclosure and a nearby control panel or float switch mechanism.
Labels, conduit runs, and wiring paths help confirm correct components before any further action or power adjustments are considered.
Step 2 Assess visual indicators and audible signals
A quick scan of the alarm housing and nearby control panel reveals the system’s current state: check for illuminated LEDs, a blinking fault indicator, or a steady red light, and listen for a continuous or intermittent audible tone that signifies an active alarm condition.
Note any secondary indicators—power, battery, or pump run lights—and correlate sounds with visible faults before proceeding.
Step 3 Silence the alarm using the alarm mute/test button
With visual and audible cues identified, attention shifts to the alarm mute/test button as the primary means to silence the audible signal while preserving system monitoring.
The operator locates the labeled button on the alarm module, presses briefly to mute the buzzer, verifies the alarm LED remains active, and consults the unit’s indicator legend.
Record the event and monitor for recurring alerts.
Step 4 Disconnect power safely (breaker or unplug) if needed
Shut off the pump’s power only after confirming that temporary silencing failed or that service requires a complete shutdown.
The technician locates the circuit breaker or unplug point, wears insulated gloves, and turns the breaker fully off or disconnects the cord.
They verify power loss with a noncontact tester, tag the breaker if working, and proceed with repairs or replacement following safety protocols.
Step 5 Temporarily disable alarm circuits without cutting power to the pump
After confirming that power to the pump will remain on, the technician shifts focus to silencing the alarm circuitry while keeping the sump operational.
They locate the alarm panel, identify the alarm fuse or alarm-specific breaker, and either remove the fuse, flip the alarm breaker, or unplug the alarm module.
They secure exposed terminals and note settings for later restoration.
Step 6 Verify alarm is off and monitor the pit
Confirm that the alarm is silenced and the sump remains operational before leaving the work area.
Observe the pit for normal pump cycling, listen for unusual noise, and watch water level sensors or float switches for correct movement.
Re-check alarm panel for fault indicators and test backup power if present.
Log the check time and plan a follow-up inspection within 24 hours.
Troubleshooting While the Alarm Is Off
With the alarm silenced, the next steps focus on diagnosing the system.
Technicians should inspect the sump pit and pump condition, verify the primary and backup floats operate correctly, and examine wiring, fuses, and the circuit breaker for faults.
Finally, the alarm module itself should be tested and reset to confirm proper function before rearming.
Inspecting the sump pit and pump condition
Begin by visually examining the sump pit and pump assembly to identify signs of debris, corrosion, or obvious mechanical damage that could impair operation.
Check for standing sediment, clogs around the intake, loose fittings, frayed cords, and rusted components. Note any unusual odors or mineral buildup.
Document findings and remove only reachable debris; postpone intrusive repairs until power is secured and professional service is arranged.
Testing the float switch and backup float
To test the primary and backup float switches while the alarm is silenced, raise each float manually to observe if the pump and backup system respond as expected and if the alarm reactivates when appropriate.
Note whether switches move freely, listen for motor engagement, and check that backup activation occurs at its higher threshold.
Replace or adjust sticky or damaged floats before rearming the alarm.
Checking wiring, fuse, and circuit breaker
After confirming that the floats and backup float respond correctly and the alarm was silenced, attention shifts to the electrical components that keep the pump and alarm powered.
Inspect visible wiring for frays, loose connections, or corrosion. Check the fuse or inline breaker for continuity and replace if blown.
Verify the circuit breaker is on and not tripped; reset if necessary, observing safety precautions.
Testing and resetting the alarm module
Power down the alarm module and record its current indicators before proceeding.
Then methodically test and reset components while the alarm remains silenced. Inspect connectors, sensors, and battery terminals for corrosion or looseness.
Apply power briefly to observe startup diagnostics, then power down and perform a factory or manual reset per manufacturer instructions.
Verify sensor continuity and restore normal operation.
When to Reset vs. Replace Alarm Components
The section outlines clear signs that an alarm unit requires replacement, such as persistent false alarms, corrosion, or failure to power on.
It also explains when simple resets, recalibration, or sensor cleaning will restore proper function.
Recommended replacement parts and notes on model compatibility are provided to help guarantee correct repairs.
Signs an alarm unit needs replacement
Because alarm components can fail gradually or suddenly, distinguishing between a simple reset and full replacement depends on specific, observable signs.
Persistent false alarms, intermittent power or connectivity loss, visible corrosion, cracked housing, burned electronics, or failure to respond after multiple resets indicate replacement.
Frequent recurring faults despite diagnostics and age beyond manufacturer recommendations also justify installing a new alarm unit to guarantee reliable protection.
When resetting or recalibrating is sufficient
After noting signs that justify replacement, it is equally important to recognize situations where resetting or recalibrating an alarm unit will restore reliable operation.
Minor faults—false triggers, sensor drift, or configuration errors—often respond to power cycling, factory reset, or sensitivity adjustment.
Routine maintenance, cleaning contacts and verifying float positions, precedes recalibration.
Replace only if faults persist after these corrective steps.
Recommended replacement parts and compatibility
Several common replacement parts—float switches, alarm modules, backup batteries, and wiring connectors—should be selected for compatibility with the sump pump’s make, model, and electrical specifications.
Appropriate replacement prevents failures and wiring faults; replace when physical damage, corrosion, or repeated false alarms occur.
Recommended items:
- OEM or exact-spec float switch
- Compatible alarm module rated for pump voltage
- Sealed replacement battery with proper terminals
Preventing False Alarms and Future Activations
A regular maintenance schedule for both the sump pump and alarm helps prevent unexpected activations by identifying wear, clogs, and weak batteries before they fail.
Common mistakes—such as ignoring debris buildup, skipping float checks, or using improper alarm settings—are frequent causes of repeated false alerts.
Practical upgrades like a reliable battery backup and dedicated high-water sensors can reduce nuisance alarms and improve overall system reliability.
Maintenance schedule for pump and alarm
Because routine upkeep directly reduces false alarms and extends service life, a concise maintenance schedule should be established that outlines monthly, quarterly, and annual tasks for both the pump and its alarm system.
Monthly: inspect float, clean debris, test alarm tone.
Quarterly: verify battery backup, check wiring and seals, exercise pump under load.
Annually: professional inspection, replace worn components, update alarm sensitivity as needed.
Common mistakes that cause repeated alarms
Ignoreable shortcuts and poor installation choices often trigger repeated sump pump alarms; common culprits include improperly positioned floats that snag on debris, clogged discharge lines that cause back-pressure, loose or corroded electrical connections, and neglected battery backups that fail during power outages.
Other frequent mistakes are misaligned check valves, insufficient basin clearance, and ignoring routine inspections that would identify wear, blockages, or wiring issues early.
Upgrades to reduce nuisance alarms (battery backup, high-water sensors)
Consider upgrading the sump system with a dedicated battery backup and high-water sensors to sharply reduce nuisance alarms and provide reliable protection during power outages.
A battery backup maintains pump operation when mains fail; selective high-water sensors trigger alarms only at critical levels, avoiding cycling from normal fluctuations.
Professional installation and periodic testing guarantee proper integration, battery health, sensor calibration, and reduced false activations.
Emergency Scenarios and Action Plans
If the sump pump fails and water begins to rise, immediate steps should focus on minimizing damage and stopping flow into finished spaces.
Temporary measures—such as using a backup pump, sump bucket, or sandbags and redirecting runoff—can reduce flooding until a permanent fix is arranged.
A licensed plumber or electrician should be contacted promptly for mechanical or electrical failures beyond basic temporary remedies.
What to do if the pump fails and water is rising
Act quickly when a sump pump fails and water is rising: assess the rate of flooding, locate the main electrical shutoff and any accessible circuit breakers, and move valuables and electronics to higher ground.
Call emergency services if water threatens safety. Shut power to the pump circuit before entering flooded areas.
Contact a licensed plumber or pump technician and document damage for insurance claims.
Temporary fixes to prevent flooding
Deploy quick, temporary measures to limit water intrusion and protect property when a sump pump fails and rising water is imminent.
Place sandbags or tightly sealed plastic barriers at low exterior openings, elevate valuables on pallets or shelving, shuttle portable pumps or wet/dry vacuums to discharge water outside, and plug floor drains with removable covers.
Monitor levels and prioritize safety until permanent repairs occur.
When to call a professional plumber or electrician
When rising water persists despite temporary measures or the alarm continues to sound, professional help should be summoned immediately. A licensed plumber or electrician can diagnose mechanical failures, unsafe electrical conditions, and mitigations that temporary fixes cannot address.
Call a plumber for jammed pumps, blocked discharge lines, or sump basin damage.
Call an electrician for tripped breakers, exposed wiring, or repeated motor failures indicating electrical faults.
Cost and Time Estimates for Repairs and Replacements
Costs and time for addressing a sump pump alarm vary from minor alarm repairs to full unit replacements, and homeowners should weigh price against urgency. Below is a quick comparison of typical expenses and expected turnaround times. The figures reflect common ranges for parts, labor, and standard service call durations.
| Service Type | Typical Cost Range | Typical Timeframe |
|---|---|---|
| Alarm repair | $50–$250 | 30 min–2 hours |
| Pump repair | $150–$600 | 1–4 hours |
| Full replacement | $400–$1,200 | 2–6 hours |
Typical costs for alarm repair vs. full unit replacement
Although specific figures vary by region and model, comparing alarm repairs to full sump pump replacements typically shows a large gap in both cost and time commitment.
Alarm fixes—sensor replacement or wiring—often run $50–$250 plus labor.
Full pump replacement commonly costs $300–$1,200 including installation.
Warranty coverage, component availability, and unit age influence whether repair is economical versus outright replacement.
Time required for common fixes and professional service calls
Repair decisions hinge not only on price but also on how long fixes take, since downtime and scheduling affect overall inconvenience and potential water damage.
Simple alarm resets or float adjustments often take 15–30 minutes.
Sensor replacements and minor wiring require 1–2 hours.
Pump motor repair or replacement and plumbing work can demand 2–6 hours; technician availability may add days for service calls.
Safety Tips and Best Practices for Sump Pump Alarms
Proper handling of sump pump alarms begins with strict electrical safety protocols to minimize shock and short-circuit risks near water.
Routine testing of alarms and pumps should be scheduled and performed to confirm reliable operation under load.
All inspections, tests, and repairs must be logged with dates and actions to create a clear maintenance history.
Electrical safety around water and pumps
When water and electricity intersect near a sump pump, the risk of shock, short circuits, and equipment damage rises sharply.
Therefore, strict adherence to electrical safety practices is essential. Ground-fault circuit interrupters (GFCIs) must protect pump circuits. Cords should remain dry and elevated, connections sealed with waterproof fittings, and power should be cut before any maintenance.
Qualified electricians handle complex electrical work.
Regular test procedures to ensure alarm reliability
Establish a routine testing schedule to verify that the sump pump alarm and its sensors function reliably under real conditions.
Periodically simulate high-water scenarios by lifting float switches or pouring water slowly until the alarm triggers. Confirm audible and visual signals, backup power operation, and auto-reset behavior.
Replace faulty sensors, clean contacts, and test after repairs.
Perform monthly checks and after storms or power outages.
Record-keeping and documenting maintenance actions
Routine testing outcomes and any repairs performed should be recorded promptly and clearly to create a reliable maintenance history for the sump pump alarm system.
Entries must include date, technician, actions taken, parts replaced, and observed performance.
Digital logs with timestamps and photos improve traceability.
Retain records for warranty and safety audits, review periodically to identify recurring issues, and share summaries with stakeholders.
Conclusion
When the alarm falls silent, it becomes a lighthouse finally visible through fog—proof that vigilance and action steered the house away from rising water. Homeowners may treat the quiet as a trusted signal: a job paused, not finished. The lamp’s glow reminds them to inspect, repair, and prepare, turning a momentary calm into lasting safety. In this way, every muted alarm is both a lesson and a promise against future storms.