How to Install a Single Handle Kitchen Faucet: Step-by-Step Guide for DIY Success
Installing a single-handle kitchen faucet is a straightforward DIY project that simplifies both operation and installation. To start, turn off the water supply, clear out the cabinet space, and disconnect the supply lines to remove the old faucet. Next, assemble the new faucet, place the gasket, and secure the mounting nuts using a basin wrench. Connect the supply lines with plumber’s tape, turn the water back on, and check for leaks and smooth operation. For additional tips, troubleshooting, and maintenance guidance, continue reading.
What a Single Handle Kitchen Faucet Is and Why Choose One
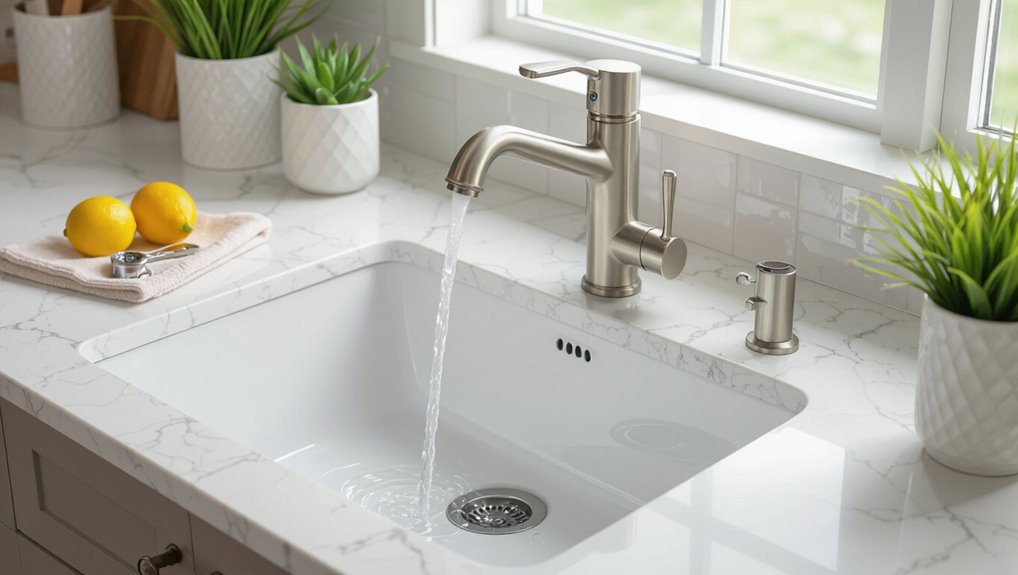
A single handle kitchen faucet combines hot and cold control into one lever, offering straightforward temperature and flow adjustments and often saving counter space.
It is available in a range of styles and finishes—from modern pull-down designs to classic high-arc chromes—so homeowners can match it to their kitchen aesthetic.
This option is particularly well suited to busy or compact kitchens where ease of use, quick operation, and a streamlined look are priorities.
Key features and benefits of single handle faucets
Choose a single-handle kitchen faucet when simplicity and space-saving control are priorities.
Single-handle faucets offer single-handed temperature and flow adjustment, compact mounting, fewer leak points, and easier maintenance.
Their straightforward design shortens tasks like how to install a single handle kitchen faucet, reducing installation time and parts.
Enhanced durability, water efficiency, and ergonomic operation suit busy kitchens and DIY installers seeking reliable performance.
Common styles and finishes available
Variety defines single-handle kitchen faucets, spanning styles from minimalist modern to classic bridge-inspired silhouettes and finishes like chrome, stainless steel, matte black, and brushed nickel that adapt to different kitchen aesthetics.
Options include pull-down sprays, high-arc designs, and low-profile models. Visual cues help match cabinetry and hardware.
- Sleek chrome reflecting contemporary light
- Warm brushed nickel complementing wood
- Bold matte black for contrast
When a single handle faucet is the right choice for your kitchen
When is a single-handle kitchen faucet the better fit: in kitchens that prioritize simplicity, quick temperature control, and streamlined cleaning.
It combines flow and temperature adjustment into one lever, saving counter space and reducing installation complexity.
Ideal for small sinks, busy cooks, and one-handed operation needs.
Maintenance is typically easier due to fewer parts and simpler cartridge replacements.
Tools and Materials You’ll Need Before Starting
Before beginning the installation, assemble a concise set of tools and replacement parts to avoid interruptions.
The core toolkit should include wrenches, a basin wrench, and plumber’s tape, while replacement items like the new faucet, supply lines, and gaskets must be on hand.
A few optional accessories—such as a flashlight, bucket, and towel—can make the job cleaner and easier.
- Wrenches, basin wrench, plumber’s tape
- Faucet, supply lines, gaskets
- Flashlight, bucket, towel
Tools checklist (wrenches, basin wrench, plumber’s tape, etc.)
A concise set of tools guarantees the faucet installation proceeds smoothly:
Essential items include adjustable and slip-joint wrenches, a basin wrench for tight underside access, plumber’s tape (PTFE) for threaded seals, a Phillips and flathead screwdriver, plumber’s putty or silicone, channel-lock pliers, a flashlight, tape measure, bucket and rags.
Optional: utility knife and small mirror for confined spaces.
Replacement parts and materials (faucet, supply lines, gaskets)
Proper parts and materials guarantee the replacement proceeds without delays or unexpected trips to the hardware store.
A compatible single‑handle faucet matching hole count and deck thickness should be selected. Flexible supply lines sized to existing valves, quality rubber or neoprene gaskets, and mounting hardware are essential.
Include replacement escutcheon or deck plate if needed and verify all parts meet local plumbing codes.
Optional helpful accessories (flashlight, bucket, towel)
Although not strictly required, a few simple accessories—an LED flashlight, a small bucket, and absorbent towels—make faucet replacement smoother by improving visibility, containing drips, and protecting the cabinet interior.
A headlamp or magnetic flashlight frees both hands. A 1–2 gallon bucket collects water and old parts. Microfiber towels absorb spills and cushion tools, preventing scratches and minimizing cleanup.
Preparing Your Workspace and Safety Precautions
Before beginning, the water supply should be shut off and faucets briefly tested to confirm no flow.
The cabinet beneath the sink must be cleared and surfaces protected with towels or a drop cloth to catch tools and prevent scratches.
Any nearby electrical outlets or the garbage disposal should be identified and disconnected or powered off to prevent shocks or accidental activation.
Shutting off water supply and testing
Once the new faucet is at hand, the installer shuts off the water supply at the house shutoff or the local shutoff valves beneath the sink.
Then, the installer opens the existing faucet to relieve pressure and drain remaining water from the lines.
After installation, the installer slowly opens valves, checks for leaks at connections, observes steady flow and proper hot/cold orientation, and tightens fittings as needed.
Clearing the cabinet and protecting surfaces
Clear the cabinet area and lay down protective coverings to prevent damage and simplify cleanup.
Remove stored items, trash, and loose debris for unobstructed access.
Place a waterproof mat or towel beneath the sink and cardboard on adjacent cabinet surfaces.
Use work gloves and safety glasses.
Keep a flashlight and small container for fasteners nearby.
Maintain clear floor space to avoid tripping hazards.
Electrical and garbage disposal considerations
Although plumbing work is the primary focus, attention to electrical and garbage-disposal systems is essential for safety and to prevent accidental damage.
Power should be switched off at the breaker before working near outlets or under-sink disposals. Unplug or lock out the disposal, secure cords, and avoid water contact with electrical components.
Confirm circuits are de-energized and test before proceeding.
How to Remove an Old Kitchen Faucet: Step-by-Step
The process begins by turning off the water supply and opening the faucet to drain remaining lines.
Next, the supply lines are disconnected and mounting hardware is removed from beneath the sink.
Finally, the old faucet is lifted out and the sink area is cleaned and inspected before installing the new fixture.
Turning off water and draining lines
Before disconnecting fittings, someone should shut off both the hot and cold supply valves and relieve residual pressure by opening the faucet.
Next, drain remaining water from the lines into a bucket, then close the faucet.
Inspect for secondary shutoffs under the sink or at the main if valves leak.
Place towels to catch drips and wear gloves to avoid contact with dirty water.
Disconnecting supply lines and removing mounting hardware
Disconnect supply lines by placing a bucket beneath the connections, then use an adjustable wrench or basin wrench to loosen the nuts where the flexible hoses meet the shutoff valves and at the faucet tailpieces; catch escaping water and cap or plug the lines if needed.
Next, remove mounting nuts or retaining clips under the sink, keeping track of hardware and noting gasket or escutcheon placement for reinstallation.
Lifting out the old faucet and cleaning the sink area
Lift the faucet straight up and out, guiding any attached hoses through the sink opening while watching for trapped water and loose mounting parts.
Place removed components on a towel.
Inspect the sink surface and underside for mineral deposits, old putty, and gasket residue.
Scrape gently with a plastic scraper, clean with mild detergent, rinse, and dry thoroughly before installing the replacement faucet.
How to Install a Single Handle Kitchen Faucet: Step-by-Step Guide
The installer first assembles faucet components on a clean surface to confirm fit and attach any hoses or gaskets.
Next the unit is inserted through the sink or countertop, aligned, and secured with mounting hardware tightened from below.
Finally the hot and cold supply lines are connected (using plumber’s tape as needed) and any sprayer or accessory hoses are reattached and tested for leaks.
Assembling the faucet components outside the sink
Before lowering the assembly into the sink, assemble the valve body, cartridge, escutcheon (if included), and O-rings on a clean, padded work surface to guarantee correct alignment and prevent damage.
Hand-tighten retaining nuts, seat the cartridge per manufacturer orientation, and lubricate O-rings with plumber’s grease.
Attach supply line connections and secure mounting hardware finger-tight for final adjustment after installation.
Inserting faucet into sink or countertop and aligning
Position the assembled faucet over the sink or countertop hole, guiding the tailpiece and supply lines through while keeping the base gasket or escutcheon seated flat against the surface; verify the faucet is oriented so the handle and spout clear surrounding fixtures and the spout reaches the sink basin without strain.
Adjust rotation for symmetry, center over the hole, guarantee even gasket contact, and confirm supply lines are untwisted and accessible.
Securing mounting hardware from under the sink
Reach beneath the sink to access the faucet tailpiece and mounting shank. Then slide the rubber or foam gasket, metal washer, and mounting nut into place in the order specified by the manufacturer.
Use a basin wrench or appropriate tool to tighten the nut securely while maintaining faucet alignment. Check for even seating and snug but not over‑tightened fasteners before proceeding to supply connections.
Connecting hot and cold supply lines and using plumber’s tape
Begin by identifying and preparing the hot and cold supply lines: the hot is typically on the left and the cold on the right.
Wrap male threads with plumber’s tape clockwise three to five turns. Hand-thread supply nuts onto faucet tailpieces, then tighten with an adjustable wrench until snug; avoid over-tightening.
Turn on water slowly, check for leaks, and re-tighten if necessary.
Reinstalling or connecting sprayer/accessory hoses (if applicable)
If the faucet includes a pull-out sprayer or additional accessories, reconnect their hoses before finalizing under‑sink work:
Route each hose through the faucet body, seating any grommets or retainers.
Attach hose fittings to the designated diverter or outlet, tightening by hand then a quarter turn with a wrench.
Check alignment, secure clips, and test for smooth operation and leaks before finishing.
Reconnecting garbage disposal or additional fittings (if needed)
After reconnecting sprayer and accessory hoses, attention turns to restoring the garbage disposal and any additional fittings beneath the sink.
Reattach the disposal’s discharge tube and dishwasher inlet, tighten clamps or mounting bolts, and reconnect electrical or plug connections per manufacturer instructions.
Check seals and slip nuts for leaks, secure supply lines, and run water while operating the disposal to confirm proper function and watertight joints.
Testing the New Faucet and Final Adjustments
Once water is restored, the new faucet is run through hot and cold cycles while the supply valves and connections are inspected for any leaks.
The handle movement and spray settings are tested and adjusted for smooth operation and correct spray pattern.
Finally, all fittings are tightened and any visible gaps around the base are sealed to prevent future leaks.
Restoring water supply and checking for leaks
Turn the water back on slowly and watch all connections closely for drips or moisture.
Open both hot and cold valves fully, then operate the faucet to purge air and flush debris.
Inspect supply lines, tailpieces, and underneath the sink for leaks.
Tighten fittings incrementally if needed.
After several minutes, recheck; verify no dampness remains before restoring cabinet contents.
Adjusting handle operation and spray settings
Begin by cycling the handle through its full range of motion to verify smoothness, correct alignment, and proper hot/cold orientation.
Test spray modes and flow patterns, switching between stream and spray to validate diverter function and pressure consistency.
Adjust limit stops or handle tension if necessary for reach and temperature range.
Recheck operation after several cycles to ascertain reliable, repeatable performance.
Tightening connections and sealing gaps
Check all supply and spray connections for tightness and inspect the sink and countertop junctions for any gaps that could allow leaks.
Tighten fittings with appropriate tools without over-torquing.
Apply plumber’s tape to threaded joints and silicone sealant around the base where needed.
Reopen water slowly, check for drips, operate the faucet and spray to confirm seals.
Retighten minor leaks.
Troubleshooting Common Installation Problems
If leaks persist at connections, the installation should be inspected for loose fittings, damaged washers, or improper sealant.
Stiff handles, uneven temperature control, low water pressure, and misaligned spouts each point to specific causes—such as cartridge issues, clogged aerators, supply line problems, or mounting hardware misplacement—that can be systematically checked and corrected.
The following section outlines targeted checks and fixes for these common problems.
Dealing with persistent leaks at connections
Persistent leaks at faucet connections often stem from improper sealing, misaligned fittings, or worn components, and addressing them requires systematic inspection and targeted fixes.
Inspect supply lines, compression nuts, and hose connections for cross-threading or loose fittings. Replace damaged O-rings, ferrules, or supply hoses.
Clean mating surfaces, apply appropriate plumber’s tape or sealant, then hand-tighten and test under pressure to confirm repairs.
Handle stiffness or uneven temperature control
Inspecting a stiff handle or one that produces uneven hot and cold flow begins with evaluating the cartridge, valve seat, and any buildup that restricts movement or balance.
The cartridge may require cleaning, lubrication, or replacement; mineral deposits on seats or inlets often cause imbalance.
Verify correct cartridge orientation, secure mounting, and smooth operation after reassembly; replace worn seals to restore proper temperature control.
Low water pressure causes and fixes
After checking cartridge alignment and clearing mineral buildup that can affect handle operation and temperature balance, attention should turn to low water pressure, a common complaint with new faucet installs.
Inspect supply shutoffs, confirm both hot and cold valves are fully open, check supply lines for kinks, remove and clean aerator and inline screens, and verify household water pressure; replace clogged hoses or valves as needed.
Addressing misaligned spout or mounting issues
Realign the spout and mounting assembly to guarantee the faucet sits level and secure, since crooked or loose installations can cause leaks, uneven water flow, and accelerated wear.
Inspect mounting nuts, gaskets, and deck for debris or warped surfaces.
Tighten evenly, use shims or plumber’s putty where needed, and confirm smooth rotation and sealed connections.
Recheck after water is on.
Maintenance Tips to Keep Your Faucet Working Longer
Routine maintenance preserves function and appearance, and simple checks can prevent most failures.
Periodic cleaning, timely replacement of cartridges and seals, and preparedness for cold weather or hard water extend service life.
The following images evoke practical steps to keep a faucet reliable.
- A soft cloth wiping mineral-streaked chrome under warm light
- A set of replacement cartridges and rubber O-rings beside a small wrench
- A winterized outdoor spigot wrapped and a water-softening pitcher on the counter
Routine cleaning and finish care
Careful maintenance preserves both function and appearance of a kitchen faucet; regular, gentle cleaning prevents mineral buildup, protects finishes, and reduces wear on moving parts.
Wipe daily with a soft cloth and mild soap, avoid abrasive pads and harsh chemicals, and remove mineral deposits with vinegar-soaked cloths for short periods.
Rinse thoroughly and dry to prevent water spots and corrosion.
Replacing cartridges and seals when and how
Inspecting and replacing worn cartridges and seals restores proper flow and stops leaks before they cause damage.
Periodic checks reveal drips, stiffness, or uneven flow; replace the cartridge when wear or mineral buildup impairs operation.
Shut off water, remove handle and retaining parts, extract cartridge, match model, install new cartridge and seals with plumber’s grease, reassemble, and test for leak-free operation.
Winterization and hard-water prevention
After replacing cartridges and seals, homeowners should also plan for seasonal winterization and measures against hard-water buildup to prolong faucet life.
Drain and shut off outdoor and seldom-used indoor lines before freezing temperatures.
Flush aerators and soak in vinegar periodically to dissolve mineral deposits.
Consider a whole-house water softener or point-of-use filter.
Inspect seals and connections after treatment to guarantee leak-free operation.
Time, Cost, and When to Call a Professional
A basic kitchen faucet replacement typically takes one to three hours for a homeowner with moderate skills, while more complex installs can take longer.
Cost commonly breaks down into the fixture and supplies versus labor, with DIY buyers paying only parts and homeowners who hire a plumber paying both parts and hourly labor.
If there are persistent leaks, corroded supply lines, damaged valves, or unfamiliar plumbing configurations, hiring a licensed plumber is recommended.
Typical DIY time estimates and difficulty level
Time estimates and difficulty vary with faucet type and existing plumbing condition; a basic single-hole replacement often takes 45–90 minutes for someone with moderate DIY skills, while multi-hole setups, integrated sprayers, or hidden shutoffs can extend the job to 2–4 hours.
Difficulty ranges from easy (basic swap) to moderate (tight spaces, corrosion) and becomes challenging when valves, supply lines, or unexpected leaks demand specialized tools or experience.
Cost breakdown: parts vs. labor
Cost varies considerably between parts and labor, and the earlier estimates for DIY time help frame when each cost applies.
Parts typically range from budget kits at $50–$150 to premium faucets over $400.
DIY labor is free aside from tools; hiring a plumber adds $100–$300 for service call plus $50–$150 per hour.
Factor warranties and unexpected parts.
Signs you should hire a plumber instead
When should a homeowner call a professional instead of attempting a DIY faucet swap?
Complex issues—corroded supply lines, inaccessible mounting nuts, multiple connections, or persistent leaks after attempts—justify hiring a plumber.
Limited time, lack of proper tools, or concerns about voiding warranties and causing water damage also warrant professional help.
Compare estimated labor costs versus potential repair risks before deciding.
Comparison: Single Handle vs. Double Handle and Pull-Down Faucets
A concise comparison of single-handle, double-handle, and pull-down faucets helps clarify differences in performance, installation complexity, and maintenance requirements. The table below summarizes key trade-offs to guide selection before installation. The following notes highlight practical implications for homeowners and installers.
| Feature | Single-Handle | Double-Handle |
|---|---|---|
| Performance | Quick temperature/flow adjustments | Precise temperature control |
| Installation Complexity | Generally simpler, fewer holes | More complex, may need extra drilling |
| Maintenance | Fewer parts, easier servicing | More parts, potentially higher upkeep |
Performance, installation complexity, and maintenance comparison
Although both single-handle and double-handle faucets plus pull-down models serve the same basic purpose, their performance, installation complexity, and maintenance demands differ in predictable ways; single-handle offers ease and compact installation, double-handle gives precise control but harder install, and pull-down adds reach with moderate complexity and extra maintenance for the sprayer.
| Feature | Comparison |
|---|---|
| Performance | Single: efficient; Double: precise |
| Installation | Single: simpler; Double: more parts |
| Maintenance | Single: fewer parts; Pull-down: hose upkeep |
| Cost | Pull-down: higher; Double: moderate |
Conclusion
To conclude, the guide reassures readers that installing a single-handle kitchen faucet is manageable with patience and the right tools. Because “measure twice, cut once” underscores the value of careful preparation, DIYers are encouraged to proceed methodically, yet to seek professional help if complications arise. With routine maintenance and attention to troubleshooting tips, the new faucet should deliver reliable, long-lasting performance and greater convenience in everyday kitchen use.