How to Find a Valve Box Fast: Step-by-Step Guide for Homeowners and Contractors
To quickly locate a valve box, look for its lid, discolored grass, depressions, or utility flags, typically found near meters or irrigation systems. Reviewing plumbing or irrigation plans and municipal maps can also help. Use tools like a probe rod, metal detector, or magnetic locator to confirm its edges. Once located, carefully expose it using a trowel and flat shovel, angling away from any utilities. Remember to label and document your findings. For additional techniques and safety tips, refer to the complete guide.
What a Valve Box Is and Why Locating It Quickly Matters
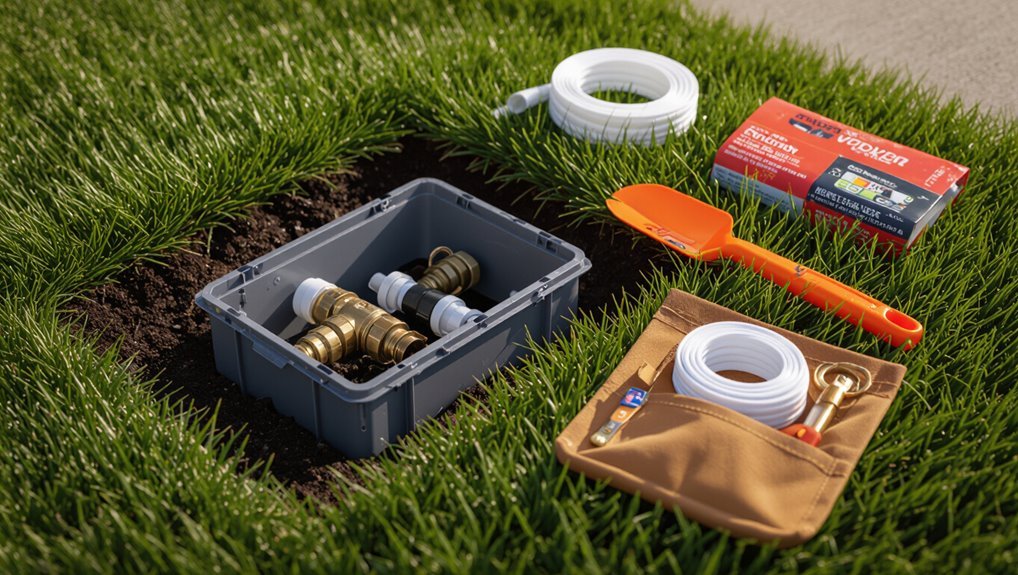
A valve box is a recessed enclosure that houses shutoff valves and can be plastic, concrete, or metal depending on use and load requirements.
They are commonly found near property water main connections, along building foundations, in utility easements, and adjacent to irrigation lines on both residential and commercial sites.
Failing to locate a valve box quickly can delay emergency shutoffs, increase water damage, and raise repair costs.
Definition and common types of valve boxes
Concrete or plastic enclosures set at ground level, valve boxes house irrigation and utility shutoff mechanisms so they remain accessible yet protected.
They vary by material (plastic, concrete, steel), size (single to multi-valve), and lid type (flush, marked, secured).
Knowledge of how to find a valve box includes recognizing lids, markers, and typical construction to identify and access the appropriate enclosure.
Typical locations on residential and commercial properties
Knowing the types and identifying features of valve boxes helps narrow where they are typically placed across properties.
Residential sites commonly locate valve boxes near meters, property lines, sprinkler manifolds, and at driveways or sidewalks for easy access.
Commercial properties place boxes along building perimeters, parking lots, landscaped islands, and service corridors.
Utility easements and gate valves adjacent to street curbs are frequent spots.
Risks of not finding a valve box promptly
Failing to locate a valve box quickly can escalate a minor maintenance task into a costly emergency.
Delayed access can cause prolonged water loss, property flooding, landscape damage, and higher repair bills. Emergency crews may perform destructive excavation.
Irrigation or utility shutdowns can interrupt business operations.
Timely location minimizes water waste, prevents structural harm, reduces restoration expenses, and limits operational downtime.
Quick Overview: Fast Methods to Find a Valve Box
The article highlights quick visual cues such as surface lids, depressions, or nearby irrigation heads that often signal a valve box.
It then outlines fast non‑invasive tools and techniques—metal detectors, probes, and listening devices—that speed location without excavation.
Finally, it explains when conditions warrant calling a professional to avoid damage or safety risks.
Immediate visual cues to check first
When time is limited, a quick scan for visible markers often reveals the valve box before deeper searching begins.
Look for rectangular or circular lids, depressions in turf, discolored grass, and soil depressions near irrigation lines.
Check along fences, sidewalks, driveways, and near water meters.
Note utility flags, spray paint, or alignment with sprinkler heads as likely indicators.
Fast non-invasive tools and techniques
Reach for simple, non-invasive tools and methods that quickly narrow the search without disturbing turf or utilities: a soil probe or screwdriver can reveal a lid edge with shallow taps.
A long screwdriver or metal rod can detect the hollow sound above a box, and a handheld metal detector rapidly locates the metal components of many valve boxes.
Supplement with a tape measure, flags, and careful probing patterns.
When to call a professional
If non-invasive methods fail to locate a valve box quickly or there are signs of buried utilities, a professional should be contacted.
A licensed locator or plumber uses advanced detection, GIS records, and safe excavation techniques.
Call when repairs are complex, aging infrastructure is suspected, or liability concerns exist.
Hiring a pro minimizes damage, guarantees code compliance, and reduces risk to people and property.
Step-by-Step Guide to Locating a Valve Box
A concise, methodical approach helps locate a valve box quickly and safely.
First, gather property details and check near the water meter, main shutoff, and backflow preventer.
Then follow irrigation lines and use careful probing to expose the box in common placement areas.
- Gather property plans and irrigation details before starting
- Inspect near the water meter, main shutoff, and backflow preventer
- Trace irrigation lines and sprinkler heads toward control valves
- Scan typical spots and use probing tools or a small-tine shovel safely
Step 1 Gather property information and irrigation plans
Begin by assembling all available property documents and existing irrigation plans to create a focused reference set for locating the valve box.
Review plot maps, as-built drawings, sprinkler layouts, and prior service notes. Note valve zone labels, pipe routes, control wire paths, and landscape features.
Record dimensions, reference points, and anomalies to narrow probable valve box locations before field inspection.
Step 2 Inspect near the water meter, main shutoff, and backflow preventer
Move systematically from the service entry toward irrigation components, focusing on the water meter, main shutoff, and backflow preventer as primary hubs for valve routing.
Visual inspection reveals nearby conduit, pipe tees, and compact valve boxes.
Note pipe exits, offsets, and utility markings.
Measure distances and record orientations to narrow search areas.
Photographs and sketches speed locating and future maintenance.
Step 3 Follow irrigation lines and sprinkler heads toward the control valves
Trace irrigation lines visually from the most distant sprinkler heads inward, following the lateral pipes toward their convergence points where control valves are typically clustered.
Note pipe direction, fittings, and any visible risers. Walk straight lines between heads to reveal buried runs, lifting minor turf only if necessary.
Mark likely valve locations with flags, then probe gently along the suspected convergence to locate the valve box.
Step 4 Scan common placement areas (front yard, near sidewalks, corners of foundation)
Several specific spots commonly hold valve boxes, so systematically scan the front yard, along sidewalks, and near foundation corners for shallow depressions, rectangular lids, or disturbed soil.
Inspect along driveway edges, beside utility meters, and under shrub overhangs. Note plastic or concrete covers, faded paint marks, and turf depressions.
Mark suspected locations with flags and record distances from fixed landmarks for verification.
Step 5 Use probing tools and small-tine shovel safely to expose the box
Prepare tools and a plan before breaking ground: a thin metal probe (or stiff screwdriver), a small-tine hand shovel, work gloves, and a kneeling pad.
Probe gently in likely spots, angling to detect the box rim without striking utilities.
Once located, remove soil in layers with the small-tine shovel, exposing the lid edge.
Keep cuts neat, dispose soil nearby, and avoid sharp impacts.
Step 6 Verify valves and label for future access
Confirm the valve identity and condition before backfilling to prevent future confusion and leaks.
The inspector verifies valve type, orientation, and operation, checks for corrosion, hairline cracks, and loose fittings, and confirms supply lines shut off fully.
Once validated, they clean the box, install a durable label or marker with date and function, and document location for maintenance records.
Tools and Equipment for Faster, Safer Location
Locating a valve box efficiently relies on a mix of simple hand tools and electronic aids.
Essential hand tools include a probe rod, trowel, and flat shovel, while magnetic locators, metal detectors, cable locators, and ground-penetrating radar speed detection and accuracy.
Proper PPE and safety equipment complete the kit to protect operators and prevent damage during excavation.
Hand tools: probe rod, trowel, flat shovel
A compact set of hand tools—a probe rod, a sturdy trowel, and a flat shovel—gives technicians the control and precision needed to expose a valve box without damaging surrounding utilities or landscaping.
The probe rod locates edges and depth; the trowel removes soil close to the box; the flat shovel lifts loosened material and trims sod.
Always work slowly, angling tools away from suspected lines.
Electronic aids: magnetic locators, metal detectors, cable locators, ground-penetrating radar
Technicians rely on electronic aids—magnetic locators, metal detectors, cable locators, and ground-penetrating radar—to detect valve boxes and nearby buried utilities quickly and with minimal excavation.
Magnetic locators find ferrous covers; metal detectors detect mixed metals; cable locators trace energized or induced lines when paired with a transmitter; GPR maps subsurface anomalies, revealing nonmetallic components and depth.
Proper device selection improves speed and reduces damage.
PPE and safety equipment
After using electronic aids to pinpoint a valve box, attention shifts to personal protective equipment and safety gear that speed work while preventing injury and utility damage.
Workers don high-visibility vests, safety glasses, gloves, steel-toe boots, and hearing protection when using power tools. Use insulated tools and non-conductive probes near electrical lines.
Carry a first-aid kit, utility maps, and communication devices for rapid response.
How to Read and Use Utility and Property Records
The reader is advised to consult irrigation and plumbing plans to pinpoint valve locations and understand pipe runs.
Municipal utility maps and mark-out services provide official records and surface indicators that narrow search areas.
Former owners, landscapers, or contractors can often supply practical insights or undocumented changes to the system.
Interpreting irrigation and plumbing plans
When interpreting irrigation and plumbing plans, professionals consult utility maps, as-built drawings, and property records to locate valves, mains, and service lines with accuracy.
They read symbols, line types, scale and legend to identify buried components, note depths, offsets, and connection points, and cross-reference plan notes with field measurements.
Clear annotation and verification reduce excavation risk and speed valve box discovery.
Using municipal utility maps and mark-out services
Having verified plan details and field measurements, professionals next consult municipal utility maps and mark-out services to confirm the exact location of buried lines and valve boxes.
They obtain official records, call 811 or local marking services, compare cadastral maps with as-built drawings, and reconcile discrepancies.
Marked flags and paint guide targeted probing and safe excavation, minimizing risk to existing utilities and property.
Asking previous owners, landscapers, or contractors
Curiosity often yields the quickest answers: contacting previous owners, landscapers, or contractors can reveal exact valve box locations, installation dates, and idiosyncratic site notes not found in official records.
Ask targeted questions, request any as-built drawings, photos, or service invoices, and note memory-based landmarks.
Cross-reference recollections with maps and tape measurements to confirm accuracy before digging or calling utility locators.
Signals and Markers to Look For Above Ground
Above-ground signs often give the quickest clues to a valve box’s location. Look for surface indicators such as depressions, variations in grass or plant growth, visible lid edges, manhole covers, valve risers, and nearby fixtures.
Seasonal changes—melt patterns, drying, or regrowth—can further reveal otherwise hidden boxes.
Surface indicators: depressions, different grass/plant growth, lid edges
Where should one look first when searching for a valve box? Observers scan lawn surfaces for subtle depressions, circular or rectangular outlines, and slight soil settling.
Vegetation differences—thinner grass, greener patches, or stunted growth—often reveal buried lids. Exposed lid edges or rim shadows near sprinkler heads signal proximity.
Combine these visual cues with recent digging or compacted soil for confirmation.
Manhole covers, valve risers, and other related fixtures
Manhole covers, valve risers, and similar fixtures serve as clear, durable signals of underground utilities and should be checked early in a search.
Inspect paved areas, sidewalks, and lawns for metal or concrete lids, exposed riser stems, painted markers, or nearby service access points.
Note alignment with property lines, meters, and visible pipes to narrow locations before probing or contacting utility services.
Seasonal changes that reveal hidden boxes
Because seasonal shifts alter vegetation, ground cover, and visibility, they often expose valve boxes that were previously concealed.
Inspecting yards and easements after snowmelt, leaf drop, or drought can reveal depressions, bare soil rings, sudden changes in grass height or color, and dislodged mulch that mark underlying access points.
Observers should note sunken spots, frost-free patches, exposed gravel, or disturbed turf edges and map likely locations.
Non-Destructive vs. Destructive Search Methods
Non-destructive and destructive search methods each trade off speed, cost, accuracy, and property impact, so choosing the right approach depends on priorities and constraints. The table below summarizes these differences to frame the decision. The next sections will compare how each method performs on those four criteria.
| Criterion | Typical Outcome |
|---|---|
| Speed | Non-destructive: moderate; Destructive: fast |
| Cost | Non-destructive: higher equipment cost; Destructive: lower labor cost |
| Accuracy | Non-destructive: higher location precision; Destructive: variable, may require confirmation |
| Property Impact | Non-destructive: minimal; Destructive: significant disturbance |
Comparison of speed, cost, accuracy, and property impact
Efficiency, expense, precision, and damage potential are the four key criteria for choosing between non‑destructive and destructive valve‑box search methods. Non‑destructive techniques are faster, lower risk to landscaping, and often costlier per hour; destructive methods can be slower overall, cheaper for simple digs, but risk property damage and require restoration.
| Criterion | Typical outcome |
|---|---|
| Speed | Non‑destructive faster |
| Cost | Destructive cheaper for simple jobs |
| Accuracy | Non‑destructive higher |
| Property impact | Destructive higher |
Common Problems When Locating Valve Boxes and How to Solve Them
Locating valve boxes often encounters predictable obstacles that require specific tactics.
Common issues include buried or overgrown boxes, damaged or missing lids, multiple nearby boxes causing misidentification, and frozen or stuck valves.
Addressing each problem with targeted tools and procedures improves speed and reduces damage.
Buried or overgrown boxes
When valve boxes become buried under soil, mulch, or dense vegetation, they can be difficult to find quickly and accurately.
Practitioners should probe carefully with a blunt rod, follow irrigation lines back from visible emitters, and use a soil knife to clear light cover.
Mark discovered locations with flags or spray paint, trim surrounding growth, and document positions for future maintenance.
Damaged or missing lids
Inspecting valve boxes can be complicated by cracked, warped, or missing lids that expose internals and obscure the box outline.
Damaged lids increase water, debris, and root intrusion, hindering identification and access.
Technicians should mark locations, clear debris carefully, replace or secure lids with appropriate covers, and document damage for future maintenance to prevent deterioration and guarantee safe, reliable access.
Multiple nearby boxes and misidentification
Because multiple valve boxes are often clustered near service lines, technicians can easily confuse one box for another, leading to wasted time or accidental system disruption.
Labeling, referencing utility maps, and using locator tools reduce errors.
Verify by visually tracing downstream piping and confirming valve function before operation.
Communicate with other crews and mark located boxes to prevent repeat misidentification.
Frozen or stuck valves
Misidentified or closely clustered boxes can mask the real problem: valves that will not operate due to corrosion, sediment, or infrequent use.
Frozen or seized valves resist turning and may shear if forced. Professionals recommend penetrating lubricant, gentle tapping, heat where safe, or slow incremental force with proper tools.
If unsuccessful, plan for valve replacement or excavation to expose and repair the shutoff mechanism.
Best Practices for Marking, Protecting, and Maintaining Valve Boxes
The article outlines durable methods for marking valve box locations so they can be found quickly in the future.
It then covers routine maintenance practices that keep valves operable and access points clear.
Finally, it explains when and how to repair or replace valve boxes and lids to guarantee ongoing functionality.
How to permanently mark valve box locations for future access
Several straightforward techniques guarantee valve box locations remain visible and accessible over time.
Use permanent markers: brass or aluminum tags stamped with coordinates and installation dates, affixed with stainless screws.
Embed a durable marker post or painted curb marker at a fixed offset.
Record precise GPS coordinates and add them to property plans.
Avoid degradable materials and place markers where landscaping or snow won’t obscure them.
Routine maintenance tips to keep valves accessible
Maintaining clear, accessible valve boxes requires a simple, regular routine that combines inspection, cleaning, and minor repairs to prevent obstructions and deterioration.
Inspect quarterly for debris, vegetation, pests, and standing water. Clear soil, trim roots, and remove trash.
Lubricate accessible stems lightly, tighten loose covers, and re-seat lids. Record maintenance dates and any adjustments for future reference.
Repairing or replacing valve boxes and lids
Inspecting and addressing damaged or missing valve boxes and lids guarantees reliable access and prevents safety hazards, service interruptions, and further infrastructure deterioration.
Technicians should assess cracks, corrosion, alignment, and lid fit, then choose repair or full replacement. Use durable, load-rated components, secure lids to prevent theft, backfill with stable material, and mark locations clearly for future maintenance and emergency access.
When to Hire a Professional and What to Expect
Professional help is recommended for deep, obscured, or damaged valve boxes, complex irrigation systems, and when utility lines may be present.
Homeowners should ask contractors about experience, licensing, insurance, estimated costs, and turnaround time.
Expect pros to use locating equipment, probes, excavation tools, and to provide a clear repair or access plan with a cost breakdown.
Scenarios that justify professional services
When circumstances exceed routine locating—such as buried boxes under heavy sod, persistent leaks, damaged lids, or complicated valve configurations—it is advisable to call a trained service technician.
Professionals are justified for deep excavation, suspected gas or electrical proximity, corroded or frozen valves, unclear system maps, or repeated DIY failures. They provide diagnostics, safe repair, and documented post-service placement for future access.
Questions to ask contractors and expected costs
How much should be paid and what services are included are central concerns when hiring a contractor for valve box locating or repair. Homeowners should ask about licensing, insurance, experience with underground utilities, diagnostic methods used (electronic locators, potholing), estimated time and labor breakdown, guarantees or warranties, and protocols for handling unforeseen issues like buried wiring or extensive excavation.
Contractors should provide written estimates, hourly versus flat-rate options, permit needs, disposal fees, and clear change-order policies.
Typical professional techniques and equipment used
Call a qualified locator if a valve box can’t be found with basic probing and visual checks; trained technicians bring specialized tools and safety protocols to reduce damage and speed discovery.
Professionals use ground-penetrating radar, electronic locators, soil probes, and vacuum excavation for delicate uncovering. They follow utility maps, mark hazards, document findings, and provide repair or relocation recommendations, ensuring compliance with local codes and minimizing liability.
Case Examples and Short Scenarios
The section presents concise, real-world examples that illustrate common valve box challenges and practical responses.
Each scenario highlights the problem, the method used to locate the box, and the outcome to help readers apply similar tactics.
These short cases include residential and commercial situations plus a tricky paved-area discovery.
- Homeowner finds valve box in front yard after landscape renovation
- Contractor locates multiple valve boxes on a commercial site quickly
- Solving a hidden box discovered under a paved area
- Tips for documenting locations to prevent future searches
Homeowner finds valve box in front yard after landscape renovation
A homeowner discovered a plastic valve box protruding from newly laid sod at the front of the property after a landscaping crew finished grading and planting.
They checked location against irrigation plans, exposed the lid carefully, verified the main shutoff and adjusted buried risers to grade.
Communication with the contractor resolved repositioning and sod repair, preventing mower damage and ensuring easy future access.
Contractor locates multiple valve boxes on a commercial site quickly
Following the homeowner’s encounter with a single exposed valve box, attention shifts to commercial properties where contractors often must locate multiple boxes across larger sites.
A crew uses site plans, systematic grid searches, and noninvasive locators to mark boxes efficiently.
Coordination with facility managers, phased verification, and clear labeling speeds project timelines, minimizes disruption, and guarantees accurate mapping for maintenance and future work.
Solving a hidden box discovered under a paved area
When a valve box is found beneath pavement, crews prioritize noninvasive assessment before any cutting or lifting. Using ground-penetrating radar (GPR) scans, utility maps, and small core samples, they determine depth, material, and surrounding utilities to plan safe access.
After confirming location, crews employ targeted saw cutting, pneumatic lifts, and shoring if needed. They then replace pavement and document location for future reference.
Quick Reference Checklist for Finding a Valve Box
A concise checklist helps field crews move from planning to a confirmed valve box quickly and consistently.
It should cover actions before starting, steps to follow while searching, and documentation once the box is located. Clear, repeatable items reduce search time and prevent missed steps.
- Verify maps, utilities permits, and required tools before going on site
- Use systematic grid or landmark-based searching and hand tools safely during the search
- Confirm valve function and note precise location with GPS or measured offsets after finding
- Update records, label the box, and inform relevant team members or databases
Pre-search checklist
Typically, technicians consult a concise pre-search checklist before beginning a valve box search to guarantee safety, efficiency, and minimal digging.
Items include utility locate confirmation, site access permission, required permits, weather and lighting assessment, appropriate tools and PPE inventory, utility maps and valve records, contact numbers for utility providers, and a brief safety briefing.
All items are verified before entry to the field.
Field checklist during search
With the pre-search items confirmed, the field checklist directs on-site actions to locate a valve box quickly and safely.
Inspect surface markers, flags, and utility maps; probe along predicted alignments; use locator/metal detector systematically; clear vegetation and debris; listen for drainage or hollow sounds; mark probable spots with nonpermanent flags; proceed cautiously near structures and lines; pause and reassess if unclear signals appear.
Post-find documentation and labeling
Document the find immediately using a consistent, field-tested format that captures location, depth, condition, and any identifying markers.
Record GPS, sketch nearby landmarks, note depth and cover type, and photograph orientation.
Label the box with durable, weatherproof tags and update site maps and maintenance logs promptly to aid future searches.
- GPS coordinates and sketch
- Depth and cover description
- Photo with orientation
- Durable tag and log update
Conclusion
Swift success spotlights sensible steps: seasoned searchers systematically scan surface signs, study schematics, and sweep soil with sensors. Methodical measures minimize mistakes, maintain mains, and meet municipal mandates. Promptly pausing to probe probable placements prevents pricey pipe problems. Clear canvassing, careful marking, and consistent care cultivate confidence. When complications complicate conclusions, competent contractors can complete complex calls. Ultimately, steady strategy saves time, spares structures, and secures service systems for sustained satisfaction.