How to Install a Pressure Regulator at the Water Meter: Step-by-Step DIY Guide
Installing a pressure regulator at your water meter is a straightforward DIY project that can help stabilize mains pressure throughout your plumbing system. To do this, you’ll need basic plumbing skills, shut off the water at the meter, use isolation valves, and select the appropriate regulator. Ensure you have unions or adapters for connections, install the regulator in the correct orientation, and create leak-free joints with proper sealant. After installation, test the downstream pressure with gauges under flow conditions and adjust to your desired setpoint. For further assistance, including troubleshooting, maintenance tips, and detailed step-by-step guidance, continue reading.
What a Pressure Regulator Does and Why It Belongs at the Water Meter
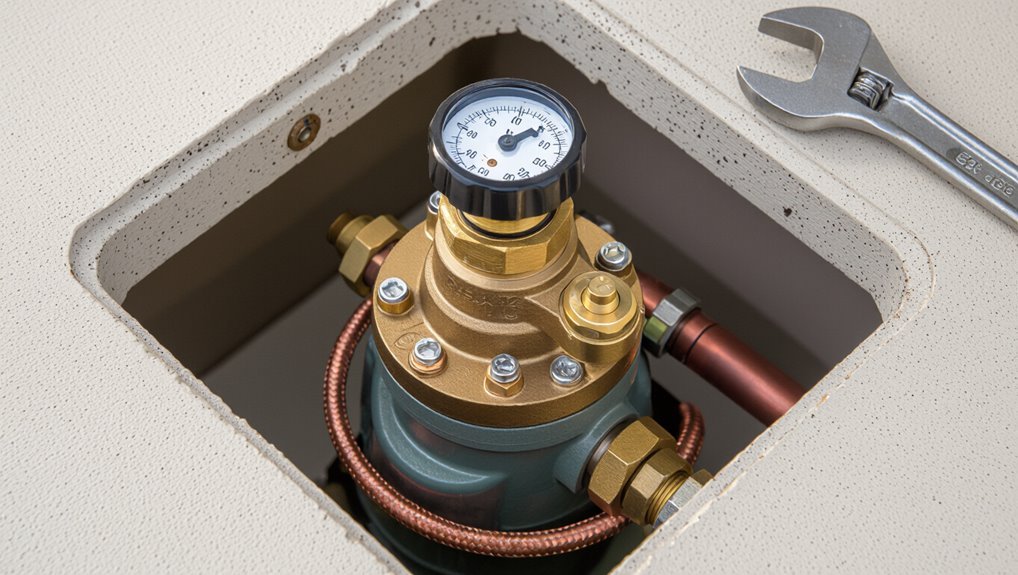
A pressure regulator reduces and stabilizes incoming mains pressure to a safe, consistent level for household plumbing and fixtures.
Placing the regulator at the water meter protects the whole system, minimizes pressure-related damage, and prevents upstream fluctuations from affecting the home.
Before installation, local codes, utility requirements, and warranty terms should be checked to guarantee proper placement and compliance.
How a pressure regulator controls household water pressure
Many homes receive water at pressures that fluctuate with municipal supply and elevation. A pressure regulator installed at the water meter reduces those variations to a steady, safe level for household plumbing and fixtures.
The device senses inlet pressure, compresses a spring-loaded diaphragm to throttle flow, and maintains set downstream pressure.
Instructions on how to install a pressure regulator at the water meter guarantee proper placement and adjustment.
Benefits of installing at the water meter vs elsewhere
Placing the pressure regulator at the water meter offers the most effective control because it moderates incoming pressure for the entire plumbing system before any branch lines or fixtures are fed.
This location prevents overpressure damage, reduces stress on fittings and fixtures, simplifies diagnostics, and provides consistent pressure management for the whole property.
It also centralizes maintenance and minimizes need for multiple regulators.
Local code, utility, and warranty considerations before installation
Compliance with local codes, utility rules, and warranty terms is essential before installing a pressure regulator at the water meter to guarantee legal, functional, and financial protection.
Review municipal plumbing codes, utility requirements for meter access or backflow prevention, and manufacturer warranty conditions that may void coverage if improperly installed.
Obtain permits, notify the utility when required, and document compliance to avoid fines or denied claims.
Quick overview: Install outcome and required skill level
A properly installed pressure regulator typically yields stable household water pressure in the 40–60 psi range and reduces pressure-related wear on pipes and fixtures.
Basic installation requires intermediate DIY plumbing skills—comfort with shutoffs, pipe cutting, and threaded or soldered connections.
Homeowners should hire a licensed plumber if the main shutoff is unclear, the supply line is corroded, or local codes require a permit.
Typical results to expect (pressure range, performance)
After installation, homeowners can expect downstream water pressure to fall within the regulator’s specified range—commonly 40–60 psi for residential systems—with performance stabilizing within minutes to an hour as the device seats and any trapped air clears.
Typical results include reduced pressure spikes, steadier flow during simultaneous fixtures, and fewer appliance stresses.
Minor adjustments may be needed to fine-tune outlet pressure to target settings.
Recommended skill level and when to call a pro
With downstream pressure stabilizing into the regulator’s designated range and only minor fine-tuning usually required, determining who should attempt the installation depends on the homeowner’s comfort with basic plumbing and local code requirements.
Suitable for competent DIYers familiar with shutoffs, soldering or compression fittings, and pressure testing.
Call a licensed plumber for meter work, gas-line adjacencies, permit mandates, rusty piping, or uncertain diagnostics.
Tools, materials, and parts checklist
A concise checklist helps guarantee the installation proceeds smoothly and safely by listing every required tool, part, and safety item.
- Adjustable wrench, tubing cutter, pipe thread sealant
- Regulator sized to system pressure, shutoff valves, unions/adapters
- Pressure gauges, Teflon tape or pipe dope, gloves and eye protection
The following section explains selection and sizing, compatible fittings, and sealing methods.
Essential tools
Several specific hand tools, safety items, fittings, and replacement parts are required before beginning a pressure regulator installation.
Essential tools include adjustable wrenches, pipe wrenches, tubing cutters, plumber’s tape, thread sealant, and a pressure gauge.
Safety gear: gloves, eye protection, and a bucket.
Additional parts: replacement regulator, isolation valves, compression fittings or unions, and appropriate pipe adapters.
Regulator types and sizing options
Although regulator selection depends on application-specific flow and pressure requirements, installers should first identify the regulator type—single-stage, dual-stage, or pilot-operated—and the required size and connection style to guarantee proper performance.
Then assess expected peak flow, inlet pressure range, and desired downstream setpoint. Choose materials compatible with potable water, review Cv/flow charts, and confirm pressure and temperature ratings match system demands.
Fittings, shutoff valves, unions, and adapters
Before beginning installation, compile a concise checklist of fittings, shutoff valves, unions, and adapters tailored to the regulator’s connection type and pipe material.
Include inlet and outlet couplings (brass, copper, or NPT), isolation ball valves sized to match pipe, a union for regulator removal, pressure-rated adapters or reducers, and any threaded-to-sweat or compression fittings required.
Verify material compatibility and pressure ratings.
Sealing materials, gauges, and safety gear
With the fittings, valves, unions, and adapters identified, attention shifts to the sealing materials, gauges, and safety gear required to complete a reliable regulator installation.
Recommended items include thread seal tape, pipe dope compatible with potable water, pressure gauges for inlet and outlet, hose bib adapters, adjustable wrenches, pipe cutters, safety glasses, gloves, and a bucket.
Verify gauge accuracy and PPE condition.
How to choose the right pressure regulator for your home
Before selecting a regulator, the homeowner should measure the existing water pressure and estimate peak flow requirements to guarantee proper sizing.
The correct unit must match the pipe diameter and flow rate, and buyers should compare adjustable versus fixed models plus useful features like bypasses and gauge ports.
Cost and brand reputation also influence the choice, with common manufacturers offering a range of prices and warranties.
Measuring existing water pressure and flow requirements
Determining existing water pressure and household flow needs begins with two measurements: static pressure at the main supply and dynamic pressure under typical use, plus an inventory of peak flow fixtures.
Use a reliable gauge to record psi when no taps run, then during normal simultaneous usage. Note pressure drops and measure fixture flow rates (gpm) with a bucket and timer to establish real-world demand.
Matching regulator size (pipe diameter and flow rate)
Once the household’s pressure and peak flow are known, selecting a regulator requires matching the home’s pipe diameter and peak gallons-per-minute to a model whose rated flow (Cv or gpm) exceeds that demand while fitting the plumbing size.
The installer compares pipe nominal size and required gpm to manufacturer flow charts, confirms pressure drop at peak flow stays acceptable, and picks appropriate end connections.
Features to consider: adjustable vs fixed, bypass, gauge ports
After matching pipe size and flow capacity to a regulator model, attention turns to specific features that affect performance and convenience.
Adjustable regulators allow fine-tuning and accommodate pressure changes; fixed units offer simplicity and reliability.
Built‑in bypasses maintain flow during maintenance; external bypasses permit isolation.
Gauge ports enable pressure verification and troubleshooting.
Choose features based on adjustability needs, service access, and diagnostic requirements.
Common brands and cost ranges
Several reputable manufacturers dominate the residential pressure regulator market, each offering models with distinct features and price points to suit different needs.
Brands like Watts, Sioux Chief, and Apollo are common choices; selection depends on flow capacity, adjustability, and materials.
Typical cost ranges:
- Entry-level brass regulators: $40–$80
- Mid-range adjustable models with gauge ports: $90–$180
- Commercial-grade or specialty units: $200+
Step-by-step installation at the water meter
The technician begins by preparing the site: locate the meter, shut off the main, and drain the system.
Next, remove any bypass components or cut and prepare the pipe section, then fit isolation valves and unions to allow future maintenance.
Finally, install the regulator with correct orientation and supports, reconnect piping using proper sealants and specified torque.
Step 1 Prepare: locate meter, shut off main, drain system
Locate the water meter and confirm the home’s main shutoff before beginning work; identifying the meter guarantees access to the main valve and any required fittings.
Inspect the area for obstructions, note pipe orientation and fittings, and warn occupants.
Shut off the main valve, open a downstream faucet and a high point to relieve pressure, then verify flow has stopped before proceeding.
Step 2 Remove meter bypass components or prepare pipe section
Begin by removing any meter bypass assemblies or cutting a short section of pipe to create a clean working space for the regulator; this confirms a straight run of pipe and accessible fittings for installation.
Then clean pipe ends, deburr and square cuts, and inspect threads or copper for damage.
Measure for regulator length, mark alignment, and verify debris-free surfaces before proceeding to fitting.
Step 3 Fit isolation valves and unions for future maintenance
Install isolation valves and unions on either side of the regulator to enable future servicing without shutting off the entire supply.
The installer fits compatible ball valves closely flanking the regulator inlet and outlet, adding unions for quick disassembly.
Guarantee proper orientation, accessible handles, rated pressure, and leak-tight seals.
Test each valve and union under pressure for correct operation before proceeding to the next step.
Step 4 Install the regulator with correct orientation and supports
With the isolation valves and unions in place, the regulator can be set into the meter run so it can be removed or serviced without disrupting the main supply.
The regulator must be installed in the correct flow direction, level and supported to prevent strain on connections. Use adjustable brackets or straps to secure the body, allowing access to adjustment screw and gauge ports while minimizing vibration.
Step 5 Reconnect piping, use proper sealants and torque specs
Reconnect the piping to the regulator using the approved thread sealant or tape and tighten fittings to the manufacturer’s specified torque to guarantee leak-free joints and avoid over-stressing components.
Use compatible sealants for metal or plastic, apply tape clockwise, and hand-start threads to prevent cross-threading.
Support piping near connections, install isolation valves if required, and label fittings for future maintenance.
Step 6 Slowly restore supply and check for leaks
Open the upstream isolation valve slowly to reintroduce water pressure to the meter and regulator while monitoring for any immediate signs of leakage or abnormal sounds.
Observe all joints, fittings, and the regulator body for drips or moisture.
Tighten accessible connections if small leaks appear, then recheck.
Verify downstream fixtures receive water; note any persistent leaks for repair before completing the installation.
Step 7 Adjust regulator and set desired pressure
After confirming the supply is restored and no significant leaks remain, the technician proceeds to adjust the pressure regulator to the target setting.
Using a calibrated gauge, the technician turns the adjustment screw slowly while monitoring outlet pressure. Small increments prevent overshoot.
Once the gauge reads the desired psi, the adjustment is secured, locknut tightened, and the area rechecked for any emerging seepage.
Step 8 Final pressure test and verify operation under load
Begin a controlled final pressure test by running multiple fixtures and appliances simultaneously to simulate peak demand while observing the outlet gauge for stability and any pressure drops.
Record baseline and loaded readings, watch for oscillation or slow recovery, and inspect for leaks.
Confirm regulator maintains set pressure within tolerance. If deviations occur, recheck adjustments, inlet strainers, and downstream valves before concluding the installation.
How to test and verify performance after installation
After installation, testing begins by attaching a pressure gauge to an outdoor hose bib and an indoor fixture to compare static and running pressures.
Flow tests should then be performed while opening multiple fixtures to observe any pressure drops under demand.
Readings are interpreted against manufacturer specifications and common tolerances to confirm proper regulator performance.
Using a pressure gauge at outdoor hose and indoor fixture
To verify the regulator’s performance, measure static and dynamic water pressure at an outdoor hose bib and an interior fixture using a reliable gauge.
Compare readings to the regulator’s setpoint and the manufacturer’s tolerances to confirm proper operation.
Record pressures with valves closed and open briefly to simulate demand. Note any large deviations, and repeat after adjustments.
Document results for future reference.
Flow tests and checking for pressure drops under demand
Run a series of flow tests to confirm the regulator maintains set pressure under real demand: measure flow rates and pressures simultaneously at representative fixtures (outdoor hose bib, kitchen sink, shower) while varying the number of open outlets, noting pressure at steady flow and during spikes.
Compare results to baseline static readings and the regulator’s specified tolerance to identify any pressure drops or instability. Record values, inspect for leaks, and repeat tests after minor adjustments.
Interpreting common readings and acceptable tolerances
Having completed flow tests and noted any pressure drops under varying demand, the next step is interpreting those readings against expected performance.
Readings should match the regulator setpoint within ±5 psi during normal demand; transient spikes under 10 psi above setpoint are acceptable briefly.
Persistent deviation, oscillation, or slow recovery indicates adjustment, debris, or replacement.
Document results and retest after fixes.
Troubleshooting common problems
After verifying operation, attention turns to common faults that can appear with new pressure regulators.
Typical issues include persistent high or low pressure, audible noise or vibration (including water hammer), visible leaks at fittings or the regulator body, and regulators that stick or fail to adjust.
Each problem has discrete causes and corrective actions that should be checked methodically.
Persistent high or low pressure after installation
When pressure remains consistently above or below the setpoint after installing a regulator, it signals either an adjustment issue, an incompatible component, or an installation fault that requires systematic troubleshooting.
The installer should verify setpoint, recheck inlet pressure, inspect for debris or bypasses, confirm correct regulator size and orientation, guarantee shutoff valves are fully open, and test after incremental adjustments before replacing the unit.
Noisy regulator, water hammer, or vibration
Addressing noise, water hammer, and vibration requires isolating mechanical and hydraulic causes quickly to prevent damage.
Technicians check mounting, loose bolts, and pipe hangers first. They inspect the regulator internals for worn diaphragms, springs, or debris.
Adding or adjusting water hammer arrestors, installing vibration dampeners, or reorienting flow can resolve issues.
Test at varied flow rates to confirm elimination.
Leaks at fittings or regulator body
Inspect fittings and body joints immediately when leaks are observed, since small drips can signal seal failure, loose connections, or cracked housing that will worsen under pressure.
Tighten compression nuts or replace seals first; use thread sealant compatible with potable water where required.
If leakage persists, isolate and depressurize the line, remove the regulator, inspect O-rings and diaphragms, and replace the unit if housing is compromised.
Regulator sticking or failing to adjust
If tightening fittings and replacing seals do not stop leaks, symptoms may point to the regulator itself sticking or failing to respond to adjustment.
Corrosion, debris, or a weakened spring can prevent diaphragm movement.
Recommend isolating the unit, relieving pressure, disassembling per manufacturer instructions, inspecting internal parts, cleaning or replacing corroded components, and reinstalling or replacing the regulator if adjustment remains ineffective.
Maintenance, inspection schedule, and lifespan
Routine checks and cleaning should be performed at regular intervals to guarantee consistent performance and prevent buildup.
Guidance on when to rebuild, replace, or upgrade the regulator depends on wear indicators, loss of accuracy, or changes in system requirements.
Seasonal precautions, including winterizing and freeze protection, help extend service life and avoid cold-weather failures.
Routine checks and cleaning intervals
Because a pressure regulator’s performance gradually degrades with use, a consistent maintenance and inspection schedule is essential to guarantee safe operation and extend service life.
Inspect visually and test downstream pressure monthly for fluctuations.
Clean screen or strainer and flush debris every six months; remove sediment and mineral buildup annually.
Record results, note trends, and tighten fittings as needed to prevent leaks and corrosion.
When to rebuild, replace, or upgrade
Monthly inspections and the scheduled cleaning steps outlined above also provide the data points needed to determine when a regulator should be rebuilt, replaced, or upgraded.
Indicators include persistent pressure fluctuation, leaks, corrosion, excessive diaphragm wear, or failure to hold set pressure.
Typical lifespan is 5–15 years; rebuild when serviceable parts remain, replace if damaged or obsolete, and upgrade for higher flow or code compliance.
Winterizing and freeze-protection tips
Any winterization plan should begin well before freezing temperatures arrive, focusing on protecting regulators and associated piping from ice damage.
Inspect insulation, replace compromised wraps, and verify valve operation annually.
Drain or blow out exposed lines, install heat tape where needed, and maintain a small trickle during severe cold.
Expect regulator service life to shorten without consistent inspection and timely repairs.
Safety, permits, and municipal coordination
The installer should verify whether a permit or utility approval is required before beginning work and follow any municipality-specific procedures.
Safe practices around the meter and attention to backflow prevention are essential to protect the system and comply with codes.
Clear documentation of the work, including permits, test results, and operating instructions, should be left for inspectors and future homeowners.
When a permit or utility approval is required
When local codes or utility policies apply, homeowners should verify whether a permit or utility approval is required before installing a pressure regulator.
Requirements vary by jurisdiction and may mandate licensed installers, inspections, or coordination with the water utility.
Contact the local building department or utility, obtain written authorization if needed, and schedule any required inspections to guarantee compliance and avoid fines or service interruptions.
Working safely around the meter and backflow considerations
After confirming permit and utility requirements, attention shifts to safe work around the water meter and preventing backflow into the public system.
Technicians isolate supply, depressurize lines, and use appropriate PPE. Install approved backflow preventers or guarantee the regulator includes one.
Coordinate shutdown times with the utility, avoid cross-connections, and test devices per local codes to protect potable supply and comply with municipal rules.
Documentation to leave for inspectors or future homeowners
Documentation should accompany any pressure regulator installation to verify safety, permits, and municipal coordination for inspectors and future homeowners.
Provide concise records: permit copies, regulator specs, and test readings. Note installation date, installer contact, and any deviations from code.
Include maintenance recommendations and shutoff locations.
- Permit and inspection certificates
- Pressure test logs and regulator settings
- As‑installed diagram and service contact
Cost breakdown and DIY vs professional installation comparison
A concise cost comparison frames whether a homeowner should tackle a pressure regulator replacement or hire a pro. Typical DIY parts and time, common contractor labor plus permit/inspection fees, and clear scenarios that justify hiring a licensed plumber are summarized below. Use the table to compare upfront costs, time, and risk quickly.
| Item | Typical range/example |
|---|---|
| DIY materials & tools | Regulator $40–$200; fittings $10–$50; basic tools on hand |
| DIY time estimate | 1–4 hours for competent DIYer; longer if shutoff/bleed issues arise |
| Pro labor | $150–$500 labor depending on region and complexity |
| Permits & inspections | $50–$300 depending on municipality |
| When to hire a plumber | Complex systems, gas connections, meter-side work, or lack of permit comfort |
Typical DIY materials and time estimate
Most homeowners can expect to gather a handful of basic materials—pressure regulator, pipe fittings, Teflon tape, pipe dope, appropriate wrenches, and thread sealant—plus optional items like a pressure gauge and replacement pipe sections.
Typical DIY time ranges from one to three hours for straightforward installs; complex layouts or corroded pipes can extend this.
Materials commonly cost $50–$200.
Typical pro labor, permit, and inspection costs
While DIY installs can minimize upfront expenses, hiring a licensed plumber typically adds labor, permit, and inspection costs that change the project’s total by hundreds to over a thousand dollars depending on location and complexity.
Typical labor rates range $75–$150+/hour; permits and inspections often add $50–$400.
Overall professional installs commonly cost $300–$1,500+, versus $50–$300 for DIY materials.
Scenarios when hiring a licensed plumber is strongly recommended
Consider hiring a licensed plumber when the pressure regulator replacement involves complex plumbing configurations, city code triggers, or risks to the main water supply.
Professional labor typically adds $200–$1,200+ for time and expertise. Permits and inspections can cost $50–$400, and specialized parts or shutoff work may raise total expenses.
Whereas a straightforward DIY swap of a single accessible regulator often limits outlay to $50–$300 in materials.
Complex homes, multi-branch mains, failed regulators with leaks, lack of shutoff access, warranty or code compliance, and homeowner uncertainty justify hiring a pro to guarantee safety, correct pressure settings, and documented inspections.
Additional tips and best practices
Sizing should match flow requirements and inlet conditions to prevent pressure drop or cavitation.
Mounting should include proper support and vibration isolation to protect regulator integrity and connections.
The set pressure should be clearly tagged and recorded for maintenance and verification.
Sizing tips to avoid pressure loss or cavitation
Properly matching a pressure regulator’s flow capacity to system demand prevents excessive pressure drop and reduces the risk of cavitation.
Determine peak flow rates (GPM), account for simultaneous fixtures, and select a regulator with adequate Cv or flow coefficient.
Verify inlet pressure margins and avoid undersized ports.
When in doubt, choose a larger regulator or staged units to maintain stable downstream pressure without turbulence.
Mounting, support, and vibration isolation recommendations
Mount regulators on a rigid, level surface close to the source to minimize unsupported piping and maintain accurate sensing. Use manufacturer-recommended mounting brackets or flanges, align piping to avoid side loads on the regulator body, and incorporate flexible connectors or vibration isolators where pumps, compressors, or long runs could transmit vibration or thermal movement.
Support nearby piping with clamps, bracing, and hangers; avoid stress at joints; verify clearances for maintenance.
How to tag and record the set pressure for future reference
Document the regulator’s set pressure immediately after adjustment and attach a durable tag that includes the set value, units, date, and initials of the technician.
Record the same details in a maintenance log or digital file, noting location and any observations. Store records accessibly for inspectors and future adjustments.
- Weatherproof metal tag on valve body
- Photo of gauge with timestamp
- Entry in maintenance database
Conclusion
A pressure regulator at the water meter protects plumbing and appliances by keeping pressure steady. Homeowners can typically install one themselves with basic plumbing skills and common tools, though some worry about meter or code issues. Most municipalities allow DIY installations if permitted and inspected; coordinating with the water utility and following local codes removes that barrier. With proper part selection, careful installation, and routine checks, a regulator delivers reliable, long-term performance and peace of mind.