
How to Stop a Water Hydrant From Leaking: Step-By-Step Fixes and When to Call a Pro
To stop a leaking water hydrant, first shut off the water supply, then secure the area for safety. Next, drain the pressure, remove the bonnet, and replace any worn seals, O-rings, or valve seats. Reassemble the hydrant and test for leaks. If you encounter major breaks, underground leaks, or high-pressure jets, it’s best to contact a utility or licensed plumber for help. Continue reading for detailed step-by-step procedures, essential tools, and guidance on when to call for professional assistance.
Why your water hydrant might be leaking
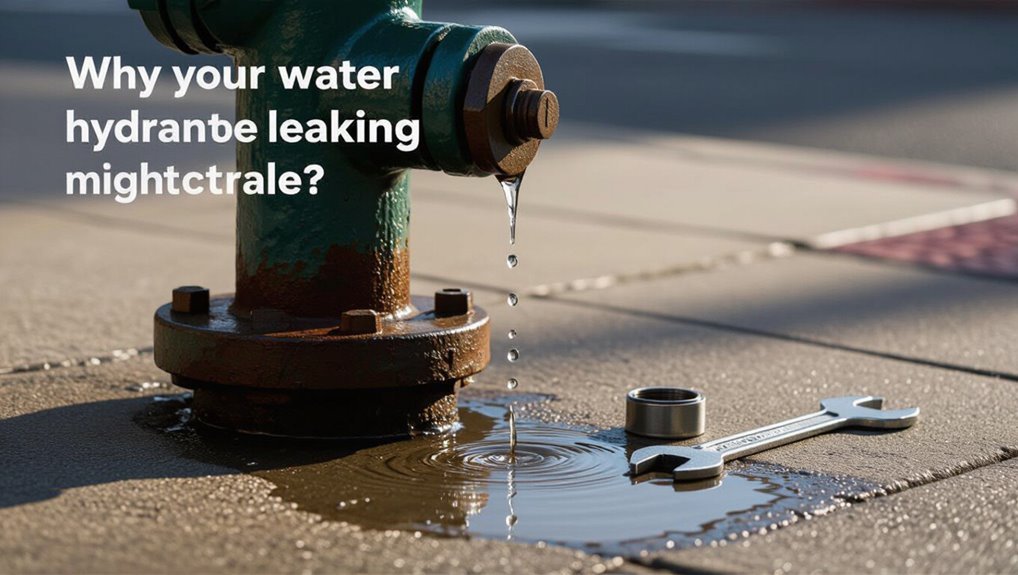
Leaks commonly stem from worn seals, a cracked bonnet, loose packing, or a corroded valve.
They can appear at the spout, stem, base, or from underground fittings, each location indicating different repair needs.
Evaluating the flow rate, persistence, and nearby hazards helps determine severity and necessary safety precautions.
Common causes of hydrant leaks (worn seals, cracked bonnet, loose packing, corroded valve)
A leaking hydrant usually stems from a small number of mechanical failures: worn rubber seals that no longer hold pressure, a cracked or corroded bonnet that allows water to escape, packing around the stem that has loosened or deteriorated, or a valve seat eaten by corrosion.
Identification focuses on seal replacement, bonnet repair, tightening or replacing packing, and restoring the corroded valve—key steps in how to stop a water hydrant from leaking.
Types of hydrant leaks and where they occur (spout, stem, base, underground)
Beyond identifying the worn seals, damaged bonnet, loose packing, or corroded valve, it helps to locate exactly where the hydrant is failing: spout, stem, base, or underground.
Spout leaks drip from outlets or threads. Stem leaks seep around the operating nut or packing. Base leaks appear at the barrel-to-base joint. Underground leaks cause wet soil, sinkholes, or reduced pressure above grade.
How to assess leak severity and safety concerns
How severely a hydrant is leaking determines both repair urgency and public safety measures.
An observer should note flow rate, spray pattern, and nearby erosion or pooling. High-pressure jets, undermining of pavement, or contamination risk require immediate isolation and utility notification.
Minor drips can be monitored and scheduled for repair.
Always maintain scene safety: traffic control, barriers, and PPE as needed.
Quick steps to stop an active leak immediately
First, the operator secures the water by using the street or service shutoff valve to stop flow.
Next, temporary measures such as hose clamps, compression fittings, or packing material are applied to reduce leakage until repairs can be made.
If the leak cannot be controlled quickly or affects public safety, the hydrant is isolated and the water utility and emergency authorities are notified.
Emergency shutoff procedures (shutting valve at street or service)
Locate and close the nearest shutoff valve to halt flow immediately: identify the street-level curb stop or the service valve inside the meter box.
Use a curb key or wrench to turn clockwise until resistance indicates it is fully seated.
Verify flow has stopped by checking the hydrant or downstream fixtures.
If inaccessible or stubborn, contact the water utility; document valve position and report leak location.
Temporary fixes to reduce flow (hose clamps, compression, packing material)
Apply a temporary mechanical restraint to reduce an active leak immediately: tighten a hose clamp or C‑clamp over a rubber patch or folded cloth around the leak, use a compression sleeve or pipe repair clamp sized to the pipe, or press packing material (rubber, plumber’s putty, or gasket compound) into the breach to slow flow until a permanent repair or utility intervention is possible.
After securing, monitor for pressure and seepage.
When to isolate the hydrant and notify authorities
Isolate the hydrant and notify authorities immediately when a leak cannot be controlled by temporary measures or poses a safety, flooding, or contamination risk; shutting nearby valves to stop flow and contacting the utility or fire department prevents escalation and guarantees a coordinated, authorized shutdown.
Then cordon the area, warn bystanders, record location/details, and await trained crews to perform full isolation, repair, and system testing.
Tools and materials you’ll need for repairs
The next section lists the essential tools and parts required to repair a leaking hydrant, including adjustable and strap wrenches, a packing tool, and replacement seals.
It also outlines common replacement components by hydrant part—packing gland, O-rings, bonnet gasket, and valve seat—and recommends keeping spares on hand.
Finally, it covers necessary safety gear and the need to secure permits and utility locates before beginning work.
Basic toolkit for hydrant repair (wrenches, packing tool, replacement seals)
Gathering the right tools before starting hydrant repair guarantees the job proceeds quickly and safely.
A basic toolkit should include adjustable and hydrant wrenches, a packing removal and installation tool, torque wrench, channel locks, and a nipple wrench.
Also useful are replacement seals stored in labeled bags, silicone grease, shop towels, and a flashlight.
Protective gloves and safety glasses complete the set.
Replacement parts list by hydrant component (packing gland, O-rings, bonnet gasket, valve seat)
A concise list of replacement parts organized by hydrant component helps guarantee correct parts are on hand before repairs begin.
Packing gland kits: packing rings, gland nut, lubricants.
Stem O-rings: size-specific elastomers.
Bonnet gasket: flat or molded gasket matching bonnet diameter.
Valve seat: replaceable seat ring and screws.
Include stainless fasteners and thread sealant compatible with potable water.
Safety gear and permit/utility locate requirements
Several essential safety items and pre-work checks are required before hydrant repairs begin: hard hat, safety glasses, high-visibility vest, steel-toe boots, gloves, hearing protection, and traffic-control devices appropriate to the site.
Additionally, confirm required permits, municipal authorization, and utility locates (call-before-you-dig) to avoid underground services.
Maintain written approvals on-site and follow local safety and environmental regulations.
Step-by-step repair for common hydrant leaks
The following section outlines concise, step-by-step procedures for the most common hydrant leaks.
It covers repairing a leaking stem or packing gland, replacing a worn valve seat or O-ring, addressing a cracked bonnet or spout, and fixing leaks at the base or underground connections.
Each repair is presented with the basic sequence of diagnosis, parts removal, replacement or repair, and testing.
Repairing a leaking stem/packing gland
The procedure begins by shutting off the hydrant and fully draining residual pressure to guarantee a safe workspace.
Next, the bonnet is removed to access the stem and packing gland so the worn packing can be inspected and extracted.
Finally, new packing is installed, the bonnet reassembled, and the hydrant tested for leaks before returning to service.
Shutoff and drain procedure
Begin by isolating the hydrant from the water supply and relieving internal pressure to prevent flow during packing replacement.
Close the supply valve, then open the drain or auxiliary outlet to evacuate residual water.
Verify zero pressure with a gauge or slow-drip check.
Once drained, cap or plug openings to prevent contamination and proceed only when the hydrant remains depressurized and dry.
Removing bonnet and accessing packing
Remove the bonnet assembly using appropriate-sized wrenches and steady, even force to avoid damaging threads or the stem.
After removal, inspect the exposed stem, packing gland, and chamber for corrosion, debris, and wear. Photograph or note orientation and component order.
Clear sediment with a brush and clean solvent.
Verify stem moves freely and packing cavity is fully accessible before proceeding to replacement steps.
Replacing packing and reassembling
Slide out the old packing and prepare replacement rings matched to the stem diameter and hydrant model.
Insert rings sequentially into the gland, compressing each lightly with a packing tool.
Reinstall the gland nut and torque to manufacturer specifications.
Reassemble the bonnet, reconnect operating nut and cap, then test for leaks under normal pressure.
Tighten or readjust if minor seepage persists.
Replacing a leaking valve seat or O-ring
The technician begins by removing the hydrant bonnet and extracting the valve assembly to access the seat and O-ring.
Each component is inspected for wear or damage and replaced with correct-size parts as needed.
After reassembly, the hydrant is pressurized and checked carefully for leaks at the repaired joint.
Removing hydrant bonnet and valve assembly
Begin by shutting off the water supply and relieving residual pressure to guarantee a safe working environment before unbolting the hydrant bonnet.
Use appropriate wrenches, loosen bonnet bolts evenly, and lift the bonnet straight to avoid damaging seals.
Withdraw the valve stem and assembly vertically, noting orientation and washer placement.
Place removed parts on a clean surface for inspection and replacement.
Inspecting and replacing valve components
With the bonnet, valve stem, and assembly laid out for inspection, attention shifts to the valve seat and O-ring as the most common sources of hydrant leakage.
The technician inspects for wear, gouges, and hardened rubber. Corroded seats are replaced; O-rings are matched by size and material, lubricated with approved grease, and seated properly.
Reassemble parts ensuring correct orientation and torque.
Testing for leaks after reassembly
Power is restored slowly and the hydrant is observed closely for any signs of leakage.
After reassembly, the technician opens the valve gradually, monitoring joints, bonnet, and outlet for drips or weeps.
Pressure is cycled and fittings are wiped to reveal slow leaks.
Any seepage prompts shutdown, tightening, or replacement of seals; successful dry operation confirms repair.
Fixing a cracked bonnet or spout
When a bonnet or spout shows a crack, the technician first determines whether a field repair will suffice or if full component replacement is necessary based on crack size, location, and pressure exposure.
Small, nonstructural hairline cracks may be managed temporarily with approved sealants, wraps, or epoxy to stop leakage until a replacement can be scheduled.
Severe cracks, wall breaches, or damage at mounting points require immediate removal and installation of a new bonnet or spout to restore safe, long-term operation.
Assessing if field repair or replacement is required
Inspect the hydrant to determine whether a cracked bonnet or spout can be safely repaired on site or warrants full replacement.
Evaluate crack size, corrosion extent, structural integrity, and leak rate.
Consider access, available parts, tools, and safety risks.
If cracks compromise pressure-bearing surfaces or repair would be temporary, plan full component replacement and schedule professional intervention to guarantee code compliance and long-term reliability.
Temporary sealing methods vs full component replacement
Distinguish quickly between temporary sealing methods and full component replacement by matching the leak’s cause, severity, and operational needs:
Temporary seals—epoxy putty, silicone, rubber patches, or hose clamps—serve short-term containment, low-pressure leaks, or awaiting parts.
Full replacement—bonnet, spout, or gate assembly—addresses structural cracks, recurring failure, or safety/pressure requirements.
Choose replacement for durability and code compliance; use seals for emergency mitigation only.
Repairing leaks at the base or underground connections
Next, attention turns to leaks at the hydrant base and underground joints, where access and sealing are more involved.
The process begins with safely exposing the buried connection, then replacing worn gaskets or damaged pipe sections, and finally backfilling and conducting pressure and flush testing.
Proper sequencing and safety precautions guarantee a durable repair and restore reliable hydrant performance.
Exposing the buried connection safely
Begin by locating the hydrant’s base and marking the area to be excavated, ensuring all utility lines are identified and the main water supply is shut off; this prevents accidental flooding and injury while exposing the buried connection.
Use hand tools near utilities, dig outward to reveal the joint, clear soil without damaging pipes, and support exposed fittings.
Photograph and document conditions before further work.
Replacing gaskets or pipe sections
Remove remaining soil to expose the flange, coupling, and gasket areas. Then inspect the components to determine whether a gasket replacement or a short section of pipe is required.
Shut water, unbolt the flange or cut the coupling, and remove the damaged gasket or corroded pipe.
Fit a correct-size gasket or slip in replacement pipe with compatible couplings. Torque bolts evenly and check for alignment before restoring service.
Backfilling and post-repair testing
After the repair is confirmed, the trench should be backfilled and the assembly tested before full service is restored.
Backfill in layers, compacting to prevent settling and protect the pipe. Reinstall surface materials and restore grade.
Gradually pressurize the hydrant, inspect for leaks, verify valve operation and pressure stability.
Document the repair and monitor the site for several days for signs of movement or seepage.
How to test and confirm the leak is fixed
After repairs, the technician should perform pressure and flow checks to verify the hydrant returns to normal operating specifications.
A brief visual inspection checklist—looking for residual drips, wet soil, and loose fittings—confirms external integrity.
If conditions were severe or repairs extensive, extended monitoring over several days is recommended to catch intermittent or slow leaks.
Pressure and flow checks
A simple set of pressure and flow checks confirms whether a repaired hydrant holds under normal service conditions: measure static pressure at the hydrant with a gauge, record residual pressure while flowing at a controlled rate, and compare readings to pre-repair baselines or municipal standards to verify the leak is sealed.
Include a flow meter or pitot readings, note pressure drop, and repeat tests to ascertain stability.
Visual inspection checklist after repair
One careful visual inspection immediately following repair helps confirm the leak is fixed and identifies any overlooked issues.
Inspect stem, bonnet and packing for dampness; check base and surrounding soil for pooling or wetness; verify hose connections and caps are dry under operating pressure; examine bolts and seals for proper seating; note any new cracks, corrosion, or drips.
Document findings and retest briefly.
When to perform extended monitoring
Following the immediate visual check, extended monitoring should begin to guarantee the repair holds under normal and variable conditions.
The hydrant is observed over 24–72 hours, noting pressure, flow, and any seepage during temperature or usage changes.
Record readings and photos at intervals. If any recurrence appears, isolate times, retest after adjustments, and consult a professional if leaks persist or worsen.
Costs, timeframes, and when repair may require replacement
Typical repair jobs—such as replacing packing, seals, or a nozzle—often fall within a modest cost range, while major valve or barrel work can be substantially more expensive.
Minor fixes are frequently completed in a few hours, whereas extensive repairs or parts ordered to spec can take days to weeks.
If recurrent failures, widespread corrosion, or structural damage are present, replacement is often more cost-effective than repeated repairs.
Typical cost ranges for common repairs and part replacements
When evaluating leaks, homeowners and contractors should expect a range of costs and timeframes driven by the leak source, part availability, and site access; minor valve pack or bonnet washer replacements typically cost $50–$200 and take under an hour, while corroded hydrant stems, broken castings, or frozen lines often require full replacement at $800–$2,500 and several hours to a full day.
| Repair | Typical cost |
|---|---|
| Valve pack/washer | $50–$200 |
| Stem/casting replacement | $800–$2,500 |
How long repairs usually take (minor vs major)
How long a hydrant repair takes depends on whether the issue is minor—such as a worn valve pack or bonnet washer—or major, like a corroded stem, damaged casting, or a frozen supply line.
Minor fixes are often completed in under an hour and cost $50–$200, while major jobs can require several hours to a full day and may necessitate full replacement at $800–$2,500.
Technicians assess access, parts, permits, and safety, which influence duration and final cost.
Signs that full hydrant replacement is more cost-effective
Although repairs can extend the service life of a leaking hydrant, replacement becomes more cost-effective when recurring failures, extensive corrosion, obsolete parts, or compromised structural integrity predict future outages or rising maintenance costs.
In such cases, upfront investment in a new hydrant—typically $800–$2,500—can save time (avoiding repeated multi-hour repairs), reduce cumulative expense, and restore full operational reliability.
Indicators include frequent seal or stem failures, bent or cracked barrels, severe underground corrosion, repeated excavation for patching, lack of available OEM parts, and escalating annual maintenance costs that approach replacement price.
When to call a professional or municipal services
Significant leaks, damaged stems, buried or broken valves, or any work affecting the public water main should be handled by licensed plumbers or municipal utility crews.
Coordination with the water utility is required for permits, street shutoffs, and safe isolation of the hydrant.
When hiring a private service, priority should be given to firms with hydrant repair experience, proper licensing and insurance, and references from local utilities.
Situations that require licensed plumbers or utility crews
Assess the situation promptly to determine whether a leaking hydrant or pipe requires intervention beyond homeowner capabilities.
Major structural damage, high-pressure bursts, visible water mains, contaminated or discolored water, recurring failures after repairs, or leaks near roadways and sidewalks necessitate licensed plumbers or municipal utility crews.
Emergency shutoffs, complex valve replacements, and situations risking public safety should always be escalated to professionals.
Coordinating with water utility, permits, and street shutoffs
When a hydrant leak extends beyond a homeowner’s property or involves street infrastructure, coordination with the local water utility and municipal authorities becomes necessary to secure proper permits, schedule street or sidewalk closures, and authorize any work on mains or curb-stop valves.
The utility assesses risks, issues required permits, arranges shutoffs or traffic control, and documents repairs; municipal approval prevents regulatory violations and liability.
How to choose a qualified hydrant repair service
Who should be called when a hydrant leak exceeds basic homeowner fixes? A licensed municipal contractor or certified water utility technician should be engaged promptly to prevent contamination, street hazards, and service disruption.
- Verify municipal authorization
- Confirm relevant certifications
- Request proof of insurance
- Check equipment and safety protocols
- Obtain written scope, timeline, and cost estimate
Preventive maintenance to avoid future leaks
A regular preventive maintenance program reduces the risk of hydrant failures and extends service life.
It should specify inspection intervals and checklist items (valve operation, seals, paint, and drainage), include seasonal tasks such as winterization and lubrication, and require prompt repairs when issues are found.
Consistent recordkeeping and simple asset management—date-stamped inspections, parts inventories, and repair histories—support scheduling and budget planning.
Routine inspection schedule and what to check
Although routine inspections require only modest time investments, they are essential to catching small issues before they become leaks.
Inspect monthly for visible drips, corrosion, loose packing nuts, damaged caps, and leaking valve stems.
Verify clear access, proper drainage at the base, and intact identification tags.
Log findings, note trends, and schedule repairs for any irregularities to prevent deterioration.
Seasonal maintenance steps (winterization, lubrication)
Routine inspections reveal issues that seasonal maintenance addresses more permanently. Winterization and lubrication are the next steps to prevent freeze damage and wear that lead to leaks.
Crews drain cavities, operate valves to expel water, apply appropriate antifreeze or insulating wraps where required, and lubricate stems, packing nuts, and operating nuts with manufacturer‑recommended greases to guarantee smooth operation and seal longevity.
Recordkeeping and asset management tips
Documenting maintenance activities and asset data systematically confirms hydrants remain reliable and leaks are prevented.
A centralized log tracks inspections, repairs, part replacements, and schedules, enabling trend analysis and budget planning.
Digital tags and maps speed localization; standardized codes confirm consistency. Clear ownership and review cycles support accountability and timely interventions.
- Inspection dates and outcomes
- Parts used and serial numbers
- Next service due
- Responsible technician
- GIS location and photos
Troubleshooting uncommon problems and pitfalls
Uncommon hydrant issues often stem from corrosion, freeze damage, or improper past repairs, each requiring distinct diagnostic steps and long-term remedies.
Corrosion-related failures may need part replacement and protective coatings, while frozen or burst components demand careful thawing and structural assessment.
Common repair mistakes—incorrect valve seating, wrong gasket types, or insufficient torque—should be identified and corrected to prevent recurrence.
Corrosion-related failures and long-term remedies
Although often gradual and invisible, corrosion is a leading cause of hydrant failure that can compromise seals, obstruct valves, and weaken structural components. Addressing it requires both diagnostic vigilance and long-term interventions tailored to the material, environment, and service history of the unit.
Inspect for pitting, galvanic action, and coating breakdown; remove rust, replace corroded parts, apply compatible coatings, install sacrificial anodes, and schedule regular monitoring to prevent recurrence.
Dealing with frozen hydrants and burst components
Inspect frozen hydrants promptly to prevent ice expansion from cracking barrels, bonnet bolts, or downstream piping; when temperatures drop rapidly, trapped water can turn into pressure that bursts components and creates hidden leaks.
Technicians should thaw safely using controlled heat, avoid open flames, inspect seals, and pressure-test lines.
Replace compromised parts, drain cavities, and monitor for recurring freeze risk or insulation failures.
Common repair mistakes to avoid and how to fix them
Troubleshooters often make preventable errors when repairing hydrants—misidentifying the leak source, using improper replacement parts, or failing to secure fittings—which can worsen damage or cause recurrent leaks.
To avoid this, verify the leak origin, match OEM parts or specified grades, torque nuts to spec, replace worn seals with proper materials, and test under pressure.
If uncertainty remains, consult a licensed hydrant technician.
Resources and reference materials
The section lists key resources for addressing a leaking hydrant, including manufacturer manuals and part lookup tools to guarantee correct components.
It also notes relevant municipal codes and permit resources that govern repairs and replacements.
Recommended suppliers and emergency contact templates are provided to streamline procurement and reporting.
Manufacturer manuals and part lookup
Consulting manufacturer manuals and using official part lookup tools helps identify correct replacement components and follow proper repair procedures for a leaking hydrant.
Manuals provide exploded diagrams, torque specs, and material compatibility. Online part lookup by model or serial number reduces misordering.
Maintaining copies of specifications and revision notices guarantees repairs match original equipment.
Contacting manufacturers for clarifications prevents improper installations and warranty issues.
Relevant municipal codes and permit resources
After confirming correct parts and repair procedures from manufacturer resources, attention shifts to local regulations that govern hydrant work.
Municipal codes often specify who may perform repairs, permit requirements, isolation procedures, backflow prevention, and recordkeeping.
Consult city public works, water utility ordinances, and permit offices for applicable sections, fee schedules, and inspection protocols.
Compliance avoids fines and guarantees public safety.
Recommended suppliers and emergency contact templates
A concise list of recommended suppliers and ready-to-use emergency contact templates helps streamline timely hydrant repairs and minimize service disruptions.
The section provides vetted vendors, parts sources, and printable contact forms for rapid dispatch. Included are municipal liaison contacts, after-hours contractors, and template messages for public advisories, ensuring consistent communication and faster restoration.
- Vetted parts suppliers
- Emergency contractor list
- Municipal liaison contacts
- After-hours dispatch template
- Public advisory message
Conclusion
Leaks can be a nuisance, a hazard, and a drain on resources—so act promptly, act patiently, and act safely. When a quick seal, a tightened coupling, or a replaced washer will do, take the tools, follow the steps, and restore control. When corrosion, complex valves, or municipal mains are involved, step back, call a pro, and confirm liability is covered. Inspect regularly, document repairs, and respect local codes to protect property, people, and peace of mind.
