How to Install a New Water Supply Line: Step-by-Step Guide for DIYers and Plumbers
To install a new water supply line for your home, follow this step-by-step guide that covers everything from planning to maintenance. You’ll learn about selecting materials like PEX or copper, required tools, safety precautions, necessary permits, and common pitfalls to avoid, such as improper soldering or skipping inspections. The installation process includes measuring, cutting, joining, securing, and pressure testing the line. Additionally, you’ll find tips for seasonal care and troubleshooting. Cost and time estimates are provided, along with advice on when it’s best to hire a licensed plumber. Continue reading for detailed procedures to ensure a successful installation.
Overview of Installing a New Water Supply Line
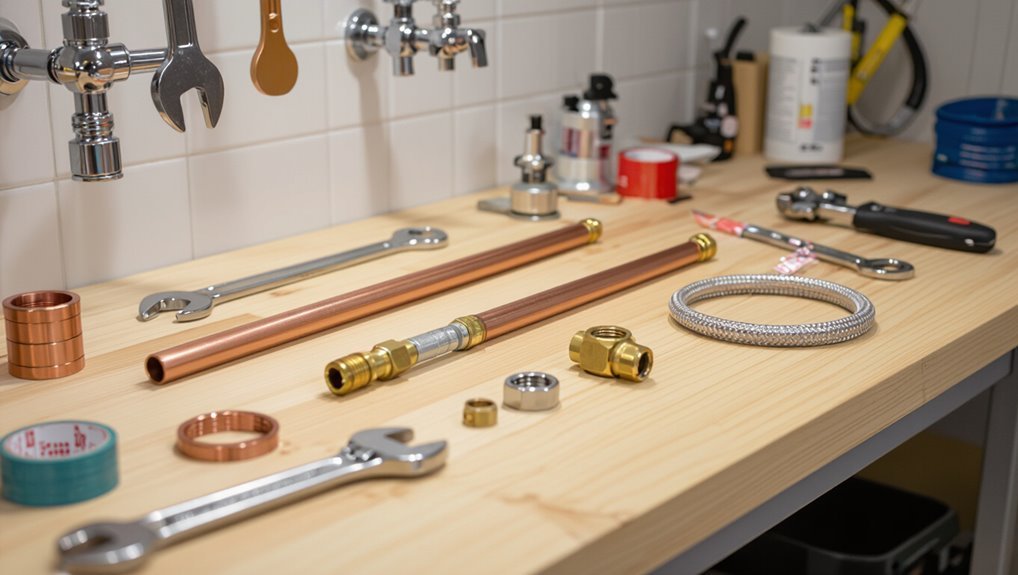
This section outlines what the guide covers—route planning, materials, connections, testing—and identifies which tasks are suitable for a competent DIYer versus those that warrant a licensed plumber.
It also summarizes typical time and cost ranges and the basic skill level and tools required.
Readers are encouraged to assess their experience and local code requirements before proceeding.
What this guide covers and who should attempt the job
Although installing a new water supply line can be straightforward for someone with basic plumbing experience, the guide focuses on tasks, tools, and safety considerations appropriate for a competent DIYer or a licensed professional.
It outlines step-by-step procedures, required materials, common fittings, testing and leak prevention, and code-conscious installation tips for those seeking clear instruction on how to install a new water supply line.
When to hire a licensed plumber versus DIY
After outlining the skills, tools, and steps involved in installing a water supply line, the guide now considers whether the project is appropriate for a competent DIYer or warrants hiring a licensed plumber.
Complex layouts, code compliance, concealed leaks, main shutoff work, or unfamiliar materials favor hiring a licensed plumber.
Routine accessible runs, simple repairs, and confident homeowners with proper permits may proceed DIY.
Typical time, cost range, and required skill level
A realistic estimate for installing a new water supply line depends on scope: a simple short run to a nearby fixture typically takes 2–4 hours, while longer or concealed routes, slab penetrations, or rerouting can require a full day or multiple days.
Costs vary $75–$800+ depending on materials and labor.
Basic plumbing skills suffice for simple runs; complex jobs require experienced tradespeople and permits.
Types of Water Supply Lines and Materials
The next section outlines the common pipe materials—copper, PEX, CPVC, and galvanized steel—and summarizes the strengths and weaknesses of each.
It also covers the typical fittings, valves, and connectors used with each material.
Finally, it lists the specific tools required to cut, join, and install the different pipe types.
Common pipe materials: copper, PEX, CPVC, galvanized steel
Several common materials are used for residential water supply lines, each with distinct properties affecting durability, cost, and installation methods.
Copper offers longevity and soldered or press fittings.
PEX is flexible, easy to route and join with crimp or push-fit fittings.
CPVC is rigid, solvent-welded plastic suitable for hot water.
Galvanized steel is heavy, corrosion-prone, and often replaced.
Pros and cons of each material
Choosing a pipe material involves balancing cost, durability, ease of installation, and suitability for specific applications. Copper: durable, expensive, soldering required. PEX: flexible, affordable, not UV-resistant. CPVC: heat-resistant, brittle over time.
| Material | Strength | Drawback |
|---|---|---|
| Copper | High | Costly |
| PEX | Flexible | UV-sensitive |
Fittings, valves, and connectors for each material
Having considered material trade-offs, attention turns to the fittings, valves, and connectors that complete each system.
Copper uses sweat, compression, and press fittings plus ball or stop valves.
CPVC relies on solvent-weld fittings and plastic ball valves.
PEX employs crimp, clamp, or press fittings with brass or plastic manifolds and isolation valves.
Galvanized requires threaded fittings and gate or globe valves, prioritizing compatibility and corrosion resistance.
Tools required for each pipe type
Equipments vary by pipe material, so selecting the right tools for copper, CPVC, PEX, and galvanized systems streamlines installation and reduces mistakes.
Required items differ: soldering kit and tube cutter for copper; PVC cutter, primer, and solvent for CPVC; crimp/expander tools and PEX cutters; pipe wrenches and thread sealant for galvanized.
- Sizing and cutting tools
- Joining and sealing tools
- Testing and finishing tools
Pre-Installation Planning and Permits
Before cutting or fitting any pipe, the installer should map the proposed water route, measure total run length, and mark shutoff locations and access panel positions.
They must verify local building codes and permit requirements and consult utility maps or call utility-location services to identify buried lines.
Clear planning reduces rework, guarantees compliance, and protects existing utilities.
How to map your water route and measure length
When planning the water route, a clear, scaled sketch of the property should be made showing the existing main supply, proposed fixture locations, and any obstacles such as driveways, trees, and utility lines.
Measure linear runs along walls, under floors, and across yards, adding allowances for bends, valves, and service tees.
Note elevation changes and mark access points for shutoffs and inspection.
Local code considerations and permit requirements
Many jurisdictions require permits and adherence to local plumbing codes governing materials, pipe sizing, backflow prevention, burial depth, and inspection points for new water supply lines.
Obtain required permits, review municipal plumbing and building codes, and confirm inspection schedules.
Verify licensed contractor requirements, approved materials and joint methods, and any setback or easement restrictions.
Noncompliance risks fines, mandatory rework, or denied occupancy certificates.
Locating existing utilities and using utility maps
Because underground and overhead utilities often intersect proposed work areas, accurate locating and review of utility maps is essential to prevent service disruption, injury, or costly repairs.
Contractors or DIYers should contact local one-call services, obtain up-to-date utility maps, and mark confirmed utility lines.
Use electronic locators and ground-penetrating radar as needed, document findings, and adjust plans to maintain required clearances and avoid conflicts.
Choosing shutoff points and access panels
Careful selection of shutoff points and access panels is critical to safe, code-compliant water supply installations and future maintenance.
The planner identifies accessible main and branch shutoffs, locates isolation valves near fixtures, and positions access panels where valves, backflow devices, or pressure regulators require inspection.
Compliance with local codes, clear labeling, and unobstructed access guarantee rapid emergency shutoff and simplify repairs without extensive demolition.
Safety and Preparation
Before beginning work on a water supply line, proper personal protective equipment and basic safety precautions should be confirmed.
The main water supply must be shut off and the system drained to prevent accidental flooding.
Affected fixtures should be isolated and protected to minimize water damage during the installation.
Personal protective equipment and safety precautions
When working on a water supply line, proper personal protective equipment and clear safety procedures reduce the risk of injury and damage.
Workers should wear safety glasses, gloves, ear protection, and appropriate footwear. Use respirators for soldering or chemical exposure.
Guarantee adequate lighting and ventilation, keep a tidy workspace, use ladders safely, and follow tool manufacturers’ instructions.
Inspect PPE before use.
How to shut off the main water supply and drain the system
Locate and close the building’s main shutoff valve to stop incoming water, then relieve pressure and empty the system by opening lowest faucets and any accessible drain valves.
Verify flow has ceased at multiple fixtures, then shut hot-water heater inlet and gas or electric supply if required.
Collect discharged water in buckets, monitor for residual drips, and keep towels handy to absorb remaining moisture.
Isolating affected fixtures and preventing water damage
Clamp off or cap the affected fixture lines and shut individual isolation valves to stop localized flow.
Then remove or protect nearby furnishings and electronics to prevent water damage.
Verify seals with a brief pressure test and place absorbent pads or buckets beneath joints.
Use plastic sheeting and tarps to isolate work areas, and keep towels and a wet vacuum on hand for immediate cleanup.
Step-by-Step Installation for PEX Supply Lines (Popular DIY Option)
The section outlines the specific materials and tools required for PEX installations, including tubing, fittings, crimp or expansion tools, and supports.
It describes accurate measuring, cutting, and deburring of PEX, then explains how to install fittings using crimp or expansion methods and secure tubing through walls, floors, and crawlspaces.
Finally, it covers proper connections to valves, appliances, and fixtures to guarantee leak-free operation.
Materials and tools checklist specific to PEX
A concise checklist of materials and tools helps guarantee a smooth PEX supply line installation and prevents mid-project delays.
Required materials: PEX tubing, fittings (crimp, clamp, or push-fit), rings or sleeves, manifold or adapters, mounting straps, pipe insulation, and appropriate sealant.
Essential tools: PEX cutter, crimp/clamp tool or expansion tool, gauge, deburring tool, adjustable wrench, and inspection gauge.
Cutting, deburring, and measuring tubing
With materials and tools assembled, attention turns to preparing PEX tubing: accurate measurement, clean cutting, and proper deburring set the foundation for leak-free joints.
Measure run length allowing bends and fittings; mark cutting points. Use a PEX-rated cutter for square, burr-free cuts.
Deburr inner and outer edges with a reamer or file. Verify ends are straight and free of nicking before proceeding.
Installing fittings and crimping/expansion techniques
Begin by assembling fittings and choosing the appropriate connection method—crimp, clamp, or expansion—based on the PEX type and local code.
Confirm pipe ends are square and burr-free, slide on rings or engage expansion tools, insert fittings fully, then crimp or collapse the tubing per manufacturer specs.
Inspect each joint with a gauge, test for leaks, and replace any imperfect connections immediately.
Routing and securing PEX in walls, floors, and crawlspaces
Route PEX runs planning the most direct, code-compliant paths through walls, floors, and crawlspaces while avoiding heat sources, electrical wiring, and structural members.
Fasten PEX with approved staples or straps every 32 inches horizontally and at closer intervals near penetrations.
Use protective nail plates at studs, allow expansion loops for thermal movement, maintain slope for drainage where needed, and keep tubing accessible at service points.
Connecting to valves, appliances, and fixtures
Installers connect PEX to valves, appliances, and fixtures by matching fitting types, cutting tubing squarely, and using the correct joining method (crimp, clamp, push-to-connect, or expansion) for the chosen system.
They deburr and measure twice, leaving proper insertion depth and support. Shutoff valves receive dedicated fittings; appliances use flexible connectors or adapters.
Verify orientation, secure connections, and follow manufacturer torque and installation specs.
Pressure testing and final inspections
After completing all connections and securing the run, perform a pressure test to confirm system integrity before restoring regular use.
Isolate the new PEX section, attach a calibrated gauge and pump to 50–100 psi per local code, and maintain pressure for the required duration.
Inspect fittings, crimps, and manifolds for leaks.
Document results and schedule or complete any required municipal or third‑party inspections before commissioning.
Step-by-Step Installation for Copper Supply Lines (Pro Option)
The guide outlines the specific materials and tools for copper work, how to cut and clean pipe ends, and the choice between soldering and compression fittings with clear criteria for each.
It also covers proper bending, anchoring, and allowances for thermal expansion, followed by pressure testing and leak-detection techniques.
Practical finishing steps and safety notes complete the pro-level copper installation procedure.
Materials and tools checklist specific to copper
When preparing to run a copper supply line, a concise, job-specific materials and tools checklist guarantees the work proceeds efficiently and meets plumbing codes.
Include Type L or K copper tubing, solder or brazing rods, flux, lead-free fittings, annealing torch, tubing cutter, deburring tool, emery cloth, fitting brush, adjustable wrenches, pipe hangers, soldering heat shield, PTFE tape, leak detector, and safety gear.
Cutting and cleaning copper pipe ends
With materials staged and tools at hand, attention moves to preparing pipe ends for reliable joints.
Cut squarely using a tubing cutter, rotating evenly until cleanly severed.
Deburr inner and outer edges with a reamer or file.
Clean exterior with emery cloth or abrasive pad until bright copper appears.
Remove debris and oil with a clean cloth and flux-ready solvent, ensuring dry, contaminant-free surfaces.
Soldering vs. compression fittings: when to use each
Choosing between soldered joints and compression fittings depends on skill level, permanence required, and site conditions.
Soldering provides stronger, leak-resistant permanent connections but requires heat, flux, and experience.
Compression fittings suit tight spaces, cold-water work, or temporary fixes and need no torch, though they may loosen over time and require careful tightening and occasional replacement to maintain reliability.
Bending, anchoring, and thermal expansion considerations
Several key practices guarantee a copper supply line remains secure and functional over time: controlled bends, adequate anchoring, and allowances for thermal expansion.
Use proper bending springs or tubing benders to avoid kinks; maintain minimum bend radii.
Anchor supports every 4–6 feet and near fixtures, allowing slight movement.
Install expansion loops or offsets where long runs heat, and use insulated clips to prevent noise and wear.
Pressure testing, leak detection, and finishing
Begin by isolating the installed copper run and preparing the system for a controlled pressure test to verify joint integrity and locate leaks.
Pressurize to code-required PSI with clean water or air per local rules, monitor gauges for dwell time, inspect joints and fittings with soapy solution or electronic leak detection, repair defects, purge air, then insulate, secure, and restore service with final documentation.
Installing Branch Lines and Multiple Fixtures
When extending a system to serve multiple fixtures, the installer evaluates manifold systems versus traditional trunk-and-branch layouts to match pressure and routing needs.
Proper pipe sizing and flow balancing are planned so each fixture receives adequate water, and individual shutoffs are added for serviceability.
Fixture-specific tips—short runs and shutoffs for kitchens, insulated runs for bathrooms, and frost-resistant valves for outdoor lines—guide final layout choices.
Manifold systems vs. trunk-and-branch layout
Although both systems distribute water to multiple fixtures, a manifold delivers individual supply lines from a central hub while a trunk-and-branch layout uses a main run with lateral branches.
Each approach has distinct implications for pressure, isolation, installation complexity, and material use.
Manifolds allow easy isolation and straightforward troubleshooting; trunk-and-branch can be simpler to install and use less tubing but may complicate isolation and affect fixture pressure.
Sizing supply lines and balancing flow
Properly sizing supply lines and balancing flow guarantees each fixture receives adequate pressure and volume without overloading the system or wasting materials.
Calculations consider fixture units, run lengths, and simultaneous demand. Increase pipe diameter for long runs or clustered fixtures; reduce where demand is low.
Use flow charts and pressure loss tables, and balance branches to prevent drops, noise, and uneven delivery.
Adding shutoffs for individual fixtures
Install shutoffs at each fixture branch to isolate repairs and minimize water loss during maintenance.
Plumbers route branch lines from the main run using tees, maintaining slope and access.
Use compatible valves (ball or gate) sized to the branch tubing, secure fittings with proper solder, compression, or push-fit methods, label shutoffs, and position them in accessible, frost-protected locations for future service.
Tips for kitchen, bathroom, and outdoor lines
When planning branch lines for kitchens, bathrooms, and outdoor fixtures, consider fixture layout, peak demand, and service access to minimize pressure loss and simplify future repairs.
Stagger runs to reduce simultaneous draw, use correct pipe sizing and manifold or trunk-and-branch methods, install individual shutoffs, protect outdoor lines from freezing, and label valves.
Prioritize accessible routing and code-compliant materials.
Connecting to Existing Plumbing and Main Supply
The section reviews options for tapping into the main supply, comparing saddle valves with full-service connections and their reliability.
It outlines precautions when working near the water meter and municipal service lines to avoid violations or service disruptions.
It also covers requirements for backflow prevention and check valve placement to protect the potable system.
Tapping into the main: saddle valve vs. full connection
Homeowners deciding how to tap into an existing water main must weigh the quick, minimal-cut approach of a saddle valve against the durability and reliability of a full connection made by cutting and soldering or using a tee and compression fittings.
Saddle valves are faster but prone to leaks and low flow; full connections require skill and tools yet provide code-compliant, long-term performance.
Working near the water meter and municipal connections
Approach water meters and municipal connections with caution and respect for local regulations and utility infrastructure.
Verify ownership boundaries, obtain permits, and notify the utility before excavation.
Use approved fittings and avoid tampering with meter seals or service lines.
Coordinate shutoffs with the provider, document meter positions, and restore trenching and markers per codes.
Hire licensed technicians for complex or restricted connections.
Backflow prevention and check valve installation
After coordinating with the utility and confirming shutoffs at the meter, attention shifts to preventing backflow into the potable supply.
Backflow prevention devices and check valves safeguard drinking water from contamination due to pressure reversals or cross-connections.
The installer selects approved assemblies, orients check valves correctly, provides accessible test ports, follows local codes for assembly type and location, and pressure-tests and documents installation before service restoration.
Testing, Troubleshooting, and Quality Checks
The section outlines a step-by-step pressure test procedure and key troubleshooting actions for identifying and repairing common leaks.
It also covers methods for detecting hidden leaks with moisture meters and dye, and guidelines for inspecting flow rates and preventing water hammer.
Readers will be guided through targeted quality checks to confirm a safe, reliable supply line.
How to perform a pressure test step-by-step
Begin by isolating the installed water supply line, sealing all open ends and connecting a calibrated pressure gauge and pump. This setup allows a controlled increase of pressure to the system so leaks and weaknesses can be detected reliably.
Gradually raise pressure to the specified test value, hold for the required duration while monitoring gauge stability. Inspect fittings visually, record results, and depressurize safely.
Common leaks and how to fix them
Several common leak types appear during water supply line testing—pinholes in copper, hairline cracks in plastic, loose compression fittings, and poorly seated joints—each requiring a specific diagnostic and repair approach.
Inspect visually, pressure-test segments, and isolate sections.
Repair methods include soldering or replacing copper, splicing or replacing plastic, tightening or replacing fittings, and redoing seals or joints.
Retest after repairs.
Detecting hidden leaks using moisture meters and dye
Use moisture meters and dye tests to pinpoint leaks that are not visible during visual inspections or pressure testing.
Technicians scan walls, floors, and ceilings with a calibrated moisture meter to locate elevated dampness.
Introduce nonstaining dye into the supply, then observe fixtures, drains, joints, and concealed cavities for colored traces.
Document findings, isolate problem areas, and plan targeted repairs.
Inspecting for adequate flow and water hammer prevention
After locating and documenting concealed leaks, the next step is to verify that the supply delivers sufficient flow and that the system is protected against water hammer.
Measure static and dynamic pressure, record flow rates at fixtures, and compare to required values.
Inspect for proper pipe sizing, valve operation, and secure supports.
Install or verify air chambers, arrestors, or pressure-reducing devices to prevent shock.
Common Mistakes and How to Avoid Them
Common installation errors include improper pipe sizing and undersized fittings that restrict flow and increase pressure loss.
Inadequate support, unsecured piping, and unchecked vibration can lead to noise, wear, and joint failure.
Incorrect joining techniques or soldering mistakes, plus skipping permits or required code devices, create safety hazards and potential legal issues.
Improper pipe sizing and undersized fittings
Incorrect pipe sizing and the use of undersized fittings reduce flow, increase pressure loss, and place undue strain on fixtures and pumps, often leading to poor performance or premature failure.
Properly calculate demand, select pipe diameters per code and fixture units, use matched fittings, and avoid long runs with restrictive bends.
Verify velocities and pressure drop to guarantee adequate supply and longevity.
Poor support, unsecured piping, and vibration issues
Neglecting proper support and secure fastening leads to sagging runs, joint stress, and amplified noise from vibration, which accelerate wear and can cause leaks or failure.
Install clips, straps, and cushioned hangers at manufacturer-recommended intervals, anchor near fittings, and isolate fasteners from metal pipe to reduce resonance.
Check for movement during pressure testing and correct loose or misaligned supports before finishing.
Incorrect joining techniques and soldering errors
Mastering proper joining and soldering techniques is essential to creating leak-free, durable water supply connections.
Common mistakes include insufficient cleaning, inadequate flux, cold joints, overheating, and poor alignment. These cause leaks, weakened joints, and contamination.
Avoid them by thoroughly cleaning fittings, using correct flux and heat, observing proper solder flow, testing joints, and practicing technique on scrap pipe before final installation.
Skipping permits or code-required devices
When homeowners or DIYers bypass permits or omit code-required devices, they risk failed inspections, costly rework, fines, and compromised safety.
Ignoring local codes—backflow preventers, pressure relief valves, inspection approvals—creates liability and may void insurance.
Compliance guarantees legal occupancy, system reliability, and public health protection.
Consult local authorities, obtain permits, and install specified devices to avoid delays, penalties, and hazardous failures.
Maintenance and Long-Term Care of New Supply Lines
A concise maintenance approach begins with a regular inspection checklist covering leaks, corrosion, pressure changes, and fixture operation.
Seasonal tasks include how to winterize exterior lines and outdoor faucets to prevent freezing and burst pipes.
Clear repair-versus-replacement indicators—such as repeated leaks, extensive corrosion, or loss of pressure—guide long-term decisions.
Regular inspection checklist
Several simple checks performed monthly can prevent most failures in a new water supply line. A concise inspection routine identifies leaks, wear, and functional issues before they worsen.
- Inspect visible joints and fittings for moisture, corrosion, or drips.
- Verify shutoff valve operation and access.
- Check pressure and listen for unusual noises; document observations and schedule repairs promptly.
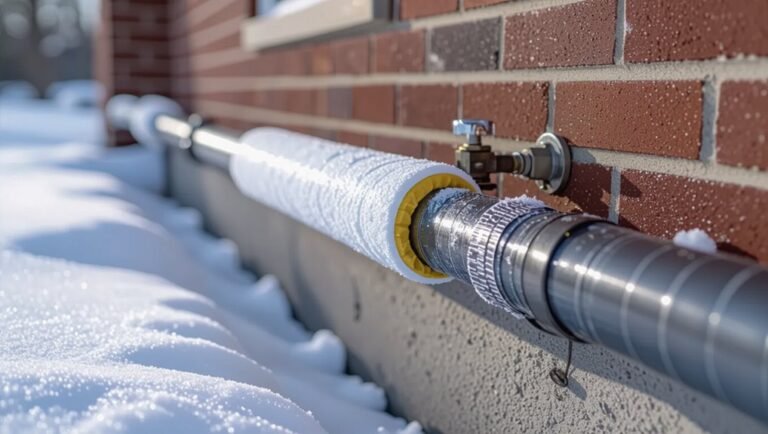
How to winterize exterior lines and outdoor faucets
Prepare outdoor plumbing for freezing temperatures to prevent pipe bursts, fittings damage, and costly repairs.
Shut off exterior water at the indoor isolation valve, drain remaining water from lines and hose bibs, open spigots, and remove hoses.
Install insulated covers on faucets, wrap exposed pipes with foam or heat tape, and verify valves are fully closed before winter.
Inspect again after cold snaps.
Repair vs. replacement indicators
When visible leaks, repeated repairs, persistent corrosion, or declining water pressure occur despite maintenance, it indicates that a supply line may need more than a patch; evaluating the age, material, and extent of damage helps determine whether repair or full replacement is the prudent choice.
Professionals assess frequency of failures, hidden rust, sediment buildup, joint integrity, and replacement cost versus ongoing repair expense to decide.
Cost Breakdown and Time Estimates
Typical material costs for copper, PEX, and PVC are compared to help plan a budget.
Labor time is estimated for DIY installs versus hiring a professional, with complexity and permits noted as key factors.
Practical cost-saving measures—such as selecting PEX, buying materials in kits, and scheduling work to avoid rush fees—are suggested while emphasizing safety and code compliance.
Typical material costs by pipe type
Because pipe choice drives both upfront expenses and long-term value, a concise breakdown of material costs by type helps homeowners budget accurately. Typical ranges per 10 ft include cost, durability, and comments summarized below.
| Pipe Type | Approx. Cost (USD) | Notes |
|---|---|---|
| PVC | 10–25 | Affordable, cold water only |
| PEX | 20–50 | Flexible, DIY-friendly |
| Copper | 75–200 | Durable, higher material cost |
| Galvanized | 30–80 | Older systems, corrosion-prone |
Labor time estimates for DIY vs. professional install
Several factors determine labor time for installing a water supply line, including pipe type, routing complexity, access to walls or crawlspaces, and the installer’s experience.
DIYers typically require 4–12 hours for straightforward runs, longer for tricky access or learning curves.
Licensed plumbers often complete similar jobs in 2–6 hours, factoring in diagnostics, code compliance, and testing.
Emergency or complex projects extend times.
Ways to reduce costs without compromising safety
Reduce expenses by prioritizing cost-effective choices that do not sacrifice code compliance or system reliability.
Select durable materials like PEX for ease and lower fittings cost, purchase bulk or contractor-grade components, and reuse existing fixtures when safe.
Perform preparatory tasks personally—shutoff, measuring, cleanup—to shorten professional time.
Obtain multiple quotes and schedule work during off-peak seasons to lower labor rates.
Tools and Materials Shopping Checklist
The article lists a concise parts and tools inventory for a typical single-fixture water supply install, including tubing, shutoff valve, fittings, connectors, flux/cleaner, and basic hand tools.
It also notes recommended brands known for reliability and compatibility, with guidance on where to purchase each item (big-box stores, plumbing supply houses, and online retailers).
This checklist prepares readers to shop efficiently and avoid last-minute trips.
Complete parts list for a typical single-fixture install
One clear checklist helps confirm a smooth single-fixture water supply installation by listing every required tool and material before work begins.
The parts list covers fixture supply tubing, shutoff valve and fittings, and sealing materials plus fasteners. Verify correct sizes and connection types for the fixture model.
- Supply tubing, shutoff valve, compression fittings
- Thread sealant, plumber’s tape, mounting hardware
- Couplings, adapters, isolation straps
Recommended brands and where to buy
After confirming sizes and connection types from the parts list, the next step is selecting reputable brands and reliable retailers for tools and materials.
Recommended brands include SharkBite, Apollo, Viega, Milwaukee, and RIDGID for fittings, valves, and tools.
Purchase from Home Depot, Lowe’s, Ferguson, or authorized plumbing supply houses; online options include Amazon and manufacturer sites for warranty-backed items and technical support.
When to Call a Professional Plumber
If the job involves complicated pipe layouts, hidden leaks, gas lines, or building-code permits, a licensed plumber should be engaged.
Guidance on vetting candidates—licenses, insurance, references, and key interview questions—helps homeowners hire confidently.
The plumber’s visit typically includes an assessment, a clear estimate, scope of work, and a discussion of timelines and warranties.
Complex situations that require licensed expertise
Recognize situations that exceed typical DIY skills and require a licensed plumber’s training and tools.
Complex scenarios include major leaks behind walls or under slabs, compromised main lines, gas‑adjacent work, cross‑connection risks, systemic low pressure or contamination, outdated or lead piping, and projects triggering permits or code compliance.
These demand diagnostic equipment, specialized repairs, liability protection, and certified inspection to guarantee safety and legality.
How to vet and hire a plumber: questions to ask
When a plumbing problem clearly exceeds homeowner skills or local codes, selecting the right licensed professional becomes the priority.
Ask about license number, insurance, and bonding; request references and recent job photos; confirm experience with water supply lines and local code compliance; obtain a written estimate and warranty terms; clarify timeline, permit responsibility, and emergency availability before hiring.
What to expect during a professional service visit
A professional service visit typically follows a predictable sequence: an initial assessment, diagnosis, recommended repairs or replacements, cost and timeline estimates, and execution with safety and code compliance in mind.
The plumber inspects access points, tests pressure, locates leaks, explains options, provides a written estimate, obtains consent, performs work using proper materials, and documents completion with advice on maintenance and warranty terms.
Visual Aids and Reference Diagrams
The article presents clear diagrams showing typical supply line layouts for kitchens and bathrooms to help readers visualize routing, shutoffs, and fixture connections.
It also compares manifold and trunk-and-branch schematics, highlighting differences in flow control, ease of isolation, and material use.
These reference visuals serve as a quick guide for planning and communicating the chosen system to installers or inspectors.
Typical supply line layouts for kitchen and bathroom

Several common layouts illustrate how cold and hot supply lines are routed to kitchen and bathroom fixtures, showing typical branch points, shutoff valve locations, and vented main connections.
Diagrams depict branch spacing for sinks, dishwashers, toilets, and tubs, hot runs grouped near water heater, accessible shutoffs at fixtures, pressure-reducing devices, and clear labeling for future maintenance and leak isolation.
Manifold vs. trunk-and-branch schematic

Comparing manifold and trunk-and-branch layouts helps clarify choices beyond the general fixture routing and shutoff placement already discussed.
The manifold offers dedicated runs, easy isolation, balanced pressure, and simpler future changes but higher material cost.
Trunk-and-branch uses a main line with tap branches, lower cost and simpler installation, yet risks pressure drop, uneven flow, and harder isolation for individual fixtures.
Conclusion
Coincidentally, the new water supply line arrives where planning, permit paperwork and a spare afternoon converge, turning theory into flowing reality. The DIY of PEX, measured fittings and safety checks aligns with cost estimates and the shopping list, while professionals stand ready when complexity or code demands. Consequently, deliberate preparation, correct materials and timely judgment guarantee the system that began as a blueprint becomes a dependable conduit for daily life.