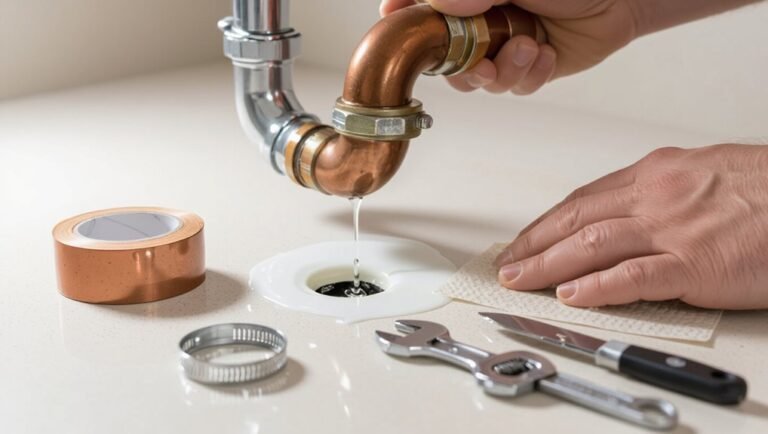
How to Clean a Basement Floor Drain Fast: Step-by-Step Guide for a Clog-Free, Odor-Free Basement
To clean your basement floor drain quickly and effectively, start by removing the cover and clearing any visible debris. Use a plunger for minor clogs and a drain snake for deeper blockages. After clearing the drain, flush it with hot water and mild detergent, then apply an enzymatic deodorizer to eliminate odors. Check for standing water or gurgling sounds, which may indicate trap or sewer issues. To prevent future clogs, perform monthly enzyme maintenance. For detailed steps, essential tools, and guidance on when to call a professional, continue reading.
Why a Clean Basement Floor Drain Matters for a Clog-Free, Odor-Free Basement
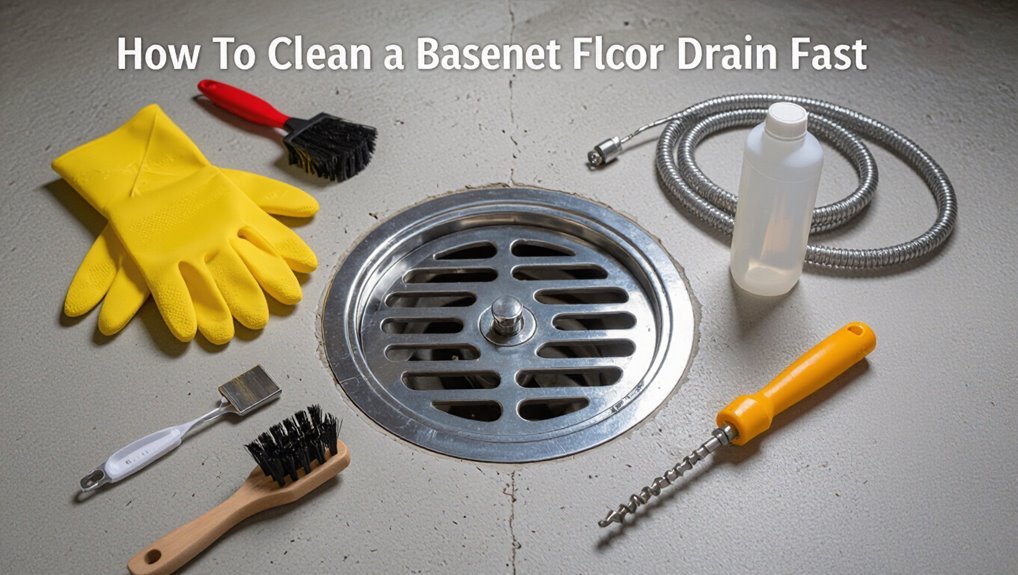
A clean basement floor drain helps control moisture, prevent sewer and organic odors, and reduce conditions that attract pests.
Clogs and smells commonly arise from hair, grease, sediment, and trapped organic debris that degrade over time.
Simple maintenance often suffices, but persistent backups, foul sewage smells, or repeated clogs indicate the need for a professional inspection.
How floor drains affect basement moisture, odors, and pests
Several factors connect a basement floor drain’s condition to indoor moisture, odors, and pest entry.
A poorly maintained drain permits water backup and evaporative odors, raising humidity and mold risk. Stagnant water and gaps invite insects and rodents.
Regular attention, including learning how to clean a basement floor drain, prevents odor traps, maintains proper drainage, and reduces pest access points.
Common causes of clogs and smells in basement drains
Keeping a floor drain clean not only prevents odors and pests but also reduces the chance of blockages that cause backups and standing water.
Common causes include hair, soap scum, grease, sediment, and trapped organic debris. Tree roots, mineral buildup from hard water, and small objects accidentally dropped also obstruct flow.
Stagnant water fosters bacterial growth, producing foul smells and attracting insects.
When to call a professional vs. DIY
When should a homeowner tackle a basement floor drain issue and when is professional help warranted?
A homeowner can handle minor clogs, slow drains, or routine cleaning with basic tools and safety precautions.
Call a professional for recurrent blockages, sewage backups, strong chemical odors, visible pipe damage, or when attempts fail.
Professionals assess risks, perform camera inspections, and guarantee repairs meet code and prevent recurrence.
Quick Checklist: What You Need Before You Start
Before beginning, a concise checklist helps guarantee the job is safe and efficient.
Essential items and preparations include:
- Tools and supplies: plunger, plumber’s snake, gloves, bucket, bleach, enzymatic cleaner, shop vacuum
- Safety gear and ventilation: goggles, respirator or mask, open windows or fans
- Preparing the area: protect flooring with drop cloths, remove nearby items
- Plan for waste disposal and a clean-up routine
With these basics in place, work can proceed methodically and safely.
Tools and supplies (plunger, plumber’s snake, gloves, bucket, bleach, enzymatic cleaner, shop vacuum)
Gathering the right tools and supplies streamlines cleaning a basement floor drain and reduces the chance of surprises.
A sturdy plunger and plumber’s snake clear blockages; nitrile or rubber gloves protect hands.
Bring a bucket and shop vacuum for water and debris removal.
Use bleach for disinfecting surfaces and an enzymatic cleaner to break down organic residue and control odors.
Safety gear and ventilation tips
A compact checklist of essential safety gear and ventilation measures helps confirm the task proceeds without health risks:
Nitrile gloves, splash-resistant goggles, and a respirator rated for chemical vapors or dust. Use long sleeves and waterproof boots.
Ascertain cross-ventilation—open windows, run a box or inline fan to exhaust air.
Keep a flashlight and phone nearby for emergencies; avoid confined-space entry.
Preparing the area (protecting flooring, removing items)
With safety measures in place, attention shifts to preparing the work area to protect surrounding surfaces and clear access to the drain.
Cover nearby flooring with plastic sheeting or drop cloths, tape edges to prevent seepage, and move boxes, tools, and furnishings away.
Remove rugs and electrical items, create an unobstructed perimeter, and set a bucket, towels, and cleaning supplies within easy reach.
Fast Step-by-Step Drain Cleaning Process
The guide outlines a concise, five-step routine for clearing a basement floor drain.
First, the drain is inspected and visible debris removed.
Then a plunger is used for minor clogs and a snake for deeper blockages.
Finally, the drain is flushed with hot water and mild detergent, then deodorized and sanitized with safe or enzymatic cleaners.
Step 1 Inspect the drain and remove visible debris
Begin by visually examining the drain cover and immediate area for leaves, sediment, hair, or other obstructions that could restrict flow.
Remove the cover if removable, wearing gloves. Use a flashlight to spot deeper debris, then extract visible material with pliers or a hooked tool.
Dispose of waste, clean the cover, and reseat it securely.
Note any slow drainage for further action.
Step 2 Use a plunger to dislodge minor clogs
Plunge firmly over the drain to create suction that can loosen minor blockages.
The person places a tight seal, uses steady, forceful strokes, then lifts to check water flow.
Repeat several times, clearing loosened debris by hand or with gloves.
If water begins draining freely and odors subside, the task is complete; otherwise, proceed to deeper methods.
Step 3 Snake the drain for deeper blockages
Feed a drain snake into the pipe to reach clogs that a plunger couldn’t dislodge.
The operator advances the cable slowly, rotating to thread through bends until resistance is felt.
Engage the auger head, break or retrieve the obstruction, then withdraw debris carefully into a bucket.
Inspect the cable for damage, clean tools, and dispose of waste safely before proceeding.
Step 4 Flush the drain with hot water and mild detergent
Run a steady stream of hot water mixed with a mild detergent into the drain to loosen remaining grease and soap scum without damaging pipes or seals.
Continue for several minutes while agitating briefly with a brush or the snake to dislodge residues.
Rinse until water runs clear, checking for improved flow.
Dry the area and replace the grate once finished.
Step 5 Deodorize and sanitize with safe cleaners or enzymatic treatments
Apply a deodorizer or enzymatic cleaner to neutralize odors and break down organic residues without harming pipes or septic systems.
The technician allows product dwell time per label, targeting trap and visible pipe sections. Non-corrosive, biodegradable formulations are preferred.
After treatment, vents are briefly aired and surrounding surfaces wiped.
Record product used for maintenance schedules and avoid mixing cleaners to prevent reactions.
Step 6 Final rinse and test for proper flow
Begin the final rinse by flushing the drain with a steady flow of warm water to remove remaining cleaner and dislodged debris.
Continue rinsing several minutes while observing water movement. Use a bucket or hose to simulate typical flow, then check nearby fixtures for backups.
If water drains freely and without gurgling or pooling, the job is complete; otherwise, repeat clearing steps or inspect the trap.
Alternative Fast Methods for Tough Clogs
When a clog resists the standard steps, alternative fast methods can be tried. A wet/dry shop vacuum may pull up debris, while simple homemade mixes like baking soda with vinegar followed by hot water can help break up organic buildup.
For stubborn blockages, chemical drain cleaners are sometimes appropriate but should be used sparingly with proper ventilation, protective gear, and by following label instructions.
Using a wet/dry shop vacuum to pull clogs
A wet/dry shop vacuum offers a fast, powerful way to remove stubborn debris from a basement floor drain by creating strong suction to pull clogs free.
The operator seals the hose over the grate, uses a wet setting if standing water is present, and alternates short bursts of suction with gentle probing.
Empty and sanitize the tank after use to prevent odors.
Homemade cleaning mixes that work (baking soda + vinegar, hot water)
After using a shop vacuum to remove large debris, attention can turn to homemade cleaning mixes that tackle remaining buildup and odors.
A half-cup of baking soda poured into the drain followed by a cup of vinegar creates fizzing action to loosen grime; wait 10–15 minutes, then flush with several liters of hot (not boiling) water.
Repeat if needed.
When chemical drain cleaners are appropriate and safe precautions
Consider chemical drain cleaners only for stubborn clogs that resist mechanical methods and homemade solutions. They can dissolve hair, grease, and organic buildup quickly but carry risks to pipes, finishes, and personal safety.
Use as directed, ventilate, wear gloves and eye protection, and never mix products. Avoid on older metal or PVC pipes prone to damage.
Call a professional for persistent or recurring blockages.
How to Remove and Clean a Removable Drain Cover and Trap
The guide explains how to locate and safely lift the removable grate to access the trap without damaging surrounding tile or injury.
It outlines steps for cleaning the trap and U-bend to remove debris, buildup, and odors.
Finally, it covers reassembly and a simple leak test to confirm a watertight fit.
Locating and removing the drain grate safely
Begin by locating the floor drain and evaluating the grate type and surrounding conditions to guarantee safe removal.
Identify fasteners, clips, or a lift point. Clear debris and test mobility with a screwdriver or pry bar, applying steady, controlled force.
Use gloves and eye protection. Lift straight up to avoid damaging the flange.
Set the grate aside on a clean surface for inspection.
Cleaning the trap and U-bend components
With the grate removed, inspect the visible trap and U-bend for standing water, sludge, and odors before proceeding.
Remove the removable trap carefully, wearing gloves.
Empty debris into a bucket, then scrub interior surfaces with a stiff brush and biodegradable cleaner or diluted bleach.
Rinse thoroughly with hot water, repeat if necessary, and check the trap for cracks or corrosion prior to reinstallation.
Reassembling and testing for leaks
Reinstall the cleaned trap and cover carefully, aligning seals and fasteners to confirm a snug fit.
Once secured, run cold water for several minutes while inspecting joints and the surrounding floor for drips.
Tighten fittings if needed, then test using a dye or paper towel to detect slow leaks.
Confirm odor seal and recheck after 24 hours to verify reliability.
Preventive Maintenance to Keep Drains Clear and Odor-Free
Routine preventive steps keep basement drains working and smelling fresh with minimal effort.
Recommended practices include a simple weekly and monthly checklist and regular use of safe treatments, plus exterior measures to lower water and debris entering the system:
- Weekly wipe and visual check of the cover and trap
- Monthly flush with enzymatic cleaner or a non-corrosive degreaser
- Inspect and clear gutters and downspouts
- Grade soil and add landscaping to divert water away from the foundation
Following these items prevents clogs and reduces the need for major cleaning.
Weekly and monthly maintenance routine
A simple weekly and monthly maintenance schedule prevents buildup and keeps a basement floor drain functioning and odor-free.
Weekly: remove visible debris, run water to refill the trap, and inspect the grate and surrounding floor for slow drainage.
Monthly: lift the grate to clear settled sediment, flush with hot water, and check for signs of leaks, corrosion, or pest entry, documenting any issues for repair.
Products and treatments to use regularly (enzymatic cleaners, non-corrosive degreasers)
Use enzymatic cleaners and non-corrosive degreasers on a regular schedule to break down organic buildup, grease, and sludge without damaging pipes or seals.
Choose biodegradable, bacteria-based formulas for weekly use; apply non-corrosive degreasers monthly to dissolve oil and soap scum.
Follow manufacturer dilution and contact times, avoid mixing chemicals, and rinse thoroughly to maintain trap integrity and prevent odors.
Landscaping and gutter tips to reduce basement drain load
Several simple landscaping and gutter adjustments can greatly reduce the volume of water and debris reaching a basement floor drain.
Grade soil away from the foundation, extend downspouts at least 6–10 feet, install splash blocks or buried drainage lines, keep gutters and screens clean, add gravel-filled swales, and plant water-tolerant vegetation.
These measures limit runoff, minimize sediment entry, and reduce clogging and odors.
Troubleshooting: Diagnosing Persistent Odors or Recurring Clogs
Persistent odors or repeated blockages often signal issues beyond routine debris removal, such as a dry trap or sewer line damage.
Distinguishing between sewage, mold or biofilm, and pest-related smells helps determine whether surface cleaning or targeted remediation is required.
If smells persist despite cleaning or clogs recur, a camera inspection or professional sewer line service should be considered.
Signs of sewer line problems or dry traps
When a foul odor lingers around a basement floor drain or clogs reoccur despite routine cleaning, these symptoms can indicate a dry trap or a deeper issue in the sewer line.
Other signs include gurgling noises from drains, slow drainage throughout the home, sewage backing up into the drain, multiple fixtures affected, and sudden recurring odors after rain.
Professional inspection is advisable.
Identifying mold, biofilm, or pest-related smells
If a sour, musty, or organic odor comes specifically from the area around a basement floor drain rather than from plumbing fixtures throughout the house, mold, biofilm, or pests are likely sources.
Inspect visible mold on grout, concrete, or trap covers; check for slimy residue or recurring slow drains indicating biofilm.
Look for pest signs—droppings, nests, dead insects—and note odor changes after cleaning.
When a camera inspection or sewer line service is needed
Should visible mold, biofilm, or pest activity and routine cleaning fail to eliminate odors or recurring clogs, a camera inspection or professional sewer-line service may be required to locate problems beyond the drain opening.
Technicians use video to identify pipe breaks, roots, deep blockages, or collapsed sections.
Repairs, targeted cleaning, or sewer-line replacement follow inspection findings to resolve persistent issues and prevent recurrence.
Cost, Time Estimates, and When to Hire a Professional
Typical DIY cleaning of a basement floor drain usually takes 30–90 minutes and costs under $50 for supplies, while professional services vary widely based on diagnostics and techniques. Major cost drivers for plumbers include camera inspection, snaking, and hydro-jetting, which can raise fees considerably. A professional should be called for recurring backups, sewer-line issues, or mold and water damage that extend beyond simple maintenance.
| Item | Typical Range |
|---|---|
| DIY time & cost | 30–90 minutes; <$50 |
| Professional services | $100–$1,200+ depending on inspection and method |
| When to hire | Persistent backups, sewer problems, or remediation needs |
Typical DIY time and cost ranges
A basic basement floor drain cleaning project usually takes between 30 minutes and two hours for a homeowner with standard tools and unobstructed access; time increases to several hours when roots, hardened scale, or collapsed pipe sections are involved.
Typical DIY costs range $10–$75 for supplies (gloves, snake, cleaning agents, replacement trap parts). More complex jobs raise expense and may prompt professional help.
Professional service cost drivers (camera inspection, snaking, hydro-jetting)
When hiring a pro, several service options drive both cost and schedule: video camera inspections to diagnose blockages, mechanical snaking for routine clogs, and high-pressure hydro-jetting for heavy buildup or root intrusion.
Costs vary: inspections $100–300, snaking $150–400, hydro-jetting $300–800. Time ranges from 30 minutes to several hours.
Choose professionals for persistent, recurrent, or unclear issues.
Situations that require plumbing or remediation experts
Recognize that some basement drain problems exceed DIY remedies and require licensed plumbers or remediation specialists to prevent structural damage, health risks, or recurring failures.
Hire professionals for persistent backups, sewage odors, mold growth, collapsed or frozen lines, and repeated repairs.
Expect inspection plus remediation to take 1–4 hours or multiple days for major repairs; costs vary widely—obtain written estimates and warranties before proceeding.
Safety and Environmental Considerations
The section addresses safe handling and proper disposal of drain-cleaning chemicals to prevent injury and environmental harm.
It also outlines child- and pet-safe cleaning alternatives for households with vulnerable occupants.
Finally, it explains how to protect finished basement floors from damage during cleaning.
Safe handling and disposal of cleaning chemicals
Handle cleaning chemicals with care: mix only required amounts, keep containers sealed and labeled, and use appropriate PPE such as gloves and eye protection.
Store products upright in ventilated areas away from heat and incompatible substances.
Never pour concentrated chemicals down drains or storm sewers; follow local hazardous-waste guidelines.
Transport waste in sealed, labeled containers to an authorized disposal facility to prevent contamination and regulatory violations.
Child- and pet-safe cleaning alternatives
Prioritize non-toxic, easily sourced cleaners when protecting children and pets from chemical exposure around basement floor drains.
Use baking soda and vinegar for routine deodorizing and mild clearing, followed by hot water flushing.
Enzyme-based drain cleaners safely break down organic buildup without harsh fumes.
Keep all products stored securely, ventilate the area, and supervise children and animals until surfaces and smells dissipate.
Protecting finished basement floors during cleaning
Several simple precautions help preserve finished basement floors while cleaning around a floor drain.
Protective mats or drop cloths prevent chemical and water damage; weighted plastic shields protect seams and edges.
Use pH-neutral cleaners and dilute solutions to avoid finish degradation. Limit abrasive scrubbing and promptly blot spills.
Guarantee proper ventilation to speed drying and reduce moisture-related warping or mold growth.
Quick Reference: Do’s and Don’ts for Basement Floor Drain Care
A concise checklist helps users keep basement floor drains functioning and prevents common problems.
Recommended actions include simple maintenance steps and habits to avoid, summarized here for quick reference:
- Flush drains regularly with water
- Use enzymes for organic buildup
- Keep drain covers clean and properly seated
- Do not pour fats, oils, or grease down the drain
Observing these do’s and don’ts reduces clogs and the need for harsh chemical treatments.
Do’s regular flushing, enzyme use, cover maintenance
Maintain a simple, consistent routine for basement floor drain care to prevent clogs and odors.
Flush drains weekly with hot water to move debris.
Apply biological enzyme cleaners monthly to break down organic buildup safely.
Inspect and clean the grate and cover quarterly, removing sediment and checking seals.
Replace damaged covers promptly to keep pests and solids out.
Don’ts pouring fats/oils, overusing harsh chemicals, ignoring slow drains
Avoid pouring fats, oils, or grease down the basement floor drain, and do not rely on caustic chemicals or ignore slow drainage—each of these mistakes accelerates clogs, corrodes pipes, and creates persistent odors.
Homeowners should dispose of grease in sealed containers, limit use of harsh drain cleaners, and address slow drains promptly with mechanical cleaning or professional service to prevent damage and odors.
Conclusion
Like a small, well-tended garden at the heart of a house, a clean basement floor drain rewards steady care with order and fresh air. When debris is cleared and traps are maintained, water flows like a calm stream instead of pooling into problems. Routine checks and quick, safe fixes keep the “garden” thriving; if weeds (stubborn clogs or smells) persist, a skilled gardener—a plumber—restores balance so the home remains healthy and at ease.