How to Install a New Toilet Water Line: Step-by-Step Guide for DIY Beginners
To install a new toilet water line, start by shutting off the water supply and draining the tank. Next, remove the old supply line and choose a compatible braided, PEX, or copper line. Connect the new line from the shutoff valve to the fill valve, using appropriate fittings and plumber’s tape. Tighten connections according to manufacturer specifications, restore the water supply, and check for leaks and proper fill. Basic tools and safety gear are necessary for this task. Additional instructions will cover troubleshooting, maintenance, and potential upgrades in detail.
What a Toilet Water Line Is and When You Need to Replace or Install One
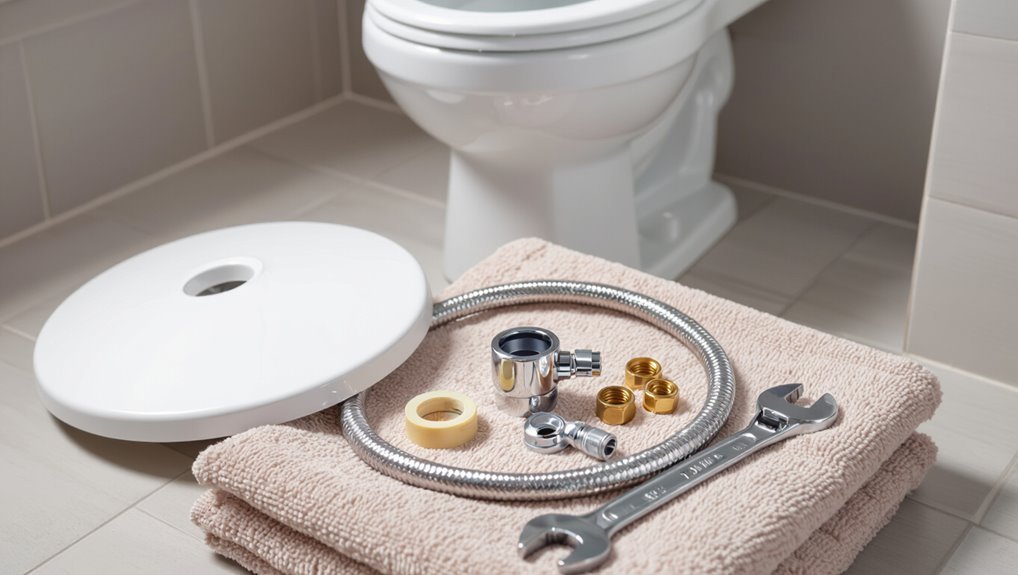
A toilet water line is the supply pipe and fittings that deliver fresh water to the tank or flush valve, including valves, connectors, and shutoffs.
Homeowners typically replace or install a new line during renovations, when existing piping leaks or corrodes, when relocating a toilet, or when upgrading materials for durability.
Familiarity with basic plumbing terms—such as supply line, shutoff valve, compression fitting, and flexible connector—helps determine the correct parts and installation steps.
Definition and function of a toilet water line
Toilet water lines are the supply pipes that deliver pressurized freshwater from the household plumbing to the tank, enabling refilling after each flush and maintaining proper tank water level.
They connect shutoff valves to fill valves, control flow rate, and prevent backflow.
Understanding materials, fittings, and basic operation is essential for DIYers learning how to install a new toilet water line safely and correctly.
Common reasons to install a new water line (renovation, leaks, relocation, upgrade)
Renovating a bathroom, repairing a persistent leak, relocating a fixture, or upgrading to more durable or flexible materials are common triggers for installing a new toilet water line.
Other reasons include replacing corroded or rigid tubing, addressing low water pressure from old lines, meeting code during remodels, and preventing recurring maintenance.
Each scenario justifies assessment and targeted replacement.
Basic plumbing terms and components to know
Plumbing professionals refer to the toilet water line as the supply pipe that delivers potable water to the tank via a shutoff valve and flexible connector.
Understanding these parts—supply shutoff, stop valve, riser or copper/PEX line, and the fill valve inside the tank—helps determine when replacement or installation is needed.
Additional components include compression fittings, angle stops, braided hoses, and escutcheons; inspect for corrosion, leaks, and compatibility.
Quick Overview: Step-by-Step Summary for Installing a New Toilet Water Line
A concise sequence outlines shutoff, drain, measure and cut supply line, install fittings, connect and test for leaks.
The task typically takes 30–90 minutes for a DIYer, rates as low to moderate difficulty depending on access and tools, and requires basic plumbing skills.
A professional should be called for persistent leaks, corroded pipes, complex shutoff configurations, or unfamiliar local code requirements.
One-paragraph high-level sequence of steps
Begin by shutting off the main water supply and draining the existing line.
Next, remove the old supply and inspect fittings.
Measure and cut new tubing, then dry-fit and tighten connections with appropriate seals.
Route the line to the toilet, secure clamps, and test for leaks by briefly restoring water.
Finally, adjust valves and retest to confirm a watertight installation.
Estimated time, difficulty level, and when to call a pro
How long will it take and how hard will it be? A typical DIY install requires 1–3 hours for a straightforward replacement, moderate skill with basic plumbing tools, and attention to sealing.
Call a pro if the supply line routing is obstructed, existing fittings are corroded, the shutoff fails, soldering or wall access is needed, or persistent leaks occur after installation.
Tools and Materials Needed
A concise list of essential tools—adjustable wrench, tape measure, tubing cutter, plumber’s tape, and a bucket—prepares the reader for the job.
Recommended materials and fittings are compared, including flexible braided supply lines versus hard tubing options like copper or PEX, plus appropriate shutoff valves and compression fittings.
Optional tools and parts that can simplify installation, such as a basin wrench, flexible coupling, and thread sealant, are noted for those seeking an easier workflow.
Essential tools list
Proper tools guarantee the water line is installed safely and efficiently; the following list covers what a typical homeowner or DIYer will need for most toilet water line installations.
Essential handheld tools and basic safety items streamline the job and reduce risks.
- Adjustable wrench, slip-joint pliers, basin wrench.
- Tubing cutter or hacksaw, deburring tool.
- Tape measure, flashlight, plumber’s tape, gloves.
Recommended materials and fittings (flexible supply line vs copper/PEX)
Several common options exist for toilet water lines, each with trade-offs in cost, durability, and ease of installation.
Flexible braided stainless supply lines are affordable, simple to fit, and resist kinking.
Copper offers longevity and rigidity but requires soldering or fittings.
PEX combines flexibility with durability, using crimp or push-fit connectors.
Choose compatible shutoff valve and compression or threaded fittings.
Optional tools and parts for easier installation
Many installers find that a few optional tools and parts speed the job and reduce callbacks: a basin wrench for tight valve access, adjustable pliers or a small pipe wrench for stubborn fittings, thread seal tape for threaded connections, and a selection of spare compression rings and nuts for older shutoff valves.
Also useful: a tubing cutter for PEX/copper, a deburring tool, quick-connect adapters, and a small flashlight.
Preparing the Work Area and Safety Precautions
Before any fittings are touched, the water supply to the toilet should be shut off and the tank and bowl drained to prevent spills.
If isolation valves are absent or the work affects multiple fixtures, the building or main water must be turned off.
The worker should wear appropriate PPE and protect the floor with drop cloths or cardboard to guard against damage and contamination.
Shutting off water and draining the toilet
Turn off the toilet’s shutoff valve and confirm the supply line is closed, then flush to drain the tank and use a sponge or towel to remove remaining water from the bowl and tank.
Place a bucket under the supply connection, disconnect the line, and catch residual water.
Keep towels or rags handy to absorb spills and protect flooring during the replacement.
Turning off building/main water if required
If the shutoff at the toilet and the disconnected supply line do not stop water flow—or if work involves multiple fixtures—the building or main water should be shut off next.
Locate the main valve (usually near the meter or utility entry), close it fully, then verify by opening a lower faucet to relieve pressure.
Notify occupants and label the valve if accessible.
Personal protective equipment and floor protection
Wear appropriate personal protective equipment and protect the floor to prevent injury and damage during installation.
The installer should wear safety glasses, gloves, and knee pads; use hearing protection if cutting.
Lay a waterproof drop cloth or thick cardboard under the work area and secure with tape.
Place absorbent towels around fittings to catch leaks.
Keep a clear, well-lit workspace to reduce trip hazards.
How to Remove the Old Supply Line Safely (If Replacing)
The old supply line and shutoff valve are removed methodically, beginning with turning off the water, draining the line, and loosening fittings with the proper wrench.
The shutoff valve and its packing should be inspected for corrosion, mineral buildup, and any signs of leakage once the line is detached.
If the valve shows damage, stiffness, leaks, or is more than a few decades old, it should be replaced as part of the job.
Step-by-step removal of old line and valve
Begin by shutting off the water at the main or the local shutoff valve and draining the line by flushing the toilet and holding the tank lever until empty.
Loosen and remove the supply nut at the tank with an adjustable wrench.
Place a bucket under the valve, loosen the valve’s compression nut, remove the old valve and tubing, and clean the pipe end for the new installation.
Inspecting shutoff valve and shutoff packing for leaks
Before removing the old supply line, inspect the shutoff valve and its packing for signs of leakage, corrosion, or looseness that could cause water to escape once pressure is released.
Check for drips, mineral buildup, wetness, and loose packing nuts.
Gently operate the valve to confirm smooth action; note any seepage when partially closed.
Document findings before proceeding.
When to replace the shutoff valve as part of the job
When is it appropriate to replace the shutoff valve while swapping a toilet supply line?
It should be replaced when the valve leaks, feels stiff, shows corrosion, or is more than 10–15 years old.
Replacement is also recommended if upgrading to a ball-style valve, converting from soldered fittings, or when the connection type mismatches the new supply line to guarantee reliable shutoff and code compliance.
Selecting the Right Type and Size of Supply Line
Choosing the correct supply line requires comparing materials—flexible braided stainless steel, rigid copper, and PEX—each offering different durability and ease of installation.
The installer must also match thread sizes and connectors (commonly 1/2″ or 3/8″) to the shutoff valve and toilet fill valve to guarantee a leak-free fit.
Finally, length, angle, and available space behind the toilet determine whether a straight, angled, or longer flexible line is most appropriate.
Flexible braided stainless steel vs copper vs PEX
Several common materials—flexible braided stainless steel, copper, and PEX—offer distinct trade-offs in durability, ease of installation, cost, and compatibility with fixtures and valves.
Braided stainless resists corrosion, is flexible, and installs quickly with fittings.
Copper is long-lasting and rigid but requires soldering or compression fittings.
PEX is inexpensive, flexible, and tolerant of freezing but may need specific fittings and code approval.
Matching thread sizes and connectors (1/2″, 3/8″)
If a supply line does not match the fixture or shutoff valve threads, leaks or failed connections will result, so identifying the correct size and connector type is essential.
Common sizes are 1/2″ IPS for older valves and 3/8″ compression for modern fixtures.
Verify thread type (IPS, NPT, or compression) and choose matching connectors or adapters, ensuring proper ferrules, washers, and hand-tightening plus quarter-turn with a wrench.
Length, angle, and space considerations for toilet installations
After confirming matching thread sizes and connector types, attention turns to supply line length, bend angles, and the clearance around the toilet so the line reaches without kinking or stressing fittings.
Measure distance from shutoff to fill valve, allow gentle curves with minimum 3–4 inch bend radius, choose appropriate flexible or rigid lines, and guarantee access space for future maintenance and replacement.
Step-by-Step Installation of a New Toilet Water Line
The installer begins by preparing fittings and applying plumber’s tape or appropriate sealant to threaded connections.
Next, the supply line is connected to the shutoff valve, routed neatly to the toilet, and attached to the fill valve with care to avoid kinks.
Final steps include tightening fittings to manufacturer recommendations without overtightening, turning the water back on, and purging air from the line while checking for leaks.
Preparing fittings and applying plumber’s tape or sealant
Prepare fittings and choose the correct sealant before connecting the water line, as proper thread preparation prevents leaks and simplifies later maintenance.
Inspect threads for damage, clean with a wire brush, and remove old tape or sealant.
For metal threads, wrap plumber’s tape clockwise three to five turns; for tapered fittings use pipe dope compatible with materials.
Assemble hand-tight, then wrench to specification.
Connecting to the shutoff valve
Begin by shutting off the main or local supply and draining residual water from the line to prevent spills.
Then verify the shutoff valve and supply outlet match the prepared fitting.
Position the fitting onto the valve, hand-tighten the nut, then use an adjustable wrench to secure without over-tightening.
Inspect for alignment and guarantee the connection is snug before restoring water to test for leaks.
Routing and connecting to the toilet fill valve
After confirming the shutoff valve connection is secure and leak-free, the installer routes the water line toward the toilet tank, planning the shortest, most direct path that avoids kinks and contact with sharp edges.
They position the line to reach the fill valve comfortably, trim excess length, slide on any required ferrules or compression nuts, and hand-thread the fitting onto the fill valve before final seating.
Tightening recommendations and avoiding overtightening
Hand-tighten the connection first, then apply measured additional torque with a wrench until snug—typically a quarter to half turn beyond finger-tight for compression fittings and 1/4 turn for threaded supply valves—while monitoring alignment so the ferrule and nut seat evenly.
Excessive force can crush ferrules, strip threads, or crack plastic fittings; stop at firm resistance and inspect for visible deformation before proceeding.
Turning water back on and purging air from the line
Open the shutoff valve slowly and watch the supply line for steady flow; this controlled reopening prevents sudden pressure spikes that can dislodge fittings or cause leaks.
Observe all joints for drips, tighten as needed.
Flush the toilet several times to purge trapped air, holding the handle for full cycles.
Recheck connections after purging and monitor for a few minutes to confirm no leaks.
Testing and Final Checks
The installer inspects the entire water line and both connection points for visible moisture and drips.
If a leak appears, they tighten fittings, reseal threads or replace the faulty section as needed.
Finally, they operate the toilet to confirm proper filling and that the shutoff valve stops flow completely.
How to check for leaks at both ends and along the line
Begin by repressurizing the supply and flush lines slowly while observing all fittings and connections for any signs of moisture, drips, or seepage.
Inspect the tank-to-valve and wall supply connections, the flex line, and any compression fittings.
Run several test flushes and watch for dampness.
Check floor and cabinet beneath for slow leaks and feel joints for warmth or wetness over a five- to ten-minute period.
What to do if you detect a leak (tighten, reseal, replace)
If a leak is discovered during testing, assess its source and severity immediately to decide whether tightening, resealing, or replacing the component is required.
Minor seepage at compression nuts or flex-line connections often responds to careful tightening, while persistent or high-pressure leaks usually require resealing with proper tape or joint compound or complete replacement of the faulty part.
After repair, retest, inspect for dampness, and verify fittings remain dry.
Verifying toilet fill operation and proper shutoff
Flush the toilet and observe the tank refilling to confirm the fill valve opens, the float stops at the correct waterline, and the fill shuts off without siphoning or continuous flow.
Check for steady shutoff over several cycles, listen for drips, and inspect connections for moisture.
Verify the shutoff valve fully closes, isolating the line, and guarantee no slow refill indicates leakage or faulty components.
Common Problems and Troubleshooting
Common issues after installation include leaks at the shutoff valve or tank connection, low or noisy water flow, and problems from corrosion or seized fittings.
Each problem has straightforward diagnostics—check fittings, supply pressure, and valve operation—to identify the cause.
Simple fixes range from tightening or replacing connectors and washers to cleaning or replacing corroded or stuck valves.
Leak at the shutoff valve connection and fixes
One of the most frequent issues during toilet water line installation is a leak at the shutoff valve connection, typically caused by loose fittings, worn compression rings, or damaged threads.
To fix it, shut off water, drain the line, tighten the nut, replace the compression ring or use thread sealant on damaged threads, then test for leaks and retighten as necessary.
Dripping from the toilet tank connection
Inspect the tank connection promptly when a steady drip appears, as it often indicates a loose nut, deteriorated washer, or misaligned fill-valve tailpiece.
Tightening the nut, replacing the rubber washer or gasket, or reseating the fill-valve tailpiece typically stops leaks.
Confirm the supply line isn’t twisted against the tank and replace corroded fittings.
Test after restoration and monitor for recurrence.
Low water flow or noisy supply line causes
When water enters the tank sluggishly or the supply line emits rattles and bangs, the problem usually stems from restricted flow, faulty valves, or pressure fluctuations. Diagnosing the source quickly prevents intermittent filling and potential damage.
Inspect flexible line kinks, debris-clogged inlet screens, and partially closed shutoffs. Check house water pressure and valve operation.
Replace defective components and flush the line to restore steady, quiet flow.
Dealing with corrosion, seized fittings, or stuck shutoff valves
Corrosion and seized fittings frequently impede toilet water line repairs, turning simple shutoff operations into stubborn, potentially damaging tasks.
Apply penetrating oil, allow soaking time, then attempt gentle back-and-forth motion with appropriate wrenches.
If still stuck, cut and replace corroded components or use a replacement shutoff valve.
Always shut main water off first and protect surrounding finishes from damage.
Cost, Time Estimates, and When to Hire a Professional
Typical DIY costs for a toilet water line are outlined with part prices for supply tubing, shutoff valves, fittings, and connectors.
Time estimates vary by experience, with novices often taking an hour or more and experienced DIYers finishing in 20–40 minutes.
The section also lists clear signs—such as persistent leaks, corroded supply stops, or work near gas or main lines—that indicate a licensed plumber should be hired.
Typical DIY cost breakdown and parts pricing
A basic DIY toilet water line replacement typically costs considerably less in materials than hiring a plumber, with most homeowners spending $10–$60 on parts (flexible braided supply lines, shutoff valves, compression fittings) and an additional $5–$25 for sealants or Teflon tape. Typical breakdown:
| Item | Typical price |
|---|---|
| Supply line | $10–$30 |
| Shutoff valve | $8–$25 |
| Fittings/sealant | $5–$15 |
| Tools/misc | $0–$20 |
Time estimates by experience level
Many DIYers can complete a straight-forward toilet water line replacement in 30–90 minutes, but actual time varies by experience, bathroom layout, and unexpected issues.
Novices should allot 1.5–3 hours, allowing extra time for reading instructions and slow fittings.
Intermediate DIYers typically finish in 45–90 minutes.
Experienced hobbyists often complete the task in 30–45 minutes with minimal cleanup.
Signs the job needs a licensed plumber
While some replacements fit neatly into the time estimates above, certain signs indicate the job should be handed to a licensed plumber.
Complex leaks, corroded supply lines, hidden water damage, irregular shutoff valves, low water pressure, or unclear pipe materials merit professional assessment.
Unexpected structural issues, persistent odors, code compliance questions, or quoted costs exceeding DIY savings also justify hiring a licensed plumber.
Maintenance Tips to Extend the Life of Your Toilet Water Line
A concise maintenance overview helps preserve the toilet water line and prevent costly damage.
It should include a routine inspection checklist, recommended replacement intervals for supply lines and valves, and simple preventive measures to avoid future leaks.
Regular checks and timely part replacement are the most effective ways to extend system life.
Routine inspection checklist
Because small issues in a toilet water line can escalate quickly, a concise routine inspection checklist helps prevent leaks, corrosion, and unexpected failures.
The homeowner or technician should inspect visible fittings, feel for moisture, and listen for drips. Record findings and address anomalies promptly to avoid damage.
- Check fittings and connections
- Inspect flexible line for wear
- Verify shutoff valve operation
How often to replace supply lines and valves
How frequently supply lines and shutoff valves should be replaced depends on material, water quality, and signs of aging. A practical guideline is to replace flexible braided stainless steel lines every 5–7 years and rubber or PVC lines every 3–5 years.
Metal shutoff valves often last 10–15 years but warrant earlier replacement if corrosion, stiffness, or leaks appear.
Replacement timing should follow visible wear, persistent drips, mineral buildup, or loss of smooth operation to prevent sudden failure.
Preventive measures to avoid future leaks
When regularly inspected and modestly maintained, toilet water lines and shutoff valves can often exceed their expected lifespans. Simple preventive steps—cleaning mineral deposits, tightening fittings, and replacing worn flexible hoses on a schedule—significantly reduce the risk of leaks and sudden failures.
Routine checks for corrosion, applying plumber’s tape to threaded joints, ensuring proper clamp tension, and promptly addressing slow drips preserve performance and prevent costly water damage.
Helpful Variations and Upgrades
The section outlines practical variations and upgrades that improve reliability and convenience when installing a toilet water line.
Options include swapping the supply hose for a braided stainless-steel line to resist kinking and corrosion, or fitting an angle stop with an integrated filter or easy-shutoff feature for added protection.
It also covers considerations and basic steps for relocating the shutoff valve to a more accessible or code-compliant position.
Installing a braided stainless-steel line for durability
Installers often choose braided stainless-steel supply lines as an upgrade for increased durability and resistance to kinking, corrosion, and abrasion compared with standard vinyl flex hoses.
These lines offer reliable, long-lasting performance, simple compression or nut connections to angle stops and fill valves, and compatibility with common toilet fittings.
They require no special tools beyond a wrench and careful hand-tightening to avoid leaks.
Adding an angle stop with built-in filter or shutoff features
Upgrading the supply connection with an angle stop that includes a built-in filter or integrated shutoff provides added protection and convenience alongside a braided stainless-steel line.
Such angle stops trap debris, reduce sediment to the fill valve, and allow localized isolation for quick repairs.
Select compatible thread sizes and pressure ratings, follow manufacturer torque recommendations, and test for leaks after installation to guarantee reliable operation.
Relocating the shutoff valve: considerations and steps
When relocating a toilet shutoff valve, careful planning guarantees access, code compliance, and leak-free operation; this includes evaluating wall cavity space, pipe material, and the new valve’s orientation.
Assess local codes, select compatible valve type and fittings, shut off main water, drain lines, cut and deburr pipe, install valve with proper support and sealing, pressure-test, and restore insulation and wall finish.
Visual Aids and Reference Diagrams
The section presents clear visual aids to show a typical toilet water line connection, highlighting routing, shutoff placement, and gasket locations.
It also includes reference diagrams of common fitting types and thread standards to help match parts.
Readers are directed to compare illustrations with their existing fittings before purchasing or cutting pipe.
Typical toilet water line connection diagram
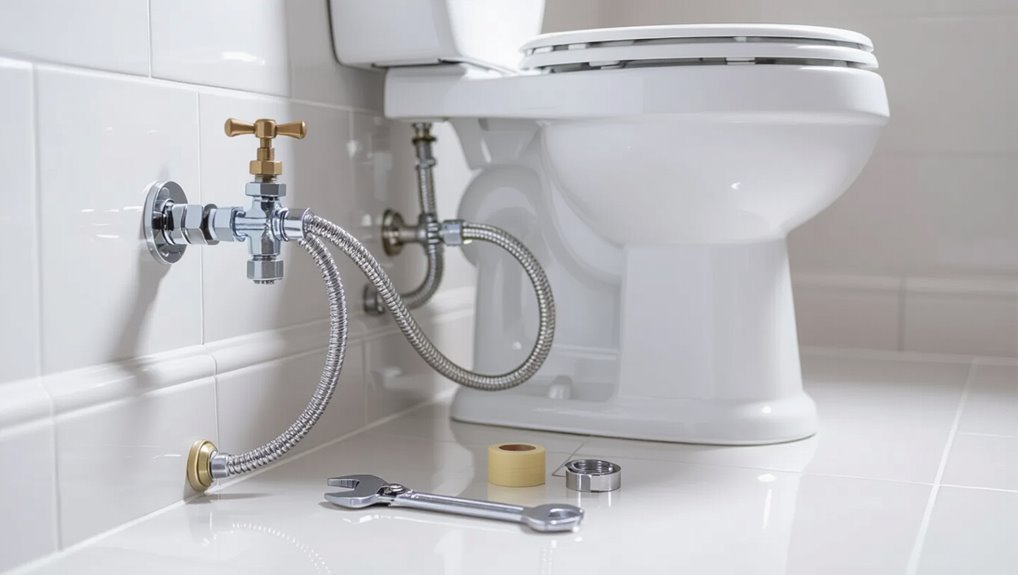
Although compact in appearance, a typical toilet water line connection diagram clarifies the relationship among the shutoff valve, supply line, angle stop, and fill valve, showing dimensions, flow direction, and common fitting types.
This visual reference helps installers verify part compatibility and locate valves, unions, and compression or threaded connections before beginning work. The diagram labels clearances, mounting points, hose routing, and isolation points for maintenance.
Common fitting types and thread diagrams
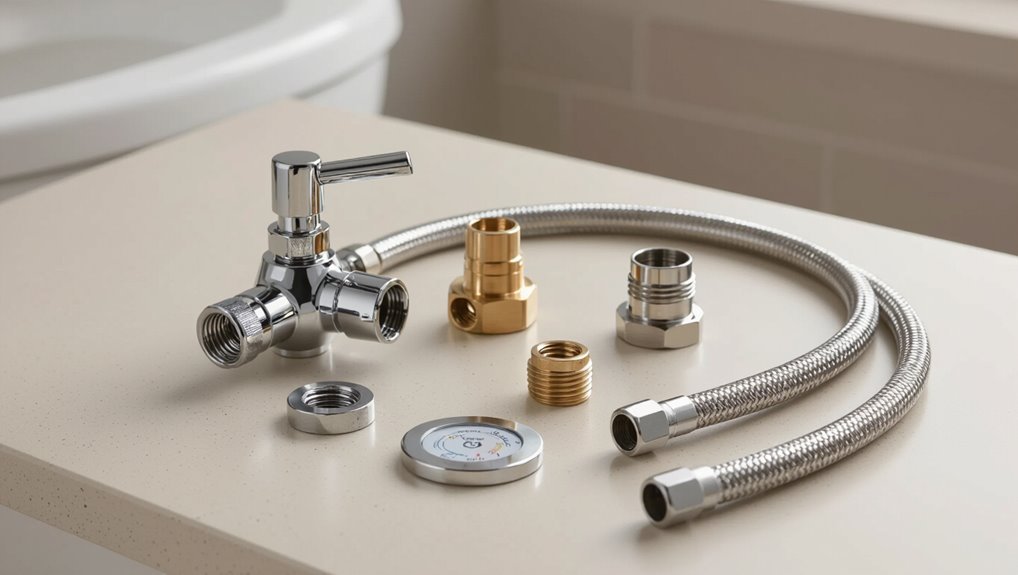
Moving from the layout and clearances of a typical connection, attention shifts to the fittings and threads that join the system: compression, flare, sweat (soldered), and various threaded adapters are shown with profile views and labeled dimensions to aid selection.
Diagrams compare NPT, BSP, and metric threads, indicate male/female orientations, sealing methods (tape, compound, ferrule, solder), and common sizing.
Conclusion
To sum up, the guide equips a homeowner with practical steps to install or replace a toilet water line, blending basic tools, safety checks, and troubleshooting tips into a clear workflow. With patience and attention to seal integrity, most installations finish within an afternoon, saving time and expense versus hiring help. Picture the job done—a gleaming new supply line humming quietly like a well-tuned gramophone—ready to serve reliably for years with simple maintenance.