
How to Cap Copper Water Lines Quickly and Safely: Step by Step Guide
To cap copper water lines quickly and safely, start by shutting off and depressurizing the water supply. Choose the right cap type: use push-fit caps for temporary work, compression caps for removable service, and soldered caps with flux and lead-free solder for permanent closures. Prepare the pipe by cutting it squarely and deburring the edges. After capping, test the seal with pressure or a soap solution to check for leaks. Follow the detailed step-by-step procedures and consider troubleshooting tips and code requirements for a successful job.
Quick overview: When and why to cap copper water lines
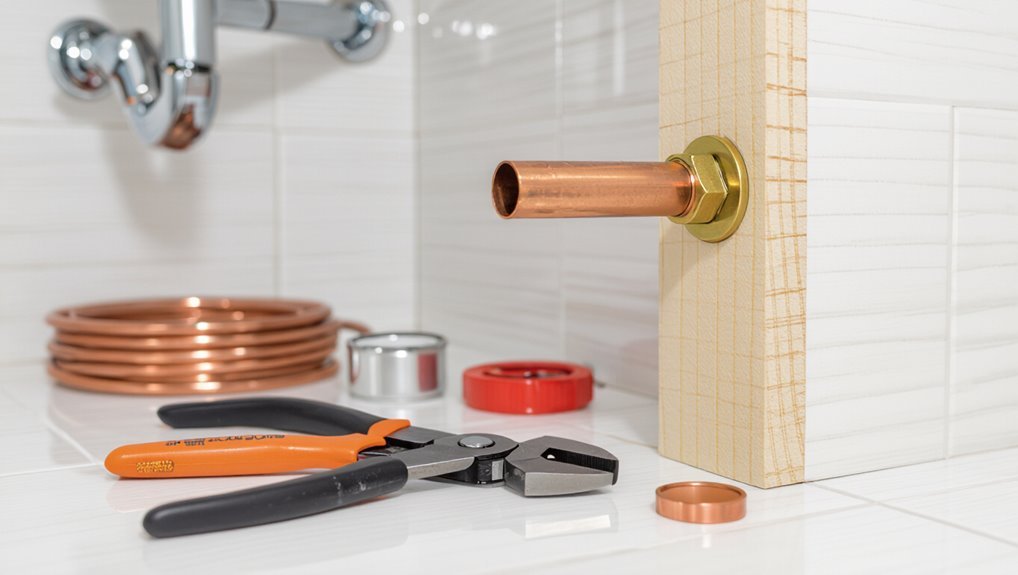
Common situations that require capping a copper water line include renovations, appliance removal, or seasonal shutoffs.
Leaving an uncapped line risks water damage, contamination, and pressure-related failures.
Simple caps can be installed by a competent DIYer, but complex jobs or uncertain connections warrant a professional plumber.
Common scenarios requiring a temporary or permanent cap
Several typical situations prompt the need to cap a copper water line, either temporarily or permanently: abandoning fixtures during renovations, isolating a damaged branch after a leak, winterizing seasonal plumbing, or preparing a property for vacancy.
Contractors and homeowners consult guides on how to cap copper water lines when removing appliances, rerouting systems, conducting repairs, or securing unused supplies to prevent future complications and simplify maintenance.
Risks of leaving lines open (water damage, contamination, pressure issues)
Neglect can quickly turn an open copper water line into a source of damage: standing water in an unused branch may corrode fittings, promote microbial growth, and leak under pressure, risking structural water damage and mold.
Open lines also invite sediment and contaminant ingress, disrupt system pressure and balance, and can cause water hammer or downstream contamination, increasing repair scope and health hazards.
When to call a professional vs. DIY
When should a homeowner tackle capping a copper line and when is a professional required?
Simple, small jobs—accessible shutoff, short exposed pipe, basic solder or compression cap—are suitable for experienced DIYers with proper tools.
Call a professional for complex routing, pressurized mains, multi-story work, corroded pipes, leaks, uncertain permits, or when confidence, tools, or time are lacking to avoid damage or code violations.
Safety precautions before you begin
Before beginning, the technician should don appropriate PPE — gloves, eye protection, and hearing protection as needed — and confirm tools are insulated if electrical hazards exist.
The water supply must be shut off and system pressure relieved, with lines identified as hot versus cold and potable versus non-potable before cutting or capping.
A quick scan for nearby wiring, junction boxes, or structural members helps prevent accidental shocks or damage.
Required personal protective equipment (PPE)
Personal protective equipment is essential to protect against burns, cuts, chemical exposure, and flying debris when capping copper water lines.
Recommended PPE includes heat-resistant gloves, safety goggles or face shield, long-sleeved flame-resistant clothing, and closed-toe work boots.
Respiratory protection is advised when soldering or using flux. Hearing protection may be needed when cutting.
Inspect PPE for damage before starting.
How to safely shut off the water supply and relieve pressure
Locate and close the main shutoff valve to isolate the affected section of plumbing.
Then verify the supply is off by opening a nearby faucet until flow stops.
Depressurize the line by opening faucets at high and low points and draining connected fixtures.
For systems with shutoffs per fixture, close them individually.
Confirm zero pressure by gently opening the target pipe before capping.
Identifying hot vs. cold and potable vs. non-potable lines
Although similar in appearance, copper pipes can be distinguished by feel, placement, and fittings to determine hot versus cold and potable versus non-potable service.
Hot lines are warmer to touch near fixtures and often insulated; cold lines are cooler and commonly lower or routed separately.
Potable lines use brass or plastic fittings and are tied to main supply, while non-potable may connect to irrigation or heater loops.
Checking for electrical or structural hazards nearby
Before cutting or capping any copper line, inspect the immediate area for electrical wiring, load-bearing elements, or gas lines that could be compromised; accidental contact with live wiring or structural members can cause shock, fire, or collapse.
Use a non-contact voltage tester, flash torch, and stud finder.
If utility locations are uncertain, halt work and consult a licensed electrician or structural engineer before proceeding.
Tools and materials needed
A concise list of tools and materials helps guarantee a proper and code-compliant copper pipe cap.
Basic hand tools (tube cutter, deburring tool, adjustable wrench) and common supplies are required for most DIY capping jobs, while specific materials vary by method: compression rings and nuts, solder and flux, push-fit caps, or flare fittings.
Note when to select special items such as lead-free caps for potable lines and appropriate thread sealant or flux for the chosen technique.
Basic tools for DIY capping
Proper preparation hinges on gathering the right tools and materials for capping copper water lines. The essential kit focuses on safety, measurement, cleanliness and secure seals.
Compact, reliable tools reduce errors and speed the job for DIYers with basic plumbing skills.
- Pipe cutter and deburring tool
- Adjustable wrench and pliers
- Wire brush or emery cloth
- Flashlight and gloves
Materials for different capping methods (compression, solder, push-fit, flare)
With tools on hand, selecting materials for the chosen capping method determines the connection type and sealing approach.
Common options include compression nuts and olives for a mechanical seal, solder and copper caps for a brazed joint, push-fit caps with integrated O-rings for quick seals, and flare nuts plus mating caps for flared tubing connections.
- Compression set
- Soldered cap
- Push-fit cap
- Flare cap
When to use special materials (lead-free caps, thread sealant, flux)
Safety and code compliance often dictate when special materials—like lead-free caps, thread sealant, or flux—are required for capping copper lines.
So the installer should choose components that match the water system’s pressure, temperature, and potable-water regulations.
Use lead-free caps for potable systems, PTFE or approved tape/sealant on threaded joints, and appropriate flux for solder joints.
Verify approvals and temperature ratings.
Step-by-step methods to cap copper water lines
The following section outlines four practical ways to cap copper water lines: push-fit caps for a fast, solder-free seal; compression caps that require minimal tools; soldered (sweat) caps for a permanent, heat-applied joint; and threaded or adapter caps for installations with matching threads.
Each method’s step-by-step procedure, required tools, and pros and cons are presented separately. Readers can select the approach that best fits pipe condition, permanence desired, and available tools.
Method 1 Push-fit (quickest, no solder)
Push-fit caps are appropriate for temporary or permanent capping of accessible copper lines where the pipe is clean, straight, and free of significant pressure beyond normal household levels.
Installation requires cutting the pipe square, deburring and cleaning the end, then firmly pushing the cap onto the pipe until it seats; some models include a visual marker or audible click to confirm engagement.
After installation, the connection should be pressurized and inspected for leaks, and a wet paper towel or soapy water can be used to verify a watertight seal.
Suitable situations for push-fit caps
When a temporary or permanent termination of a copper water line is needed without heat or specialized tools, push-fit caps are an efficient choice; they work best on clean, straight sections of pipe with sufficient length for a full engagement and where system pressure is within the cap’s rated limits.
Ideal situations include accessible stub-outs, pressure-tested systems, short-term shutdowns, and repairs requiring minimal disruption or when soldering is impractical.
Step-by-step installation for push-fit caps
Prepare a clean, straight section of copper pipe and gather a properly sized push-fit cap, a pipe cutter, deburring tool or file, and a cloth.
Remove water, cut squarely, deburr and clean, then dry the pipe. Push the cap firmly until it seats, ensuring the O-ring engages.
- Cut pipe cleanly
- Deburr edge
- Wipe dry
- Push cap fully seated
Testing and verifying the seal
Verify the integrity of a push-fit cap immediately after installation to guarantee a watertight seal and prevent leaks.
Inspect visually for full seating and any visible deformity. Restore water pressure gradually, observing for drips at the joint for several minutes.
Apply soapy water to detect fine leaks; bubbles indicate failure. If leaking, depressurize, remove and reinstall or replace the cap.
Method 2 Compression cap (mechanical, tool-minimal)
Compression caps offer a simple, tool-minimal option for temporarily or permanently sealing exposed copper lines when access is limited and pressure ratings match the system.
The following section outlines step-by-step installation—measuring and cutting the pipe square, sliding on the nut and ferrule, and tightening to the manufacturer’s torque—and highlights common errors such as undercutting the pipe, omitting the ferrule, or overtightening.
Practical tips to avoid leaks and guarantee a reliable seal are provided alongside troubleshooting guidance.
When compression caps are appropriate
When a copper line will remain accessible and water pressure will not exceed typical household levels, a compression cap offers a quick, reliable way to seal the pipe without soldering.
It suits temporary shutoffs, unfinished basements, and service stub-outs. Best for straight, clean-cut tubing with proper ferrule fit; not recommended where concealed, high-pressure, or permanent code-mandated joints are required.
Step-by-step installation for compression caps
Begin by cutting the copper tube squarely and removing any burrs so the cap can seat evenly; a clean, straight end is essential for a reliable compression seal.
Slide the nut and ferrule onto the tube, insert the tube into the cap, hand-tighten the nut, then snug with a wrench until firm.
Visualize:
- Clean square cut
- Ferrule aligned
- Nut threaded by hand
- Final wrench snug
Common mistakes and how to avoid them
After the nut is snugged, several common mistakes still threaten a reliable seal; recognizing and preventing these will save time and leaks.
Mistakes include misaligned ferrules, over- or under-tightening, using damaged caps, leaving burrs, and failing to test.
Avoid them by deburring and cleaning, seating ferrules squarely, tightening to finger-plus-quarter-turn guidelines, inspecting components, and performing a pressure or leak test before finishing.
Method 3 Soldered (sweat) cap (permanent, high-temperature)
Soldering is recommended when a permanent, high-temperature seal is needed or when other caps may not withstand pressure or heat.
The process requires careful preparation of the copper—scraping or sanding to bright metal, applying flux, and fitting the cap—followed by a controlled heating and solder application sequence.
After cooling, the joint must be cleaned and pressure-tested to confirm a leak-free seal.
When to choose soldering over other methods
Choose the soldered (sweat) cap when a permanent, high-temperature seal is required and the copper pipe will remain in service or behind finished surfaces.
Prefer soldering for pressurized lines, joints subject to thermal cycling, or installations needing long-term leak resistance.
Avoid it where heat can damage nearby materials, for temporary caps, or when quick, nonthermal methods (compression, push-fit) suffice.
Preparing copper for soldering (cleaning, fluxing)
Prepare the copper with care: remove oxidation and debris, then apply flux to confirm a clean, wetting surface for the solder.
The installer inspects, cleans, and fluxes precisely to guarantee cap adhesion and leak-free joints.
- Sand pipe end to bright copper.
- Deburr interior edge.
- Wipe with solvent to remove oils.
- Brush flux evenly over mating surfaces.
Step-by-step soldering procedure
Begin by seating the fluxed cap onto the cleaned pipe end and ensuring alignment before applying heat.
Using a torch, heat evenly around the joint until flux sizzles.
Feed solder to the joint, allowing capillary action to draw metal into the seam.
Remove heat once filled and let the joint set briefly before moving.
- Torch glow
- Sizzle of flux
- Molten bead
- Smooth seam
Cooling, cleaning, and leak testing
After the solder has flowed and the torch is removed, the joint should be allowed to cool naturally to room temperature without disturbance to guarantee a solid bond.
Once cool, clean flux residue with warm water and a brush to prevent corrosion.
Repressurize the line slowly, inspect visually, then apply soapy water to detect bubbles.
Repair or redo if any leak appears before insulation and final placement.
Method 4 Threaded or adapter caps (for threaded installations)
When threaded caps are required on a copper water line, installers first fit a compression or sweat-to-thread adapter to convert the copper to a male or female thread.
Proper application of thread sealant—PTFE tape or pipe dope—and adherence to manufacturer torque limits guarantee a leak-free, mechanically secure connection.
Careful alignment and hand-starting threads reduce cross-threading and damage to the adapter.
Converting copper to threaded fittings using adapters
Converting a copper water line to accept a threaded cap requires installing a copper-to-threaded adapter that provides a secure changeover from smooth tubing to male or female threads.
The procedure: cut and deburr the tube, clean and flux the joint, solder or sweat the adapter, verify alignment, then attach the threaded cap to the adapter.
Inspect the joint for leaks after pressure testing.
Proper use of thread sealant and torque limits
Select and apply the correct thread sealant and observe torque limits to guarantee a watertight, damage-free connection when using threaded or adapter caps on copper lines.
Use approved PTFE tape or pipe thread compound rated for potable water. Wrap tape clockwise three to five times or apply compound sparingly.
Tighten by hand, then wrench to manufacturer torque specification—avoid over-torquing to prevent thread damage or leaks.
How to test and confirm a secure cap
After capping a copper water line, the installer should perform pressure tests appropriate for DIY or professional standards to verify the seal.
A careful visual inspection combined with a soap-bubble solution applied to joints will reveal any escaping air or water.
Finally, short-term and periodic long-term monitoring—checking fittings after initial pressurization and again over days or weeks—confirms lasting integrity.
Pressure test procedures for DIY and professional checks
A pressure test verifies that a capped copper line is leak-free and secure by subjecting the capped section to controlled air or water pressure and monitoring for drops or visible seepage.
Technicians isolate the segment, attach a gauge, pressurize to code-specified PSI, hold for the required duration, then observe. Procedures differ for DIY versus licensed plumbers.
- Isolate and plug ends.
- Attach gauge.
- Pressurize to spec.
- Hold and observe.
Visual inspection and soap-bubble leak testing
Inspect the capped joint visually and with a soap-bubble solution to quickly confirm there are no small leaks or loose fittings.
Apply mixture to seams and observe for continuous bubbles while the system is pressurized.
Check soldered, compression, or push-fit connections for hairline gaps, corrosion, or moisture.
If bubbles form, depressurize, tighten or reseal the cap, then retest until no bubbles appear.
Monitoring after capping (short-term and long-term checks)
When the cap is installed, the first step is a short-term check to verify immediate integrity and then establish a schedule for long-term monitoring to catch slow leaks or degradation over time.
Perform a pressure test, inspect joints, and reapply soap solution.
For long-term checks, log pressure readings weekly initially, then monthly, and inspect for corrosion or movement; address anomalies promptly.
Troubleshooting common problems
Common issues after capping copper lines include slow drips versus major leaks, corroded or damaged pipe ends, and failures during soldering that can also harm nearby materials.
Guidance should differentiate temporary fixes from conditions that require upgrading to a permanent repair.
Clear steps for identifying leak severity, preparing corroded ends, and recovering from soldering problems help determine when professional intervention is needed.
Fixing a leaky cap (slow leak vs. major leak)
A leaky cap can present as a slow, persistent drip or a more serious stream indicating a failed joint or cracked fitting; distinguishing between these allows appropriate repair choices.
For slow leaks, tighten fittings, dry area, apply threaded sealant or solder a new cap after draining.
For major leaks, shut water, cut back to sound copper, install a compression or push-fit cap and pressure-test before restoring service.
Dealing with corroded or damaged pipe ends
Inspect the pipe ends closely for pitting, thinning, flaking green or white corrosion, or uneven cuts that prevent a good seal.
Corroded sections should be trimmed back to sound metal with a tubing cutter. Clean with emery cloth or brush to bright copper.
If damage is extensive, consider replacing the segment or using a mechanical repair coupling rated for potable water before installing the cap.
What to do if soldering fails or heat damaged nearby materials
If soldering attempts fail or nearby materials are heat-damaged after trimming and cleaning the pipe ends, assess the cause and contain any hazards before proceeding.
Stop work, let components cool, and ventilate.
Inspect for charred insulation, wiring, or structural damage.
Remove compromised materials, replace with heat-resistant alternatives, and dry the area.
Retry using proper flux, fit, and heat control or opt for a mechanical cap.
When a temporary cap needs upgrade to permanent repair
When a temporary cap shows signs of leakage, corrosion, or mechanical stress, the situation requires converting the quick fix into a permanent repair to guarantee long-term system integrity.
The technician assesses pipe condition, removes the temporary cap, cleans and deburr, then selects an appropriate permanent fitting—soldered cap, compression fitting, or brazed joint.
Pressure-test and insulate or support the repair to prevent recurrence.
Code, materials, and health considerations
Before capping copper water lines, the author notes that local building codes and permit requirements must be checked to guarantee legal compliance.
Materials used should meet lead‑free and potable water standards to protect drinking-water safety.
Old fittings, flux, and solder require proper disposal and safe handling to minimize environmental and health risks.
Local code and permit considerations for plumbing changes
Local plumbing codes and permit requirements dictate acceptable methods for capping copper water lines, and compliance is essential both for legal reasons and for public health.
Practitioners should verify local jurisdiction rules, obtain required permits, follow inspection schedules, and use approved materials and fittings.
Failure to comply can result in fines, failed inspections, or liability for later failures; document approvals and retain records.
Lead-free requirements and potable water compliance
Although capping copper water lines may seem straightforward, compliance with lead-free requirements and potable-water standards is critical to protect health and meet code.
Install only certified lead-free fittings and solder; verify NSF/ANSI 61 and state limits.
Confirm materials and workmanship prevent contamination, maintain full bore for flushing, and document compliance for inspection.
Noncompliant components risk enforcement and health liabilities.
Disposal of old fittings and safe handling of flux and solder
Proper disposal of old copper fittings and careful handling of flux and solder protect both workers and the environment while ensuring code compliance.
Contractors must segregate scrap copper for recycling, avoiding landfill. Use lead-free solder and certified flux; store in labeled containers and follow MSDS guidance.
Dispose of contaminated rags and residues as hazardous waste if required by local regulations; document disposal for inspections.
When to replace a capped line or restore service
A capped copper line should be evaluated for corrosion, pressure integrity, and stagnation before any reconnection is considered.
When restoring service, technicians should follow procedures that purge air, flush stagnant water, and use proper fittings to prevent contamination.
The cap location and any work performed must be documented and communicated to occupants or building managers.
Signs the capped line is ready to be reconnected
Inspect visual and performance indicators before deciding to reconnect a capped copper water line.
Confirm the cap and surrounding fittings show no corrosion, cracks, or leaks; guarantee joints remain secure and soldered seams intact.
Verify water pressure and flow stability at downstream fixtures, absence of discoloration or sediment, and that any prior repairs have cured.
Document inspection results before restoring service.
Reconnection best practices and minimizing air/water contamination
Several factors determine whether a capped copper line should be replaced or simply reconnected: extent of corrosion, age and condition of the cap and fittings, evidence of internal contamination, and the history of the system’s repairs.
Reconnection requires flushing, pressure testing, and chlorination if contamination is suspected.
Replace if pitting, brittle solder, or recurring contamination exists.
Use certified fittings and purge air to prevent bacterial growth and water hammer.
Documenting the cap and notifying household or building occupants
Documenting each capped copper line immediately after work completion guarantees traceability and informs decisions about replacement or service restoration. Records should include cap location, type and condition of fitting, date, technician, pressure test and chlorination results, and any observed contamination or corrosion.
Notify occupants with location, expected downtime, safety precautions, and contact info.
Replace or restore service when tests pass, repairs completed, and occupants acknowledged timing.
Time-saving tips and best practices for efficient capping
The guide outlines how to select the fastest reliable capping method for common situations, from simple press-fit caps to soldered or compression fittings.
It emphasizes staging tools and spare parts to complete the job in a single trip.
It also highlights steps—cleaning, proper sealing, and corrosion-resistant materials—to minimize future maintenance.
Choosing the fastest reliable method for different scenarios
When is speed more important than permanence? The guide recommends quick, reliable methods matched to context: temporary shutoff, emergency leak, test run, or long-term repair planning.
Choose push-fit caps for instant stops, compression caps for short-term durability, soldered caps when permanence is needed later, and threaded adapters for repeated access.
- Push-fit cap
- Compression cap
- Soldered cap
- Threaded adapter
Organizing tools and parts for one-trip completion
A compact checklist of tools and parts prevents return trips by guaranteeing everything needed for a single visit is gathered beforehand.
The technician organizes items: tubing cutter, deburring tool, flux, solder or compression caps, torch or wrench set, PTFE tape, emery cloth, measuring tape, and safety gear.
Parts sorted in labeled pouch and checklist ticked before departure to guarantee efficient completion.
Preventing future maintenance issues when capping
If installed with attention to joint integrity and accessibility, capped copper lines remain reliable and maintenance-free for years.
Inspect and clean pipe ends, use quality solder or compression fittings, and apply thread sealant where required.
Label capped lines, leave serviceable access panels, and document locations.
Periodic visual checks and moisture monitoring prevent corrosion and undetected leaks, saving time and costly repairs.
Comparative summary of capping methods
Which cap is best depends on pipe size, permanence, and available tools: soldered caps offer the most secure, permanent seal for copper but require flux, solder, and torch skills; compression caps provide a reliable, tool-limited alternative suited to moderate-term use and easier removal; push-fit caps are fastest and safest for temporary or emergency stops yet cost more and may not suit buried or high-pressure long-term applications; threaded adapters and mechanical plugs serve specialized needs where compatibility or frequent access is required but add bulk and potential leak points.
| Type | Strength | Best use |
|---|---|---|
| Soldered | Permanent | Long-term, exposed lines |
| Compression | Moderate | Accessible, removable caps |
| Push-fit | Quick/temporary | Emergency or repairs |
Conclusion
To summarize, capping copper water lines quickly and safely reduces leak risk and enables system modifications. A homeowner in Portland sealed an unused branch with a threaded cap and flux-soldered joint, restoring water service same day and avoiding a costly plumber visit. Proper PPE, correct materials, and pressure testing are essential. When uncertain, professionals should be called; otherwise, timed inspections and occasional replacement keep capped lines reliable and code-compliant.

