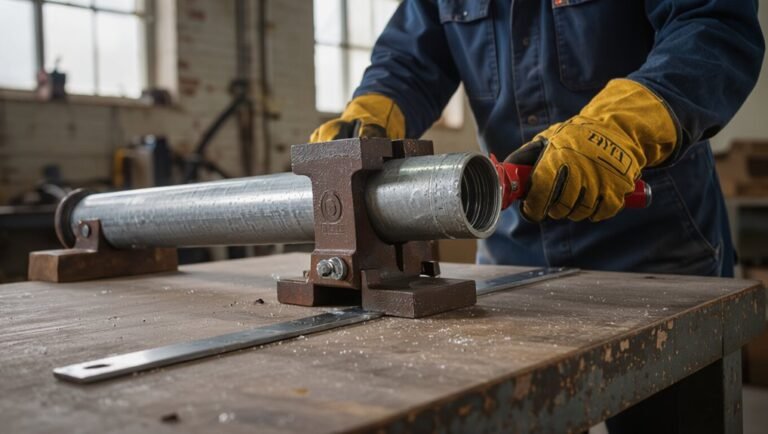
How to Clean a Coupling Rigid: Step-by-Step Guide for Safe, Effective Maintenance
To effectively clean a rigid coupling, follow this step-by-step guide. Start by ensuring lockout-tagout procedures are in place and gather your personal protective equipment (PPE) and necessary tools. Begin by removing loose debris and surface rust using soft brushes, compressed air, and lint-free cloths. Inspect the bores, keyways, and fasteners for any signs of pitting or damage. Apply a low-residue, nonconductive solvent sparingly, limiting soak time before rinsing and drying the coupling thoroughly. When reassembling, adhere to proper torque and alignment procedures, and check bearings and seals for integrity. This process ensures safe and effective maintenance of your rigid coupling. Further steps detail specific inspection criteria, methods, and guidance on when to replace components.
What a Rigid Coupling Is and Why Cleaning Matters
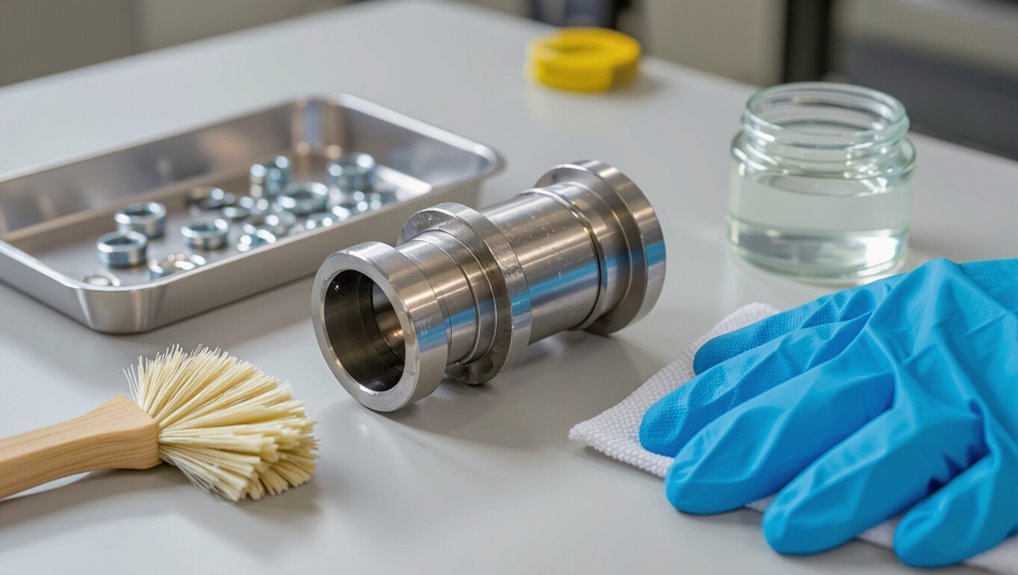
A rigid coupling is a solid, non-flexible connector used to join shafts in machinery where precise alignment is required. It is commonly found in pumps, gearboxes, and industrial drives.
Contaminants such as grit, grease, and corrosion can accelerate wear, cause misalignment, and lead to premature failure. Regular cleaning removes debris, reduces friction-related damage, and helps maintain service life and operational safety.
Definition and common applications of rigid couplings
Rigid couplings are solid mechanical connectors that join two shafts to transmit torque without permitting misalignment or relative motion between them.
They appear in machine tools, pumps, compressors, gearboxes, and precision drives where rigid shaft alignment is required.
Maintenance guidance, including how to clean a coupling’s rigid, focuses on preserving contact surfaces, fasteners, and protective finishes to guarantee consistent performance.
Risks of dirty or contaminated couplings (wear, misalignment, failure)
Contaminants such as dirt, metal shavings, oil residues, and corrosion layers accelerate surface wear, compromise fastener clamping, and promote shaft misalignment that can cascade into bearing damage and premature coupling failure.
Accumulated debris obscures inspection, fosters fretting and galvanic corrosion, and alters torque transmission. Vibrations increase, tolerances shift, and unexpected downtime or catastrophic separation becomes more likely without timely remediation.
How regular cleaning extends service life and ensures safety
Cleaned and maintained on a routine schedule, a rigid coupling preserves precise shaft alignment and consistent torque transmission, directly reducing wear on mating surfaces and adjacent bearings.
Regular cleaning removes abrasive particles, corrosive residues, and lubricant build-up that cause imbalance, heat, and fatigue.
Predictable maintenance intervals extend component life, minimize unplanned downtime, and maintain operational safety by preventing seizure, misalignment-induced failures, and hazardous vibrations.
Safety Precautions Before You Start
Before beginning cleaning, the technician should don appropriate PPE such as gloves, eye protection, and respiratory gear suited to the contaminants.
Machines must be isolated and locked out according to lockout-tagout procedures to prevent unexpected startup.
Any hazardous residues encountered should be handled with compatible methods and disposed of per local regulations.
Required personal protective equipment (PPE)
Proper personal protective equipment (PPE) is essential to protect personnel from chemical exposure, sharp edges, and pinch points when cleaning a coupling rigid.
Required PPE includes chemical-resistant gloves, safety goggles or face shield, cut-resistant sleeves, steel-toe footwear, and hearing protection if nearby noise levels exceed limits.
Disposable coveralls and respirators are recommended when solvent vapors or hazardous particulates are present.
Lockout-tagout and machine isolation procedures
Begin by de-energizing and isolating all power sources that could move or energize the coupling rigid: electrical, hydraulic, pneumatic, and stored-energy systems must be controlled.
Apply lockout-tagout devices per site procedures, verify zero energy with appropriate tests, and secure isolation points.
Only authorized personnel should remove locks/tags after completing work and confirming safe restart conditions.
Handling hazardous residues and disposal rules
Many coupling rigs may retain oily films, metal shavings, solvents, or other hazardous residues that require controlled handling and disposal.
Personnel should use appropriate PPE, contain residues with absorbents, and segregate waste by type.
Follow local hazardous-waste regulations, label containers, and use authorized disposal vendors.
Decontaminate tools and document disposal actions to maintain compliance and traceability.
Tools, Materials, and Replacement Parts You’ll Need
A concise list of required tools, materials, and spare parts sets the stage for an effective coupling rigid cleaning.
Essential items include cleaning tools (brushes, picks, scrapers), appropriate solvents and lubricants selected for material compatibility, and inspection gauges such as feeler gauges and calipers.
It is also advisable to have common replacement parts and consumables on hand to address wear or contamination discovered during inspection.
Cleaning tools (brushes, picks, scrapers)
Select compact, sturdy tools designed to reach tight seams and remove stubborn deposits without damaging the coupling’s surfaces.
A small toolkit improves access and control during disassembly and inspection. Choose shapes and stiffness appropriate for crevices, threads, and mating faces to prevent scoring or deformation.
- Nylon-bristle brush (various sizes)
- Stainless steel pick set
- Plastic scrapers
- Brass wire brush
Cleaning agents and lubricants: solvent types and compatibility
Choose cleaning agents and lubricants based on the coupling material, seal types, and manufacturer recommendations to prevent corrosion, swelling, or loss of sealing integrity.
- Use non‑chlorinated solvents for light grease removal on metals.
- Select petroleum‑based lubricants for metal‑to‑metal surfaces where seals tolerate hydrocarbons.
- Use synthetic or PTFE greases with compatible elastomers.
- Avoid strong alkalis or oxidizers that attack seals and coatings.
Inspection tools and measuring equipment (feeler gauges, calipers)
Several precision tools are essential for inspecting a rigid coupling: feeler gauges to check axial and radial clearances, calipers (digital or vernier) for measuring bore diameters and flange thicknesses, micrometers for shaft and keyway dimensions, and depth gauges for shoulder and recess verification.
- Feeler gauge set for clearance checks
- Calipers for diameter/thickness
- Micrometer for shaft/key fits
- Depth gauge for recesses
Spare parts and consumables to have on hand
A compact inventory of spare parts and consumables prevents downtime and guarantees proper reassembly during coupling maintenance.
Essential items include replacement seals, O-rings, gaskets, and fastening hardware matched to manufacturer specs.
Stock approved lubricants, anti-seize, threadlocker, and cleaning solvents.
Keep spare bolts, dowel pins, bushes, and a service kit for common wear parts.
Label parts and track usage for timely reorder.
Step-by-Step Cleaning Procedure for Rigid Couplings
The procedure begins with preparatory steps—ensuring safe access, recording assembly documentation, and marking component orientation for reassembly.
Next, a controlled disassembly removes coupling halves and fasteners while minimizing damage and retaining parts for inspection.
Cleaning progresses from initial dry removal of debris and corrosion to targeted wet cleaning with appropriate solvents, finishing with detailed attention to bores, keyways, and fastener areas.
Preparatory steps: access, documentation, and marking components
Before any disassembly, personnel should verify access, record baseline conditions, and mark components to guarantee accurate reassembly and traceability.
Inspect clearance, lighting, and required tools; document serial numbers, torque settings, and wear evidence with photos and notes.
Apply durable, non-invasive marks or tags to each half, fastener, and spacer.
Secure permits and communicate shutdown status to affected teams.
Disassembly sequence and safe removal of coupling halves
When ready to proceed, technicians should follow a documented, stepwise disassembly sequence that minimizes risk and preserves alignment data.
They must isolate equipment, lock out power, and relieve residual loads.
Record fastener locations and torque marks before loosening in a prescribed order.
Use appropriate tools and lifting aids, support each half to prevent sudden separation, and store components on prepared, labeled surfaces.
Initial dry cleaning: removing bulk debris and corrosion
Begin by removing loose debris and surface rust with dry, non-abrasive methods to prevent damage to mating faces and alignment marks.
Use soft brushes, compressed air at safe pressure, and lint-free cloths to clear grime and particulates.
Gently work corrosion flakes free with plastic or brass picks.
Inspect surfaces and fastener threads for pitting or embedded particles before proceeding to wet cleaning.
Wet cleaning: solvent selection and application techniques
Select solvents and apply them methodically to dissolve oils, salts, and remaining corrosion without harming metal surfaces, seals, or alignment markings.
Choose low-residue, nonconductive solvents compatible with alloy and elastomer specifications.
Apply with lint-free wipes, brushes, or controlled spray; limit soak times.
Rinse with approved fluid, then dry thoroughly using filtered compressed air or clean cloths to prevent contamination and preserve tolerances.
Detailed cleaning of bores, keyways, and fastener areas
Inspect the bore, keyway, and fastener areas to identify deposits, corrosion, burrs, or alignment marks requiring attention.
Use appropriate brushes, picks, and non‑reactive solvent to remove grease, sludge, and debris.
Carefully work burrs with a fine file or stone, clearing chips.
Clean threads and fastener recesses with a thread chaser or brush.
Rinse residues and reinspect for complete contaminant removal.
Drying and anti-corrosion treatment after cleaning
Allow the component to dry thoroughly and apply corrosion protection promptly to prevent flash rust.
Use compressed air and lint-free cloths to remove moisture from bores, keyways, and crevices. Inspect for residual solvent.
Apply a thin, even film of compatible anti-corrosion lubricant or preservative.
Label treated parts, store in a dry environment, and document the treatment for maintenance records.
Reassembly steps and correct torqueing of bolts
With parts fully dry and corrosion protection applied, reassembly can begin by arranging the coupling halves and fasteners on a clean, organized work surface.
Components are aligned, seals seated, and mating faces checked for debris.
Bolts are installed finger-tight in a star pattern, then torqued progressively in stages to the manufacturer’s specified values using a calibrated torque wrench, confirming each bolt reaches the target.
Functional checks and alignment verification after reassembly
Begin functional checks by performing a systematic verification of the coupling’s mechanical integrity and alignment before returning the assembly to service.
Inspect for proper bolt torque, absence of debris, and correct fit of mating faces.
Rotate shafts slowly, observing runout and listening for abnormal noise.
Measure angular and parallel misalignment with dial indicators or laser tools; correct as needed and document final readings.
Inspection Criteria During and After Cleaning
Inspection during and after cleaning should focus on visible wear, cracks, corrosion, and any deformation that could affect fit.
Dimensional checks and fastener/thread inspections determine serviceability and whether repair or scrapping is required, with clear tolerances guiding the decision.
Seals, keys, and severely damaged components must be replaced rather than reused to guarantee reliable coupling performance.
Visual signs of wear, cracks, and corrosion to watch for
A close visual check should focus on wear patterns, hairline cracks, pitting, and rust deposits that indicate compromised integrity; worn lobes, uneven contact surfaces, and score marks reveal misalignment or abrasive damage, while transverse or radial cracks—especially near bolt holes or stress concentrators—signal imminent failure.
Also note flaking corrosion, crevice corrosion at joints, loose or deformed fasteners, and surface discoloration indicating heat or chemical attack.
Dimensional checks and when to scrap versus repair
How should dimensional checks be applied to determine whether a coupling rigid is repairable or must be scrapped?
Precise measurements of bore, face runout, keyways, and axial length against manufacturer tolerances identify unacceptable deformation.
If deviations exceed specified limits, hard-to-repair distortion, wall thinning, or alignment loss mandate scrapping.
Minor, within-tolerance wear may permit machining or refurbishment with documented reinspection.
Fastener condition and thread inspection guidelines
Examine fasteners and threads systematically during and after cleaning to verify mechanical integrity, dimensional accuracy, and thread fit.
Inspect for corrosion, galling, cross‑threading, nicks, and thread deformation.
Verify thread engagement length and torque ability; compare to specification.
Clean debris from roots and crests, use magnification or gauges for fine threads, and record findings for maintenance disposition and reassembly decisions.
When to replace seals, keys, or the entire coupling
Following thread and fastener assessment, attention turns to seals, keys, and the coupling assembly as a whole to determine serviceability.
Seals should be replaced if cracked, hardened, swelled, or deformed; keys require replacement when edges are rounded, bent, or exhibit corrosion pits.
Replace the entire coupling if misalignment, severe wear, hairline fractures, or lost concentricity compromise mechanical integrity or safe operation.
Common Problems, Root Causes, and Troubleshooting
Common issues after cleaning include residual contamination that can cause noise or vibration, misalignment introduced during reassembly, and bolt loosening that compromises coupling integrity.
Each problem typically has identifiable root causes—insufficient cleaning, improper alignment procedures, inadequate torque or locking methods, and incomplete corrosion protection.
Practical troubleshooting focuses on verifying cleanliness, rechecking alignment and torque, and applying long-term corrosion prevention measures.
Residual contamination causing noise or vibration
Residual contamination trapped in a rigid coupling can produce audible noise and perceptible vibration by creating uneven contact surfaces and unbalanced rotation.
Particles, old lubricant, or corrosion pits alter load distribution and generate intermittent impacts or harmonic excitation.
Inspection should target mating surfaces, bores, and fastener seats.
Cleaning, degreasing, and surface restoration followed by balanced reassembly and torque verification typically resolve noise and vibration issues.
Misalignment introduced during reassembly
Misalignment introduced during reassembly occurs when shaft centers, keyways, or coupling faces are not returned to their original spatial relationships. This produces angular, parallel (offset), or axial misalignments that compromise coupling performance.
Common causes include inadequate marking, omitted alignment checks, debris between faces, or uneven torque.
Troubleshooting: inspect marks, clean contact surfaces, measure runout and offset, correct positions, and recheck alignment before final tightening.
Bolt loosening and preventive fixes
When reassembly errors such as mispositioned faces or uneven torque have been corrected, attention must turn to bolt loosening, a frequent failure mode that can quickly negate alignment work and cause vibration, wear, or catastrophic separation.
Inspect fasteners for proper grade, correct torque, and thread damage. Use locking methods—nyloc nuts, threadlocker, split washers—or periodic torque checks.
Replace stretched bolts and document torque values.
Corrosion recurrence and long-term prevention
Because couplings are exposed to moisture, chemicals, and mechanical stresses, corrosion often reappears even after superficial cleaning, undermining fit, sealing surfaces, and fastener integrity.
Diagnosing recurrence requires distinguishing surface oxidation from pitting, crevice attack, or galvanic corrosion and tracing exposure vectors such as condensate, salt spray, or electrolyte-laden lubricants.
Implement material upgrades, protective coatings, controlled drainage, compatible lubricants, and scheduled inspections with corrosion mapping and torque checks.
Best Practices and Maintenance Schedule Recommendations
Recommended maintenance addresses frequency by environment and duty cycle, prescribes lubrication and corrosion‑protection intervals, and outlines recordkeeping expectations.
A concise inspection checklist helps guarantee consistent checks and documents findings for trend analysis.
Scheduling should balance manufacturer recommendations with observed operating conditions to minimize failures and extend service life.
Frequency guidelines based on environment and duty cycle
Although service intervals vary with operating conditions and load patterns, establishing frequency guidelines tied to environment and duty cycle guarantees consistent coupling performance.
Inspection and cleaning frequency should increase for corrosive, dusty, or wet settings and for high-speed or continuous-duty applications.
Light-duty, clean environments may follow longer intervals.
Adjust schedules after initial monitoring, using wear and contamination trends to refine inspection and maintenance cadence.
Recordkeeping and inspection checklists
A concise recordkeeping system and standardized inspection checklist secure consistent detection of wear, contamination, and alignment issues over a coupling’s service life.
Records should note inspection date, findings, corrective actions, and responsible technician.
Checklists guarantee uniform checks and traceability for audits and trend analysis.
- Inspection date and inspector
- Wear and contamination observations
- Corrective actions taken
- Next scheduled inspection
Lubrication and corrosion-protection intervals
Establish fixed lubrication and corrosion-protection intervals based on operating conditions, coupling type, and manufacturer guidance to prevent premature wear and seizing.
Specify lubricant type, quantity, and application method; record dates and responsible personnel.
Increase frequency for high temperature, moisture, salt exposure, or heavy cycling.
Inspect protective coatings and reapply corrosion inhibitors per schedule.
Adjust intervals after failures or altered duty cycles.
Comparison of Cleaning Methods and When to Use Each
The article compares manual cleaning, ultrasonic cleaning, and chemical soaking for coupling rigids, highlighting differences in cost, time, effectiveness, and safety.
It outlines scenarios where each method is preferable—simple visible debris for manual cleaning, intricate geometries or rapid throughput for ultrasonic, and stubborn residue for chemical soaking.
Trade-offs in expense, processing time, cleaning efficacy, and handling risks are summarized to guide method selection.
Manual cleaning vs. ultrasonic vs. chemical soaking
Compare manual cleaning, ultrasonic baths, and chemical soaking by their effectiveness, speed, equipment needs, and impact on component life to choose the proper approach for a rigid coupling. Manual is precise, low-equipment, suitable for light debris. Ultrasonic excels with intricate crevices. Chemical soaking removes heavy contaminants but may affect finishes; use compatible agents and controls.
| Method | Best for | Key constraint |
|---|---|---|
| Manual | Light fouling | Time, access |
| Ultrasonic | Complex geometry | Equipment cost |
| Chemical | Heavy deposits | Material compatibility |
Cost, time, effectiveness, and safety trade-offs for each method
Weighing cost, time, effectiveness, and safety reveals clear trade-offs that guide method selection for rigid coupling cleaning: manual cleaning is low-cost and low-risk but labor- and time-intensive with limited effectiveness on stubborn or intricate deposits.
Ultrasonic cleaning requires higher upfront equipment expense and safe operating procedures yet often delivers the fastest, most thorough removal in complex geometries.
Chemical soaking can be highly effective and fast for heavy contamination but introduces ongoing consumable costs, disposal requirements, and the risk of surface damage or hazardous exposure unless compatible agents and controls are used.
Tips to Improve Safety and Efficiency
Practical measures can improve both safety and throughput when cleaning a coupling rigid, such as employing jigs and fixtures to standardize and speed disassembly and reassembly.
Consistent training, clear team roles, and communication protocols reduce errors and downtime.
Selecting low-toxicity, recyclable solvents and minimizing waste through targeted cleaning and filtration further enhances safety and environmental performance.
Using jigs and fixtures to speed disassembly/reassembly
Using purpose-built jigs and fixtures speeds coupling rigid disassembly and reassembly by holding components securely, aligning parts precisely, and repeatably controlling clearances.
Custom fixtures reduce handling time, minimize part damage, and guarantee correct torque and seal placement.
Quick-change mounts and indexed locating features cut setup time, improve inspection access, and standardize procedures, yielding faster cycles, fewer errors, and more consistent maintenance outcomes.
Training and team coordination best practices
Effective training and clear team coordination greatly reduce risks and cut downtime during coupling rigid maintenance.
Staff receive role-specific instruction, hands-on drills, and competency checks.
Standardized communication protocols, pre-task briefings, and defined handoff procedures guarantee continuity.
Supervisors monitor adherence and provide corrective coaching.
Regular debriefs capture lessons, update procedures, and reinforce accountability, improving safety, efficiency, and consistent maintenance outcomes.
Eco-friendly solvent and waste-reduction tips
Adopt greener solvents and minimize waste streams to reduce environmental impact and lower disposal costs during coupling rigid maintenance.
Personnel should select biodegradable cleaners, implement solvent recycling, and limit single‑use wipes. Proper segregation and labeling prevent contamination and simplify disposal.
- Use water‑based or bio-solvent cleaners
- Establish solvent reclaim systems
- Replace disposable wipes with launderable rags
- Segregate and label waste containers
When to Call a Professional or Replace the Coupling
Visible cracks, persistent leaks, excessive wear, or misalignment that cannot be corrected with cleaning are indicators that warrant expert evaluation.
A professional can assess structural integrity and perform repairs that may be unsafe for an untrained person.
The decision to replace versus repair should be guided by a cost-benefit comparison of repair expenses, remaining service life, and downtime implications.
Indicators that require expert evaluation
Several clear signs indicate the coupling requires professional assessment or replacement: persistent leaking despite basic repairs, significant corrosion or cracking, misalignment that cannot be corrected with simple adjustments, recurring noise or vibration under normal operation, and damage after impact or overheating.
Additional indicators include sudden loss of torque transmission, visible shaft play, failed seals repeatedly, electrical grounding faults, and unusual thermal hotspots during routine operation.
Cost-benefit considerations for replacement versus repair
Weigh costs and operational risks when deciding to repair or replace a rigid coupling: factor in parts and labor expenses, expected remaining service life after repair, downtime impact, and the probability of future failures.
Perform a cost-per-service-year comparison, include inspection and hidden damage assessments, and consider safety, warranty, and precision requirements.
Replace when repairs approach replacement cost or compromise reliability; otherwise schedule professional repair.
Quick Reference: Condensed Cleaning Checklist
A concise, step-by-step checklist is provided for field technicians to follow when cleaning a coupling rigid.
It outlines required tools, safety checks, disassembly and cleaning actions, inspection criteria, and reassembly steps in logical order.
The checklist is designed for quick reference during on-site maintenance to guarantee consistency and safety.
Step-by-step checklist for field technicians
When preparing to clean a coupling rigid, the field technician follows a concise, ordered checklist that prioritizes safety, inspection, and tool readiness. This checklist serves as a quick-reference guide to guarantee each step is completed methodically before, during, and after cleaning.
- Verify lockout/tagout, PPE, and workspace stability.
- Inspect coupling, seals, and fasteners for wear.
- Assemble brushes, solvents, rags, and torque tools.
- Clean, rinse, dry, reassemble, torque, and document completion.
Conclusion
Cleaning a rigid coupling is likened to tuning a clock: small, precise actions keep the whole mechanism reliable. Adhering to safety precautions, using correct tools, and following the stepwise cleaning and inspection routine prevents wear and failure. Regular maintenance, timely replacement of damaged parts, and escalating complex issues to professionals extend service life and reduce downtime. Consistent, attentive care transforms routine cleaning into dependable, long-term performance.