How to Clean a Toilet Drain Snake Safely: Step-by-Step Guide for Beginners
To clean a toilet drain snake safely after use, follow these steps: Immediately rinse and disinfect the snake to remove waste and prevent corrosion. Always wear gloves and eye protection. Slowly retract the cable, wiping debris onto disposable towels. Rinse the head and cable into a bucket, then scrub with mild detergent. Apply an EPA-approved disinfectant or a diluted bleach solution, ensuring proper contact time. Dry the snake completely and lubricate it before storage. For further assistance, additional troubleshooting, maintenance, and safety tips are available for beginners.
What a Toilet Drain Snake Is and When to Use One
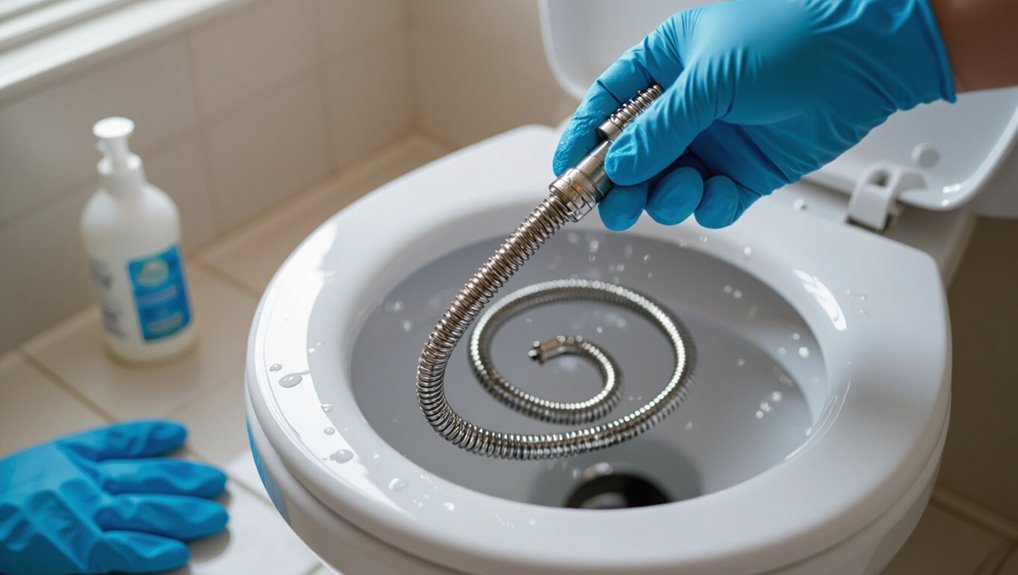
A toilet drain snake is a flexible cable—manual or power-operated—designed to break up or retrieve clogs beyond the reach of a plunger.
It is typically chosen when standing water, persistent backups, or objects lodged past the trap indicate a mechanical obstruction rather than a simple surface clog treatable with a plunger or chemicals.
Before use, potential hazards such as sharp cable ends, damaged porcelain, and exposure to sewage require appropriate protective gear and caution.
Definition and common types of toilet drain snakes
Although often thought of as a last-resort tool, a toilet drain snake is a flexible rod—either manual or powered—designed to reach and dislodge clogs beyond the reach of a plunger.
Types include handheld augers, drum snakes, and motorized cable machines; toilet-specific heads reduce porcelain damage.
Routine maintenance and clear instructions on how to clean toilet drain snake extend tool life and guarantee sanitary use.
Signs a snake is the right tool vs. plunger or chemical drain cleaner
When water backs up slowly or a plunger fails to clear a persistent blockage, a toilet drain snake becomes the appropriate next step; it is especially suitable for clogs located beyond the trap or composed of hair, tissue, or compacted waste that resist simple plunging.
A snake probes deeper, breaks or retrieves obstructive material, and avoids chemical exposure; choose it when mechanical reach and control are required.
Safety hazards to be aware of before starting
After deciding a snake is the appropriate tool instead of a plunger or chemicals, attention must shift to potential hazards before beginning work.
Operators must consider biohazard exposure, splashes, and contaminated water. Protective gloves and eye protection are essential.
Electrical risks from nearby outlets, fragile porcelain, and pipe damage from aggressive feeding must be assessed.
Adequate ventilation and a clear workspace reduce accidents.
Tools and Materials Needed
The section on tools and materials outlines what is needed to clean a toilet drain snake safely and efficiently.
It covers essential protective gear, optional aids that simplify the task, and items to avoid to prevent damage or contamination. Clear recommendations help the reader prepare before beginning work.
- Gloves, eye protection, and a utility towel
- Manual or power drain snake and wrench set
- Bucket, disinfectant, and lubricant for the snake
- Harsh chemical drain cleaners and abrasive tools to avoid
Essential tools and protective gear
Gather basic tools and protective gear before handling a toilet drain snake to guarantee safety and efficiency.
Recommended items include heavy-duty nitrile gloves, eye protection, a waterproof apron, and closed-toe shoes.
In addition, a bucket, disinfectant, clean rags, and a stiff-bristled brush are essential for cleaning and sanitizing the snake and work area after use.
Optional tools that make the job easier
Several handy extras can streamline the job and reduce strain when using a toilet drain snake. A small flashlight improves visibility inside the bowl and trap.
Disposable towels and a bucket catch drips. A hose adapter speeds rinsing. Gloves with reinforced grip and knee pads increase comfort.
A damp cloth and mild disinfectant finish cleanup, minimizing contamination and odors.
Recommended products and materials to avoid
Any household should exclude abrasive powders, wire brushes, and chemical drain cleaners when preparing to snake a toilet; these products can damage porcelain, corrode metal cable coatings, or react dangerously with trapped waste.
Also avoid metal scouring pads, acid-based descalers, and incompatible lubricants.
Use nonabrasive cleaners, plastic or nylon tools, and manufacturer-approved cable oils.
Dispose of hazardous residues per local regulations.
Preparatory Steps Before Snaking the Toilet
Before beginning work, clear the area around the toilet and cover nearby surfaces to prevent damage or contamination.
The water supply should be turned off and the tank flushed to lower water level and minimize splash risk.
Towels and a bucket should be placed nearby to catch spills and make cleanup easier.
How to clear the area and protect surfaces
Clear the bathroom floor and remove nearby items such as rugs, towels, toiletries, and trash bins to create an unobstructed workspace; this minimizes contamination and makes cleanup easier.
Cover surrounding surfaces—floor, vanity, and toilet base—with disposable absorbent pads or plastic sheeting. Protect fixtures with painter’s tape where sheeting meets edges.
Keep a small waste bag and disinfectant wipes nearby for immediate cleanup.
How to shut off water and reduce splash risk
One simple but essential step is to shut off the toilet’s water supply and take measures to minimize splashback before feeding the snake.
Locate the shutoff valve behind the bowl, turn clockwise until snug. Flush to drain the bowl. Close the valve fully to prevent refilling.
Wear gloves and eye protection. Consider a disposable splash guard over the bowl rim to reduce aerosol and liquid dispersal.
How to position towels and a bucket for cleanup
After shutting off the water and minimizing splash risk, towels and a bucket should be arranged to contain any spills and make cleanup straightforward.
Fold absorbent towels into layers and place them around the base of the toilet and on the floor where water may collect.
Position a sturdy bucket within reach for dirty water and tools.
Keep extra towels nearby for quick swaps.
Step-by-Step Guide to Using a Toilet Drain Snake Safely
The following steps outline a safe, methodical approach to using a toilet drain snake, beginning with inspecting the bowl and removing excess water.
Next, the user should don protective gear, guarantee adequate lighting, and insert the snake while carefully feeding the cable.
The guide then covers techniques for feeling and breaking the clog, followed by proper retraction and debris removal.
Step 1 Inspect the toilet and remove excess water
Begin by visually inspecting the toilet bowl, tank, and surrounding floor for cracks, loose components, or signs of leakage; this assessment prevents damage during snaking and identifies whether professional repair is needed first.
Next, remove excess water from the bowl using a cup or small container and a bucket, lowering water level to avoid spills and reduce contamination while accessing the drain opening.
Step 2 Put on protective gear and set up lighting
One pair of gloves, eye protection, and a simple face mask are essential before handling a toilet drain snake; donning nitrile or heavy-duty rubber gloves, safety glasses, and a dust/splash mask reduces exposure to bacteria, chemical residues, and flying debris.
A headlamp or adjustable work light should illuminate the bowl and surrounding floor; secure cords away from wet areas and maintain stable, shadow-free lighting.
Step 3 Insert the snake properly and begin feeding cable
With gloves, eye protection, and adequate lighting in place, the operator positions the snake’s tip above the toilet bowl outlet and slowly feeds the cable into the trap.
They advance steadily, keeping the cable centered to avoid scraping porcelain. If resistance is minimal, continue feeding in short increments; if kinking or sharp bends occur, retract slightly, straighten the cable, then resume.
Maintain firm, controlled grip.
Step 4 Techniques for feeling and breaking the clog
Apply gentle pressure and rhythmic turns to detect the clog’s location and character: the operator advances the cable until increased resistance is felt, then alternates small forward pushes with clockwise and counterclockwise rotations to snag or shear the obstruction.
Tactile feedback guides adjustments in force and rotation speed; if resistance yields, continue controlled maneuvers to break compacted material while avoiding excessive torque that could damage the pipe.
Step 5 Retracting the snake and removing debris
Retract the snake slowly while maintaining steady tension on the cable and watching for loosened debris; controlled withdrawal prevents flushing material back into the bowl or deep into the trap.
As the coil emerges, wipe debris onto disposable paper towels, depositing solids into a plastic bag.
Inspect the head for obstructions, rinse the cable into a bucket, then seal and dispose of contaminated materials safely.
Step 6 Flushing test and verifying drain clearance
Begin the flushing test by slowly running clean water into the bowl and activating a standard flush to observe water flow and drainage speed.
The technician watches for smooth, rapid drainage and absence of gurgling or backups.
Repeat flushes as needed; if water drains normally and no slow spots or noises persist, the line is verified clear and ready for normal use.
Step 7 Final cleaning and disinfecting the snake and area
After confirming the line is clear and normal drainage is consistent, attention shifts to cleaning and disinfecting the snake and surrounding area to prevent contamination and odors.
Wear gloves; rinse the cable into the toilet briefly, then in a utility sink with hot water and detergent.
Disinfect with bleach solution, dry and lubricate lightly, store in a sealed case.
Wipe surfaces and discard waste.
Troubleshooting Common Problems
If the snake will not advance, users are advised to check for tight turns, reduce feed speed, and rotate the cable slowly to ease passage.
A stuck or broken cable requires stopping immediately, securing the tool, and deciding whether extraction or professional help is safest.
Escalation is indicated when snaking worsens the clog, causes overflow, or shows signs the blockage is in the sewer line beyond a hand snake’s reach.
What to do if the snake won’t advance
When the snake refuses to advance, the user should pause and assess cause rather than forcing more feed; common issues include a kinked cable, a lodged obstruction directly at the head, or the head catching on a trapway or flange.
Inspect cable for bends, retract slightly, rotate slowly to realign the head, and try gentle back-and-forth motions. If resistance persists, remove and clear debris before retrying.
How to handle a stuck snake or broken cable
Should efforts to realign and retract the snake fail, the operator must address two common emergencies: a cable that is jammed in the trapway or a cable that has snapped inside the drain.
For a jammed cable, gently rock and rotate while applying steady retraction; use penetrating lubricant if accessible.
If the cable breaks, stop, mark access points, and call a professional to avoid pushing fragments deeper.
When snaking makes the clog worse or causes overflow
Proceed with caution when snaking appears to worsen a clog or triggers an overflow, as these signs indicate either a displaced blockage further down the line or an exacerbated backup in the trap.
Stop immediately, retract the snake slowly, and contain overflow with towels. Avoid forcing the cable; reassess with a plunger, check vents, wear PPE, and call a professional if water level keeps rising.
Signs the clog is in the sewer line and not fixable with a hand snake
Several clear indicators point to a sewer-line blockage that a hand snake cannot resolve: multiple drains in the house back up simultaneously, sewage or strong sewage odors appear in fixtures or the yard, water levels rise in toilets despite snaking, or repeated clogs persist soon after temporary clearing.
Professional intervention is required when backups occur across fixtures, exterior drains surge, or snaking fails to restore proper flow.
Cleaning and Disinfecting Your Drain Snake
After each use, the drain snake should be rinsed thoroughly to remove debris before any disinfecting steps are taken.
Recommended disinfection includes soaking or wiping with an appropriate bleach or disinfectant solution and allowing sufficient contact time to kill bacteria and pathogens.
Once cleaned, the snake must be dried completely, lightly lubricated to prevent rust, and stored coiled in a dry, ventilated space to prolong its life.
Safe cleaning method immediately after use
Rinse the snake immediately with hot water to remove loose debris, then use a stiff brush and a mild detergent to scrub the coil and handle before disinfecting; prompt cleaning prevents residue buildup and reduces bacterial growth.
Wipe excess moisture with disposable towels, straighten the coil while brushing to reach crevices, and allow brief air-drying on a protected surface before moving to disinfection.
Disinfection steps to kill bacteria and pathogens
Disinfecting the drain snake requires a targeted approach that eliminates bacteria and viruses without damaging the tool.
Wear gloves and eye protection. Rinse debris, then apply a disinfectant solution (bleach diluted per label or EPA-registered disinfectant) along the cable and drum.
Allow recommended contact time, scrub stubborn spots with a stiff brush, rinse thoroughly, and dispose of contaminated rinse water per local guidelines.
Drying, lubricating, and storing the snake for longevity
Allow the snake to air-dry completely in a well-ventilated area.
Then wipe the cable and drum with a lint-free cloth to remove any remaining moisture before applying lubricant.
Use a light, corrosion-inhibiting oil or silicone spray sparingly along the cable.
Wipe off excess, rewind neatly onto the drum, and store in a dry, cool place away from direct sunlight to prevent rust and material degradation.
Safety Tips and Best Practices
Before beginning work, a brief checklist of personal protective equipment and clear guidance on safe body mechanics help reduce the risk of injury and contamination.
Attention to chemical exposure risks, including incompatible cleaners and proper ventilation, is emphasized to prevent harmful reactions.
Finally, recommended snaking frequency and simple preventative maintenance tips are provided to minimize future clogs and limit the need for frequent chemical or mechanical intervention.
Personal protective equipment checklist
When preparing to use a toilet drain snake, the operator should assemble and inspect a concise set of personal protective equipment (PPE) to reduce exposure to biological matter, chemicals, and mechanical hazards.
Recommended items: nitrile gloves, splash-resistant safety goggles, a disposable apron or coveralls, non-slip closed-toe footwear, and a mask if chemical fumes are present.
Confirm fit, integrity, and accessibility before starting.
Proper body mechanics to avoid injury
After assembling PPE, the operator should maintain proper body mechanics to prevent strains and slips while using a toilet drain snake.
Stand with feet shoulder-width apart, bend knees, and hinge at hips rather than rounding the back. Keep the core engaged, hold the snake close to the body, and avoid twisting.
Shift feet to reposition instead of reaching. Pause if fatigue or discomfort appears.
Chemical exposure precautions and interactions
Although mechanical clearing reduces reliance on chemicals, operators must still recognize and mitigate risks from residue, fumes, and incompatible product interactions; gloves, eye protection, and a respirator rated for organic vapors should be used whenever chemical drain agents are present or suspected.
Containers should be sealed and ventilated areas used; never mix acids with alkalis or bleach. Rinse tools thoroughly and decontaminate hands after work.
How often to snake a toilet and preventative maintenance
Regularly evaluating toilet performance and scheduling snaking only as needed keeps plumbing reliable and minimizes unnecessary intervention.
Inspections every few months identify slow drains or recurring backups; routine snaking is typically necessary only for persistent blockages.
Preventative maintenance includes using enzyme cleaners, avoiding flushing nondegradables, installing drain strainers, and addressing leaks promptly.
Professional service should follow repeated clogs or aging pipes.
When to Call a Professional
When a toilet drain snake fails to clear a clog or other warning signs appear, it may be time to call a professional plumber. A technician can assess hidden damage, perform safer mechanical or hydro-jetting methods, and provide a cost estimate.
Understanding common red flags and typical service charges helps homeowners decide when DIY stops and professional help is warranted.
- Persistent backups after snaking
- Sewage odors or multiple fixtures affected
- Structural damage, recurring clogs, or cracked pipes
Expect assessment fees, hourly labor, and possible parts or specialty equipment costs.
Red flags indicating professional help is needed
Signs that a toilet snake job requires professional attention include persistent backups, recurring clogs after successful clearing, sewage odors, visible pipe damage, or water seeping from fixtures.
Additional red flags are gurgling noises, slow drainage throughout the home, mold or discoloration near plumbing, and inability to advance the snake past an obstruction.
These indicate complex blockages, structural issues, or sewer-line problems requiring expert diagnosis.
What to expect from a plumber and typical costs
If a homeowner calls a plumber for a stubborn toilet clog, they can expect a technician to assess the situation, explain likely causes, and outline recommended repairs before beginning work. Typical costs vary by complexity, travel, and local rates; expect a diagnostic fee plus hourly or flat rates for repairs.
| Service | Typical Cost | Notes |
|---|---|---|
| Diagnosis | $50–$150 | Often credited if hired |
| Simple clear | $100–$200 | Snaking or auger |
| Major repair | $200–$800+ | Parts, excavation |
Quick Reference: Do’s and Don’ts for Beginner DIYers
A short list of clear do’s and don’ts helps a beginner tackle toilet drain snakes safely and efficiently:
- Do wear gloves and eye protection; keep cleaning supplies ready.
- Do feed the snake gently; retract slowly to avoid damage.
- Don’t force the snake through resistance; stop and reassess.
- Don’t use harsh chemicals immediately after mechanical snaking; wait and ventilate.
Conclusion
A final sweep leaves the bathroom quiet, the snake coiled like a patient river stone beside a gleaming bowl. With gloves scrubbed clean and tools rinsed, the task becomes a small victory against grime and clogs. Beginners, steady-handed and cautious, can reclaim flow and peace—yet should recognize limits and call a pro when the current fights back. The ritual of proper cleaning and care guarantees the next clog meets a ready, confident hand.