How to Test Aerobic Septic System Sprinklers: Step-by-Step Checklist for Homeowners
To effectively test your aerobic septic system sprinklers, follow this step-by-step checklist to ensure safe and efficient operation. Start with safety checks and inspect the sprinkler heads, lines, control panel, pump, and filters. Run a full cycle while observing spray patterns, coverage, pressure, and flow, noting any leaks or clogs. Collect effluent samples for on-site pH, chlorine, and turbidity tests, and send samples for lab analysis of BOD, TSS, and coliforms if necessary. Document your findings with photos and logs for compliance, and keep this checklist handy for ongoing maintenance.
Overview of Aerobic Septic System Sprinklers and Why Testing Matters
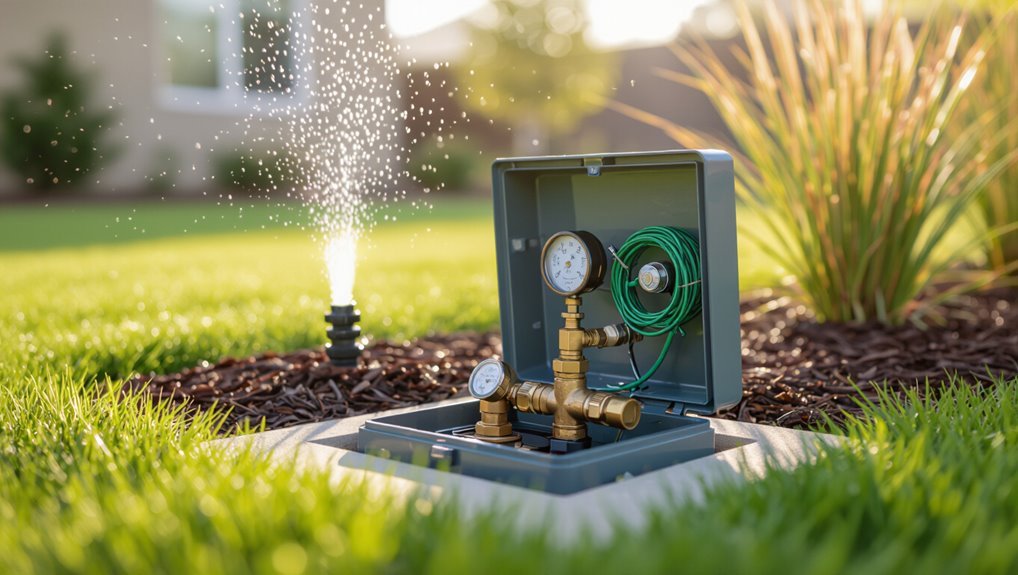
An aerobic septic sprinkler system treats wastewater with oxygen and microbes before distributing the effluent through pressurized sprinklers across a designated dispersal area.
Typical components include the aerobic treatment unit, pump station, filtration, control panel, and the spray heads and piping that deliver the treated effluent.
Regular testing verifies system performance to protect public health, prevent environmental contamination, and guarantee compliance with local regulations.
What an aerobic septic sprinkler system is and how it works
Aerobic septic sprinkler systems treat household wastewater by introducing oxygen into a sealed tank to promote aerobic bacterial breakdown before dispersing the clarified effluent through pressurized sprinklers.
The system reduces pathogens and solids, then applies treated effluent over soil.
Homeowners benefit from regular inspection and maintenance; guidance on how to test aerobic septic system sprinklers guarantees performance, prevents failures, and protects nearby water and landscape.
Common components of a sprinkler dispersal system
Following a review of how oxygenation and clarification prepare effluent for surface application, attention turns to the sprinkler dispersal components that actually deliver treated wastewater to the landscape.
Typical elements include pump stations, pressurized piping, control valves, filtration screens, sprinkler heads, and timers or controllers.
Regular inspection guarantees proper pressure, uniform coverage, and clog-free emitters to maintain system performance and longevity.
Health, environmental, and regulatory reasons to test sprinklers
Because sprinkler dispersal applies treated wastewater directly to lawns and gardens, routine testing is essential to protect public health, prevent environmental contamination, and confirm compliance with regulations.
Testing verifies effluent quality, detects system failures or leaks, reduces pathogen and nutrient runoff risks, and guarantees spray patterns avoid potable water and neighbors.
Documented tests satisfy local permits and support timely maintenance to avert violations.
When to Test Your Aerobic Septic Sprinklers
Routine inspections are recommended at least annually for homeowners, with some systems benefiting from biannual checks.
Immediate testing should occur when signs such as unusual odors, a persistently soggy lawn, or alarm signals are present.
Seasonal factors and severe weather can affect performance and may warrant additional checks before high-use periods or after storms.
Recommended testing frequency for homeowners
Homeowners should test their aerobic septic sprinklers at regular intervals to guarantee system performance and prevent failures. Most manufacturers and wastewater professionals recommend inspections and basic functional tests every 6 months, with a full service and system check at least once a year.
Routine checks include verifying spray pattern, pump operation, timers, and filters. Schedule professional maintenance annually and document all inspections for records.
Triggers for immediate testing (odor, soggy lawn, alarms)
Alongside scheduled inspections, certain signs warrant immediate testing of an aerobic septic sprinkler system.
Detectable sewage odors, persistently soggy or unusually lush lawn areas near dispersal lines, and system alarms or warning lights indicate potential failure.
Upon these triggers, homeowners should stop irrigation, document observations, and arrange prompt diagnostic testing by a qualified technician to prevent contamination and system damage.
Seasonal considerations and weather impacts
Seasonal weather patterns directly affect when and how an aerobic septic sprinkler system should be tested.
Testing is best during moderate, dry conditions to assess performance without frozen ground or excessive runoff.
Spring checks follow thaw and heavy rains; summer verifies peak use; fall prepares for winter shutdown and freeze prevention.
Avoid testing during storms, deep freeze, or saturated soil that can mask issues.
Safety Precautions Before You Begin
Before testing, the reader should prepare appropriate personal protective equipment, follow hygiene practices, and be ready to wash hands and sanitize clothing after contact.
They should verify power is isolated and pumps are stable to prevent electrical or mechanical hazards.
Children, pets, and neighbors must be notified and kept clear of the spray area for the duration of the test.
Personal protective equipment and hygiene precautions
While testing aerobic septic system sprinklers, technicians must wear appropriate personal protective equipment and follow strict hygiene practices to minimize exposure to pathogens and chemicals. Gloves, eye protection, boots, and respirators are recommended; handwashing and disinfecting tools after work reduce contamination risks.
| Item | Purpose |
|---|---|
| Gloves | Barrier protection |
| Goggles | Eye safety |
| Boots | Foot protection |
| Respirator | Inhalation control |
| Disinfectant | Decontamination |
Electrical and pump safety checks
Begin with a visual and electrical inspection of the pump and control panel, ensuring power is disconnected at the circuit breaker and labeled to prevent accidental re-energizing.
Verify wiring integrity, corrosion, and dry connections. Test any lockouts or safety switches with a meter.
Confirm pump housing is secure and grounded.
Only qualified individuals should reapply power after testing and repairs are completed.
Coordinating with children, pets, and neighbors
Although testing will be brief, coordinating with children, pets, and neighbors prevents accidental exposure to moving equipment, trip hazards, or unexpected spray. Inform household members, secure pets indoors, and notify neighbors of brief activity. Keep clear barriers and supervise children. Use simple signs and set a testing window to minimize disruption.
| Role | Action |
|---|---|
| Child | Supervise/indoors |
| Pet | Secure |
| Neighbor | Notify |
| Sign | Post |
| Window | Set time |
Tools and Materials You Need for Testing
Before testing begins, the tester should assemble the necessary tools and materials to guarantee accurate, efficient measurements and safe handling of samples.
Essential hand tools and timing devices enable basic operation checks, while measurement instruments and water-quality kits provide verification of flow and effluent condition.
Consideration of optional professional equipment can improve precision for more complex diagnostics.
- Basic hand tools and timing devices (wrench, screwdriver, timer, bucket)
- Measurement instruments and meters (stopwatch, measuring tape, flow meter)
- Water-quality test kits, sample containers, and optional professional equipment
Basic tools (wrench, screwdriver, timer, bucket)
Gather a small kit of basic hand tools and timing equipment to carry out a straightforward sprinkler test.
A wrench fits service fittings and nozzle caps; a flathead and Phillips screwdriver adjust control boxes and secure panels.
A simple programmable timer or watch records run durations.
A sturdy bucket collects discharged water for quick visual checks and system flushing.
Keep tools organized and accessible.
Measurement tools (stopwatch, measuring tape, flow meter)
A small set of measurement tools—stopwatch, measuring tape, and flow meter—provides the objective data needed to evaluate sprinkler performance.
The stopwatch times cycles and soak intervals; the measuring tape gauges spray radius and head spacing; the flow meter records gallons per minute to compare actual output with design specifications.
Together they identify uneven coverage, pressure issues, and leaks for accurate troubleshooting.
Water quality test kits and sample containers
Once mechanical performance is measured, water chemistry must be checked with simple test kits and clean sample containers to complete the assessment. Homeowners need basic kits for pH, chlorine, nitrate, and BOD indicators plus sterile bottles for representative samples. Label containers, avoid contamination, and follow kit timing instructions for reliable results.
| Item | Purpose |
|---|---|
| pH strips | Acidity |
| Chlorine kit | Disinfectant |
| Nitrate kit | Nutrients |
| BOD test | Organic load |
| Sterile bottle | Sample integrity |
Optional professional equipment to consider
Consider investing in a few professional-grade tools to expand testing accuracy and diagnose complex issues: a handheld multiparameter meter for precise pH, conductivity, and dissolved oxygen readings; a turbidity meter to quantify suspended solids; a portable colorimeter for low-level nutrient and chlorine detection; and a calibrated flow meter or pressure gauge to verify sprinkler performance under field conditions.
Additional useful items include inspection cameras, long-reach sampling poles, and spare tubing fittings.
Step-by-Step Pre-Test Inspection
Before running a test, the inspector visually checks sprinkler heads, lateral lines, and visible connections for damage or blockage.
The control panel is examined for correct timers, alarm indicators, and programmed settings while pump and air compressor function are verified.
Finally, dosing schedules and system parameters are confirmed to match manufacturer specifications and local requirements.
Visually inspect sprinkler heads and lateral lines
A visual inspection of sprinkler heads and lateral lines confirms component condition and identifies obvious defects that could affect test results.
The inspector checks for cracked, clogged, tilted, or missing heads; uneven spray patterns; visible leaks; corrosion; and sagging or exposed lateral lines.
Document locations, take photos, and mark defects for repair before operational testing to guarantee accurate results.
Check control panel, timers, and alarm indicators
Inspect the control panel, timers, and alarm indicators to confirm the system’s electronics are operational and correctly configured for testing.
Verify power supply, circuit breakers, and visible wiring for damage.
Check timer settings, cycle duration, and manual override function.
Test audible and visual alarms for proper activation and reset.
Note any fault codes and record settings before proceeding to physical system tests.
Verify pump operation and air compressor (if applicable)
Confirm that the system’s pump and, if present, the air compressor are ready for operation by checking power connections, visible wear, and mounting stability.
Inspect electrical wiring for secure terminals and corrosion, listen for unusual noises during a brief activation, verify seals and couplings show no leaks, and guarantee vibration isolation is intact.
Note any performance anomalies for technician follow-up.
Confirm dosing schedule and system settings
Before testing begins, the operator reviews the dosing schedule and system settings to verify timing, cycle lengths, and volume parameters match the approved design and recent maintenance records.
They confirm programmable controller settings, check manual overrides, verify alarm thresholds, and ascertain pump run times align with soil loading limits.
Any discrepancies are logged and corrected before initiating sprinkler performance tests.
Step-by-Step Functional Sprinkler Test
The technician begins the functional sprinkler test by following the start-up procedure and running the system to observe initial operation.
Each sprinkler zone and individual head is inspected for spray pattern, run time, and uniformity to guarantee even coverage across the drainfield.
Flow rates and pressure readings are recorded to verify system performance and identify any adjustments or repairs needed.
- Start the system and observe initial full-cycle operation
- Test each zone/head for pattern, run time, and coverage
- Measure and log flow rates and pressures for comparison
Start-up procedure and initial system run
Begin the start-up procedure by ensuring all valves, air vents, and control settings are in their prescribed positions so the system can operate safely and predictably.
Then power pumps and controllers, slowly open supply valves, and observe pressure gauges and flow indicators.
Listen for abnormal noises, check for leaks, confirm alarms reset, and run a brief timed cycle to verify stable pressure and proper emitter distribution before full operation.
How to test individual sprinkler zones or heads
After confirming the system has run through an initial cycle and pressures, flows, and alarms are normal, testing each sprinkler zone or head proceeds methodically to verify dispersal patterns, nozzle function, and uniform application.
Technicians or homeowners activate zones one at a time, inspect each head for clogging, leaks, misalignment, or worn nozzles, document deficiencies, and flag components for cleaning, repair, or replacement.
Measuring run time and actual spray pattern
Measure run time and document spray patterns systematically to quantify actual water delivery and identify coverage gaps.
The inspector records start and stop times for each zone, notes spray arc, radius, and droplet size, and maps observed patterns against design plans.
Calculate delivered volume using flow rate and duration.
Flag deviations, intermittent pulsing, or blocked nozzles for immediate correction or further diagnostics.
Checking uniformity and coverage across the drainfield
A systematic, grid-based walk-through verifies whether sprinklers deliver consistent coverage and uniform application across the drainfield.
The inspector notes dry spots, oversaturated zones, and overlaps, marking locations on a map. Adjustments or nozzle swaps are planned for deficient areas.
Uniform soil wetting guarantees proper treatment and prevents pooling; documented observations guide targeted maintenance and corrective actions.
Recording flow rates and pressure readings
Begin by noting baseline conditions at the sprinkler control: the inspector records static and operating pressures at the pump/distribution manifold and captures individual nozzle flow rates using a flow meter or calibrated catch-can method.
Readings are logged systematically with time, zone, nozzle ID, and weather.
Compare values to design specifications and manufacturer tolerances, flagging deviations for adjustment or maintenance and documenting corrective actions taken.
Water Quality and Effluent Testing Procedures
Attention to effluent quality begins with safe sampling from the sprinkler line using clean containers and following any system-specific shutoff or purge procedures.
Homeowners can perform simple on-site checks—pH, free chlorine, and turbidity—to screen for obvious problems, while persistent anomalies or regulatory needs warrant sending samples to a certified lab with requests for BOD, TSS, coliforms, and nutrient analyses.
Lab reports should be compared to typical permit limits and flag concentrations (high BOD/TSS, elevated coliforms, extreme pH or chlorine) that indicate treatment failures or contamination.
Taking safe effluent samples from the sprinkler line
Collecting effluent samples from the sprinkler line requires careful planning and adherence to safety and contamination-control protocols to guarantee representative, legally defensible results.
Technicians should isolate a clean sampling port, purge stagnant water, use sterile containers, and wear PPE.
Label and chain-of-custody containers immediately, keep samples chilled, and transport to accredited labs promptly.
Avoid cross‑contamination and unauthorized access during sampling.
On-site tests homeowners can do (pH, chlorine, turbidity)
After completing professional sampling protocols, homeowners can perform a few straightforward on-site checks—pH, residual chlorine, and turbidity—to monitor sprinkler effluent between formal tests. Simple test kits, color charts, and portable turbidity tubes provide immediate feedback. Record results, compare to local guidelines, and repeat periodically. Seek professional advice for persistent deviations.
| Test | Typical tool | Quick pass/fail |
|---|---|---|
| pH | Strip or meter | 6.5–8.5 |
| Chlorine | DPD kit | <0.5 mg/L |
| Turbidity | Turbidity tube | <5 NTU |
When to send samples to a certified lab and what to request
When should effluent be sent to a certified laboratory, and what should be requested to guarantee compliance and system performance?
Effluent samples should be sent when routine home tests show anomalies, after maintenance, or per local regulations.
Request analysis for fecal coliform/E. coli, total suspended solids, biochemical oxygen demand (BOD5), nitrogen species (ammonia/nitrate), and chlorine residual.
Include chain-of-custody and certified report.
Interpreting typical lab results and red flags
Although laboratory results can appear technical, they yield clear indicators of system health when interpreted against established benchmarks.
Typical parameters include BOD, TSS, pH, nitrates, and fecal coliform. Values exceeding regulatory limits signal malfunction, clogging, or treatment failure.
Consistently rising trends require prompt inspection; single anomalous results warrant retesting.
Document results, compare to permit standards, and consult a professional for corrective action.
Troubleshooting Common Problems During Testing
When testing aerobic septic system sprinklers, common issues such as low or no spray, uneven coverage from clogged or misaligned nozzles, and pump cycling or pressure anomalies should be identified and addressed promptly.
Technicians should follow systematic diagnostics—checking filters, nozzles, pump operation and pressure readings—and perform cleaning, nozzle adjustment, or component replacement as indicated.
If alarms sound, odors arise, or surface pooling occurs, testing is halted and immediate corrective actions and safety measures are implemented before resuming.
Low or no spray from heads causes and fixes
Inspecting sprinkler heads reveals common causes of low or no spray during aerobic septic system testing: clogged nozzles, damaged risers or seals, collapsed lateral lines, low system pressure from pump or valve issues, and airlocks or blockages in the distribution network.
Technicians should isolate zones, verify pump output and pressure, check valves and filters, purge trapped air, and replace damaged components before retesting to restore proper distribution.
Uneven coverage or clogged nozzles cleaning and adjustment
Address uneven spray patterns and clogged nozzles by systematically cleaning, adjusting, and testing each head to guarantee uniform distribution across the absorption area.
Inspect nozzle screens and orifices for debris, remove mineral buildup with a soft brush, and flush lines.
Replace damaged nozzles, realign spray angles, and retest coverage.
Document problematic heads for follow-up maintenance or replacement to maintain system efficacy.
Pump cycling or pressure issues diagnostic steps
After cleaning and correcting nozzle issues, attention turns to pump cycling and system pressure, since irregular head performance can mask deeper hydraulic faults.
Inspect pump run/stop intervals, note rapid cycling or long draws. Measure static and operating pressure at sprinkler manifold.
Check for air in lines, leaking valves, clogged filters, and pressure switch settings.
Record findings before adjusting or calling service.
Alarms, odors, or surface pooling immediate actions
If alarms sound, foul odors arise, or water pools on the surface during testing, treat the situation as potentially hazardous and stop routine operation immediately.
Secure the area, avoid contact, and note alarm codes and odor characteristics.
Notify the service provider and local health authority. Photograph pooling and affected zones.
Do not restart equipment until a qualified technician inspects, diagnoses, and authorizes resumption.
Simple Maintenance Tasks to Improve Test Results
The section outlines straightforward maintenance actions that can sharpen sprinkler performance and clarify test results.
It covers safe cleaning and adjustment of sprinkler heads, routine care for filters, nozzles, and emitters, plus seasonal winterization and restart procedures.
A compact record-keeping checklist is recommended to document maintenance and test outcomes.
How to clean and adjust sprinkler heads safely
Inspecting and gently cleaning sprinkler heads before testing an aerobic septic system guarantees accurate coverage and prevents damage to the system. A homeowner uses gloves, shuts off the system, removes debris, and straightens nozzles; avoid harsh tools. Reassemble, test for spray pattern, and adjust alignment for uniform distribution.
| Task | Action |
|---|---|
| Gloves | Wear protective gloves |
| Debris | Remove leaves/grit |
| Alignment | Straighten nozzles |
| Test | Run short spray check |
Recommended filter, nozzle, and emitter maintenance
After cleaning and aligning heads, attention should shift to the filters, nozzles, and emitters that control flow and distribution.
Inspect filters for clogging; rinse or replace media as manufacturer recommends.
Remove and clean nozzles, using appropriate tools to clear deposits.
Check emitters for blockages and consistent discharge; flush lines if necessary.
Record changes and reuse matched parts to preserve uniform coverage.
Seasonal winterization and restart tips
Each season brings specific risks to aerobic septic sprinklers, so owners should winterize and restart systems to prevent freeze damage and guarantee reliable testing.
Drain and blow out lines, insulate aboveground components, and shut off timers if required.
On restart, inspect nozzles, filters, and drip zones, slowly reintroduce flow, check pressure and coverage, and correct leaks before formal testing.
Record-keeping checklist for maintenance and tests
Good documentation ties seasonal preparations and restarts to measurable outcomes, making it easier to spot trends and justify repairs.
A concise checklist should include date, technician, weather, flow rates, pressure readings, sprinkler run times, observed clogs/leaks, maintenance performed, parts replaced, and next scheduled inspection.
Store entries digitally and as paper backups, label files by date, and review annually to inform adjustments and budgeting.
When to Call a Professional
If test results show persistent low pressure, uneven spray patterns, foul odors, or visible mechanical damage, the problem likely exceeds routine homeowner repair.
Homeowners should record pressure readings, runtime, observed symptoms, and any recent maintenance to provide a technician.
A professional may perform diagnostics, nozzle or valve replacement, pump service, or system flushing, with typical costs varying by service complexity.
Signs the issue is beyond homeowner repair
When visible backflow, foul odors, or saturated ground persist despite basic troubleshooting, the problem likely exceeds routine homeowner fixes.
Professional assessment is warranted if sprinklers fail repeatedly, electrical faults or alarm lights occur, or unexplained pressure loss and uneven spray patterns continue.
Significant root intrusion, systemic clogging, or component damage beyond visible inspection also indicate the need for licensed septic service.
What information and measurements to provide to a technician
A concise set of observations and measurements helps a technician diagnose aerobic septic sprinkler problems more quickly: note the system make and model, recent maintenance or repairs, dates and descriptions of alarm events, exact locations of affected sprinkler heads, and any visible signs (saturation, pooling, corrosion, odors).
Also provide sprinkler PSI and run times, measured flow or spray radius, soil moisture patterns, recent weather, and access constraints.
Typical professional services and expected costs
Professional intervention is recommended for issues beyond basic homeowner checks: common services include diagnostic inspections, pump and timer repairs, sprinkler head replacement or realignment, pressure and flow testing, drain-field evaluation, and system disinfection.
Typical costs vary regionally: diagnostics $100–$300, repairs $150–$800, pump replacement $500–$2,500, and full system servicing or disinfection $200–$1,000.
Regulatory Compliance and Documentation
The article next addresses regulatory compliance and documentation requirements for sprinkler dispersal testing, highlighting common local rules such as setback, application rate, and seasonal restrictions.
It outlines proper test documentation needed for permits and inspections, including required forms, signatures, and reporting timelines.
A simple sample test log template is provided with fields for site ID, test date/time, pressure and flow readings, weather conditions, inspector name, and corrective actions.
Common local regulations affecting sprinkler dispersal testing
When local jurisdictions set rules for testing aerobic septic system sprinklers, they typically prescribe allowable spray distances, setback requirements from property lines and water bodies, operating hours, and notification or permitting procedures; compliance with these elements determines whether a dispersal test is lawful and how results must be documented. Regulations also specify buffer zones, record retention, and fines for violations.
| Requirement | Typical limit |
|---|---|
| Setbacks | 10–50 ft |
| Hours | Daytime only |
| Permits | Local approval needed |
How to document tests for permits and inspections
Document tests for permits and inspections by creating a clear, chronological record that links field observations to regulatory requirements.
The record should show dates, personnel, measurements, and citations to applicable codes. Maintain originals and backups; label locations and conditions.
Present concise summaries for inspectors and attach raw data when requested.
- Date-stamped observations
- Regulatory references cited
- Copies and backups retained
Sample test log template and what to include
Although often concise, a standardized test log template guarantees every aerobic septic system sprinkler test captures the data regulators require; it should be organized, chronological, and easy to cross-reference.
Include: property ID, tester name and license, date/time, weather, system model/serial, pre-test conditions, sprinkler run durations, pressures and flow readings, anomalies, corrective actions, photos references, signatures, and retention period.
Preventive Tips to Minimize Future Problems
Homeowners can reduce failures by adopting water‑wise habits, avoiding harsh chemicals, and keeping solids out of the system.
Proper landscaping and careful irrigation around drainfields prevent root intrusion and soil saturation that impair sprinkler dispersal.
Regular inspections and scheduled professional maintenance provide early detection and preserve system performance.
Best household habits to protect aerobic systems
Maintain simple, consistent habits to keep an aerobic septic system functioning reliably and to reduce costly repairs.
Limit water use, stagger laundry loads, repair leaks promptly, and use low-flow fixtures.
Avoid flushing chemicals, grease, or non-biodegradables.
Use phosphate-free detergents and septic-safe cleaners.
Schedule routine inspections and pump-outs per manufacturer recommendations to prevent biological imbalance and mechanical failures.
Landscaping and irrigation practices around drainfields
Proper landscaping and careful irrigation around a drainfield greatly reduce the risk of system damage and costly repairs.
Maintain shallow-rooted, drought-tolerant plants; avoid trees and shrubs with invasive roots.
Grade soil to shed surface water away from trenches.
Use drip irrigation or low-volume systems to prevent saturation.
Keep heavy vehicles and structures off the area to preserve soil porosity and distribution field integrity.
Scheduling routine inspections and professional service intervals
Regular inspections and timely professional servicing form the backbone of long-term septic sprinkler reliability. Homeowners should follow a simple schedule: quarterly self-checks, annual professional inspections, and service every 2–3 years or as recommended. Record dates, findings, and actions to track trends and catch issues early.
| Task | Interval |
|---|---|
| Self-check | Quarterly |
| Pro inspection | Annual |
| Pump/service | Every 2–3 years |
| Recordkeeping | Ongoing |
Quick Checklist: Do-It-Now Testing Steps for Homeowners
A concise, action-focused checklist helps a homeowner complete a basic sprinkler test safely and efficiently.
The steps outline ten quick actions to run and observe each zone, plus clear guidance on what measurements and photos to record.
Visual documentation and simple notes make follow-up with a service professional faster and more accurate.
- Run a 10-step quick test for each sprinkler zone
- Record run times, flow observations, and any odors or pooling
- Take photos of heads, wet spots, and the control panel display
Immediate 10-step checklist to perform a basic sprinkler test
Homeowners can complete a basic sprinkler test quickly by following a focused 10-step checklist that verifies system operation, identifies leaks or clogs, and confirms even effluent dispersal. Steps include visual inspection, controller activation, zone timing, pressure check, spray pattern assessment, leak search, clog clearing, valve operation, soil moisture check, and final cleanup.
| Step | Action | Expected Result |
|---|---|---|
| 1 | Visual inspect | No damage |
| 2 | Activate system | Sprinklers run |
| 3 | Check pressure | Within range |
| 4 | Assess spray | Even coverage |
What to record and photos to take during the test
After completing the initial 10-step check, the tester should document key observations and capture specific photos to support diagnosis and future comparisons.
Record date, time, weather, sprinkler run duration, pump pressures, flow rates, and any odors or visual discharge.
Photograph controller settings, individual sprinkler heads (close and wide), spray patterns, wet/dry patches, visible leaks, alarm displays, and serial/model labels for reference.
Common Myths and Misconceptions About Aerobic Septic Sprinkler Testing
Homeowners often mistake normal sounds, brief spray pattern changes, or seasonal fluctuation for system failure, which can lead to unnecessary alarm.
Basic inspections and simple maintenance tasks can be performed safely by nonprofessionals, but complex diagnostics, pressure adjustments, and pump or control work should be left to trained technicians.
Clear differentiation between signs that warrant immediate professional attention and those suitable for home monitoring prevents both neglect and costly, unnecessary repairs.
Misunderstood signs of failure versus normal operation
Why do some signs around an aerobic septic sprinkler system provoke alarm when they are actually normal? Observers often mistake occasional surface moisture, faint odors during aeration cycles, or sporadic sprinkler hesitations for failure.
Routine noise, brief pressure drops, and minor vegetation lushness near spray zones usually reflect normal operation or maintenance state.
Persistent, worsening, or widespread symptoms merit professional evaluation.
Why DIY always has limits and what can safely be done at home
Although basic visual checks and simple maintenance tasks can be handled by a property owner, DIY efforts have clear limits when it comes to testing aerobic septic sprinkler systems.
The equipment and procedures involve pressurized components, electrical controls, and biological processes that can be damaged or misdiagnosed without proper training.
Homeowners can safely inspect for leaks, clear debris, record system noises, and confirm power; leave diagnostics, repairs, and permit work to professionals.
Conclusion
Regular testing of aerobic septic system sprinklers preserves system function and protects property value. Homeowners often underestimate frequency: studies show nearly 30% of residential aerobic systems experience distribution failures within five years without routine checks. By following safety steps, documenting results, and scheduling professional inspections, users can reduce leakages, odors, and costly repairs. Consistent preventive maintenance and adherence to local regulations extend system lifespan and safeguard health and the environment.