
How to Cut Galvanised Steel Pipe Safely: Tools, Techniques & Rust-Free Tips
To cut galvanised steel pipe safely, use the right tools, secure clamps, and appropriate personal protective equipment (PPE). Start by measuring and marking the pipe, then choose a suitable cutter based on the pipe’s diameter: tubing cutters or hacksaws for small pipes, ratcheting cutters or fine-tooth blades for medium sizes, and band, chop, or plasma/oxy-fuel tools for larger pipes. Always manage heat during the cutting process. After cutting, deburr the edges and apply zinc-rich touch-up paint to prevent corrosion. Ensure adequate ventilation and wear respirators if necessary. For detailed techniques and checklists, continue reading.
Quick overview of cutting galvanised steel pipe safely
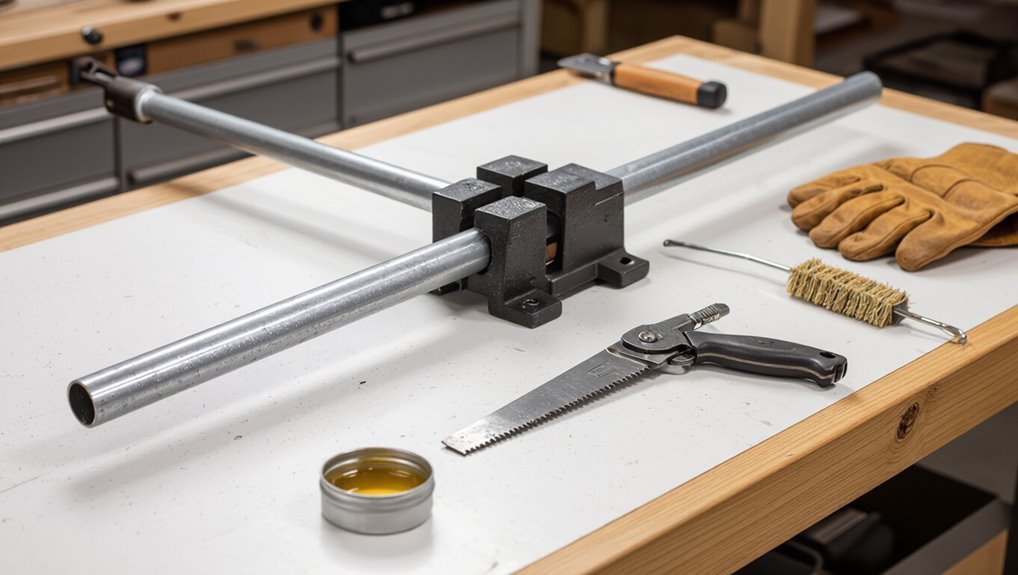
The safest, fastest methods for cutting galvanised steel pipe are summarized: using a tubing cutter or abrasive wheel for clean cuts and a reciprocating saw for speed, always with proper PPE and dust control.
A one-sentence answer notes that manual cutters and band/angle grinders balance safety and efficiency best for typical jobs.
Replacement rather than cutting is recommended when corrosion, fittings, or long runs make repairs impractical.
One-sentence answer: safest, fastest methods summarized
Start by choosing the method that balances safety and speed for the job: a pipe cutter or hacksaw for small-diameter work, an abrasive cutoff wheel or reciprocating saw with a metal blade for moderate thickness, and a powered band saw or abrasive chop saw for thicker or production cuts.
Always using proper PPE, ventilation, and measures to contain zinc dust and sparks.
For how to cut galvanised steel pipe: prioritize steady clamping, clean cuts, deburring, and corrosion protection after cutting.
When to cut galvanised pipe vs replace
After choosing the safest, fastest cutting method for the job, evaluate whether cutting an existing galvanized pipe is the better option compared with full replacement.
Consider pipe age, corrosion extent, leak frequency, and future access. Cut to repair localized damage or reroute short sections; replace when widespread pitting, multiple joints fail, or long-term reliability and compliance are priorities.
Assess cost, time, and safety.
Safety precautions before you start
Before cutting, the operator should assemble appropriate PPE, confirm adequate ventilation or use respiratory protection for zinc fumes, and arrange good lighting.
The workspace must be secured with proper clamping and fire prevention measures. The pipe should be checked for contents and pressure and isolated or depressurised before any work begins.
Personal protective equipment (PPE) required
Personal protective equipment is essential when cutting galvanised steel pipe to protect against flying metal shards, toxic dust from the zinc coating, and high-noise levels.
Operators should wear impact-rated safety goggles, a full-face shield, cut-resistant gloves, long-sleeve flame-resistant clothing, and steel-toe boots.
Hearing protection with adequate noise reduction and a sturdy respirator fit-tested per task complete the mandatory PPE ensemble for safe cutting operations.
Ventilation and respiratory protection for zinc fumes
When galvanised steel is heated or cut, zinc coatings can produce hazardous fumes that require engineering controls and respiratory protection to prevent metal fume fever and long-term respiratory harm.
Work in well-ventilated areas with local exhaust ventilation or portable fume extractors.
Use NIOSH-approved respirators with P100 or combination particulate/organic vapor cartridges when ventilation is inadequate.
Monitor airborne zinc levels and rotate tasks to limit exposure.
Workspace setup: clamping, lighting, and fire prevention
A well-organized workspace reduces accidents and improves cutting accuracy.
The pipe should be securely clamped on a stable bench or vise; use padded jaws to avoid damaging galvanised coating.
Confirm bright, shadow-free task lighting and clear sightlines.
Remove flammable materials, keep a fire extinguisher rated for metal and electrical fires nearby, and have a metal fire blanket accessible during cutting and grinding.
Identifying pipe contents and pressure precautions
After securing the pipe and clearing the work area, attention must shift to confirming what the pipe contains and whether it is under pressure.
Verify system diagrams, labels or tags; consult building plans.
Isolate and depressurise lines using appropriate valves; bleed residual pressure to atmosphere safely.
Beware chemicals, gas, steam or water.
Use gas detectors where applicable and lockout/tagout procedures before cutting.
Tools and materials for cutting galvanised steel pipe
A concise inventory of tools and materials clarifies the choices for cutting galvanised steel pipe safely and efficiently.
Essential power and manual cutting tools, correct cutting discs and blades, and secure workholding and finishing supplies each affect cut quality and corrosion protection.
The following list groups the key items to evaluate before beginning work.
- Power and manual cutters (angle grinder, chop saw, reciprocating saw, band saw, hacksaw, pipe/tubing cutter)
- Cutting consumables and workholding (cutting discs, blades, abrasive wheels, clamps, pipe vises, measuring and marking tools)
- Finishing and protection (deburring tools, cold zinc spray, primer, paint)
Power tools: angle grinder, chop saw, reciprocating saw, band saw
Select the appropriate power tool based on pipe diameter, wall thickness, workspace constraints, and desired finish:
an angle grinder offers portability and quick cuts on thin-walled tubing;
a chop saw (cold-cut or abrasive) delivers fast, square cuts for repetitive work;
a reciprocating saw provides versatility in tight or irregular positions;
and a band saw yields the cleanest, most controlled cuts for thicker or precision-critical sections.
Choose appropriate blades, guards, clamps, PPE, and dust control.
Manual tools: hacksaw, pipe cutter, tubing cutter
Choose hand tools when portability, low noise, or fine control outweigh speed; hacksaws, wheel-style pipe cutters, and three-wheel tubing cutters each suit specific pipe sizes, wall thicknesses, and access conditions.
A hacksaw offers versatility for awkward positions; wheel cutters score thin-walled conduit cleanly; three-wheel tubing cutters deliver uniform, burr-minimised cuts on thicker sections.
Secure clamping and slow, steady strokes prevent deformation and jagged edges.
Cutting discs, blades, and abrasive wheel selection
When power tools are preferred over hand tools for speed or repeatability, the choice of cutting disc, blade, or abrasive wheel dictates cut quality, heat generation, and operator safety.
Use thin, metal-cutoff discs for angle grinders, bi-metal blades for circular saws, and non-ferrous-rated abrasive wheels for pipe material.
Match grit, RPM rating, and arbor size; prefer coated abrasives to reduce spark and galvanised coating damage.
Clamps, pipe vises, deburring tools, measuring and marking tools
Secure holding and accurate layout are foundational to safe, clean cuts on galvanised steel pipe. Heavy-duty clamps or a dedicated pipe vise prevent rotation and vibration.
Use a non-marring jaw or protective pads for coating preservation. Measure with a steel tape, mark with a scribe or permanent marker, and transfer reference lines with a square.
Finish edges using a deburring tool or file for a smooth, safe bore.
Rust-prevention supplies: cold zinc spray, primer, paint
After cutting and deburring, exposed zinc and steel edges require protection to prevent rapid corrosion and preserve fitting integrity.
Cold zinc spray (zinc-rich touch-up) restores sacrificial protection quickly. Follow with a corrosion-inhibiting primer to guarantee adhesion, then finish with compatible topcoat paint for UV and moisture resistance.
Apply thin, even coats, allow recommended drying times, and store remaining supplies per manufacturer instructions.
Choosing the right cutting method by pipe size and location
Selection of a cutting method should be guided by pipe diameter and the working location to balance control, safety, and tool access.
For small-diameter pipes (≤1 inch), a tubing cutter or fine-toothed hacksaw is often ideal, while medium (1–3 inches) and large (>3 inches) pipes may require reciprocating saws, abrasive cutoff wheels, or stationary cutters depending on thickness.
In restricted or installed runs, portable low-profile tools and careful setup are essential to avoid damage and guarantee safe cutting.
Cutting small-diameter pipe (≤1 inch)
Cutting small-diameter galvanized pipe (≤1 inch) requires methods that minimize distortion and maintain a clean, burr-free edge suitable for threads or fittings.
Use a tubing cutter for straight, square cuts when access allows. For confined spaces, a hacksaw with steady clamping works.
Deburr with a file or reamer, then protect exposed zinc with cold-galvanizing spray to prevent corrosion.
Cutting medium-diameter pipe (1 to 3 inches)
For medium-diameter galvanized pipe (1–3 inches), choose a method that balances access, finish quality, and heat or zinc damage risk.
Use a ratcheting pipe cutter or fine-tooth hacksaw for clean, cold cuts when space allows. An angle grinder with thin cutoff wheel speeds work but require heat control and zinc re-coating afterward.
Secure the pipe and deburr edges after cutting.
Cutting large-diameter pipe (>3 inches)
Handle large-diameter galvanized pipe (>3 inches) with methods suited to its size, weight, and installation context: band saws, abrasive chop saws with proper guards, reciprocating saws with metal-cutting blades, or oxy-fuel/plasma torches for field work where mechanical cutters cannot reach.
Secure the pipe, support ends to prevent collapse, mark cuts clearly, deburr and treat exposed galvanizing to prevent corrosion, and follow PPE and ventilation protocols.
Cutting in tight spaces and on installed runs
In confined areas or on pipes already installed, selecting the appropriate cutting method depends on pipe diameter, surrounding clearance, and access for tools and safety gear.
Small pipes suit tubular pipe cutters or compact reciprocating saws with metal blades; medium runs may require mini grinders or rotary cutters with guarding.
For large or poorly accessible pipes, remote cutting heads, flange cutters, or professional hot-work teams minimize risk and distortion.
Step-by-step cutting procedures
The section outlines clear, ordered procedures for preparing and cutting galvanised steel pipe, beginning with measuring, marking, and protecting threads and fittings.
It then presents concise step-by-step methods for manual cutting with a hacksaw or pipe cutter, and for power tools including angle grinders, chop/miter saws with metal blades, and reciprocating saws for confined spaces.
Each procedure emphasizes setup, blade or tool selection, secure clamping, cut technique, and post-cut finishing and safety checks.
Preparing the pipe: measure, mark, protect threads and fittings
Measure twice and mark once: before any cutting begins, the pipe should be measured accurately, scribed at the cut line with a permanent marker or scribe, and checked for square using a carpenter’s square or template.
Clamp securely in a vise with protective jaws, shield adjacent fittings and threads with tape or caps, and remove nearby debris to prevent scratches or contamination during cutting.
Using a hacksaw or manual pipe cutter step-by-step
Begin cutting only after confirming the marked line and securing the pipe; a steady, controlled technique minimizes burrs and guarantees an even edge.
For a hacksaw, use full strokes, maintain blade perpendicularity, and pause to clear filings.
For a manual pipe cutter, tighten incrementally, rotate smoothly, and score repeatedly until separation.
Deburr with a file or reamer, then inspect the cut for square and smoothness.
Using an angle grinder safely step-by-step
After marking and securing the pipe as with a hacksaw or manual cutter, an angle grinder offers faster cuts but demands stricter safety and control.
The operator fits a metal-cutting disc, wears eye, ear and respiratory protection, and clamps pipe to prevent movement.
Start the wheel before contact, use steady light pressure, follow the mark, stop frequently to cool, and deburr the cut edge.
Using a chop saw or miter saw with metal blade step-by-step
Position the pipe securely in the saw’s vise or clamp before lowering the guard and aligning the metal-cutting blade with the layout mark.
The operator should confirm the blade type, wear full PPE (eye, ear, respiratory, and gloves), and guarantee sparks will be directed away from flammables and bystanders.
Start at low speed to check alignment, then cut with steady feed. Avoid binding, and let the blade stop fully before releasing the clamp.
Using a reciprocating saw in confined areas step-by-step
For cutting galvanised steel pipe in tight spaces, a reciprocating saw offers maneuverability and accessibility that larger tools lack; operators should first verify blade type (bi-metal or carbide-grit for metal), inspect the blade and saw for damage, and don appropriate PPE (eye, ear, respiratory protection, and cut-resistant gloves).
Secure the pipe, mark cut, clamp if possible, start slowly to score, increase speed, cut steadily, deburr and inspect for heat or sparks.
Using a band saw or tube cutter for precision cuts step-by-step
When finer control or cleaner edges are required than a reciprocating saw can provide, a band saw or a tube cutter offers superior precision for galvanised steel pipe.
The operator secures the pipe, marks the cut, selects a blade or wheel rated for ferrous metal, adjusts speed/pressure, and makes a steady pass.
Deburr, inspect the cut, and apply galvanised touch-up to prevent corrosion.
Post-cut finishing and rust prevention
After cutting, the workpiece should have burrs removed and the edge cleaned to prevent snagging and corrosion.
Any damaged galvanised coating must be treated and the metal prepared before applying a zinc-rich spray, cold galvanizing compound, or touch-up paint.
Threads and fittings require separate protection, such as tape or localized coating, to maintain corrosion resistance and fit.
Deburring and cleaning the cut edge
Deburr the freshly cut galvanized pipe immediately to remove sharp edges, metal burrs, and loose zinc fragments that can cause injury or compromise coatings.
Use a file, deburring tool, or flap wheel to smooth the ID and OD.
Remove swarf with a nylon brush or compressed air, then wipe with a lint-free cloth.
Inspect for nicks and verify a clean, even edge.
Removing galvanised coating damage and preparing for protection
Inspect the cut area for zinc loss and mechanical damage, noting scratches, flaking, or exposed steel that will accelerate corrosion.
Remove loose particles with a wire brush, lightly abrade surrounding zinc to feather edges, and degrease with solvent.
Confirm surfaces are dry and free of salts.
Mask adjacent undamaged coating to protect it during subsequent touch-up and allow proper adhesion of protective treatments.
Applying zinc-rich spray, cold galvanizing, or touch-up paint
Select the appropriate corrosion protection—zinc-rich spray, cold galvanizing compound, or touch-up paint—based on the extent of zinc loss, exposure conditions, and compatibility with the existing coating.
Clean the cut, remove rust, and apply per manufacturer instructions: multiple thin coats for zinc-rich sprays or cold galvanizing, allowing proper cure.
Use touch-up paint for minor areas; verify adhesion and recoat intervals for long-term protection.
Protecting threads and fittings after cutting
After cutting, protect threads and fittings promptly to prevent corrosion and preserve seal integrity.
Clean cuts, remove burrs, and apply a thin coat of zinc-rich touch-up paint or cold galvanizing compound to exposed metal.
Wrap threads with PTFE tape for sealing and use thread lubricant where specified.
Store prepared fittings dry and off the ground to avoid moisture and contamination.
Common problems and how to avoid them
Common problems when cutting galvanised steel pipe include overheating that produces zinc oxide fumes, abrasive or blade clogging and wear, pipe crushing or deformation, and spark- or fire-related hazards.
Each issue has straightforward preventive steps—temperature control and ventilation to limit fumes, proper wheel selection and cleaning to reduce clogging, correct clamping and support to prevent deformation, and spark containment with fire-watch measures.
The following section outlines practical techniques and safety checks to avoid these failures.
Avoiding overheating and inhalation of zinc oxide fumes
Work at moderate cutting speeds and with appropriate cooling to prevent the galvanised coating from reaching temperatures that generate zinc oxide fumes.
Use water or mist cooling and intermittent cutting to limit heat buildup.
Guarantee local exhaust ventilation or outdoors cutting, and wear a suitable respirator (P100 or N95 where appropriate).
Monitor for discoloration and stop if visible smoke appears.
Preventing blade/abrasive wheel clogging and premature wear
Several factors accelerate clogging and wear of blades or abrasive wheels when cutting galvanised steel, including built-up zinc, adhesive residues, excessive heat, incorrect abrasive type, and cutting at too slow a feed rate.
Prevent clogging by using appropriate metal-cutting blades, softer grit for zinc-rich coatings, moderate feed rates, frequent cleaning with a wire brush, coolant or lubricant where safe, and replacing glazed or damaged discs promptly.
Preventing crushed or deformed pipe during cutting
Clamp the pipe securely and support it along its length to prevent crushing or distortion during cutting. Use padded clamps or wooden blocks to distribute pressure.
Choose the correct cutting tool and blade to minimise force; score first with a pilot cut if using a grinder. Apply steady, even feed, avoid angled pressure, and reposition supports for longer sections to maintain roundness.
What to do if sparks or fire risks occur
Even with proper clamping and support, cutting galvanised steel can produce sparks or hot slag that ignite nearby combustibles or damage coatings.
Clear the area of flammables, cover surfaces with fire‑resistant blankets, and keep a charged extinguisher and bucket of water or sand nearby.
Wear spark‑resistant PPE, cut slowly to reduce slag, and stop immediately if smouldering or unexpected flames appear.
Comparison of cutting methods: speed, cost, precision, and safety
Different cutting methods are weighed for speed, cost, precision, and safety to recommend the best option for each scenario: home DIY, professional shop, and job site. The choice balances tool availability, required finish, and workplace constraints. The table below summarizes concise recommendations by scenario.
| Scenario | Recommended method |
|---|---|
| Home DIY | Hacksaw or manual pipe cutter |
| Professional shop | Band saw or cold saw |
| Job site | Reciprocating saw with proper PPE |
| Quick temporary cuts | Angle grinder with cutting wheel |
Recommended method by scenario (home DIY, professional, job site)
Select the cutting method that matches skill level, tools available, and site constraints: homeowners, professionals, and job-site crews require different balances of speed, cost, precision, and safety.
Home DIYers: use a hacksaw or compact reciprocating saw—low cost, moderate speed, safe with PPE.
Professionals: choose abrasive cutoff or cold saws—high precision and throughput.
Job-site crews: cordless reciprocating or pneumatic cutters for flexibility and speed.
Tools maintenance and blade selection tips
Selection of the correct blade type and grit for cutting galvanised steel is essential to balance cut quality and blade life.
Regular maintenance, safe blade replacement procedures, and proper tool storage reduce wear and the risk of injury.
Protecting tools from moisture and handling them to avoid nicks preserves performance and prevents corrosion.
Choosing blade type and grit for galvanised steel
Choosing the correct blade type and grit for cutting galvanised steel balances cutting speed, edge life, and minimised heat to protect the zinc coating.
Carbide-tipped or abrasive-coated blades designed for metal cutting are preferred, with finer grits (higher grit numbers) producing smoother edges and reducing burrs.
Coarser grits remove material faster but increase heat and wear.
Select medium-fine grit for general use.
Maintaining cutting tools and safe blade replacement
Keep blades sharp, clean, and correctly mounted to guarantee safe, efficient cuts and to protect the galvanised coating from excessive heat or tearing.
Inspect blades for cracks, chips, and wear before use. Replace dull or damaged blades immediately, following manufacturer torque and mounting instructions.
Lubricate moving parts, tighten guards and fasteners, and use proper PPE.
Record maintenance and replacement dates for consistency and safety.
Storage and handling to prevent corrosion of tools
After blade maintenance and replacement practices have been established, attention should shift to how tools are stored and handled to prevent corrosion.
Tools are cleaned, dried, lightly oiled, and kept in sealed cases or cabinets with silica packs.
Handles stay dry; metal-to-metal contact is avoided with protective sleeves.
Regular inspections and rotation prevent long-term exposure to moisture and galvanic corrosion.
When to hire a professional and regulatory considerations
Complex or structural jobs, work on pressurised systems, or projects affecting drainage typically require certified plumbers or metalworkers.
Local building codes may mandate permits or specific methods for cutting and joining galvanized pipe, and professionals can guarantee compliance.
Proper disposal of cut pieces and any contaminated residue should follow local waste regulations, which contractors are more likely to manage correctly.
Situations requiring certified plumbers or metalworkers
Safety and compliance dictate that cutting galvanised steel pipe is not always a do-it-yourself task; when work affects a building’s structural integrity, plumbing system, or gas lines, a certified plumber or licensed metalworker should be engaged.
Professionals are required for concealed or load-bearing pipes, complex joints, multi-story systems, backflow safeguards, or when warranties and insurance demand certified installation or repair to guarantee safety and liability protection.
Local codes, permits, and disposal of cut pieces
Because municipal codes and permit requirements vary widely, anyone planning to cut galvanised steel pipe should verify local regulations before beginning work.
Contractors must obtain permits for structural, plumbing, or gas-line alterations; inspectors may require certified installers.
Dispose of cut pieces per local waste and recycling rules—galvanised steel often recycles but contaminated or coated sections may need hazardous-waste handling.
When unsure, hire licensed professionals.
Quick-reference checklist before, during, and after cutting
A concise checklist guides safe work on galvanised steel pipe by separating tasks into before, during, and after the cut.
It guarantees PPE, secure workholding, and ventilation are confirmed, that cutting technique and tool control are maintained, and that cleanup and corrosion protection follow.
The following quick-reference items summarize those stages:
- Pre-cut checklist
- During-cut checklist
- Post-cut checklist
Pre-cut checklist
Several quick checks should be completed before, during, and after cutting to minimize risk and guarantee a clean job: confirm proper PPE and ventilation, verify the pipe is secured and marked, select the correct blade or cutting method, inspect tools for damage, and prepare a plan for hot metal and waste disposal.
Pre-cut actions: clear work area, review material dimensions, confirm clamp placement, test tool operation, make certain fire extinguisher nearby.
During-cut checklist
With the work area prepared and tools inspected, attention shifts to maintaining control and safety while the cut is made.
Steady the pipe in a vice or clamp, confirm blade or wheel speed, and keep both hands clear.
Wear eye, ear, and respiratory protection.
Pause for alignment checks, remove sparks or swarf, and avoid forcing the tool.
Monitor for heat buildup.
Post-cut checklist
Finish by running a concise post-cut checklist to confirm the pipe, tools, and workspace are safe and ready for the next task.
Inspect cut edges for burrs and threads; deburr and file as needed.
Clean metal shavings and dispose of waste properly.
Wipe tools, check blade/bit condition, lubricate moving parts.
Store materials dry, note measurements, log any damage or safety incidents.
Conclusion
Like a surgeon preparing instruments, the craftsman approaches the galvanized pipe with calm precision: gloves, mask, and the correct blade gleam under measured light. Each cut—whether by saw, grinder, or tubing cutter—answers a specific need, balancing speed, cost, and safety. Proper maintenance and rust prevention keep the project clean; when complexity or risk grows, a professional step in. With caution and the right tools, the metal yields predictably, not violently.
