How to Hide a Water Meter in Your Front Yard: 10 Attractive, Legal Solutions
If you’re looking to hide a water meter in your front yard while keeping it accessible and legal, consider using options like low shrubs, groundcover, decorative rock beds, flush paver panels, removable hardscape covers, faux rocks, lattice screens, planter boxes, or sculptural screens. Ensure you maintain a clear 12–18 inch access zone, label the meter appropriately, and check with your utility provider for any necessary approvals or permits. Opt for durable, noncorrosive materials and design your concealment to allow for easy removal during maintenance. The following guidance offers specific designs, costs, and step-by-step tips to help you achieve a beautiful and functional solution.
Why You Might Want to Hide a Water Meter in Your Front Yard
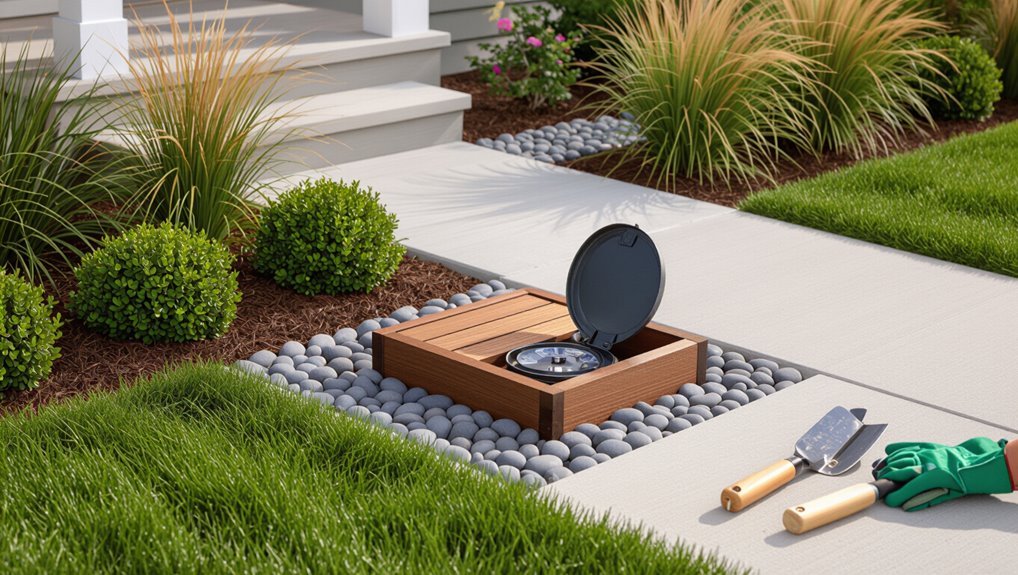
Homeowners may choose to conceal a front-yard water meter to improve curb appeal, protect the meter from damage, or reduce tripping hazards.
Before altering or obscuring the device, local regulations, utility access requirements, and potential inspection needs must be checked.
Practical constraints such as ventilation, material durability, and emergency accessibility should also shape any concealment plan.
Common reasons homeowners conceal water meters
A patch of shrubs or a decorative cover often masks a front-yard water meter to improve curb appeal, reduce theft or vandalism, and keep utility hardware from clashing with landscaping design.
Homeowners seek privacy, protect meters from accidental damage, and maintain property value.
Practical interests include concealing unsightly metalwork, integrating features into garden themes, and discreetly demonstrating how to hide water meter in front yard without disrupting overall aesthetics.
Legal and practical constraints to consider before hiding a meter
Before concealing a water meter, check municipal regulations and utility company rules that often require unobstructed access for reading, maintenance, and emergency shutoff.
Failure to comply can result in fines, forced removal of coverings, or liability for damaged equipment.
Homeowners should also consider inspection schedules, meter replacement, frost protection, irrigation lines, and clear marking for emergency responders before installing screens, plants, or decorative enclosures.
Quick overview of permissible approaches to conceal a water meter
A concise list of ten attractive, legal options for concealing a water meter is presented to guide homeowners toward compliant choices.
Each option balances aesthetics with access and local regulations, ranging from low plantings and decorative covers to built-in landscape features.
Brief notes highlight benefits and basic installation considerations for each solution.
Summary of 10 attractive, legal solutions
When protecting curb appeal while remaining fully compliant with regulations, homeowners can choose from a range of tasteful, legal options to conceal a water meter. The following quick overview summarizes ten practical approaches that balance accessibility, aesthetics, and code requirements.
Practical choices include low screens, decorative boxes, planting beds, painted covers, and removable lattice panels.
- Low screens
- Decorative boxes
- Planting beds
- Painted covers
- Removable lattice panels
Low-profile landscaping solutions
The article notes that low shrubs and groundcover can screen a water meter while leaving clear access for reading and maintenance.
It also mentions decorative rock beds or mulch with clearly labeled access points as a tidy, low-maintenance option.
Turf and ornamental grasses are presented as ways to blend the meter into the landscape without obstructing service.
Use of low shrubs and groundcover that allow access
Choose low-growing shrubs and groundcovers that conceal a water meter without blocking access or visibility for reading and maintenance.
Plant compact species with shallow roots and non-invasive habits, keeping a clear 12–18 inch radius for meter operations.
Use removable edging and avoid dense, tall foliage.
Select hardy, low-maintenance plants that tolerate occasional foot traffic and periodic inspection without obscuring valves or lids.
Decorative rock beds and mulch with labeled access points
Several low-profile options, such as decorative rock beds or a thin layer of mulch, can neatly mask a water meter while maintaining clear, labeled access points for reading and maintenance.
Durable edging defines the zone, unobtrusive marker stakes indicate meter location, and a removable flag or small plaque guarantees visibility for technicians.
Choose noninvasive materials to prevent cover shifting and allow unobstructed access.
Turf and ornamental grasses that blend with the yard
When placed carefully, turf and ornamental grasses can conceal a water meter while preserving access and aesthetic continuity with the lawn.
Low-growing fescues, tufted hairgrass, or dwarf mondo grass form subtle cover; spacing them for service access and marking with discreet flags prevents damage.
Choose shallow-rooted varieties, avoid dense mounding over the box, and maintain a narrow clear perimeter for inspection and repairs.
Built-in hardscape options
Built-in hardscape solutions offer a durable, unobtrusive way to conceal a water meter while maintaining access.
Examples include flush decorative stone or paver covers with removable panels and custom utility-grade meter boxes fabricated to match adjacent walkways.
These options prioritize seamless appearance, weather resistance, and straightforward maintenance access.
Flush decorative stone or paver covers with removable panels
Integrate a flush decorative stone or paver cover with a removable panel to conceal a water meter while maintaining a seamless hardscape surface; these covers are cut and fitted so the removable section lifts out cleanly for meter access without disrupting surrounding paving.
Durable materials match existing patterns and withstand foot traffic.
Install with recessed lip and corrosion-resistant hardware for secure, code-compliant access and easy maintenance.
Custom utility-grade meter boxes that match walkways
Although often overlooked, custom utility-grade meter boxes can be fabricated to match walkways precisely, providing a durable, code-compliant enclosure that blends with hardscape materials.
These boxes integrate pavers, concrete, or stone facades, allow secure access panels, and resist settling and moisture.
Installed by a contractor familiar with utility clearances, they preserve aesthetics without obstructing meter reading or violating municipal regulations.
Decorative enclosures and boxes
Wood or composite planter boxes can be built around a meter to blend utility with landscaping while allowing easy access for readings and maintenance.
Lattice screens and trellises with hinged access doors offer a lightweight, ventilated solution that supports climbing plants without obstructing service.
Both approaches prioritize concealment that remains removable or openable for authorized access.
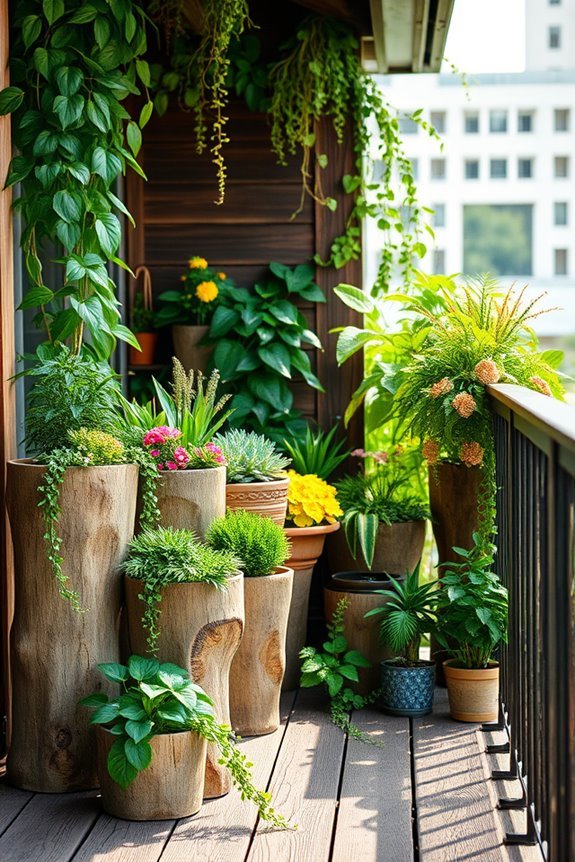
Wood or composite planter boxes designed for meter access
Crafted planter boxes made from wood or composite materials offer an attractive way to conceal a water meter while preserving easy access for readings and maintenance.
These boxes should include a removable or hinged panel, ventilation, and a non-invasive base to avoid pipe pressure.
Choose rot-resistant materials, secure fastenings, and tasteful plantings that don’t obstruct access or violate utility regulations.
Lattice screens and trellises with hinged access doors
Install lattice screens or trellises with a hinged access door to combine visual screening and plant support while keeping the water meter reachable for readings and service.
These lightweight structures conceal the meter yet allow quick access; hinges should swing outward and be lockable but inspector-friendly.
Use rot-resistant materials, anchor securely, and position vines or climbing plants to soften appearance without obstructing access or violating utility regulations.
Functional art and accents
The section introduces functional art as a way to blend utility with aesthetics, highlighting sculptural screens and metalwork that conceal meters while allowing quick access.
It notes faux rocks and resin covers as low-profile options that mimic natural elements and resist weathering.
Considerations include ease of maintenance, access for reads and repairs, and materials that match the surrounding landscape.
Sculptural screens and metalwork that conceal yet open easily
Several homeowners choose sculptural metal screens as a way to both mask and access a water meter, blending durable fabrication with hinged or removable sections that align with inspection needs.
Designers favor powder-coated steel or corten with patterned cutouts for ventilation and visual interest.
Lockable latches, concealed hinges, and measured clearances guarantee utility access, code compliance, and a tidy, artistic front-yard accent.
Faux rocks and resin meter covers that mimic natural elements
A faux rock or resin meter cover offers a low-profile, natural-looking solution that disguises utility hardware while providing easy access for readings and maintenance.
Durable, weatherproof composites resist fading and cracking. Sizes and textures emulate stone, bark, or slate to blend with landscaping.
Lightweight designs permit quick removal for authorized personnel. Choose models compliant with local regulations and large enough to avoid obstructing service.
Planting strategies that comply with regulations
Practical planting strategies near a water meter prioritize non-invasive, low-root species to prevent damage to pipes and fittings.
Clear guidelines on placement distances and maximum plant heights guarantee meter access for reading and maintenance.
Seasonal choices and pruning schedules are recommended to keep the meter visible and unobstructed year-round.
Selecting non-invasive, low-root plants near meters
Choose plants with shallow, non-invasive root systems and modest mature size to prevent damage to pipes, easy meter access, and regulatory conflicts.
Favor low-growing perennials, ornamental grasses, and compact shrubs known for fibrous, non-penetrating roots.
Use container plantings or raised beds for visual screening where permitted.
Verify species with local utility guidelines and choose drought-tolerant, low-maintenance varieties to minimize disturbance.
Placement distances and plant height guidelines for access
When planting near a water meter, maintain clearances that allow unobstructed visual and physical access for reading, maintenance, and emergency shutoff—common guidelines call for a 3-foot clear radius directly in front of the meter and 1–2 feet on the remaining sides, though local utility rules may vary.
Choose low-growing, non-woody plants under 18 inches tall; avoid dense shrubs, tall grasses, and trees whose roots or canopy impede access.
Seasonal planting tips to keep meter visible year-round
Although seasonal changes alter plant height, color, and foliage density, planning with a year-round visibility goal guarantees the meter remains accessible and compliant with utility rules.
Select low-growing evergreen groundcovers and ornamental grasses that stay below allowed sightlines. Use spring bulbs for temporary color and prune perennials before they obscure the box.
Mark clear sightlines and document plant choices to satisfy inspections.
Practical access solutions and maintenance considerations
Concealed meters should be clearly labeled and marked so inspectors and utility crews can locate them without disturbance.
Enclosures and plantings ought to allow quick removal and straightforward tool access to valves and fittings.
Regular maintenance schedules and winterization procedures should be planned and documented to prevent damage and guarantee reliable readings.
Labeling and marking concealed meters for inspectors and crews
Several clear labels and simple markers assure that a hidden water meter can be quickly located by inspectors and maintenance crews without compromising concealment.
Durable, weatherproof tags, discreetly placed at property edges or on fences, guide professionals.
Paint dots, low-profile stakes, or stamped curb markers identify access points.
Maintain an updated record for utility crews and confirm markers conform to local regulations to avoid confusion or obstruction.
Designing for quick removal and tool access
Design access points so a meter can be removed quickly with commonly carried tools, balancing ease of service with secure concealment.
Specify unobstructed clearances, removable panels or discreet hinged covers, and captive fasteners compatible with standard wrenches.
Confirm markings indicate tool type and access sequence.
Choose durable, weather-resistant hardware positioned to prevent accidental tampering while allowing efficient technician access.
Routine maintenance and winterization best practices
After establishing access points and hardware that allow rapid, secure removal, attention turns to routine maintenance and winterization to preserve functionality and prevent freeze damage.
Regular inspections clear debris, verify seals and insulation, and guarantee valves operate.
Seasonal insulating wraps, heat tape where allowed, and controlled drainage before freezing temperatures reduce burst risk.
Document schedules and provide clear labels for utility workers.
Legal, safety, and utility requirements
Before concealing a water meter, the homeowner should verify applicable municipal and utility company regulations governing meter location, allowed covers, and clearance requirements.
They must also consider liability and emergency access rules that prioritize unobstructed meter readability and quick shutoff access for first responders.
Written approval or permits should be obtained from the utility whenever modifications could affect access, service, or meter function.
Typical municipal and utility company regulations to check
Many municipalities and utility companies maintain specific regulations governing water meter access, placement, and concealment that homeowners must follow.
Regulations commonly specify minimum clearance, permitted landscaping or screening materials, tamper-proof cover requirements, visibility for reading, irrigation line restrictions, and required notification or permit procedures.
Homeowners should verify local codes, utility easements, setback rules, and approved obstruction types before installing any concealment.
Liability and emergency access rules
When a water meter is concealed, homeowners remain legally responsible for ensuring unobstructed access for utility personnel and emergency responders.
Failure to do so can result in fines, repair liabilities, or denial of service if crews cannot reach valves or meters during emergencies.
Design choices should preserve a clear, marked pathway, avoid permanent barriers, and be documented to demonstrate reasonable access and reduce liability exposure.
When to get written approval or permits
Obscuring a meter does not remove the need for official authorization; homeowners should obtain written approval or permits whenever concealment affects access, alters meter enclosures, or changes landscaping, hardscaping, or structures around utility equipment.
Local codes, utility company policies, and HOA rules dictate requirements; failure risks fines, service disruption, or forced removal.
- Contact the water utility first
- Check municipal permitting
- Review HOA covenants
- Document written approvals
- Schedule inspections as required
DIY vs. hiring a professional
The homeowner can handle simple, noninvasive concealments like plantings, lightweight boxes, or decorative covers with basic tools and a weekend of work.
For structural builds, complex grading, or anything affecting meter access, hiring a landscaper, carpenter, or a utility-approved contractor is advisable.
Typical DIY projects run from under $50 to a few hundred dollars and a day or two, while professional jobs commonly range from several hundred to a few thousand dollars and may take several days to schedule and complete.
Project types suitable for a DIY homeowner
Many homeowners can handle simple water meter concealment tasks—such as installing a prefabricated meter box, planting shallow ornamental groundcover, or attaching a decorative cover—while projects that involve rerouting pipes, altering meter placement, or breaching utility seals should be left to licensed professionals due to code, warranty, and safety considerations.
Suitable DIY jobs include painting or staining an approved cover, adding gravel or flagstones, and planting noninvasive low plants.
When to hire a landscaper, carpenter, or utility-approved contractor
When concealment requires altering grade, relocating piping, or removing utility seals, a licensed contractor should be engaged to guarantee compliance with codes and avoid service interruptions.
Simpler tasks like installing a prefabricated box, painting an approved cover, or planting noninvasive groundcover can usually be handled by a competent homeowner.
For intermediate projects—custom cabinetry, built-in planters, or adjustments near mains—hire a landscaper, carpenter, or utility-approved contractor.
Cost ranges and time estimates for common solutions
Several common concealment methods carry predictable cost and time profiles that differ markedly between DIY efforts and professional jobs. Typical DIYs (mulch beds, small screens) cost $20–$200 and take 1–4 hours; contractors quote $300–$2,000 and require 1–3 days. More complex enclosures increase both estimates and may need permits.
| Solution | DIY Cost/Time | Pro Cost/Time |
|---|---|---|
| Mulch/planting | $20–$100 / 1–2 hr | $100–$300 / 2–6 hr |
| Decorative screen | $50–$200 / 1–4 hr | $200–$800 / 4–8 hr |
| Custom box/enclosure | $100–$400 / 3–8 hr | $500–$2,000 / 1–3 days |
Before-and-after examples and scenario ideas
The article presents before-and-after examples illustrating how different settings affect meter-hiding choices.
It compares compact solutions for small front yards, focal landscaping and screening ideas for large properties, and practical treatments for sidewalk meters in urban homes.
Each scenario pairs recommended materials and placement strategies with photos or sketches to show expected outcomes.
Small front yard with limited space recommended solutions
In tight front-yard spaces, practical camouflage blends function with minimal footprint: low-profile planting, slender screening like a bamboo or ornamental grass border, and compact hardscape features such as a narrow planter box or decorative cover that doubles as a stepping stone can all conceal a water meter without crowding pathways.
Examples include recessed planter edges, removable stone covers for access, and slim lattice panels allowing inspection while preserving visual continuity.
Large front yard with landscaping focal points recommended solutions
Larger front yards offer more flexibility for disguising a water meter by integrating it into a designed focal point rather than simply hiding it.
Examples: a rock garden with a recessed meter cover, a low sculptural planter that masks access while permitting service, or a decorative fence panel with hinged access.
Before-and-after photos show improved curb appeal without obstructing utility access or violating codes.
Urban homes with sidewalk meters recommended solutions
When sidewalks run close to a home’s facade, creative, code-compliant solutions are needed to conceal meters without impeding access.
Options include low-profile decorative grates flush with paving, narrow planting strips with removable plant covers, custom metal screens anchored to allow quick removal, and compact box benches with hinged lids.
Before-and-after scenarios show preserved pedestrian flow, maintained service access, and improved streetscape integration.
Common mistakes to avoid when concealing a water meter
Common errors include obstructing meter visibility or access, which can delay emergency shutoff.
Using materials that corrode or retain moisture around the meter can shorten its lifespan and cause leaks.
Selecting plants with aggressive roots risks damage to underground lines and the meter itself.
Blocking visibility or access for emergency shutoff
Because quick access to a shutoff valve can be the difference between a minor leak and major damage, hiding a water meter in a way that obstructs visibility or access is a serious mistake.
Concealment should never require tools, removal of heavy structures, or delay emergency responders.
Guarantee clear sightlines, unobstructed paths, and removable screening that can be opened immediately without damaging landscaping or fixtures.
Using materials that corrode or trap moisture
Choose durable, non-porous materials for enclosures and mounts to prevent accelerated corrosion or moisture retention that can damage the meter and fittings.
Avoid untreated wood, ferrous metals, and porous stones that trap water. Use stainless steel, marine-grade composites, or sealed plastics and allow ventilation and drainage.
Periodically inspect for rust, mold, or trapped debris to guarantee long-term meter integrity and accessibility.
Plant choices that damage underground lines
Planting without regard for root behavior can lead to cracked pipes, displaced fittings, and costly repairs.
Homeowners should avoid aggressive-rooting trees and shrubs (willow, poplar, eucalyptus, bamboo) near meter lines. Use shallow-rooted, non-invasive perennials and native grasses instead.
Maintain clear access, plant at recommended distances, and consult utility plans before planting to prevent damage and preserve meter function.
Step-by-step checklist for concealing a meter legally and attractively
A concise, step-by-step checklist helps guarantee the meter is concealed both legally and attractively.
It should begin with a pre-project review of local regulations and required permissions, proceed through design choices and material selection, and finish with installation and a post-installation inspection.
Following this sequence reduces compliance risks and produces a durable, visually pleasing result.
Pre-project checklist: research and permissions
Why start with research and permissions before any physical work? A homeowner should verify local codes, utility easements, and meter access requirements, then contact the water utility for rules and mark underground lines.
Obtain any required permits and record restrictions. Confirm emergency access and maintenance clearance dimensions.
Keep written approvals and utility contact details on file before proceeding with concealment planning.
Design and material selection checklist
Designers should begin by matching concealment goals—visibility for utility access, aesthetic integration, and durability—to site conditions and regulatory limits; this clarifies whether solutions will be decorative screens, planting beds, box covers, or small fences and which materials meet both municipal requirements and weather exposure.
Next steps: verify clearances, select noncorrosive finishes, choose low-maintenance plants, confirm removable access panels, and document material specs.
Installation and post-installation inspection checklist
Several clear steps guide the installation and post‑installation inspection to guarantee a meter is concealed legally and attractively: verify final-site clearances and utility access, assemble and install the chosen cover or screening system per manufacturer and municipal specifications, secure removable panels or gates for unobstructed meter reading, protect piping and valves from damage during work, and document installed materials and measurements for future reference and inspections.
- Confirm municipal permits and utility markings
- Follow manufacturer installation tolerances
- Maintain a 12–24 inch access zone per code
- Test meter readability and valve operation
- Photograph and record dimensions, materials, and dates
Cost-saving tips and sustainable materials
The discussion turns to cost-saving and sustainable choices for concealing a water meter, emphasizing reclaimed materials and low-maintenance planting as practical options.
Reused wood, stone, or metal can reduce expense while providing durable, attractive covers.
Designs that combine concealment with function—such as bench seating, planter boxes, or storage—maximize value and utility.
Reclaimed materials and low-maintenance planting options
Many homeowners can save money and reduce waste by using reclaimed materials—such as salvaged bricks, weathered timber, and recycled metal—to build discreet meter enclosures and surround them with low-maintenance plantings that thrive with minimal care.
Native grasses, drought-tolerant succulents, and clumping perennials reduce watering and upkeep. Simple mulch, permeable edging, and noninvasive species keep long-term maintenance and costs low while remaining attractive.
Multi-use designs that combine concealment with function
Building on reclaimed materials and low-maintenance plantings, multi-use meter enclosures can blend concealment with practical function by incorporating storage, seating, or tool racks into the design.
Durable, recycled wood or composite panels reduce cost and maintenance. Thoughtful access panels preserve meter reading.
Modular units allow seasonal repurposing, while permeable bases and native groundcovers support drainage and sustainability without compromising utility access.
Resources and where to find help
Readers are advised to contact their local water utility to confirm regulatory requirements and any approved installation practices.
Recommended online tools and forums can help source measurements and design ideas, while suppliers of weatherproof covers, low-profile boxes, and landscaping-friendly enclosures provide suitable materials.
Professional plumbers and utility-authorized contractors are suggested when permits or complex modifications are needed.
How to contact your local water utility for guidelines
Where can a homeowner find definitive rules about concealing a water meter?
The homeowner should contact the local water utility via its customer service phone number or official website.
Request meter access and cover regulations, permitted materials, setback and visibility requirements, and any permit processes.
Keep written confirmation of guidance.
If unclear, ask for a supervisor or field inspector visit to verify compliance.
Recommended online tools and supplier types for materials and covers
After obtaining official guidance from the local water utility, homeowners can identify specific online tools and supplier types that match the utility’s rules for meter covers and concealment materials.
Recommended resources include utility-approved parts catalogs, landscape supply marketplaces, custom fabricators for metal or composite covers, and e-commerce platforms for planting kits and low-profile enclosures.
Review product specs, customer reviews, and return policies before purchase.
Conclusion
Concealing a front-yard water meter can balance curb appeal with access and compliance. Studies show roughly 30% of homeowners modify utility access points without permits, risking fines and service delays; this underscores the need for permitted, reversible solutions. By favoring low-profile landscaping, ventilated enclosures, and professional guidance, homeowners achieve attractive, functional results while preserving meter readability and avoiding common pitfalls—maintaining safety, legality, and long-term value.