
How to Use a Pipe Reamer: Step-by-Step Guide for Clean, Accurate Pipe Deburring
A pipe reamer is an essential tool used to remove burrs and chamfer the ends of cut pipes, ensuring leak-free joints and consistent flow. To use a pipe reamer effectively, start by inspecting the tool and securing the workpiece. Choose the right reamer based on the material and diameter of the pipe. For hand reaming, insert the cone, apply steady rotation with light pressure, then remove shavings and check for a smooth edge. When using powered reamers, ensure the speed matches the tool’s requirements, use lubricant, and control the feed for optimal results. Additional guidance includes troubleshooting tips, maintenance advice, and best practices for achieving clean, precise finishes.
What a Pipe Reamer Is and Why Deburring Matters
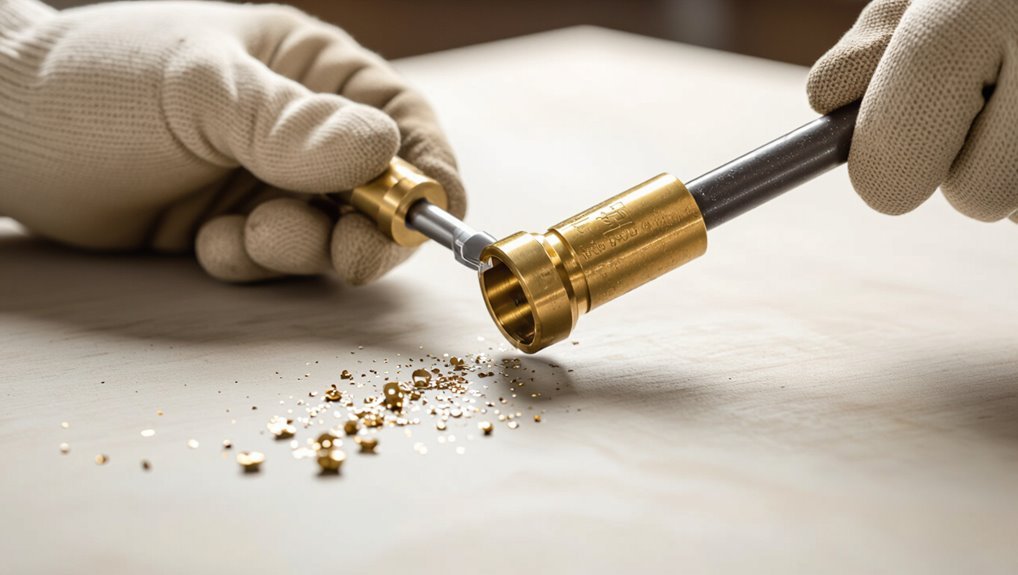
A pipe reamer is a tool—available as a simple hand reamer, a rotary attachment, or an adjustable model—used to remove interior burrs and smooth cut edges.
Burrs can impede flow, trap debris, cause leaks, or promote corrosion in plumbing and HVAC systems.
Reaming is recommended after new cuts and repairs, with technique and frequency adjusted for material type such as copper, PVC, or steel.
Definition and types of pipe reamers (hand, rotary, adjustable)
Pipe reamers are specialized tools designed to remove burrs and smooth the inside edges of cut pipes, improving fit and flow while preventing damage to seals and fittings.
Types include handheld cone reamers for quick manual smoothing, rotary reamers mounted on drills for faster cutting, and adjustable multi-blade reamers that fit varied diameters.
Guidance on how to use a pipe reamer emphasizes correct selection and secure mounting.
Effects of burrs on plumbing and HVAC systems
After selecting the proper reamer and securing it to the cut tube, attention shifts to why removing burrs matters: leftover metal shards and jagged edges can cause leaks, restrict flow, abrade seals, and create turbulence that reduces system efficiency.
Burrs also promote corrosion by trapping moisture, compromise sensor readings, clog filters and valves, and shorten component life, increasing maintenance and replacement costs.
When to ream: new cuts, repairs, and material-specific considerations
One clear rule governs when reaming is required: any fresh cut or disturbed joint should be deburred before assembly.
Reaming is essential after new cuts, during repairs, when replacing fittings, and after threading.
Material-specific considerations—soft plastics, copper, steel, and cast iron—dictate blade choice, pressure, and technique to avoid collapse or tearing.
Inspect edges, remove burrs, and verify flow and fit.
Tools and Safety Equipment Needed
Necessary tools include a pipe reamer, secondary deburring tool, files and emery cloth, and proper PPE such as gloves, eye protection and hearing protection.
Selection of the reamer should match the material being worked on—different styles and materials suit copper, PVC and steel.
The following discussion will cover tool selection, safe handling and basic maintenance.
Essential tools: pipe reamer, deburring tool, files, emery cloth
Several basic tools are required to prepare and finish pipe ends properly: a pipe reamer for removing internal burrs, a deburring tool or countersink for smoothing the outer edge, files for shaping or removing rough spots, and emery cloth for final surface polishing.
Each tool’s selection depends on pipe material and diameter; quality guarantees consistent edges, reduces leaks, and eases assembly.
PPE: gloves, eye protection, hearing protection
Personal protective equipment (PPE) protects the operator from the common hazards encountered when reaming and finishing pipe ends: cut and puncture risks to the hands, flying metal fragments to the eyes, and high-noise exposure from power tools.
Appropriate choices include cut-resistant gloves for grip and protection, impact-rated safety glasses or face shield, and hearing protection (earplugs or earmuffs).
Inspect and replace damaged PPE regularly.
Choosing the right reamer for different materials (copper, PVC, steel)
Selecting the correct reamer depends on the pipe material, wall thickness, and whether the work is manual or power-driven.
For copper, use sharp HSS or carbide-tipped reamers for clean, burr-free edges.
PVC requires single-flute or plastic-specific reamers to prevent cracking.
For steel, choose hardened, multi-flute reamers or carbide inserts designed for heavier cuts and compatible with power tools.
Preparing the Workpiece and Workspace
Before reaming, the workpiece should be inspected for burrs, jagged edges, or deformation at the cut end that could affect fit or damage the tool.
The pipe must be secured firmly in a vice, clamp, or support to prevent movement and guarantee a concentric ream.
Both the interior and exterior should be cleaned of debris, oil, and scale to allow a smooth, accurate operation.
Inspecting the cut end for burrs and deformation
Examine the freshly cut pipe end for visible burrs, crushed edges, or ovality that could hinder a proper fit or damage the reamer.
Rotate the pipe, using light tactile and visual inspection to locate sharp inner and outer burrs, lips, or splintered metal.
Note any deformation exceeding acceptable roundness or wall thinning; document defects and decide if trimming or replacement is required before reaming.
Securing pipe: vices, clamps, and supports
After confirming the cut end is free of burrs and deformation that would interfere with tool engagement, the workpiece must be firmly supported to prevent movement during reaming.
Secure the pipe with a vice padded to avoid crushing, or use pipe clamps and V-blocks for round stock.
Add adjustable supports for long runs, check alignment, and tighten progressively to maintain concentricity without distortion.
Cleaning the pipe interior and exterior before reaming
Clear the pipe interior and exterior of debris, oil, and scale to confirm the reamer cuts accurately and the tool seats properly.
Inspect ends for burrs, rust, and weld spatter. Use brushes, solvent, and compressed air for internal cleaning; wipe and degrease external surfaces.
Remove loose particles, verify straightness, and ascertain the work area is clean to prevent contamination during reaming.
Step-by-Step Guide to Using a Hand Pipe Reamer
The user should position the reamer so its axis aligns with the pipe axis before beginning.
They must insert the tool to the correct depth at a slight, controlled angle, then apply steady pressure while rotating to maintain even cutting.
Progress should be checked frequently and chips cleared safely to avoid clogging or damage.
Positioning the reamer and aligning with the pipe axis
When beginning alignment, the operator places the reamer perpendicular to the pipe end and brings it close enough to engage the mouth without forcing contact.
Visual cues and light fingertip adjustments guarantee the tool’s pilot centers the bore. Eyes level with the axis confirm concentricity.
Steady, minimal lateral pressure maintains alignment while preparing for rotation, preventing wobble and uneven deburring.
Proper insertion depth and angle
Having confirmed the reamer is concentric with the pipe mouth and held with minimal lateral pressure, the operator must set insertion depth and angle to guarantee an even, controlled cut.
The reamer should enter just past the burr edge—deep enough to engage cutting edges without bottoming out.
Maintain a neutral angle aligned with the pipe axis; slight canting risks uneven removal or scoring.
Applying consistent pressure and rotation technique
Start by seating the reamer firmly in the pipe mouth and apply steady, even pressure while rotating the tool clockwise with the fingertips; this prevents chatter and guarantees the cutting edges shave the burr uniformly.
Maintain consistent feed rate, avoid sudden pushes or stalls, and let the cutter do the work. Reverse direction only when specified by tool design to prevent score marks.
Checking progress and removing chips safely
Inspect progress frequently and clear swarf to guarantee a clean, accurate bore: after a few full turns of the reamer, withdraw it, wipe the cutting edges and the pipe mouth with a clean rag or brush, and visually and tactilely check the chamfer for evenness and remaining burrs.
Remove chips from the work area, resecure the pipe, and resume reaming in short intervals until the edge meets specifications.
Step-by-Step Guide to Using a Rotary or Powered Reamer
When using a rotary or powered reamer, operators should select speed and feed appropriate to the pipe material and wall thickness to prevent chatter and tool wear.
A safe startup routine with controlled torque and a secure work-hold minimizes kickback, while steady application of coolant or lubricant reduces heat and prolongs cutter life in metal pipes.
Final finishing passes at reduced speed and a careful inspection for burrs, concentricity, and surface finish complete the process.
Setting speed and feed for material type
Different materials require specific speed and feed settings to achieve a clean, accurate ream without tool damage or workpiece deflection.
Hard materials like stainless steel need lower RPM and lighter feed per pass; softer metals and plastics allow higher speeds and slightly increased feed.
Adjust coolant, monitor chip formation, and reduce feed for thin-walled or brittle pipes to prevent distortion and chatter.
Safe startup procedure and controlling torque
Begin the procedure by confirming that the reamer, chuck, workpiece, and tooling are secure and correctly aligned.
Then set the machine to the prescribed RPM and feed for the material. Engage the spindle at low idle, monitor current draw and vibration, and ramp to operating speed.
Use gradual feed increases if torque spikes occur. Stop immediately on binding, lock out power before adjustments.
Cooling and lubrication recommendations for metal pipes
After verifying alignment, securement, and smooth spindle engagement, attention turns to cooling and lubrication for metal pipe reaming.
Apply a compatible cutting fluid to reduce heat, prevent work hardening, and flush chips. For steel, use soluble oil or synthetic coolant; for stainless, choose high-performance, sulfurized or chlorinated formulations.
Maintain steady flow, reapply as needed, and drain residue after completion.
Finishing passes and inspection
Perform final reaming in measured passes while inspecting progress at each stage to guarantee the hole meets size, roundness, and surface-finish specifications.
Use light cuts, minimal feed, and constant rotation speed. After each pass, remove chips, clean the bore, and verify dimensions with gauges or calipers.
Check concentricity and tactile finish; correct any high spots with controlled secondary passes.
Finalize with a deburred edge.
Material-Specific Techniques
Different materials require distinct reaming techniques to achieve clean, safe edges.
Copper and brass tubing often need gentle reaming and light file finishing, while PVC, CPVC, and other plastics benefit from slower rotation and deburring to avoid melting or cracking.
Steel, stainless steel, and black iron demand more robust tools and steady pressure to remove burrs without overcutting.
Deburring copper and brass tubing
When deburring copper and brass tubing, the techniques prioritize preserving soft metal edges while removing sharp flash from cuts.
A conical reamer with light pressure removes burrs without thinning walls. Rotate smoothly, inspect edges visually and by touch, and use fine emery cloth for final smoothing.
Debris should be brushed away and fittings trial-fit to guarantee a clean, leak-free joint.
Deburring PVC, CPVC, and other plastics
Plastic piping requires gentler handling than metal: deburring PVC, CPVC, and other thermoplastics calls for tools and techniques that remove burrs without cracking, shaving too much material, or creating heat that deforms the edge.
Use plastic-specific reamers, fine-tooth files, or deburring blades; cut slowly, support the pipe, and clear swarf frequently.
Inspect edges for smoothness and uniformity before joining.
Deburring steel, stainless steel, and black iron pipe
Handle ferrous pipes with deliberate care: steel, stainless, and black iron require more aggressive deburring tools than plastics but also demand attention to material-specific risks like work hardening, heat buildup, and corrosion.
Use hardened reamers or carbide cutters, light feeds, steady rotation, and frequent lubricant or coolant.
Inspect edges for burrs, remove small nicks with fine files, and protect finished surfaces from rust.
How to Inspect and Measure a Proper Deburr
The inspector follows a visual checklist to confirm absence of burrs, consistent chamfer, and surface uniformity.
Surface smoothness is then assessed by touch and by trial-fitting with the appropriate coupling or fitting to verify proper seating and alignment.
If the burrs persist or the fit is tight, the decision is made to re-cut for square ends or to ream again for internal smoothing.
Visual inspection checklist
A visual inspection checklist for a proper deburr focuses on key, measurable indicators: uniform chamfer width, absence of sharp burrs or jagged edges, smooth radial and axial changes, and consistent surface finish around the pipe bore.
Inspect for nicks, scoring, or deformation; verify chamfer angle and width against specification; confirm inner lip continuity; note any residual swarf or tool marks requiring rework.
Smoothness tests and fit verification with fittings
Verify smoothness and fit by performing tactile and dimensional checks that simulate real-use assembly.
The operator runs a finger around the bore to detect burrs, measures inner diameter with calipers or gauges, and trials the mating fitting for smooth seating and consistent gap.
Any binding, uneven contact, or size deviation triggers rework until the joint seats uniformly and rotates or slides as planned.
When to re-cut vs. ream again
After tactile and dimensional checks reveal any irregularities in the bore or mating surface, the operator must decide whether to re-cut the edge or perform another reaming pass to achieve a proper deburr.
Choose re-cutting when the edge geometry or threads are damaged; reaming suits minor burrs, slight taper corrections, or surface smoothing.
Verify with calipers, go/no-go gauges, and a visual inspection before final assembly.
Common Problems and How to Fix Them
Common problems during reaming include over-reaming that thins the pipe wall, incomplete burr removal that leaves trapped debris, and tool slippage that damages edges.
Each issue produces visible signs—excessive wall taper, loose shaving inside the bore, or scored/marred surfaces—that can be identified with a quick inspection.
Practical remedies include using depth stops or lighter passes, reworking and cleaning the bore with a brush, and securing the tool or replacing worn cutters to restore proper cutting action.
Over-reaming and wall thinning: signs and remedies
Over-reaming gradually enlarges the bore beyond specified dimensions and can thin the pipe wall to the point of structural compromise. Operators should recognize symptoms such as excessive diameter, visible light through cut ends, reduced wall thickness readings, or unexpected leaks and vibration.
Remedy involves halting reaming, measuring remaining wall thickness, rejecting or sleeving weakened sections, adjusting reamer depth/feed, and retraining operators to prevent recurrence.
Incomplete burr removal and trapped debris
Inspecting reamed pipe ends often reveals residual burrs and trapped machining debris that impede fit-up, promote corrosion, and can score sealing surfaces.
These issues typically stem from insufficient cutter sharpness, improper feed rates, or inadequate chip evacuation.
Resolve by replacing or sharpening cutters, adjusting feeds/rotation for continuous chips, using coolant or compressed air to clear chips, and performing final visual and tactile inspections before assembly.
Tool slippage and damaged edges
Slip and chatter during reaming often indicate tool slippage or dulled/damaged cutting edges, which compromise diameter accuracy and produce ragged finishes.
Inspect the reamer for nicks, burrs, or rounded teeth; replace or resharpen as needed.
Confirm secure clamping, correct feed angle, and steady hand pressure.
Use appropriate lubrication and avoid excessive speed to prevent recurrence and extend tool life.
Maintenance and Care for Pipe Reamers
Regular maintenance keeps a pipe reamer safe and effective by removing metal shavings after each use, inspecting and sharpening or replacing dull blades, and storing the tool in a dry, protected place.
Routine cleaning prevents burr buildup that can affect performance and damage pipes. Proper storage and timely blade care greatly extend tool life and reduce the need for repairs.
Cleaning and removing metal shavings
After each use, the reamer should be cleared of metal shavings and debris to prevent dulling and guarantee accurate cutting.
Wear gloves and eye protection, then brush or blow out chips with compressed air. Inspect the flutes and handle for lodged particles.
Use a nylon brush and solvent if needed, then dry thoroughly and store in a protective case to avoid contamination and corrosion.
Sharpening and replacing blades
Sharpening and replacing blades prolongs a reamer’s life and preserves cutting accuracy; users should monitor blade condition and address wear promptly.
Inspect edges for nicks, burrs, and rounding. Lightly hone with a fine diamond or ceramic stone at the original bevel, maintaining angle consistency.
Replace blades when sharpening fails to restore geometry or when corrosion, cracking, or excessive wear compromises performance.
Proper storage to extend tool life
Maintaining blade condition naturally leads to contemplating how the reamer is stored between uses, since even well-sharpened cutters will deteriorate if exposed to moisture, grit, or improper contact.
Store reamers in a dry, padded case or on a dedicated rack to prevent blade contact and airborne corrosion.
Apply light oil before storage, label containers, and avoid stacking tools to minimize damage and maintain readiness.
Time-Saving Tips and Best Practices
Efficiency improves when operators batch process cuts to maintain consistent dimensions.
Employing guides, stops, or jigs guarantees repeatable reaming and reduces setup time.
Combining reaming with chamfering in a single pass streamlines preparation for faster assembly.
Batch processing cuts for consistency
Group similar reaming tasks together to reduce setup time and guarantee uniform results.
Operators should prepare identical pipe lengths, material types, and tool settings, then process them in one run.
Inspect and mark a sample from each batch to confirm deburr size and surface finish.
Adjust feed or speed only between batches, document settings, and maintain consistent cleaning to prevent cross-contamination.
Using guides, stops, and jigs for repeatable results
After batching similar pipes, operators can further improve consistency and speed by employing guides, stops, and jigs that lock position and control reamer travel.
Fixed guides center the tool, reducing wobble; adjustable stops set uniform insertion depth; simple jigs secure pipe and hand tools for repeatable angles.
Properly designed fixtures reduce inspection time, lower scrap rates, and enable faster, safer deburring across production runs.
Combining reaming with chamfering for faster assembly
Combine reaming and chamfering in a single setup to shave cycle time and improve fit-up consistency for assemblies.
Operators align tooling so the reamer deburrs internal edges while a chamfer cutter bevels the tube end in one pass. This reduces handling, maintains concentricity, and speeds soldering or welding readiness.
Inspect combined operations for correct profiles and adjust feeds to prevent overheating or tool chatter.
Comparison of Reaming Methods and Tools
A concise comparison of hand reamers, rotary reamers, and powered deburrers clarifies trade-offs in speed, control, and finish quality. The table below summarizes key differences to guide tool selection. Subsequent discussion will evaluate typical use cases and limitations for each option.
| Tool | Typical Strength |
|---|---|
| Hand reamer | Control and precision |
| Rotary reamer | Faster material removal, consistent size |
Hand reamer vs. rotary reamer vs. powered deburrer
Choosing between a hand reamer, a rotary reamer, and a powered deburrer depends on the workpiece material, hole size, required tolerances, and production volume. Each tool offers tradeoffs: hand reamers provide control for low-volume, rotary reamers balance speed and finish, and powered deburrers maximize throughput but risk overcutting if misused.
| Tool | Best for | Drawback |
|---|---|---|
| Hand reamer | Precision, low volume | Slow |
| Rotary reamer | Moderate volume | Requires setup |
| Powered deburrer | High volume | Less tactile feedback |
Safety Checklist Before, During, and After Reaming
A concise safety checklist frames the steps to take before, during, and after reaming to protect operators and maintain equipment.
It covers pre-task preparations, on-task reminders, and post-task disposal and cleanup. The list below highlights key checkpoints to observe throughout the procedure.
- Verify PPE, tool condition, and work area stability before starting
- Confirm ventilation and secure fittings to prevent leaks during reaming
- Maintain correct body position, feed rate, and tool control while working
- Inspect chips and sharp edges immediately after reaming to avoid injuries
- Dispose of metal shavings, clean tools, and store equipment safely after use
Pre-task safety preparations
Begin by conducting a thorough safety checklist that identifies hazards, verifies permit and lockout/tagout status, confirms tool condition, and affirms appropriate personal protective equipment (PPE) and ventilation are in place; this step reduces risk by establishing clear controls and responsibilities before, during, and after reaming.
- Inspect reamer, handles, and cutting edges
- Verify workspace isolation and permits
- Confirm PPE: gloves, eye, respiratory
- Guarantee adequate lighting and ventilation
- Review emergency procedures and communication
On-task safety reminders
With pre-task checks completed, attention shifts to maintaining safety throughout the reaming operation by following a concise on-task checklist.
- Verify stable pipe support and secure clamping before cutting motion.
- Keep hands clear of the cutting edge and reamer path.
- Maintain steady, controlled rotation and feed; avoid excessive force.
- Monitor tool condition and stop if vibration or binding occurs.
- Wear eye protection and clear metal chips frequently.
Post-task disposal and cleanup
Complete the task by clearing debris, securing tools, and disposing of metal shavings and cuttings according to workplace protocols.
The operator inspects the reamer, cleans work surfaces, bags hazardous waste, and logs completion.
Final checks confirm PPE removal and area ventilation.
Follow documented disposal, recycling, and reporting procedures to maintain safety and compliance.
- Inspect and clean reamer
- Collect metal shavings
- Bag and label waste
- Log task completion
- Ventilate and secure area
Conclusion
To sum up, the pipe reamer proves indispensable for producing smooth, accurate joints and preventing leaks; attention to technique and upkeep keeps projects running like a well-oiled machine. By selecting the proper tool, following safety protocols, and deburring methodically, users minimize rework and extend tool life. Consistent maintenance and correct pressure—whether by hand or power—ensure clean cuts and reliable connections, making reaming a small step that yields big returns.
