How to Get Yellow Stains Out of a Corian Sink: Fast, Safe Methods That Work
To effectively remove yellow stains from your Corian sink, start by making a baking soda paste and gently scrubbing with a soft sponge. For deeper stains, soak the area with a mixture of hydrogen peroxide and dish soap, then rinse and dry. For persistent discoloration, briefly use diluted bleach or a nonabrasive cleaner, and lightly sand or polish to restore shine. Follow these step-by-step methods and preventative tips for best results.
What Causes Yellow Stains on Corian Sinks
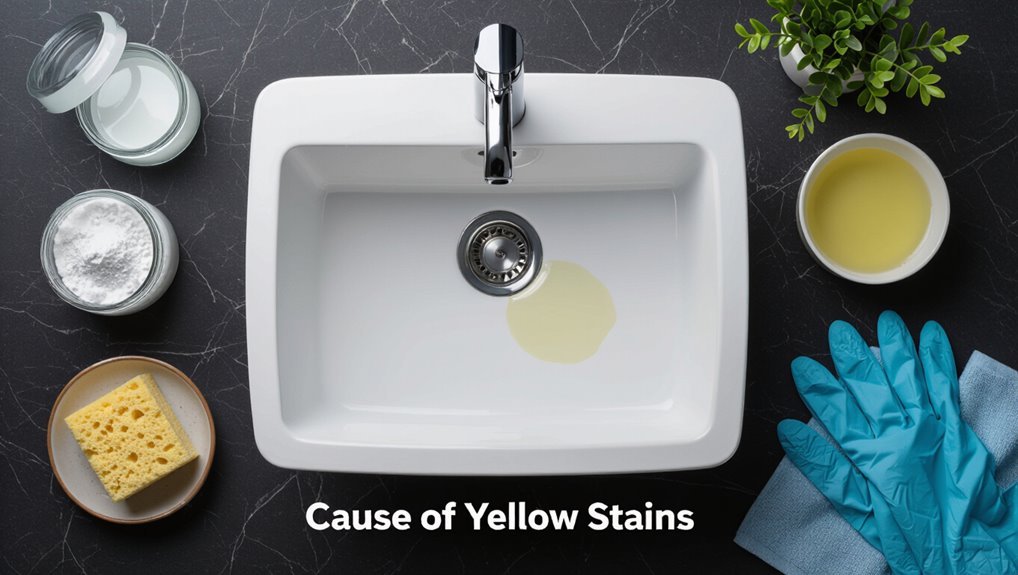
Yellowing on Corian sinks commonly originates from food residues, grease, mineral deposits from hard water, and certain household cleaners.
The solid surface can absorb or hold pigments and residues on the finish, while prolonged exposure or abrasive cleaning can alter the material and trap stains more permanently.
Distinguishing superficial discoloration from true surface damage requires inspecting whether stains polish away or persist after gentle cleaning and mild abrasion.
Common sources of yellowing (food, grease, hard water, cleaners)
Stains on Corian sinks most often originate from everyday substances: cooking oils and grease, deeply pigmented foods (turmeric, tomato sauces), mineral deposits from hard water, and residue or chemical reactions caused by certain household cleaners.
Identifying these sources guides cleaning choices and prevents recurrence; homeowners seeking how to get yellow stains out of corian sink should target grease, lift pigment, dissolve minerals, or neutralize cleaner residues.
How Corian material reacts to stains and discoloration
After identifying common sources—grease, pigmented foods, hard-water minerals, and reactive cleaners—understanding how Corian itself responds to those agents explains why discoloration can persist.
Corian is a nonporous acrylic solid surface with pigments and resins that can absorb dyes superficially or undergo chemical interactions.
Heat and harsh chemicals can soften the resin matrix, allowing staining agents to embed and become harder to lift.
When yellowing indicates surface damage vs. superficial stains
Several factors help determine whether discoloration on a Corian sink is a surface stain that can be removed or a sign of deeper material damage.
Surface stains sit atop the acrylic, respond to cleaning, and often fade after gentle abrasion or bleach.
Structural damage shows persistent yellowing, chalky texture, loss of gloss, or color variation that returns after refinishing, indicating resin degradation or embedded contaminants.
Fast, Safe Overview: Best Approaches to Remove Yellow Stains
A concise set of strategies can quickly improve yellowing on Corian with household cleaners and mild abrasives for immediate results.
For persistent or deep-set discoloration, stronger cleaning techniques and targeted refinishing steps may be required.
If stains remain after thorough cleaning or the surface is damaged, a professional refinisher should be consulted.
Quick methods for immediate improvement
Begin with gentle, fast-acting remedies that improve appearance without risking the material: mild household cleaners (diluted dish soap), baking soda paste, and a non-abrasive melamine sponge remove surface yellowing quickly, while a diluted hydrogen peroxide spot treatment addresses light organic stains.
Rinse thoroughly, dry, and repeat as needed. For routine upkeep, wipe after use and avoid prolonged contact with staining substances.
Deep-cleaning options for stubborn discoloration
When mild cleaners and quick spot treatments fail to restore the sink’s original color, stronger but safe deep-cleaning methods are warranted.
Concentrated baking soda paste, diluted hydrogen peroxide applied briefly, and non-abrasive cream cleaners used with a soft brush can lift stubborn yellowing.
Rinse thoroughly, repeat as needed, and test a hidden area first to confirm colorfastness and surface integrity.
When to call a professional refinisher
Consider contacting a professional refinisher if persistent yellowing resists safe home treatments, the stain covers a large area, or the surface shows damage such as deep scratches, burnout, or uneven color that DIY methods cannot correct.
A pro assesses substrate condition, advises on repair versus replacement, and uses industry-grade products and controlled processes to restore color uniformity and durability while minimizing risk to surrounding surfaces and fixtures.
Step-by-Step: Quick Clean Using Everyday Supplies
The section lists required materials and simple safety steps before starting the clean.
It then outlines two effective home methods — a baking soda paste for scrubbing and a gentle hydrogen peroxide soak for lighter discoloration — followed by rinsing and careful drying to avoid streaks.
Clear, step-by-step instructions will guide the reader through each action and timing.
Materials and safety precautions
A few basic household items and simple precautions are sufficient for a quick, effective Corian sink clean: white vinegar, baking soda, a soft nonabrasive sponge or microfiber cloth, a plastic scrub pad, rubber gloves, and safety glasses.
Guarantee good ventilation, test any cleaner on an inconspicuous spot, avoid abrasive powders or metal pads, and keep children and pets away during cleaning.
Procedure: baking soda paste method
Begin by assembling the prepared materials and ensuring the sink is dry; this method relies on a thick baking soda paste that gently lifts yellow stains without harsh abrasives.
Apply paste to stained areas, let sit 10–15 minutes, then gently scrub with a soft sponge or microfiber cloth in circular motions.
Rinse thoroughly, dry, and repeat if faint discoloration remains.
Procedure: hydrogen peroxide soak for light stains
Mix a 3% hydrogen peroxide solution with a few drops of mild dish soap, then pour or sponge it onto the dry, yellowed areas of the Corian sink so the liquid fully covers the stains and remains in contact for 10–20 minutes.
After soaking, gently agitate with a soft cloth or nonabrasive sponge to lift discoloration.
Repeat once if needed, avoiding abrasive tools.
Rinsing and drying to prevent streaks
After the peroxide soak, rinse the area thoroughly with warm water to remove all residue and loosened discoloration, directing the flow from the highest point of the sink toward the drain to carry particles away.
Pat the surface dry with a soft microfiber cloth, working outward in overlapping strokes to prevent streaks.
Finish by buffing gently for an even, satin appearance.
Step-by-Step: Stronger Methods for Persistent Yellowing
For stubborn yellowing, the article outlines stronger options with clear materials and safety precautions before use.
It describes step-by-step methods including a diluted bleach soak with timing guidelines, a non-abrasive cleaner paired with a soft scrub pad, and the proper use of commercial Corian-safe stain removers.
Each procedure emphasizes safe handling, rinsing, and testing on an inconspicuous area first.
Materials and safety precautions for stronger agents
Strong cleaning agents require appropriate materials and careful safety measures to protect both the sink and the user.
Recommended items include nitrile gloves, eye protection, chemical-resistant sponge or cloth, plastic mixing container, and a well-ventilated workspace.
Keep a neutralizing agent and fresh water nearby.
Read product labels, test on an inconspicuous area, avoid mixing chemicals, and store supplies securely after use.
Procedure: diluted bleach application and timing
Begin by preparing a diluted bleach solution—typically one part household bleach (5–6% sodium hypochlorite) to ten parts water—in a plastic container, wearing nitrile gloves and eye protection and ensuring the area is well ventilated.
Apply with a soft cloth, keep wet for 10–15 minutes, then rinse thoroughly with water.
Repeat once if staining persists, allowing full drying between treatments.
Procedure: non-abrasive cleaner + soft scrub pad technique
Apply a non-abrasive cleaner with a soft scrub pad to tackle persistent yellowing, choosing a product formulated for solid-surface materials or a mild household cleanser (no powdered or bleach-based abrasives).
Work in small sections with gentle, circular motions, rinsing frequently to check progress. For stubborn spots, repeat application, avoid excessive pressure, then dry with a microfiber cloth to inspect results.
Procedure: commercial Corian-safe stain removers
If the non‑abrasive cleaner and soft pad method fails to lift deep or aged yellowing, a Corian‑safe commercial stain remover can be used as a stronger option.
Read product label, verify Corian compatibility, and test an inconspicuous area.
Apply per instructions, allow dwell time, gently agitate with a soft pad, rinse thoroughly, and repeat only if necessary.
Neutralize and dry to inspect results.
Restoring Finish and Removing Minor Surface Damage
After stains are lifted, attention turns to blending the treated area with the surrounding surface by buffing and polishing the Corian to restore its original sheen.
Minor scratches and dull spots can be smoothed using progressively finer grit sandpaper followed by a compatible polishing compound, taking care to work evenly and avoid heat buildup.
If damage is deep or widespread, a professional refinish or replacement of the top layer may be required, a process that typically involves sanding to a uniform surface and applying a factory-matched finish.
How to buff and polish Corian to blend treated areas
Begin by leveling the repaired area with fine-grit sandpaper to remove any ridges or haze left from stain removal.
Then progress through progressively finer grits until the surface is uniformly matte.
Use a soft cloth and a rotational buffer with a nonabrasive polishing compound to restore sheen, working small sections.
Finish by wiping residue and inspecting under good light to guarantee seamless blending.
Using fine-grit sanding and polishing compounds safely
Work methodically when using fine-grit sandpaper and polishing compounds to restore Corian surfaces, keeping pressure light and movements even to avoid gouging or heat buildup.
Begin with 400–600 grit, progress to 800–1200, then apply a non-abrasive polish.
Rinse frequently, inspect under good light, and test a small area first.
Use clean cloths and avoid harsh chemicals to preserve finish.
When refinishing is necessary and what it involves
Refinishing becomes necessary when scratches, etching, or dulling penetrate the Corian’s surface beyond what light sanding and polishing can conceal; these signs include visible gouges, uneven gloss, or areas that trap dirt despite cleaning.
The process involves deeper sanding to feather edges, filling voids with compatible resin, progressively finer abrasives to restore uniform sheen, and a final polish or matte finish matching the original texture.
Preventing Yellow Stains and Long-Term Care
Routine daily cleaning with mild, nonabrasive soap and a soft cloth helps minimize discoloration before stains set.
The piece warns against bleach, abrasive pads, and acidic cleaners that can damage Corian, and recommends avoiding direct heat and harsh scrubbing.
It also notes protective habits—periodic rinsing after use, prompt spill removal, and considering professional sealing—to preserve appearance long term.
Daily cleaning routine to minimize discoloration
Although daily wear alone rarely causes permanent discoloration, a simple, consistent cleaning habit prevents buildup that leads to yellow stains on Corian sinks.
Wipe dry after use to remove residues, rinse with warm water, and gently clean with a soft cloth and mild dish soap.
Address spills immediately and perform a quick weekly rinse-and-wipe to keep the surface uniform and stain-free.
What cleaners and tools to avoid
Because Corian is a solid-surface material with a consistent acrylic-resin finish, harsh chemicals and abrasive tools can damage the color and texture and accelerate yellowing.
Avoid bleach, ammonia, oven cleaners, straight acetone, and paint strippers. Steer clear of steel wool, scouring pads, and aggressive scrapers.
Use only manufacturer-approved, nonabrasive cleaners and soft cloths or nonabrasive sponges to prevent surface degradation.
Protective habits: sealing, rinsing, and avoiding heat
Establishing simple protective habits can greatly slow yellowing and preserve a Corian sink’s appearance.
Regular rinsing after use removes residues that cause discoloration. Periodic application of a manufacturer-approved sealant restores surface integrity and eases cleaning.
Avoid placing hot pots or direct heat on the sink; thermal stress can alter color and finish.
Promptly clean spills of staining substances.
Troubleshooting Common Scenarios
When yellowing persists or appears in specific patterns, targeted checks and follow-up actions are required.
The most common scenarios that need different responses include:
- Yellow halo around the drain or adhesives
- Stains that return after cleaning
- Faint yellowing that resists all household methods
Each case calls for a distinct troubleshooting step, from inspecting fittings to evaluating professional refinishing.
Yellow halo around drain or adhesives
A distinct yellow halo around the drain or under adhesive areas on a Corian sink typically indicates chemical staining or trapped residues rather than uniform surface fading.
The area should be cleaned with a mild, nonabrasive cleaner and soft brush; adhesive removers must be compatible with solid surface materials.
If discoloration persists, professional assessment can determine whether localized refinishing or targeted chemical neutralization is necessary.
Stains that return after cleaning
Why does a stain reappear after a thorough cleaning?
Residual contamination, porous micro-scratches, or embedded pigment beneath the surface can cause relapse.
Inadequate rinsing or milder cleaners may leave residues that oxidize later.
Persistent stains often require deeper cleaning, gentle abrasion, or professional refinishing to remove subsurface color and restore uniformity; otherwise, discoloration will recur despite repeated surface treatments.
Faint yellowing that resists all household methods
Encountering faint yellowing on Corian that resists household methods signals deeper discoloration rather than surface residue.
This subtle, uniform haze often stems from prolonged UV exposure, chemical interactions, or resin oxidation within the material.
Professional restoration or replacement of affected sections may be required.
A trained technician can evaluate color-matching, mild refinishing, or resurfacing options; permanent dye changes often cannot be reversed by DIY cleaning.
Comparison of Cleaning Methods and Effectiveness
Different cleaning approaches yield varying balances of speed, safety, cost, and risk, which guides the choice for a Corian sink. The table below summarizes typical outcomes for common methods to help compare them quickly. The following discussion will reference these practical trade-offs.
| Method | Typical Speed | Relative Risk |
|---|---|---|
| Mild soap & sponge | Fast | Low |
| Baking soda paste | Moderate | Low to moderate |
| Bleach or strong cleaners | Fast | High |
Speed, safety, cost, and risk of each method
Compare common cleaning methods for yellow Corian stains by evaluating speed, safety, cost, and risk to determine the best option for each situation.
Mild detergents and baking soda: fast, very safe, low cost, minimal risk.
Hydrogen peroxide: moderate speed, safe with ventilation, low cost, slight discoloration risk.
Bleach and abrasives: fast, higher risk to finish, cheap, potential surface damage and warranty voiding.
Recommended Products and Supplies
A concise selection of products and tools can make removing yellow stains from a Corian sink more reliable and safe.
Recommended options include common household cleaners, professional-grade products formulated for solid surface materials, and the right pads, cloths, and polishing accessories to avoid damage.
The following list highlights these categories for quick reference:
- Household items that work best
- Professional-grade cleaners safe for Corian
- Tools: pads, cloths, and polishing accessories
Household items that work best
Gathering a few common household items makes treating yellow stains on Corian sinks straightforward: baking soda, distilled white vinegar, hydrogen peroxide, mild dish soap, nonabrasive sponge or soft cloths, and a plastic or silicone scraper cover the most effective DIY options.
Baking soda and water form a gentle paste; vinegar or peroxide work as stain-lifters. Soft tools prevent scratching; dish soap removes residue and oils.
Professional-grade cleaners safe for Corian
After outlining effective household options, attention can shift to professional-grade cleaners formulated for solid-surface materials.
Manufacturers recommend nonabrasive, pH-neutral formulas designed for Corian and similar acrylic polymer surfaces.
Look for products labeled safe for solid surfaces, containing mild surfactants and optical brighteners rather than bleach or strong acids.
Use per label instructions and test discreetly to confirm compatibility before full application.
Tools: pads, cloths, and polishing accessories
Several types of pads, cloths, and polishing accessories are essential for safely removing yellow stains from Corian without damaging the finish.
Non-abrasive microfiber cloths, soft foam pads, white or light-duty Scotch-Brite pads, and fine-grit sanding pads (if manufacturer permits) handle cleaning and light abrasion.
A polishing compound and a soft buffing bonnet finish gleaming edges.
Avoid steel wool or harsh abrasive wheels.
When to Seek Professional Repair or Replacement
If yellowing persists after recommended cleaning or is accompanied by deep discoloration, cracks, or warping, it may indicate permanent staining or structural damage necessitating a professional assessment.
A certified refinisher can describe options such as sanding and reglazing versus full replacement, outline typical procedures, and provide a warranty estimate.
Cost estimates and projected lifespan after repair vary by extent of damage and should be obtained in writing before work begins.
Signs that stain is permanent or structural
Recognition of permanence matters: certain visual and tactile cues indicate a yellow stain on Corian is not just surface-level discoloration but a symptom of deeper damage.
Persistent discoloration visible from multiple angles, staining through the material edge, soft or pitted texture, cracks or crazing, and color that resists solvent and abrasion tests all suggest the stain is structural and may require professional assessment or replacement.
What professional refinishing or replacement involves
Engage a qualified surface repair professional when stains show signs of depth, texture change, or when DIY methods fail; professional intervention typically involves a detailed inspection, controlled sanding to remove compromised material, color-matching and blending of the solid surface, and application of a factory-grade finish or sealer to restore appearance and durability.
Technicians may also assess adhesion, repair delamination, replace damaged sections, and polish to uniform gloss.
Estimating cost and lifespan after repair
Several factors determine the cost and expected lifespan of a Corian sink repair, including the extent of staining or damage, whether color-matching and blending are required, and the type of finish applied.
Minor stain removal and resealing typically cost less and can last years; deep discoloration, structural damage, or frequent heavy use may justify full replacement, which has higher upfront cost but longer service life.
Conclusion
Like a weathered map that still points home, a Corian sink’s yellowing can be read and repaired. With basic household agents or, for stubborn stains, measured commercial products and gentle resurfacing, the original tone and sheen often return. Small scratches and haze respond to careful polishing; deep damage may require professional restoration. Attentive, prompt care prevents decline, turning a faded surface back into a reliable, familiar anchor in the kitchen.