How to Mount a Toilet Tank: Step-by-Step Guide for a Secure, Leak-Free Installation
To mount a toilet tank securely and ensure a leak-free installation, start by aligning the tank with the bowl. Install a new tank-to-bowl gasket and insert bolts with rubber washers to create a watertight seal. Hand-tighten the bolts in an alternating pattern, then use a wrench for small equal turns to prevent cracking. Reconnect the supply line and lightly tighten it, then open the water supply and check for leaks and proper flush operation. Additional steps cover sealing methods, troubleshooting tips, and maintenance for ongoing reliability.
Overview of Toilet Tank Installation and When to Replace or Reinstall
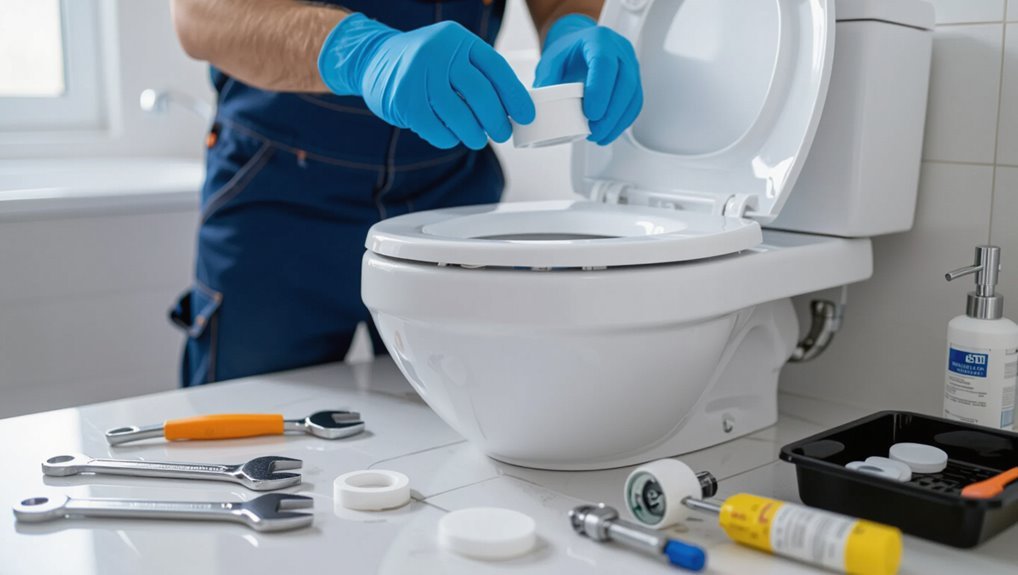
Mounting a toilet tank involves aligning the tank on the bowl, securing bolts and gaskets, and testing for a watertight seal.
The need to mount, replace, or reattach a tank is indicated by wobbling, persistent leaks, cracks, or malfunctioning internal parts.
A concise tools-and-materials checklist—wrenches, new bolts and washers, a tank-to-bowl gasket, plumber’s tape, and a level—ensures a secure, leak-free installation.
What mounting a toilet tank involves
Securely attaching a toilet tank requires aligning the tank with the bowl, fastening the mounting hardware, and connecting the water supply and internal mechanisms so the unit functions reliably and remains watertight.
The process covers gasket placement, bolt torque, seal inspection, and float/flush valve adjustment.
Proper tools, correct torque sequence, and leak testing complete how to mount a toilet tank for durable, reliable performance.
Signs you need to mount, replace, or reattach a tank
When a toilet tank shows persistent leaks, wobbling, or repeated flushing problems, it signals the need to mount, replace, or reattach the unit.
Additional indicators include water pooling at the base, visible cracks, loose or corroded bolts, and uneven seating on the bowl.
Frequent refilling, phantom flushing, or mold growth behind the tank also warrant inspection and corrective action.
Tools and materials checklist for a secure, leak-free installation
Noticing signs like leaks, wobbling, or loose bolts should prompt an assessment of tools and materials needed for a proper tank installation or replacement.
Essential items guarantee a secure, leak-free result:
- Adjustable wrench, screwdriver set, and socket wrench.
- New tank-to-bowl gasket and bolt kit with rubber washers.
- Flush valve and fill valve assembly.
- Plumber’s tape, silicone sealant, and a level.
Preparing for the Job: Safety, Measurements, and Compatibility
Before beginning work, the installer guarantees safety by shutting off the water supply, draining the tank, and wearing basic protective gear.
Precise measurements of tank-to-bowl alignment and bolt spacing are taken to confirm compatibility and identify any special parts needed.
The fitter then verifies tank-to-bowl fit and selects the correct gasket, bolts, and washers to prevent leaks and guarantee a secure connection.
Safety precautions and water shutoff steps
Although plumbing work can seem straightforward, strict safety steps and a reliable water shutoff are essential to prevent injury and water damage.
Wear gloves and eye protection, disconnect electricity nearby, and clear the workspace.
Locate and close the fixture shutoff valve; if absent, shut off the main water supply.
Drain remaining water by flushing and blotting.
Verify shutoff with no-flow at the tank.
Measuring the tank and bowl alignment and bolt spacing
How should the tank sit on the bowl to verify a secure, leak-free connection?
The installer measures tank-to-bowl mating surface for even contact, checks flange and gasket seating, then measures bolt hole center-to-center spacing with calipers or tape.
Record vertical alignment and bolt length clearance.
Confirm symmetry and consistent gap around the gasket to ascertain uniform compression when tightened.
Verifying tank-to-bowl compatibility and required parts
When confirming tank-to-bowl compatibility, the installer inspects dimensions, mounting patterns, and component condition to assure a proper seal and secure fit.
He checks flange alignment, bolt hole spacing, and tank lip clearance, compares manufacturer part numbers, and verifies inlet and overflow placement.
Required parts inventory includes replacement seals, mounting hardware, and any model-specific brackets or shims to guarantee stable installation.
Choosing the right gasket, bolts, and washers
After confirming tank-to-bowl compatibility and inventorying model-specific hardware, the installer selects the proper gasket, bolts, and washers to guarantee a watertight, mechanically sound connection.
Choose a rubber or neoprene gasket sized to the flush valve opening, stainless or brass bolts resisting corrosion, and nylon or rubber washers for compression and seal.
Match lengths to tank thickness and avoid overtightening.
Step-by-Step: How to Mount a Toilet Tank to a Bowl
The procedure begins with draining and removing any existing tank, then inspecting the bowl flange and mounting surface for damage or debris.
Next, the correct tank-to-bowl gasket is installed and tank bolts are inserted before positioning the tank on the bowl.
Finally, bolts are hand‑tightened while checking alignment to guarantee a proper, leak‑free fit.
Step 1 Drain, disconnect, and remove existing tank (if applicable)
Begin by shutting off the water supply to the toilet and flushing to empty as much water from the tank and bowl as possible.
Disconnect the supply line at the shutoff valve and use a sponge or towel to remove remaining water.
Remove tank-to-bowl nuts and bolts, supporting the tank to prevent dropping.
Lift the tank straight up and set aside on a protected surface.
Step 2 Inspect bowl flange and mounting surface
A close inspection of the bowl flange and mounting surface determines whether the tank will seat properly and seal reliably.
The person checks for cracks, chips, warped surfaces, and corrosion around mounting holes. Debris, old gasket remnants, and mineral buildup are removed.
Mounting hole threads and surrounding porcelain must be intact and flat; any damage requires repair or replacement before proceeding.
Step 3 Install or replace tank-to-bowl gasket
Next, fit or replace the tank-to-bowl gasket to guarantee a watertight seal between the tank and bowl.
Remove old gasket, clean mating surfaces, and dry thoroughly.
Center a new rubber or foam gasket over the tank outlet, ensuring even contact and no twists.
Verify gasket sits flush against both tank and bowl openings before proceeding to bolt alignment and tightening.
Step 4 Insert tank bolts and position tank on bowl
Gather the tank bolts, rubber washers, and metal washers. Then insert each bolt through the tank’s mounting holes from the inside so the threaded ends extend downward.
While holding the tank above the bowl, align the bolts with the flange holes on the bowl and gently lower the tank until the bolts pass through and the gasket seats evenly.
Place rubber washers beneath the tank, then metal washers and protruding bolts ready for fastening.
Step 5 Hand-tighten bolts and check alignment
With fingers, begin tightening the tank bolts evenly, turning each nut a few rotations at a time so pressure is applied uniformly; alternate between bolts to prevent warping the porcelain and stop when the nuts feel snug but not fully tight.
Visually verify the tank sits flush on the bowl, confirming even gaps and level orientation.
Confirm no wobble and that gasket compression looks consistent.
Step 6 Gradual tightening sequence to avoid cracking
After hand-tightening until the nuts feel snug and the tank sits level, proceed with a gradual tightening sequence to finish securing the assembly without stressing the porcelain.
Alternate tightening each nut a quarter turn at a time, checking level and gasket compression between turns.
Stop as soon as the tank is stable and gasket seals; avoid over-torquing which can cause cracks or uneven seating.
Step 7 Reconnect water supply and install fill valve
Reconnect the water supply and install the fill valve to restore the tank’s water flow and prepare it for testing.
The installer fits the fill valve into the tank’s threaded opening, secures it with the locknut, and attaches the refill tube to the overflow.
The supply line is hand-tightened then given a quarter turn with a wrench.
Check for visible leaks before proceeding.
Step 8 Test flush operation and adjust internal components
Begin testing the flush by filling the tank and operating the lever several times to observe water flow, valve seating, and the refill cycle.
Check for complete flush, proper flapper/flush valve seal, and correct refill height.
Adjust float or fill valve to stop at manufacturer’s waterline.
Tighten or realign chain length for full closure.
Confirm no leaks around tank, bolts, or supply connection.
Sealing and Leak Prevention Techniques
Proper gasket seating and selecting the correct gasket type are essential to prevent leaks where the tank meets the bowl.
Attention to bolt torque and washer placement, plus the selective use of plumber’s tape, sealant, or silicone on threaded or mating surfaces, further guarantees a watertight assembly.
A simple pressure and visual test after filling will reveal common leak points such as the tank-to-bowl flange, bolt seals, and supply line connection.
Proper gasket seating and types of gaskets
A watertight connection between the tank and bowl depends on correct gasket selection and precise seating; mismatched materials or uneven compression are common causes of leaks.
The guide outlines types: rubber flange gaskets for flexibility, foam or neoprene for irregular surfaces, and reinforced wax for heavy-duty seals.
Gaskets must sit centered, undistorted, and flat against both surfaces before tightening to guarantee uniform compression.
Correct bolt torque and washer placement
With the gasket centered and compressed evenly, attention shifts to bolt torque and washer placement to complete the seal and prevent leaks.
Bolts should be tightened incrementally and alternately to equalize pressure; hand-tight plus a quarter turn with a wrench is typical.
Use a flat washer beneath the nut and a rubber or nylon washer against the porcelain or gasket to distribute load and prevent cracking or seepage.
Using plumber’s tape, sealant, or silicone where appropriate
Apply plumber’s tape, sealant, or silicone selectively to joints and threads to reinforce seals and prevent seepage.
Use tape on threaded supply connections, wrapping clockwise three to five turns.
Apply plumber’s putty or silicone sparingly under tank-to-bowl gaskets and around bolt bases to block microchannels.
Avoid excess that can squeeze into valves.
Allow recommended cure time before water restoration to guarantee reliable seals.
How to test for leaks and spot common leak points
After allowing sealants and tape to cure per manufacturer instructions, proceed to check for leaks by pressurizing the system and inspecting common failure points.
Fill the tank, operate the flush, and observe connections: tank-to-bowl bolts, gasket, fill valve, supply line, and shutoff.
Look for drips, moisture, stains, or pooling.
Tighten fittings incrementally, replace compromised seals, and retest until dry.
Common Problems During Tank Mounting and How to Fix Them
Common issues that arise during tank mounting include cracked porcelain, misaligned bolt holes or uneven mounting surfaces, and persistent leaks at the tank-to-bowl joint.
Each problem has specific diagnostics and remedies—such as inspecting and replacing cracked components, shimming or re-drilling for alignment, reseating gaskets, and adjusting or replacing fill and flush valve parts.
Addressing these promptly prevents water damage and restores proper toilet function.
Cracked tank or bowl diagnosis and repair options
Inspect the tank and bowl closely for hairline cracks, chips, or stress fractures before proceeding with repairs.
Small exterior hairline cracks may be sealed with waterproof epoxy designed for ceramics; allow full cure.
Larger cracks, interior fractures near mounting points, or bowl damage require replacement to guarantee safety and prevent leaks.
Document damage, consult manufacturer, and replace if structural integrity is compromised.
Misaligned bolt holes or uneven mounting surface
Misaligned bolt holes or an uneven mounting surface can prevent a toilet tank from seating properly, leading to leaks, wobble, or stripped hardware.
The installer should check flange and tank alignment, use shims or a neoprene gasket to level surfaces, and, if necessary, re-drill or tap bolt holes carefully.
Replace warped mounting hardware and retighten evenly to distribute pressure.
Persistent leaks at the tank-to-bowl joint
Persistent leaks at the tank-to-bowl joint often stem from a failed gasket, uneven mating surfaces, or improperly torqued bolts, allowing water to seep between the tank and bowl.
Inspect and replace the rubber gasket, clean and level both mating surfaces, and use new washers and bolts.
Tighten bolts gradually in a crisscross pattern to specified torque, then test for seepage.
Running toilet after installation causes and fixes
A running toilet after installation usually indicates a problem with the fill or flush assembly—commonly a warped flapper, a misadjusted float, or a faulty fill valve—allowing water to continuously flow or prevent the tank from shutting off properly.
Inspect and replace the flapper if warped, adjust or replace the float arm or fill valve, check chain slack, and test for proper shutoff and refilling after each fix.
Maintenance and Adjustment After Installation
After installation, attention turns to fine-tuning the fill valve and float to set the ideal water level and prevent overflows or weak flushes.
Regular inspections and a tightening schedule for tank-to-bowl bolts help catch leaks and loosening before they cause damage.
Worn gaskets and bolts should be replaced proactively to avoid sudden failures and water waste.
Adjusting fill valve and float for optimal water level
Several simple adjustments to the fill valve and float guarantee the tank refills to the correct level without wasting water or causing weak flushes.
Turn the fill-valve screw or slide the float arm to set water to the mark on the overflow tube, typically 1 inch below the rim.
Test by flushing, fine-tune until consistent shutoff and stable water line are achieved.
Periodic checks and tightening schedule
Periodic checks and a tightening schedule help keep the fill valve and float settings reliable and prevent leaks or loosening over months of use.
Inspect connections monthly for drips, wobble, or corrosion. Gently hand-tighten plastic nuts and slightly snug metal fasteners quarterly.
Verify water level and operation after adjustments. Record dates and actions to track trends and anticipate needed repairs.
Replacing worn gaskets and bolts before failure
Replace worn gaskets and bolts proactively to prevent leaks, tank instability, and water damage.
Inspect rubber seals, tank-to-bowl gaskets, and mounting bolts every six months. Replace any brittle, compressed, corroded, or loose components with compatible parts and stainless hardware.
Tighten uniformly to specified torque, avoid over-tightening, and test for leaks. Document replacements and monitor performance to catch recurrence early.
Cost, Time Estimates, and When to Call a Professional
Typical DIY installation requires one to three hours and commonly costs $20–$100 for parts.
Professional labor raises total expense depending on region and complexity. A licensed plumber is recommended for persistent leaks, damaged flanges, complex drain alignment, or when local codes must be met.
Homeowners should ask plumbers for an estimate, scope of work, warranty, and expected timeline before service begins.
Typical DIY time and cost breakdown
When undertaken by a homeowner with basic tools and steady hands, mounting a toilet tank usually takes 30–90 minutes and costs between $10 and $60 in materials; labor increases, and complexity rises when additional repairs or part replacements are required. Typical estimates by task:
| Task | Time | Cost |
|---|---|---|
| Tank mounting | 30–90 min | $10–$30 |
| Seal/gasket | 10–20 min | $5–$15 |
| Fasteners | 5–15 min | $1–$15 |
When a professional plumber is recommended
If unexpected complications arise or the installation involves older plumbing, concealed damage, or complex tank-to-bowl interfaces, hiring a professional plumber is advisable.
Professionals can more quickly diagnose leaks, guarantee proper seal and flange alignment, and handle flange replacement or floor repairs that exceed typical DIY scope.
Typical service costs range widely; expect faster completion, warranty-backed work, and avoidance of costly mistakes when scope surpasses homeowner skills.
Questions to ask a plumber and what to expect during service
How should a homeowner prepare for a plumber’s visit and what should they expect regarding cost and timing?
A homeowner should clear workspace, note symptoms, and have model details ready.
Ask for diagnostic fees, hourly versus flat rates, estimated job duration, parts cost, warranty, and permit needs.
Expect inspection, quoted estimate, and agreed timeline; call a professional for persistent leaks, structural damage, or complex flange/toilet alignment issues.
Additional Tips, Tools, and Upgrades
The section outlines practical upgrades such as slow-close seats, dual-flush valves, and other water-saving components that can improve function and conserve resources.
It also addresses specialty scenarios like wall-mounted tanks, concealed cisterns, and aging fixtures that may require different tools or mounting techniques.
Finally, it recommends eco-friendly installation choices and low-flow options to reduce long-term water use.
Upgrading to slow-close lids, dual-flush valves, or water-saving components
Consider upgrading toilet hardware to improve comfort, conserve water, and reduce noise.
Practical upgrades extend function and efficiency while remaining simple to install.
- Slow-close lid: prevents slams, prolongs seat life.
- Dual-flush valve: reduces water per flush.
- Low-flow components: replace flappers and fill valves.
- Pressure-assist or fill restrictors: boost performance with less water.
Specialty situations: wall-mounted tanks, concealed cisterns, and older fixtures
When dealing with wall-mounted tanks, concealed cisterns, or vintage fixtures, installers must adapt standard mounting and repair techniques to accommodate limited access, different mounting hardware, and nonstandard parts.
Careful measurement, the right specialty tools (e.g., access panels, long-reach wrenches, and compatible replacement valves), and verification of wall or frame load capacity are essential before beginning work.
Remove finishes cautiously, document fittings, source matched fasteners, and test seals thoroughly.
Eco-friendly and low-water installation recommendations
After addressing access and mounting challenges for nonstandard tanks, attention turns to conserving water and minimizing environmental impact during installation and upgrades.
Install dual-flush or low-flow flush valves, retrofit existing tanks with displacement devices or adjustable fill valves, and use WaterSense-certified components.
Ascertain seals and connections prevent leaks, which waste water.
Recommend recycled or sustainably sourced materials for visible trim and covers.
Conclusion
Like fitting the final puzzle piece into a calm mosaic, mounting a toilet tank completes a practical tableau — water’s choreography depends on a careful, even touch. When bolts are snug, gaskets kiss evenly and valves whisper open, the system becomes a quietly dependable instrument. Vigilance, routine checks and gentle adjustments keep leaks at bay; if repairs become a stormy sea, calling a pro steadies the craft and preserves household peace.