How to Charge a Heat Pump: Step-by-Step Guide for Safe, Efficient Refrigerant Top-Up
Charging a heat pump involves adding refrigerant to the manufacturer’s specified levels to optimize heating and cooling performance. A trained technician employs tools like gauges, a vacuum pump, and leak detectors, while wearing appropriate personal protective equipment (PPE).
Step-by-Step Process:
- Pre-checks: Inspect filters, coils, and electrical components, and isolate the system.
- Evacuate the System: Create a deep vacuum to remove any air or moisture.
- Top Up Refrigerant: Add refrigerant by weight or use superheat/subcooling methods.
- Verify Performance: Check pressures, temperatures, and ensure all joints are leak-free.
- Documentation: Follow EPA regulations and document the quantities used.
For detailed procedures and troubleshooting tips, continue with the full guide.
What charging a heat pump means and when it’s necessary
Refrigerant charging for a heat pump refers to adding or adjusting the system’s refrigerant to the manufacturer-specified level to guarantee proper cooling and heating performance.
Indicators that a unit may need a top-up include reduced airflow or temperature change, unusually long run times, ice on the coils, and system short-cycling.
Because refrigerants are regulated and can be hazardous, handling and disposal must follow legal requirements and safety protocols or be performed by certified technicians.
Definition of refrigerant charging for heat pumps
Charging a heat pump means adding, removing, or adjusting the amount of coolant in the system to reach the manufacturer-specified charge for safe and efficient operation.
The definition of refrigerant charging for heat pumps covers measurement, metering, and balancing refrigerant volume and pressure to restore designed performance.
It explains why trained technicians follow protocols and use gauges, scales, and certified refrigerants when learning how to charge a heat pump.
Common signs your heat pump needs refrigerant top-up
Several clear indicators can signal that a heat pump requires a refrigerant top-up.
Reduced heating or cooling performance, longer run times, ice buildup on coils, and hissing or bubbling sounds suggest low refrigerant.
Increased energy bills and uneven room temperatures also point to leaks or undercharge.
Persistent cycling and poor airflow combined with these signs warrant professional diagnosis and possible refrigerant replenishment.
Legal and safety considerations for refrigerant handling
When dealing with a heat pump, topping up the refrigerant means adding the specific amount and type of coolant the system requires to operate efficiently and safely. It becomes necessary only after a verified leak or documented undercharge is identified by diagnostic testing.
Technicians must comply with certification, refrigerant-specific regulations, proper leak repair, recovery equipment use, ventilation, PPE, and accurate records to avoid legal and environmental penalties.
Required tools, equipment, and protective gear
Before beginning any charging procedure, the technician should confirm the heat pump’s approved refrigerant type and verify all tools are compatible with that refrigerant.
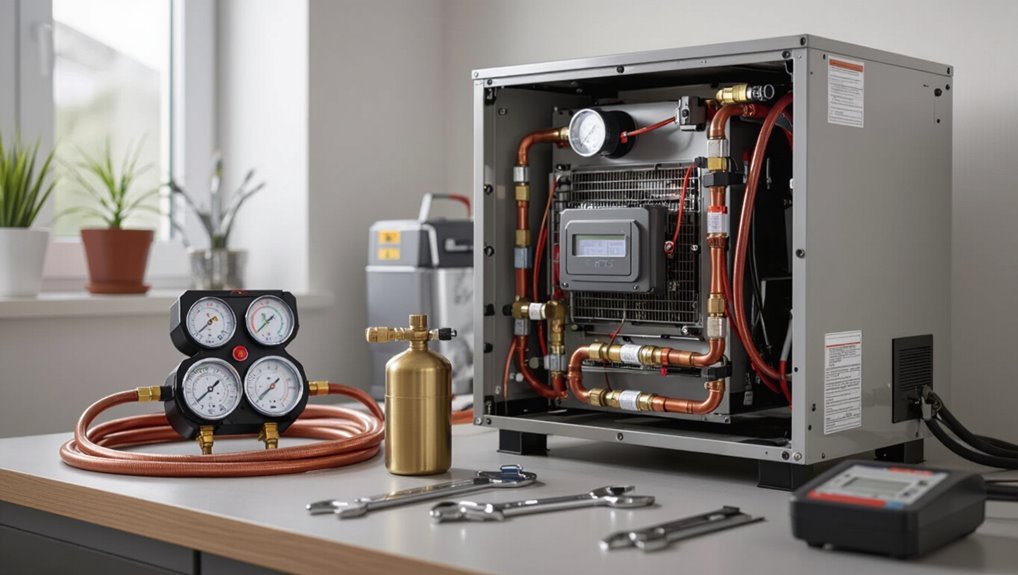
Required equipment typically includes a manifold gauge set, vacuum pump, refrigerant scale, recovery machine, and a reliable leak detector.
Appropriate personal protective equipment—gloves, goggles, and respiratory protection when needed—and a clear, well-ventilated workspace are essential for safe, compliant work.
Refrigerant types used in residential heat pumps and compatibility
Many residential heat pumps use a small set of refrigerants—commonly R-410A, R-32, and increasingly low‑GWP blends—each of which requires specific handling, tools, and personal protective equipment due to differences in pressure, flammability, and chemical properties.
Technicians must verify manufacturer compatibility, label and segregate refrigerant types, follow charge limits, and use appropriate PPE and ventilation for flammable or high‑pressure refrigerants to prevent cross‑contamination and hazards.
Essential tools: manifold gauge set, vacuum pump, scale, recovery machine, leak detector
A concise set of tools and proper protective gear are essential for safely charging a heat pump.
Required equipment includes a calibrated manifold gauge set, vacuum pump for evacuation, electronic scale for accurate refrigerant charging, recovery machine for removal, and a sensitive leak detector.
Ancillary items: refrigerant hoses, adapters, brass fittings, and documentation for system specifications and refrigerant type.
Personal protective equipment and workspace preparation
Proper personal protective equipment (PPE) and a well-organized workspace reduce risk and improve accuracy when charging a heat pump.
Technicians should wear safety glasses, chemical-resistant gloves, insulated footwear, and long sleeves.
Confirm adequate ventilation, clear the work area of trip hazards, position refrigerant cylinders upright, and keep fire extinguisher and first-aid kit nearby.
Verify lighting, tool accessibility, and communication means before starting.
Pre-checks before adding refrigerant
Before adding refrigerant, a technician inspects filters, coils, fans, and electrical connections to confirm proper operation and clear any airflow or safety issues.
They then measure operating pressures and temperatures at specified service ports to establish current system performance.
Finally, measured values are compared to manufacturer charge specifications to determine whether additional refrigerant is required.
Inspecting system components: filters, coils, fans, electrical connections
Start by visually and physically inspecting the heat pump’s accessible components to confirm they are clean, intact, and operable before any refrigerant is added.
Check air filters for dirt and replace if clogged.
Examine coils for debris or damage, verify fan blades spin freely and motors run smoothly, and tighten or secure loose electrical connections.
Note corrosion, burned wiring, or mechanical faults before proceeding.
Measuring operating pressures and temperatures
Once visual and mechanical checks are complete, measuring operating pressures and temperatures verifies system balance and identifies issues that could contraindicate adding refrigerant.
Technicians record suction and discharge pressures, indoor and outdoor coil temperatures, and line-set temperature differential. Readings compare to expected ranges for current mode and ambient conditions.
Abnormal values prompt troubleshooting—restricted airflow, compressor faults, or refrigerant leak detection—before any top-up.
Verifying system charge vs. manufacturer specifications
After confirming pressures, temperatures, and airflow are within acceptable ranges, the technician compares the measured charge to the manufacturer’s specified refrigerant mass or target superheat/subcooling values for the specific model and operating conditions. Deviations prompt investigation of leaks, metering device faults, or measurement error before adding refrigerant. Document findings and follow OEM correction procedures.
| Spec item | Measured | OEM target |
|---|---|---|
| Charge |
Step-by-step refrigerant top-up procedure
The technician begins by isolating and securing the system and, if required, recovering any existing refrigerant to comply with regulations.
Next steps include evacuating air and moisture with a vacuum pump before adding refrigerant.
Charging is then performed either by weight using a scale for precise addition or by measuring and adjusting to the correct superheat/subcooling.
Isolating and securing the system
Begin by isolating and securing the system to create a safe, controlled environment for the refrigerant top-up.
Technicians shut service valves, lockout electrical supply, post danger notices, and guarantee access panels remain closed.
Pressure gauges are connected to service ports; areas are ventilated and cleared of ignition sources.
A confined-space plan and PPE are confirmed before proceeding with any service.
Recovering existing refrigerant if required
If existing refrigerant must be removed before charging, the technician follows a controlled recovery procedure using approved recovery equipment and certified recovery cylinders.
The technician connects recovery hoses to service ports, operates recovery unit per manufacturer instructions, monitors pressures and temperatures, and transfers refrigerant safely.
Recovered refrigerant is labeled, stored, and disposed of or reclaimed according to regulations and company policy.
Evacuating air and moisture with a vacuum pump
Evacuate the system using a certified vacuum pump to remove air and moisture that can degrade performance and harm components.
Connect gauges and manifold, open service valves, and run the pump until deep vacuum (typically <500 microns) is achieved.
Perform a hold test to confirm no leak or re‑pressurization.
Close valves, isolate the system, and allow stabilization before proceeding.
Charging by weight: using a scale for precise refrigerant addition
After confirming a sustained deep vacuum and isolating the system, charging by weight guarantees the heat pump receives the exact refrigerant mass specified by the manufacturer.
A calibrated electronic scale is tared with the cylinder; prescribed mass is added while monitoring pressure.
Add refrigerant slowly, pause to stabilize, and verify final cylinder weight matches expected remaining charge.
Record values and secure service valves.
Charging by superheat/subcooling: measuring and adjusting charge
Begin by stabilizing the heat pump at normal operating conditions—run it on the appropriate mode until steady-state pressures, temperatures, and airflow are achieved.
Technicians measure suction and liquid line temps, read manifold gauges, and consult refrigerant pressure-temperature charts.
Calculate superheat or subcooling, then add or remove refrigerant incrementally while rechecking values until target superheat/subcooling is reached and system runs steadily.
Final pressure and performance checks
Perform a systematic final check of pressures, temperatures, and system performance after topping up refrigerant to confirm correct charge and stable operation.
Technicians verify high‑ and low‑side pressures, suction and discharge temperatures, and superheat/subcooling values against manufacturer specifications.
They observe compressor current, cycling behavior, and client comfort.
Any deviation prompts controlled adjustment or leak investigation before sealing service ports and documenting final readings.
How to diagnose and resolve common charging-related problems
The section outlines how to recognize and correct common charging faults, starting with signs of an overcharged system and the steps to reduce refrigerant safely.
It then covers indicators of undercharge and the appropriate methods to recover performance, including proper leak checks.
Finally, it explains systematic leak troubleshooting and criteria for repairing versus replacing components.
Overcharged system symptoms and corrective actions
Many symptoms can indicate a heat pump is overcharged, and recognizing them quickly helps prevent compressor damage and inefficient operation.
Visible signs include high head pressure, liquid slugging, reduced cooling capacity, iced suction lines, and frequent short cycling.
Corrective actions: safely recover excess refrigerant, verify charge by pressure/temperature chart, inspect expansion device, test for restrictions, then retest system performance.
Undercharged system symptoms and corrective actions
Several clear symptoms point to an undercharged heat pump, and identifying them promptly prevents poor comfort, higher energy use, and compressor damage.
Typical signs include reduced heating/cooling capacity, long runtimes, frost on evaporator, and low suction pressure.
Corrective actions: verify pressures and superheat/subcooling, recover and weigh refrigerant, top up to manufacturer specs, and retest system performance for stability.
Troubleshooting leaks and when to replace components
When a heat pump exhibits charging-related issues that recur after topping off, technicians should first look for leaks and failing components that allow refrigerant loss or impaired flow.
Inspect joints, valves, service ports, and coils with electronic detectors and dye.
Verify compressor seals, TXV/expansion device operation, and accumulator integrity.
Repair brazed joints, replace faulty valves or metering devices, and pressure-test post-repair.
Safety, compliance, and environmental best practices
The section outlines required EPA and local regulations for refrigerant handling and recordkeeping to guarantee legal compliance.
It also summarizes proper refrigerant recovery, recycling, and disposal procedures to minimize environmental harm.
Guidance is provided on situations that require a licensed HVAC technician versus tasks a trained homeowner or installer may perform.
EPA and local regulations for refrigerant handling and recordkeeping
Because refrigerants can harm the ozone layer and contribute to climate change, technicians must follow EPA and local regulations governing handling, recovery, and recordkeeping.
Certification requirements, permitted refrigerant types, leak-check thresholds, and mandatory service documentation vary by jurisdiction.
Accurate logs of quantities added or removed, invoice retention, and timely reporting of large releases guarantee legal compliance, facilitate inspections, and support environmental accountability.
Proper refrigerant recovery, recycling, and disposal procedures
Handle refrigerant recovery, recycling, and disposal with strict adherence to safety protocols and legal requirements to prevent environmental release and secure technician protection.
Use certified recovery equipment, follow manufacturer and EPA procedures, and separate contaminated refrigerant for recycling or safe disposal.
Maintain accurate records, label containers, transport via authorized channels, and never vent refrigerants.
Guarantee proper PPE, leak containment, and spill response measures.
When to hire a licensed HVAC technician
Proper refrigerant recovery, recycling, and disposal practices often signal when tasks exceed homeowner capability and require a licensed HVAC technician.
Certified technicians guarantee legal compliance with EPA regulations, perform leak detection, recover and recharge refrigerant to exact specifications, and handle hazardous materials safely.
Hire a pro for complex diagnostics, major repairs, system retrofits, or whenever warranties, local codes, or environmental risks are involved.
Efficiency optimization and maintenance after charging
After charging, the technician verifies energy performance and temperature balance to confirm the system meets expected efficiency and comfort targets.
A documented routine maintenance schedule—filter changes, coil cleaning, and leak inspections—helps prevent future charge and performance problems.
Recommendations for extending lifespan and efficiency include correct refrigerant levels, proper airflow, and timely component replacements.
Verifying energy performance and temperature balance
Begin by measuring baseline system metrics immediately after charging to establish a reference for energy use and temperature distribution:
Record power draw, COP, supply and return temperatures, and airflow at representative zones.
Compare readings to pre-charge baselines and manufacturer specifications.
Identify imbalances, insulation or airflow issues, and improper setpoints.
Adjust controls and retest until energy performance and temperature uniformity meet targets.
Routine maintenance schedule to prevent future charge issues
A concise, regular maintenance schedule minimizes the risk of future refrigerant imbalances and preserves heat pump efficiency by ensuring critical components are inspected, cleaned, and calibrated at appropriate intervals.
Technicians should adhere to seasonal checks, document findings, and address minor leaks promptly to avoid charge drift.
- Inspect refrigerant lines and connections
- Clean coils and filters
- Verify pressures and superheat/subcool
- Test electrical components
- Record service and follow-up dates
Tips to extend heat pump lifespan and efficiency
With routine inspections and prompt leak repairs secured, long-term performance hinges on a few targeted practices that preserve charge balance and mechanical health.
Operators should maintain clean coils, correct airflow, and calibrated controls; replace filters and worn components; verify refrigerant level seasonally; insulate refrigerant lines; lubricate moving parts; and schedule professional diagnostics to detect inefficiencies early, preventing stress and prolonging system lifespan.
Quick-reference charging checklist
A concise checklist guides technicians through the process, starting with pre-charge inspections such as leak checks, filter and coil condition, and correct access port fittings.
It then lists charging steps and the exact measurements to record—target pressures, refrigerant weight added, superheat or subcooling values, and ambient conditions.
Finally, post-charge verifications confirm system pressures, temperature splits, compressor current, and proper defrost and safety control operation.
Pre-charge inspection steps
Several clear steps must be completed before introducing refrigerant: verify system isolation and lockout/tagout, confirm appliance and line-set pressures are at ambient, inspect access ports and service valves for leaks or damage, guarantee manifold gauges and scales are calibrated, and confirm correct refrigerant type and quantity on site.
Inspect and document conditions, then proceed only if all checks pass.
- Verify isolation
- Check pressures
- Inspect ports
- Calibrate tools
- Confirm refrigerant
Charging steps and measurements to record
Begin the charging sequence by following a concise, ordered checklist that ties each physical action to specific measurements to record.
Technicians perform steps sequentially, noting pressures, temperatures, superheat/subcooling, and charge added. Record values clearly for each step:
- Evacuate and verify vacuum level
- Introduce refrigerant amount (grams/oz)
- Stabilize operating pressures
- Measure suction/discharge temperatures
- Log final superheat/subcooling
Post-charge verification items
One concise checklist itemizes the essential post-charge verifications technicians must perform to confirm system integrity and performance.
Verify leak-free fittings, correct pressures and temperatures, and proper superheat/subcooling.
Guarantee electrical connections and compressor operation match specifications.
Document results and notify the client.
- Leak check
- System pressures
- Superheat/subcooling
- Electrical/compressor function
- Documentation and client notice
Conclusion
To sum up, one imagines the heat pump as a finicky, small-minded monarch appeased by ritual refrigerant offerings. The technician, a humble courtier armed with gauges and gloves, performs the rites—checks, balances, and a cautious top-up—so the sovereign HVAC may resume benevolent warmth. Compliance, safety, and a tidy panache for efficiency keep disaster and F-gas fines at bay. Consequently, civilization endures, if slightly less chilly and infinitely more bureaucratic.