How to Flare Copper Pipe Without a Tool: 5 Simple DIY Methods That Work
If you need to flare copper pipe without a dedicated tool, there are five effective DIY methods you can use with common items. These methods include using a matching socket rim, compressing sand inside the pipe, employing a tapered punch or nail, tightening a bolt-nut-washer stack, and briefly heating the pipe to hand-form the flare. Each approach focuses on secure clamping, smooth shaping, leak testing, and careful heating. Below, you’ll find detailed step-by-step techniques and important precautions to ensure success.
How to Flare Copper Pipe Without a Tool Quick Overview
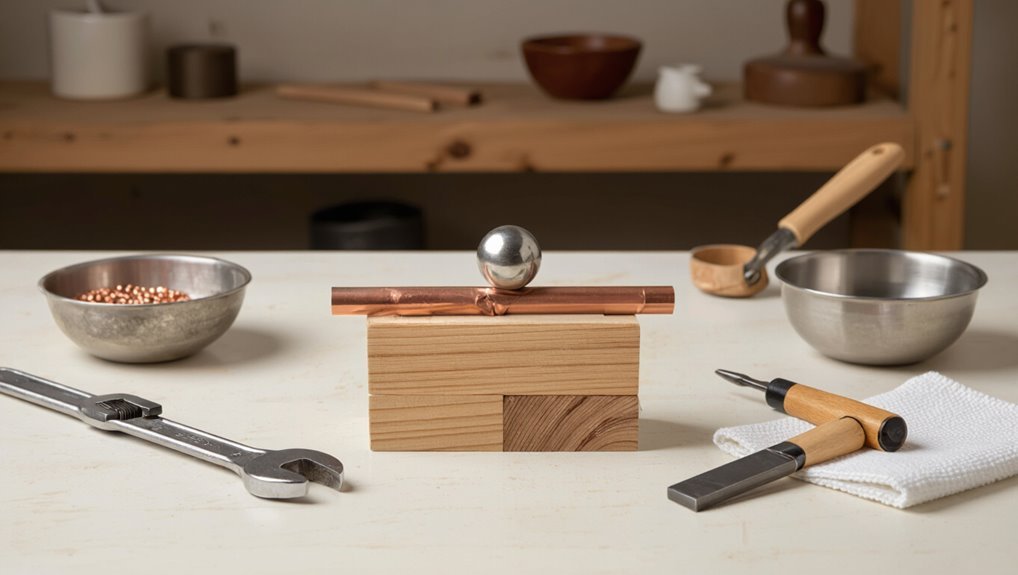
The article outlines situations where a proper flaring tool is unavailable or an emergency repair is required, explaining why improvised flaring may be attempted.
It emphasizes evaluating the condition of the copper and the fitting to determine if a makeshift flare is feasible.
Basic safety precautions—eye protection, gloves, securing the pipe, and avoiding excessive heat or force—are recommended before proceeding.
When and why you might need to flare without a flaring tool
Sometimes a flaring tool is unavailable, prompting a homeowner or tradesperson to improvise when a tight deadline, remote location, or minor repair prevents waiting for proper equipment.
Knowledge of how to flare copper pipe without tool helps complete urgent connections, temporary fixes, or verify fit before ordering parts.
Situations include travel trailers, job sites, emergency plumbing and single-fit adjustments where speed outweighs perfection.
Safety precautions before you start
After deciding to improvise a flare, a brief pause to assess hazards and prepare the workspace prevents common mistakes and injuries. Wear gloves, eye protection, clear the area, secure the pipe, and keep a fire extinguisher nearby. Work slowly, avoid excessive force, and inspect for leaks afterward.
| Hazard | Precaution | Toolless Tip |
|---|---|---|
| Cuts | Gloves | File burrs |
| Eye injury | Goggles | Use steady pressure |
| Fire | Extinguisher | Keep cloth damp |
| Leak | Test with soap | Re-flare if needed |
| Slips | Clear floor | Stabilize pipe |
What a Proper Copper Flare Looks Like
A proper copper flare presents a smooth, evenly formed trumpet shape with no cracks, sharp edges, or uneven thickness.
Typical flare sizes correspond to common tubing diameters (1/4″, 3/8″, 1/2″) and must seat fully against matching flare fittings.
After assembly, the joint is tested under pressure or with a soap solution to detect any leaks.
Visual characteristics of a good flare
A proper copper flare presents a smooth, even conical lip that seats fully against the fitting, with no cracks, sharp edges, or visible gaps.
The flare’s surface is uniformly compressed, free of wrinkles or metal folds. The cone remains concentric to the pipe bore, showing consistent thickness and a clean outer rim.
No distortion, splitting, or uneven flaring should be present.
Common flare sizes and matching fittings
Understanding the correct flare size and its corresponding fitting complements the visual standards previously described, ensuring the flare will seal properly under pressure.
Common flare sizes include 1/4″, 3/8″, 1/2″, and 3/4″, each matching specific nut and seating dimensions.
Selecting fittings labeled for the same nominal tubing size prevents leaks and uneven seating; adapters exist for size changes.
How to check for leaks after flaring
Inspecting the flare begins with a dry visual check and progresses to pressure and leak detection tests to confirm a reliable seal.
The flare should be symmetrical, free of cracks or jagged edges, and seated correctly in the fitting.
After pressurizing the system, apply soapy water or a commercial leak detector at the joint and watch for bubbles.
Re-tighten or re-flare if any leakage appears.
Required Materials and Preparations
The author lists simple substitutes for a flaring tool—such as a tapered punch, socket, or rounded bolt—and notes basic shop items that make the job easier.
Recommended accessories include a pipe cutter, sandpaper or emery cloth, and flux for a clean joint.
Prior to flaring, the pipe end must be cut square, deburred, and cleaned to guarantee a proper seal.
Basic materials you can use instead of a flaring tool
Gather a small set of readily available items to substitute for a flaring tool: a short length of copper tubing, a bench vise or sturdy clamp, a smooth round mandrel or ball-bearing (or a socket slightly smaller than the tubing OD), a file or sandpaper, a tubing cutter or hacksaw, and safety gear (gloves and eye protection).
Additional useful substitutes include a hardwood dowel for support and a small hammer for controlled shaping.
Recommended accessories (pipe cutter, sandpaper, emery cloth, flux)
Select a few key accessories to make hand-flaring copper tubing cleaner and safer: a reliable pipe cutter or fine-toothed hacksaw for square cuts, medium and fine sandpaper or emery cloth for deburring and smoothing, and flux to promote solder flow and joint strength.
Additional useful items include a marker for alignment, a small file for edge control, and protective gloves and goggles for safety.
Preparing the pipe end: cutting, deburring, and cleaning
Begin by cutting the copper tubing squarely to length, then remove burrs and oil before flaring: use a pipe cutter or fine-toothed hacksaw to make a clean, perpendicular cut; deburr the inside and outside edges with a small round file or emery cloth; and wipe the end with a clean rag and apply flux to guarantee good solder flow and a tight, reliable joint.
| Step | Action |
|---|---|
| 1 | Cut square |
| 2 | Deburr inside |
| 3 | Deburr outside |
| 4 | Clean rag |
| 5 | Apply flux |
Method 1 Using a Socket or Wrench and Hammer
Method 1 uses a socket or a nut as a form along with a wrench or hammer to shape the copper end into a flare.
The process covers choosing a correctly sized socket or nut, securing the pipe and backing support, controlled tapping to form the flare, and final trimming and smoothing.
Advantages and limitations of this improvised technique are also noted to help decide when it is appropriate.
Step 1: Choose the right socket or nut
One suitable socket or nut should closely match the diameter of the copper tube so the flare will form evenly without crushing the metal.
Select a hardened socket or heavy nut whose inner edge is smooth and round. Test fit it over the tube end to guarantee uniform contact.
Avoid overly large or tapered pieces that deform the tubing; choose one that centers reliably.
Step 2: Positioning the pipe and support
With the chosen socket or nut slipped over the tube end, the copper should be supported on a solid, flat surface so the tube axis sits level and the socket’s rim is flush with the end.
The pipe must be stabilized to prevent rotation or tilt; a block of wood or vise jaws cradle the tube just behind the socket, leaving the end exposed and aligned for uniform deformation.
Step 3: Tapping technique to form the flare
Begin by aligning the socket or nut squarely over the tube end and holding the pipe firmly so it cannot shift.
Then deliver controlled taps around the socket’s rim using the hammer against the wrench or socket body.
Rotate the assembly incrementally, tapping evenly to coax metal outward.
Monitor progress, keeping strikes light and consistent to avoid splitting; stop when a smooth, even lip forms.
Step 4: Trimming and finishing the flare
After the flare lip has formed, inspect it for uniformity and any burrs that could prevent a leak-free seal.
Remove burrs with a fine file or deburring tool, rotating gently to preserve the flare angle. Trim any uneven edge with a hacksaw, then refile.
Wipe the flare clean, test fit the fitting, and make minor adjustments by light tapping until a snug, even seat is achieved.
Pros and cons of this method
Although the socket-and-hammer method requires minimal specialized equipment and can produce an adequate flare in a pinch, it balances accessibility against a higher risk of inconsistent results and pipe damage.
Pros: fast, uses common tools, no special purchase.
Cons: uneven flares, scoring or splitting, poor seal potential, requires practice, limited to softer tubing, and may void warranties or lead to leaks.
Method 2 Using a Bolt, Nut, and Washer
The second method outlines how a suitably sized bolt, nut, and washer can be used to flare copper pipe without specialized tools.
It briefly covers choosing matching dimensions, clamping the pipe, tightening to form the flare, and removing and refining the finished flare.
The section concludes with a concise list of pros and cons for this approach.
Step 1: Selecting bolt and nut dimensions
Before cutting or assembling anything, determine bolts and nuts that match the pipe’s wall thickness and designated flare diameter.
Choose a bolt shank slightly smaller than the pipe ID so the nut can form the flare without splitting. Use a nut diameter that seats against the pipe end evenly.
Select stainless or zinc-plated hardware for corrosion resistance and confirm thread size fits available wrenches.
Step 2: Assembling and clamping the pipe
Position the components so the pipe, washer, nut, and bolt align concentrically: slide the bolt through the washer, insert the bolt shank into the pipe end, and thread the nut onto the exposed shank until the washer sits flush against the pipe mouth. Clamp assembly in a vise or secure with pliers, keeping alignment and preventing lateral movement.
| Component | Purpose |
|---|---|
| Bolt | Centering rod |
| Washer | Spreads pressure |
| Nut | Holds assembly |
Step 3: Tightening to form the flare
Begin tightening the nut slowly and evenly, turning it a quarter-turn at a time while observing the pipe end for even deformation.
The washer should press concentrically against the pipe, guiding metal outward into a uniform bell shape.
Continue incremental tightening until the flare reaches desired angle and diameter, avoiding over-torquing.
Stop when the flare appears smooth and continuous around the circumference.
Step 4: Removing and refining the flare
Once the nut has been loosened and removed, the flared end is carefully eased off the bolt and inspected for uniformity and any sharp burrs.
Slight irregularities are then corrected by re-seating the washer and nut for a light final compression or by gently filing the rim with a fine file or emery cloth to smooth rough edges.
Edges are deburred, interior passages cleared, and fit tested against the mating fitting for proper seating.
Pros and cons of this method
This method offers a low-cost, accessible alternative to a dedicated flaring tool by using common hardware to form a serviceable flare; it excels for occasional jobs or emergencies where specialized gear is unavailable.
Advantages include affordability, simplicity, and portability.
Drawbacks include less precision, risk of uneven or cracked flares, limited suitability for high-pressure systems, and the need for careful alignment and extra deburring.
Method 3 Using a Cone-Shaped Object (Nail or Tapered Punch)
A tapered nail or punch can be fashioned into a cone-shaped mandrel by grinding or selecting a suitably tapered piece.
The pipe end is supported on a solid surface while the cone is driven or twisted into the tube to form the flare. Then the lip is filed and inspected for evenness and fit.
This method is quick and requires minimal materials but risks uneven flares and metal deformation if not done carefully.
Step 1: Shaping or selecting the cone tool
Several suitable cone-shaped objects can serve as improvised flaring tools; common choices include a large nail with a tapered shank or a small tapered punch.
Select a piece that fits the pipe bore and tapers smoothly. File any burrs, round sharp edges, and shorten the shaft for comfortable handling.
Confirm the tip is centered and the taper is gradual to avoid splitting the copper.
Step 2: Supporting the pipe and forming the flare
Place the prepared pipe in a stable position so the end to be flared is fully supported and the bore aligned with the cone; a bench vise with soft jaws, a block of wood clamped under the pipe, or a notch in a workbench all work to prevent movement and deformation. Gently drive the nail or tapered punch into the bore, rotating slightly to form an even flare.
| Tool | Purpose |
|---|---|
| Nail | Core former |
| Wood block | Support and protect |
Step 3: Smoothing and validating the flare
Precision guarantees the flare seats properly against fittings and prevents leaks.
The person inspects the lip for burrs, gently files or sands the edge until smooth and even, and removes debris with a brush.
They dry-fit the fitting, check for uniform contact and alignment, then tighten hand-tight to confirm seating.
Final testing uses a slow pressure check for leaks before full assembly.
Pros and cons of this method
When using a cone-shaped object like a nail or tapered punch to flare copper pipe, the method offers clear advantages in accessibility and cost-effectiveness: it requires no specialized tools, can be executed with items commonly found in a toolbox, and is quick for occasional or emergency jobs.
Drawbacks include inconsistent flare geometry, higher risk of cracking or uneven seals, limited suitability for larger diameters, and slower repeatability.
Method 4 Using Sand and a Socket (Compress-and-Form)
The compress-and-form method fills the pipe end with sand, then uses a suitably sized socket to press and shape the flare.
After forming, the sand is removed and the flare is filed or smoothed as needed.
This technique is simple and inexpensive but can be messy and less precise than dedicated flaring tools.
Step 1: Packing sand into the pipe end
Start by cutting the pipe end square and deburring it.
The person fills the tube with dry, fine sand, tapping gently to settle grains and avoid voids. Overfill slightly so sand protrudes above the rim.
Compact with a dowel or rounded rod until firm; the packed core should resist compression and hold shape, preventing collapse during the subsequent forming step.
Step 2: Using a socket to press the flare
With the sand-packed end firmly compacted, attention turns to forming the flare using a socket as a press. The socket seats over the pipe mouth, evenly compressing metal outward while a mallet taps the socket rim. Controlled strikes create a uniform flare profile. Inspect alignment frequently to avoid distortion.
| Tool | Action | Result |
|---|---|---|
| Socket | Seat | Even pressure |
| Mallet | Tap | Metal flows |
| Hands | Guide | Alignment maintained |
Step 3: Removing sand and finishing the flare
After the flare shape holds, the sand core is cleared so the pipe interior is unobstructed and the formed lip can be refined.
The tube is inverted, sand tapped out, and remaining granules blown or rinsed away.
Burrs are removed with a file or fine emery cloth, the flare’s edge deburred, and the seal face checked for evenness before reassembly or pressure testing.
Pros and cons of this method
Although it requires extra preparation, the sand-and-socket compress-and-form technique offers clear advantages and trade-offs: it produces smooth, uniform flares with minimal specialized equipment and conforms well to nonstandard pipe lengths, but it demands careful sand packing, precise compression, and thorough deburring to avoid leaks or uneven seating.
Advantages: low-cost, adaptable, clean results.
Drawbacks: time-consuming, less repeatable, risk of improper seal without skill.
Method 5 Heating and Hand-Forming (with Caution)
This method applies only when heating is safe and permitted, such as outdoors or with proper ventilation and fire precautions.
Controlled heating softens the copper so it can be expanded and shaped by hand or over an improvised mandrel, followed by quenching and any final shaping to achieve a smooth flare.
The technique can produce a usable flare without specialized tools but carries burn, fire, and metallurgical risks that require caution and appropriate protective gear.
Step 1: When heating is appropriate and safe
Before applying heat, the person should verify that the work area, materials, and local regulations make heating both necessary and safe.
They should confirm flammable materials are cleared, adequate ventilation exists, and nearby piping or fixtures won’t be damaged.
Copper type and joint suitability must be assessed, and permits or codes consulted.
If risks remain, choose a non-heat method instead.
Step 2: Controlled heating to soften the copper
When heat is used to make copper pliable, it must be applied gradually and evenly so the metal softens without burning flux, solder, or nearby materials.
The operator directs a small, controlled flame along the section to be flared, watching color change to dull red.
Heating focuses on the area just behind the end, avoiding prolonged exposure and protecting adjacent fittings and insulation.
Step 3: Forming the flare by hand or with improvised mandrel
Use steady pressure to shape the softened copper over an improvised mandrel or by hand, taking care to maintain the flare’s concentricity and smooth contour. Rotate pipe slowly, checking thickness and symmetry. Gentle tapping refines edge. Avoid overworking metal; stop when profile matches fitting. Visualize stages:
| Mandrel | Pressure | Edge |
|---|---|---|
| Spoon handle | Firm | Rounded |
| Bolt head | Moderate | Smooth |
| Wood dowel | Light | Even |
Step 4: Quenching and final shaping
Cool the freshly formed flare immediately in water to lock in the shape and relieve heat while the copper is still malleable.
After quenching, inspect for cracks, burrs, or uneven edges.
Use fine files or emery cloth to refine the bead and guarantee a smooth sealing surface.
Reheat briefly only if reshaping is required, then quench and recheck alignment and fit.
Pros and cons and safety warnings
Method 5—heating and hand-forming—offers a low-tool alternative that can produce serviceable flares but carries distinct trade-offs: it allows work without a dedicated flaring tool and can be faster for one-off repairs, yet it risks inconsistent flare geometry, weakened metal from overheating, and surface contamination that compromises seals.
Benefits: speed, minimal tools.
Drawbacks: poor consistency, reduced strength.
Safety: use heat-resistant gloves, eye protection, ventilation, and avoid overheating.
How to Test and Seal the Flared Connection
After forming the flare, the connection should be dry-fit and visually inspected for even seating and gaps.
A controlled pressure test—using compressed air with soapy water or a water pressure test—will reveal any leaks.
Finally, select a compatible sealant or fitting type (flare nuts, PTFE tape sparingly, or approved thread sealants) that matches the tubing alloy and service conditions.
Dry-fit check and visual inspection
Before committing the joint, the flared connection should be dry-fitted and inspected visually to confirm alignment, seating depth, and uniform flare geometry.
The technician checks for gaps, metal irregularities, cracks, or uneven compression against the fitting. Surfaces should be clean and burr-free; the flare must sit flush without overhang.
If defects appear, re-flare or trim and re-debur before final assembly.
Pressure testing methods for leaks
Verify the integrity of the flared connection by performing systematic pressure tests and targeted leak-seal checks. Isolate the line, pressurize with water or air at recommended low pressure, monitor gauge for drops, and inspect joints. Apply bubble solution for pinpointing leaks, drain, and retest after repairs. Use documented hold times and repeat until stable.
| Step | Action | Outcome |
|---|---|---|
| 1 | Isolate | Controlled test |
| 2 | Pressurize | Detect loss |
| 3 | Inspect | Confirm seal |
Best sealants and fittings compatibility
Compatibility is critical when selecting sealants and fittings for a flared copper connection: the chosen materials must match flare geometry, service fluid, pressure, and temperature to guarantee a reliable seal without degrading tubing or threads.
Use flare-specific brass fittings and soft copper or nickel-plated ferrules.
For thread joints prefer PTFE tape or anaerobic sealants rated for fuel or refrigerant; avoid petroleum-based greases.
Test under working pressure.
Common Problems and How to Fix Them
Common problems include cracked or split flares, uneven flare faces, and leaks after installation.
Repair options for splits, trimming and reshaping techniques for irregular flares, and step-by-step diagnostics for post-installation leaks will be covered.
The goal is to identify the cause quickly and apply the appropriate fix to restore a reliable seal.
Cracked or split flare repair options
When a copper flare cracks or splits, the integrity of the joint is compromised and must be addressed quickly to prevent leaks and further damage.
Options include cutting out the damaged section and installing a new flare or using a compression or flare-style repair fitting rated for the system.
For minor hairline cracks, brazing or soldering by a skilled person can restore strength; always pressure-test afterward.
Uneven flare trimming and reshaping techniques
Uneven flares are a frequent consequence of rushed cuts, misaligned tubing, or dull tools and can prevent a proper seal or cause stress points that lead to leaks. Refile high spots with a fine file, deburr edges, and gently reshape with a conical mandrel or rounded punch. Check concentricity frequently; remove minimal material to maintain strength.
| Issue | Tool | Fix |
|---|---|---|
| High spot | File | Light strokes |
| Lip deformity | Mandrel | Reshape |
| Burrs | Deburrer | Smooth |
Leaking after installation diagnostics and remedies
Several simple checks quickly reveal why a newly flared copper joint may leak: inspect the flare face for cracks or gaps, verify the tubing end is square and fully seated, confirm the flare nut is torqued evenly to the manufacturer’s spec, and look for warped or overtightened fittings that deform the flare.
If leaks persist, disassemble, recut, reflare cleanly, replace damaged nuts or sleeves, and retest under pressure.
When to Use a Proper Flaring Tool or Call a Professional
The article notes that improvised flares are unacceptable for high-pressure systems, critical potable-water lines, or where code compliance is required.
It suggests weighing the one-time cost of a proper flaring tool against the recurring expense and liability of hiring a professional for complex or infrequent jobs.
Readers are encouraged to choose the safest and most economical option for their specific situation.
Situations where improvised flares are unacceptable
When pressure, safety, or code compliance matters, improvised flares are not acceptable; situations such as gas lines, high-pressure refrigeration, or any installation subject to building inspections require a proper flaring tool or a licensed technician to confirm leak-free, standardized joints.
Aircraft, medical gas systems, and critical HVAC circuits also demand certified fittings and trained installers to ascertain reliability, traceability, and regulatory compliance.
Cost-benefit of buying a tool versus hiring help
After noting scenarios where improvised flares are inappropriate, the decision to buy a proper flaring tool or hire a professional comes down to frequency of use, skill level, cost, and liability.
Occasional one-off jobs often justify paying a plumber to guarantee reliability and warranty.
Regular repairs favor purchasing a quality flaring tool; amortized cost, learning curve, and risk management then favor DIY over repeated professional fees.
Quick Tips, Safety Reminders, and Material Care
The section offers concise do’s and don’ts for improvising a flare and basic reminders to protect the installer. It also outlines simple maintenance steps to reduce the chance of future leaks. The guidance favors safety, proper material handling, and knowing when to stop and call a professional.
- Use clean cuts, smooth edges, and gentle, even pressure when forming a flare; never force or hammer the pipe.
- Wear eye protection and gloves, keep the work area dry, and depressurize lines before starting.
- Inspect flares for cracks or gaps and test joints slowly under low pressure before full use.
- Schedule periodic inspections, replace corroded sections promptly, and prioritize proper tools for long-term repairs.
Do’s and don’ts for flaring copper without a tool
A few simple precautions and techniques can greatly reduce the risk of damaging copper pipe or causing injury during an improvised flare; these do’s and don’ts focus on safe handling, correct shaping methods, and proper material care to guarantee a reliable joint. Follow branded safety, avoid overworking, keep edges smooth, and test fit before sealing.
| Do | Don’t |
|---|---|
| Wear gloves | Use excessive force |
| Deburr edges | Hammer indiscriminately |
| Work slowly | Skip test fit |
| Clean tube | Leave burrs |
| Check alignment | Ignore leaks |
Long-term maintenance to prevent future leaks
Regularly inspect flare joints and surrounding fittings for signs of corrosion, deformation, or slow weeps, addressing any issues promptly to prevent small problems from becoming leaks.
Schedule checks annually and after temperature extremes.
Tighten mildly, replace damaged ferrules, and reflare compromised ends.
Apply appropriate sealant sparingly and avoid over-tightening.
Keep pipes clean, supported, and free from chemical exposure to extend service life.
Conclusion
Like a shoemaker shaping leather without his last, the DIY flarer molds copper to fit, honoring craft over convenience. Each improvised method becomes a compass, pointing toward patience, precision, and respect for the metal’s voice. Yet the tale warns that frugality has limits: when joints demand perfection or safety trembles, the craftsman lays down the hammer and seeks the true tool or a steadier hand, ensuring the work endures.