How to Fix Heater in Bathroom: Step-by-Step DIY Repair Guide
How to Fix a Heater in Your Bathroom: A Step-by-Step DIY Repair Guide
This guide offers a straightforward approach to diagnosing and repairing common bathroom heater issues. Whether you have a wall, baseboard, tankless, or towel warmer, we cover essential pre-job checks—such as turning off power, gathering tools, wearing PPE, and tagging the heater.
You’ll learn to conduct a visual inspection, perform voltage and continuity tests, check the thermostat and heating element, and assess airflow. Repair procedures include fixing elements, motors, and fans, as well as descaling and cleaning vents. We emphasize safety, compliance with codes, and scheduled maintenance. Detailed steps for each repair scenario follow to ensure you can effectively restore your bathroom heater.
What to Expect When Repairing a Bathroom Heater
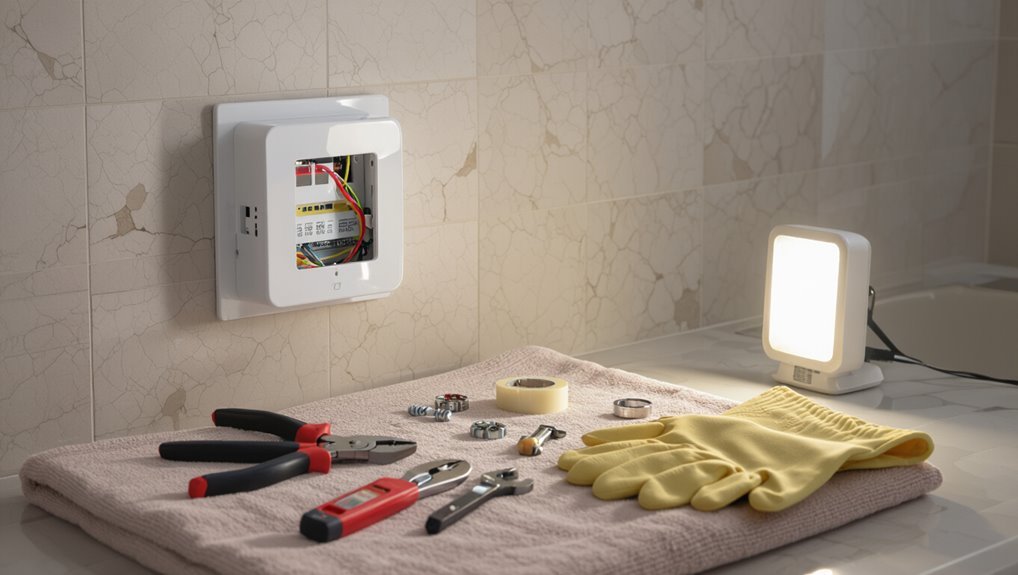
The section outlines common bathroom heater types—electric wall heaters, baseboards, tankless units, and towel warmers—and how each presents different repair needs.
It summarizes typical symptoms such as uneven heating, strange noises, tripped breakers, or visible damage that indicate a problem.
It also highlights safety risks like electrical shock, burning smells, or exposed wiring and specifies when to stop work and call a professional.
Common heater types found in bathrooms (electric wall heater, baseboard, tankless heater, towel warmer)
Bathroom heaters come in several common types—electric wall heaters, baseboard units, tankless water heaters, and towel warmers—each with distinct repair needs and typical failure modes.
For someone learning how to fix heaters in the bathroom, electric wall heaters often need thermostat or element replacement.
Baseboards may require wiring checks.
Tankless units need descaling and flow sensor attention.
Towel warmers commonly face connection or resistor faults.
Typical symptoms that indicate a heater problem
When a heater begins to falter, a handful of clear symptoms usually reveals the trouble: uneven or insufficient heat output, intermittent operation or cycling, unusual noises (clicking, buzzing, rattling), visible corrosion or discoloration, persistent odors when running, tripped breakers or blown fuses, and thermostat unresponsiveness.
Observing these signs helps pinpoint whether components, wiring, or controls require inspection or replacement.
Safety risks and when to stop and call a professional
Several clear hazards accompany attempts to repair a bathroom heater, and recognizing them early helps decide whether to proceed or call a professional.
Electric shock, water exposure, damaged insulation, burning smells, persistent arcing, or structural corrosion warrant immediate cessation.
If wiring is unclear, thermostat fails, or visible damage exists, a licensed electrician or HVAC technician should be engaged to prevent injury, fire, or code violations.
Quick Checklist Before You Start
Before beginning work on a bathroom heater, the reader should assemble basic tools and replacement parts such as screwdrivers, a voltage tester, and any manufacturer-recommended components.
They should put on appropriate safety gear and follow electrical precautions, including verifying the circuit is de-energized.
Finally, instructions for shutting off the power — and the water supply if the heater is plumbed — should be confirmed before proceeding.
Tools and materials you’ll likely need
Gather the right tools and materials to guarantee the repair proceeds safely and efficiently. A concise kit speeds diagnosis and repair: basic hand tools, replacement parts, and consumables.
Typical items include:
- Screwdrivers and pliers for access and fastening
- Multimeter for basic electrical checks
- Replacement heater element or thermostat as model-specific parts
- Silicone sealant and electrical tape for finishing and minor repairs
Safety gear and electrical precautions
Always wear appropriate personal protective equipment and verify power is isolated before any work begins: safety glasses, insulated gloves, and non-slip footwear protect against debris, electric shock, and slips.
Use a voltage tester to confirm absence of live circuits. Keep tools insulated, work in dry conditions, and avoid metal jewelry.
Guarantee adequate lighting and a clear escape path in case of emergency.
How to shut off power and, if applicable, water supply
One clear step is to cut power to the bathroom circuit and, if working on plumbing-connected heaters, shut off the water source as well.
Verify power off at the breaker and test with a noncontact tester.
Close the local water isolation valve or the home’s main if needed, drain residual water, and place a tag on switches/valves to prevent accidental reactivation during repairs.
Step-by-Step Diagnostic Process
A systematic diagnostic sequence guides the repair and helps pinpoint the heater’s fault. It begins with a visual inspection for obvious damage, then proceeds to test the electrical supply, switches, thermostat and controls.
Next steps check heating elements, fuses and wiring connections, and for forced-air units assess airflow and venting.
Visual inspection: what to look for
Visual inspection begins with a systematic sweep of the heater and its immediate surroundings to identify obvious faults.
The observer checks for visible damage: cracks, corrosion, loose or missing fasteners, water stains, soot, burnt insulation, and frayed wiring insulation.
Inspect mounting stability, grille integrity, vent blockages, and any signs of overheating or rodent activity.
Document findings for follow-up diagnostics.
Testing electrical supply and switches
Begin by confirming that power reaches the bathroom heater before testing internal components: check the breaker and any dedicated fuses, verify the heater’s supply voltage with a multimeter, and inspect terminal connections for tightness and corrosion.
Operate wall switches while observing meter readings; test any inline switches or pull cords for continuity. Note intermittent operation and document findings for next steps.
Verifying thermostat and controls
With supply integrity confirmed, attention shifts to the thermostat and control elements to determine whether they regulate temperature and power correctly.
Inspect the thermostat for visible damage, corrosion, or loose mounts.
Verify setpoint responsiveness by adjusting temperature controls while monitoring heater behavior.
Test control knobs, switches, and digital interfaces for continuity or error codes.
Record anomalies for targeted repairs or replacement.
Checking heating elements, fuses, and wiring connections
Proceed to examine the heater’s core components—elements, fuses, and wiring—using a methodical diagnostic sequence that prioritizes safety and isolation from mains power.
Inspect heating elements for continuity and visible damage with a multimeter.
Check fuses and thermal cutouts for continuity and correct ratings.
Verify wiring connections are secure, corrosion-free, and correctly routed; tighten or replace terminals as needed, documenting changes.
Assessing airflow and venting for forced-air units
After confirming that elements, fuses, and wiring are sound and isolated from mains power, the technician turns attention to the airflow system of the forced-air bathroom heater.
He inspects intake and exhaust vents for debris, checks blower operation and airflow direction, measures static pressure if available, verifies duct integrity and grille positions, and confirms no obstructions or backdrafts compromise performance.
Common Repairs with Detailed Steps
The section outlines common bathroom heater repairs and gives clear, ordered steps for each task.
It covers electrical fixes like replacing a blown fuse or tripped breaker, diagnosing and swapping a faulty thermostat or control switch, and replacing a heating element in electric units.
Mechanical and airflow issues are addressed as well, including motor or fan replacement and unclogging or cleaning vents and heating fins.
Replacing a blown fuse or tripped breaker
When a bathroom heater stops working, a blown fuse or a tripped breaker is a common, easily checked cause; diagnosing and correcting it first can often restore heat without further repairs.
Turn off power at the panel, inspect for tripped breaker or blown fuse, reset or replace with identical rating, then restore power.
If it trips again, stop and call an electrician.
Fixing a faulty thermostat or control switch
Begin by verifying the thermostat or control switch, since faulty controls are a frequent cause of intermittent or nonworking bathroom heaters.
A simple test can distinguish between wiring, sensor, and switch failures. Isolate power, inspect connections for corrosion or looseness, test continuity with a multimeter, and confirm sensor responsivity.
Replace the defective control unit and retest operation; document voltage and settings.
Replacing a heating element in electric heaters
Start by powering down and isolating the heater to guarantee safety before handling the element.
The technician inspects for damage and tests continuity with a multimeter.
After draining and accessing the housing, heating element terminals are disconnected, the element removed, and the correct replacement fitted and sealed with appropriate gaskets.
Reassemble, restore power, and verify operation and leak-free installation.
Repairing or replacing a faulty wall heater motor or fan
After replacing heating elements, attention often shifts to the blower assembly when a bathroom wall heater continues to run intermittently, makes noise, or fails to move air.
Technicians inspect power, capacitor, and bearings, then test motor windings with a multimeter. If diagnostics indicate failure, remove housing, disconnect wiring, replace with matching motor or fan assembly, reassemble, and verify safe operation.
Unclogging and cleaning vents and heating fins
Clear vents and unobstructed heating fins are essential for efficient, safe bathroom heater operation and should be inspected before replacing components.
Power is disconnected, grille removed, and vacuum with brush attachment used to clear dust.
Compressed air and a soft brush clean fins gently to avoid bending.
Reassemble, test airflow, and repeat periodically to maintain performance and prevent overheating.
Addressing loose or corroded wiring connections
Inspect wiring connections for signs of looseness, corrosion, or heat damage before proceeding with other repairs, since faulty connections are a common cause of intermittent heating, arcing, and elevated fire risk.
Power must be disconnected. Tighten terminals, replace frayed wires, and cut out corrosion back to clean copper.
Use proper connectors, heat‑shrink tubing, and corrosion‑resistant hardware.
Test circuit and monitor for stable operation.
When the Issue Is a Tankless or Water-Connected Heater
When a bathroom heater is tankless or directly connected to the water supply, the problem set shifts toward ignition or pilot faults, mineral buildup, and hydraulic issues.
Technicians will typically test ignition/pilot operation, flush and descale the unit to remove limescale, and inspect inlet/outlet valves and system pressure.
If electrical or flow sensing components fail, replacing sensors or flow switches is often required.
Diagnosing ignition or pilot problems
Begin by understanding the basic ignition sequence of a tankless or water-connected heater: the control board calls for heat, the gas valve opens, and the ignition source lights the burner; failure at any step can cause no heat or intermittent operation.
Check error codes, confirm power and gas supply, inspect igniter or pilot assembly for damage or soot, and test flame sensor continuity before replacing components.
Flushing mineral buildup and descaling procedures
If ignition and pilot checks rule out electrical or gas faults, attention should shift to mineral buildup in the heat exchanger and water pathways—common in tankless and water-connected heaters, especially where hard water is present.
Isolate unit, follow manufacturer drainage and bypass instructions, circulate a citric-acid or vinegar descaling solution per recommended concentration and duration, then flush thoroughly with clean water and reassemble.
Checking inlet/outlet valves and pressure issues
Inspecting the inlet and outlet valves and verifying system pressure are essential steps for diagnosing flow-related problems in tankless or water-connected heaters.
Technicians should confirm valves fully open, check for leaks, and guarantee strainers are clear.
Measure static and dynamic pressure against manufacturer specs; low or fluctuating pressure suggests supply issues, shutoff valve restrictions, or blocked lines requiring targeted repair or replacement.
Replacing sensors or flow switches
When diagnosing a malfunctioning tankless or water-connected heater, replacing a faulty sensor or flow switch is often the next logical step after ruling out valves and pressure issues.
Identify the defective component via error codes or multimeter tests, shut off power and water, drain as needed, swap the sensor or flow switch with manufacturer-approved parts, reconnect, restore supply, and verify operation and leak-free connections.
Parts Replacement Guide
The guide outlines how to confirm correct replacement parts using model numbers and specifications to guarantee compatibility.
It summarizes step‑by‑step removal and installation procedures for common components such as thermostats, heating elements, and valves.
It also compares typical costs and reliable sourcing options so the reader can plan repairs.
How to identify correct replacement parts (model numbers, specs)
How can one be sure a replacement part will fit and function correctly? Identify the heater’s make, model number, and serial; consult the unit’s label or manual.
Record electrical specs (voltage, wattage, amperage), physical dimensions, mounting type, and connector styles.
Cross-reference OEM part numbers and approved aftermarket equivalents.
Verify compatibility via manufacturer documentation or retailer compatibility tools before purchasing.
Stepwise removal and installation of common parts
Begin by powering off the bathroom heater at the circuit breaker and confirming no voltage with a non-contact tester; this guarantees a safe work environment before any removal or installation steps.
Remove covers, document wire positions, label connections, and detach fasteners.
Replace elements, thermostats, or switches with matching parts.
Reconnect per labels, secure components, reinstall covers, restore power, and verify safe operation.
Cost and sourcing options for parts
After completing removal and installation steps and confirming correct reconnection, attention turns to sourcing replacement parts and understanding their costs.
Local hardware stores, OEM dealers, online marketplaces, and salvage yards offer options; price varies by brand, model, and part condition.
- Thermostats: $20–$120
- Heating elements: $15–$80
- Switches and fuses: $5–$30
- Wiring and connectors: $2–$25
Troubleshooting Table for Common Symptoms
A compact troubleshooting table helps match common heater symptoms to likely causes and simple remedies, plus guidance on when to call a professional. The table below summarizes typical issues, quick fixes, and signs that warrant expert help. Use it as a first step before attempting repairs.
| Symptom | Probable cause | Quick fix / When to call a pro |
|---|---|---|
| No heat | Tripped breaker or faulty thermostat | Reset breaker, check thermostat; call a pro if unit won’t power on |
| Weak heat | Blocked air flow or low output element | Clean vents, replace filter; call a pro if output stays low |
| Intermittent operation | Loose wiring or overheating cutout | Tighten connections, allow cool-down; call a pro for recurring faults |
| Strange noise | Fan or motor wear, loose parts | Tighten or lubricate; call a pro for persistent grinding |
| Odor or burning smell | Dust burn-off or electrical issue | Ventilate and run briefly; call a pro immediately for persistent burning smell |
Symptom, probable cause, quick fix, when to call a pro
When a bathroom heater malfunctions, a concise troubleshooting table helps identify symptoms, likely causes, quick fixes a homeowner can try, and signs that warrant a professional call.
Symptoms: no heat, intermittent operation, unusual noise, burning smell, leak.
Probable causes and quick fixes: tripped breaker, loose connection, fan obstruction, burning dust, faulty valve.
Call a pro for persistent electrical issues, gas leaks, or internal component failures.
Preventive Maintenance to Extend Heater Life
A regular cleaning schedule and clear procedures help prevent buildup that shortens heater lifespan.
Seasonal checks and simple calibration guarantee components operate within safe tolerances.
Practical efficiency tips—such as optimizing thermostat settings and reducing standby power—cut energy use and lessen wear.
Regular cleaning schedule and procedures
Establish a consistent cleaning schedule to prevent buildup that impairs heater performance and shortens its lifespan.
Monthly light cleaning removes dust from grills and fan blades with a soft brush and vacuum.
Quarterly deeper cleaning includes removing covers, wiping heating elements gently, inspecting for corrosion, and clearing drainage paths.
Record dates and any findings to track wear and schedule repairs before failures.
Seasonal checks and calibration
Schedule seasonal checks and calibration at least twice a year—before winter and after the cold season—to verify safe, efficient operation and catch developing issues early.
Inspect thermostat accuracy, test temperature consistency across settings, tighten electrical connections, check for corrosion or wear, and confirm timer or sensor functions.
Record findings, adjust calibration per manufacturer specs, and schedule repairs if deviations exceed safe tolerances.
Tips to improve efficiency and reduce power use
Optimize heater efficiency and reduce energy use by combining simple behavioral changes with targeted maintenance.
Regular inspections, prompt filter cleaning, and thermostat calibration keep performance high while lowering consumption.
Recommended actions include:
- Seal drafts and insulate around the unit.
- Clean or replace filters monthly.
- Program lower setpoints and use timers.
- Schedule annual professional checkups to prevent failures.
Safety and Code Considerations
Before any repair work begins, the article outlines the electrical codes and installation clearances that apply to bathroom heaters.
It highlights the need for GFCI protection, proper grounding, and other bathroom-specific requirements to reduce shock and fire risk.
Finally, it explains when permits or a licensed electrician are required to perform safe, code-compliant work.
Electrical codes and installation clearances to know
Respecting electrical codes and mandated clearances is essential when installing or repairing a bathroom heater, because improper wiring or placement can create shock, fire, or moisture-damage hazards and may violate local regulations.
Installers must follow minimum clearances from tubs, showers, and ceilings, maintain access to junction boxes, use appropriate cable routing and conduit, and adhere to local permit and inspection requirements.
GFCI, grounding, and bathroom-specific requirements
Several critical protections—ground-fault circuit interrupters (GFCIs), proper grounding, and bathroom-specific wiring practices—are required to reduce electrocution and fire risk when installing or servicing a bathroom heater.
GFCI protection must cover outlets and heaters in defined zones. Equipment grounding must be continuous, and wiring and enclosure ratings must match moisture exposure.
Labels and accessible disconnects improve safety and compliance.
When a permit or licensed electrician is required
When local codes affect safety and liability, homeowners should verify whether a permit and a licensed electrician are required before altering or installing a bathroom heater.
Work involving wiring, circuit changes, fixed ceiling heaters, or relocations typically triggers permitting and licensed-electrician rules.
Inspectors enforce grounding, GFCI, ventilation, and insulation clearances; noncompliance risks fines, voided insurance, and safety hazards, so consult authorities first.
Cost Estimates and Time Breakdown
The section outlines typical time commitments for DIY heater fixes compared with hiring a professional technician.
It also presents estimated costs for common repairs and replacements, including parts and labor.
Readers are guided to weigh time savings against expense when choosing an approach.
Typical DIY repair time vs professional service time
How long will a bathroom heater repair take and how does that affect cost?
Typical DIY fixes—cleaning, thermostat reset, simple part swaps—often take 30–90 minutes.
Complex diagnostics or element replacement may require 2–4 hours.
A professional completes similar tasks faster, typically 1–2 hours for simple jobs and 2–3 hours for complex ones, reducing homeowner time but adding labor charges.
Estimated costs for common repairs and replacements
Estimate costs for bathroom heater repairs by grouping common faults into quick fixes, mid-level repairs, and major replacements, then combining parts, labor, and any permit or disposal fees.
Typical ranges: DIY small parts $10–$50, pro service $75–$200; mid repairs $150–$600; replacements $400–$2,500 including installation and disposal.
- Quick fixes: thermostats, fuses
- Mid: motors, wiring
- Major: full unit swap
- Misc: permits, disposal fees
Troubleshooting Scenarios and Solutions
Common bathroom heater problems fall into a few recognizable scenarios: the unit runs but produces no heat, makes noise or vibrates, cycles on and off frequently, or trips breakers and blows fuses.
For each scenario, the article will outline likely causes—such as faulty elements, loose mounts, thermostat or sensor faults, and electrical shorts—and practical diagnostic steps.
Recommended solutions will prioritize simple safety checks first, then targeted repairs or professional service as needed.
Heater runs but produces no heat
When a bathroom heater spins but fails to warm the room, the problem can stem from electrical, mechanical, or airflow issues rather than the motor alone.
Technicians should check the thermostat, heating element continuity, and proper voltage.
Inspect air filters, vents, and dampers for blockages.
Confirm safety cutouts or thermal fuses aren’t open.
Replace failed components and retest operation after repairs.
Heater makes noise or vibrates
Investigate unusual noises or vibration promptly, as these symptoms often point to loose components, imbalanced fans, worn bearings, or airflow restrictions that can worsen if left unaddressed.
Inspect mounting brackets, fasteners, and fan blades. Tighten or replace loose parts, clean debris, and realign imbalanced fans.
Lubricate motor bearings per manufacturer instructions. If noise persists, consult a qualified technician to prevent further damage or safety risks.
Heater cycles on and off frequently
Rapid cycling—where the bathroom heater repeatedly turns on and off in short intervals—signals an underlying control or safety issue that requires prompt attention.
Possible causes include faulty thermostat, loose temperature sensor, overheating due to blocked vents, or failing control board.
Recommend inspecting vents, cleaning the unit, testing thermostat and sensor continuity, and replacing defective components.
If unsure, consult a licensed electrician or HVAC technician.
Heater causes tripped breakers or blown fuses
Check the electrical system promptly if a bathroom heater repeatedly trips breakers or blows fuses, as this indicates a potentially dangerous overload or short circuit.
Inspect wiring for damage, loose connections, or moisture.
Verify heater amperage matches circuit capacity and that no other heavy loads share the line.
Replace failed components and reset or upgrade the breaker; consult a licensed electrician for persistent faults.
Final Safety Checklist After Repair
After repairs are complete, the technician verifies safe operation and confirms proper ventilation to prevent hazards.
They test thermostats, timers, and switches for correct function and reliable response.
Finally, they document the repairs and schedule the next maintenance to guarantee ongoing safety and compliance.
Verifying safe operation and proper ventilation
Confirming safe operation and adequate ventilation completes the repair process.
The heater is observed running briefly to guarantee stable flame or element heat, no unusual odors, and no vibration.
The bathroom vents and exhaust fans are checked for clear airflow; windows and duct paths are unobstructed.
Carbon monoxide detectors function and placement is verified.
Any residual debris is removed and tools stored.
Testing thermostats, timers, and switches
With the heater operating and ventilation verified, the final focus shifts to the control components that regulate temperature and runtime.
Inspect wiring and connections for damage, then verify thermostat accuracy with a calibrated thermometer.
Cycle timers through settings to confirm on/off schedules.
Test switches for consistent response and no arcing.
Replace faulty controls and secure covers before restoring normal use.
Documenting repairs and scheduling next maintenance
Record all repair actions, parts replaced, and test results in a concise service log to guarantee traceability and future troubleshooting.
Include dates, technician identity, serial numbers, and photos of work areas.
Note measurements taken and safety checks passed.
Schedule the next inspection and preventive maintenance interval based on manufacturer recommendations.
Store records digitally and as a printed copy near the heater for easy access.
Conclusion
The guide equips readers with practical steps and cautions, leaving confidence like a lamp in fog—steady, focused, and warming. After diagnostics and targeted fixes, minor faults dissolve; complex issues prompt professional help. Safety and codes remain the steady compass, while cost and time estimates set realistic expectations. Ultimately, a methodical approach restores comfort and function, transforming a malfunctioning bathroom heater into reliable warmth and renewed peace of mind.