How to Fix a Hot Water Tank Leak: Step-by-Step Repair Guide for Homeowners
If you have a leaking hot water tank, the first step is to quickly shut off the power and the cold-water supply. Next, systematically inspect the tank to determine the leak’s source—either the tank body, fittings, drain valve, or TPR valve. For minor fitting leaks, you can often fix them by tightening connections, re-sealing with Teflon tape or pipe dope, or replacing faulty valves. However, leaks in the tank body typically require temporary epoxy as a stopgap until you can replace the tank. After making repairs, flush the tank and test it for leaks, monitor the pressure, and remember to replace the anode rod regularly to prevent future issues. Continue reading for detailed step-by-step procedures and essential safety tips.
How to Know If Your Hot Water Tank Is Leaking
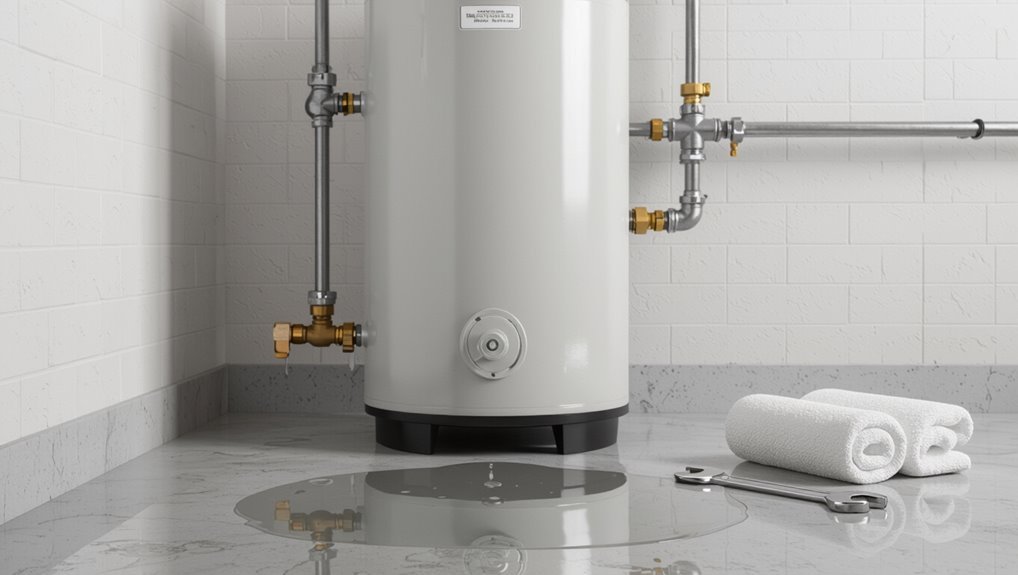
Visible puddles, rusty water, hissing sounds, or unexplained increases in water bills are common signs that a hot water tank may be leaking.
Inspection should focus on the tank body versus adjacent pipes, valves, and fittings to pinpoint the source by looking for wetness directly on the tank, corrosion at seams, or leaks originating from connections.
If water is pooling rapidly, the pressure-relief valve is discharging, or the tank shows significant corrosion, a professional should be contacted immediately.
Common signs of a leaking water heater
When a hot water tank begins to leak, early indicators are often subtle but consistent: puddles or dampness around the base, unexplained drops in water pressure or temperature, and rust-colored water from faucets.
Additional signs include corrosion or crusting on the tank, unusual noises from heating cycles, and a sudden increase in utility bills.
Understanding these signs aids decisions about how to fix a hot water tank leak.
How to distinguish tank leaks from pipe or valve leaks
Signs like puddles or rust-colored water point to a leak, but pinpointing whether the tank itself, its fittings, or connected pipes are the source requires systematic inspection.
Inspect seams, the drain valve, pressure-relief valve, inlet/outlet connections, and nearby piping.
Dry paper towels reveal active drips.
Corrosion or wetness at tank base suggests tank failure; localized wet fittings indicate pipe or valve issues.
When to call a professional immediately
How quickly and how much water is escaping are the key factors that determine whether immediate professional intervention is necessary.
If water pools rapidly, electrical components are wet, gas odors appear, or structural damage threatens, call a licensed plumber or emergency service at once.
Slow drips from fittings can wait for scheduled repair, but any risk to safety, gas, or wiring requires immediate expert attention.
Quick Safety Steps Before Any Repair
Before any repair on a leaking hot water tank, the technician first isolates energy sources by turning off electric power at the breaker and shutting gas supply per manufacturer guidance.
Next, the water feed to the tank is closed and the unit is drained to an appropriate floor drain or outdoor area while avoiding scalding and environmental damage.
Personal protective equipment is worn and the work area is cleared and ventilated to prevent slips, burns, and inhalation hazards.
Turning off power (electric and gas) safely
Shut off electricity and gas to the water heater before any inspection or repair to eliminate shock, fire, and explosion risks.
For electric heaters, switch off the dedicated circuit breaker and verify with a noncontact voltage tester.
For gas units, turn the gas valve to “off” or close the shutoff, then ventilate the area and confirm pilot light and control valves are cool and inert before proceeding.
Shutting off the water supply to the tank
Once electrical and gas supplies are secured, the water feed to the tank must be isolated to prevent flooding and allow safe repairs.
Locate the cold-water shutoff valve on the tank or main supply, turn it clockwise to close, and confirm flow stops at nearby faucets.
If a valve is seized, use the house main or call a professional rather than forcing it.
Draining precautions and where to drain to
Several simple precautions reduce risk when draining a hot water tank: confirm the cold-water feed is closed and power/gas remain isolated, wear heat-resistant gloves and eye protection, and open a hot-water faucet to relieve pressure before attaching a hose.
Direct drainwater to a floor drain, utility sink, or outside away from foundations and landscaping; use a suitable hose, watch for scalding, and monitor flow until empty.
Personal protective equipment and workspace setup
Before any work on the tank begins, the technician should don appropriate personal protective equipment and arrange the workspace to minimize hazards.
Safety gear includes gloves, eye protection, long sleeves, and non-slip footwear.
The area should be well-ventilated, cleared of tripping hazards, and illuminated.
Combustible materials must be removed; a fire extinguisher and first-aid kit should be nearby.
Identifying the Source of the Leak
The technician begins by systematically inspecting top connections, plumbing fittings, the temperature and pressure relief (TPR) valve, and the drain valve along with inlet and outlet nipples.
Attention then turns to the tank body for signs of corrosion or cracks that indicate a structural leak.
Simple tools—flashlight, mirror, paper towel, or leak-detection spray—are used to pinpoint small or hidden drips.
Inspecting the top connections and plumbing fittings
Start at the tank’s top by visually and physically checking each visible connection—cold-water inlet, hot-water outlet, pressure relief discharge, and any attached fittings—for signs of corrosion, weeping, mineral build-up, or loose joints.
Note wetness, staining, or white crusts. Gently tighten accessible unions and slip joints, replacing damaged washers or compression fittings.
Document locations needing professional repair or parts replacement.
Checking the temperature and pressure relief valve (TPR)
Inspect the temperature and pressure relief (TPR) valve for dripping, pooled water beneath the discharge pipe, or corrosion on the valve body—these signs pinpoint whether the valve is the leak source.
Verify the discharge pipe is tight and routed downward.
Test the valve by lifting the lever briefly to observe discharge and reseating.
Replace the TPR valve if it fails to close or shows active leakage.
Examining the drain valve and inlet/outlet nipples
Examine the tank’s drain valve and the inlet/outlet nipples for visible signs of leakage—wetness, rust streaks, mineral buildup, or corrosion around threads indicate the source.
Inspect fittings and compression nuts for looseness, check the valve body for drips, and note leaks that appear only during draining or refilling.
Capture location and severity to decide repair or replacement.
Detecting leaks from the tank body (corrosion or cracks)
After ruling out leaks at the drain valve and inlet/outlet nipples, attention shifts to the tank body itself, where corrosion or hairline cracks often produce slow, hard-to-locate leaks.
Inspect the exterior for rust stains, bulges, or damp patches; probe suspicious areas with a dry cloth.
Note leak patterns near the tank base and welded seams, documenting locations and severity for repair assessment.
Using simple tools to pinpoint small or hidden leaks
Start by assembling a few simple tools—a flashlight, a mirror on an extendable handle, a clean rag, paper towels, and a small spray bottle of soapy water—and approach the tank methodically to locate slow or hidden leaks.
Inspect fittings, valves, and seams with light and mirror. Wipe suspect areas, apply soapy spray; bubbles reveal pinholes.
Note locations, document severity, and prepare for repair or professional assessment.
Step-by-Step Repairs by Leak Location
The guide now turns to specific repair steps based on where the tank is leaking, prioritizing safety and appropriate tools.
Common targets include connection fittings, valves, and small tank-body defects; major corrosion or large cracks may mandate replacement.
Suggested focus areas are:
- Plumbing connections and pipe fittings; TPR valve and drain valve repairs
- Pinholes, hairline cracks, and temporary patch options
- Criteria and signs indicating full tank replacement
Repairing leaks at plumbing connections and pipe fittings
The following section lists the materials and tools required for common hot water tank connection repairs and explains how to tighten, re-seal, or replace fittings by location.
It specifies when to use plumbers tape, pipe dope, replacement nuts, or new valve assemblies and which wrenches and sealants are appropriate.
Step-by-step instructions follow for shutting off water, preparing threads, applying sealant, and testing repaired connections.
Materials and tools needed
Essential tools and materials for repairing leaks at plumbing connections and pipe fittings include adjustable wrenches, pipe wrenches, thread sealant (Teflon tape or pipe dope), replacement fittings or compression sleeves, copper or stainless repair couplings, emery cloth or sandpaper, flux and solder with a propane torch for sweat joints, pipe cutters, and plumbing tape; safety gear such as gloves and eye protection should also be on hand.
Additional items: replacement washers, plumber’s putty, a bucket, rag, and a basic tool tray to organize parts.
Steps to tighten, re-seal, and replace fittings
Begin by isolating the water supply and draining the tank to minimize moisture.
Inspect fittings for corrosion or damage.
Tighten loose connections with appropriate wrenches, avoiding over-torquing.
Remove and clean threads; apply plumber’s tape or pipe dope.
Replace damaged valves, nipples, or fittings with matching materials and solder or thread per code.
Refill, pressurize, and check for leaks.
Fixing a leaking temperature and pressure relief (TPR) valve
The article next addresses leaks at the temperature and pressure relief (TPR) valve, distinguishing when a simple tightening will suffice versus when full replacement is required.
It then provides a clear, step-by-step TPR valve replacement procedure, including safety precautions, draining the tank, removing the old valve, and installing a new one with proper sealing.
Readers are guided to test the new valve and check for continued leaks before restoring normal operation.
When to tighten vs. when to replace the TPR valve
Evaluating whether to tighten or replace a leaking temperature-and-pressure relief (TPR) valve hinges on the leak’s source, the valve’s age, and signs of corrosion or mineral buildup.
Tightening or reseating may stop minor drips from a loose connection.
Replace if the valve leaks from the discharge outlet, shows visible corrosion, fails an activation test, or is older than manufacturer recommendations.
Step-by-step TPR valve replacement procedure
To replace a leaking TPR valve safely and effectively, first shut off power or gas to the water heater and close the cold-water supply.
Then drain enough hot water to lower pressure below the valve level.
Use a wrench to remove the old valve, inspect the tank opening, apply pipe thread sealant or tape, install the new TPR valve, and tighten securely.
Reopen supply, restore power, and test for leaks.
Replacing or repairing a leaking drain valve
A leaking drain valve can sometimes be managed temporarily with epoxy or a hose clamp to stop minor weeps until a proper repair is possible.
These fixes are limited—epoxy may not bond to corroded metal and clamps can fail under pressure—so they should not replace a full repair.
The recommended approach is to drain the tank, remove the old valve, and install a new, properly sealed drain valve following manufacturer torque and sealing instructions.
Temporary repair options (epoxy, hose clamp) and limitations
When a drain valve begins to leak before a replacement can be installed, homeowners often resort to temporary fixes such as epoxy putty or a hose clamp and rubber gasket to slow or stop the drip.
These methods can reduce leakage for days to weeks but are not permanent: epoxy may not bond to corroded metal and clamps can fail under pressure or vibration.
Replace promptly.
How to replace the drain valve properly
After using a temporary patch, the homeowner should replace a leaking drain valve promptly to restore a reliable seal and prevent further tank damage.
Turn off power and water, drain the tank below the valve, remove the old valve with appropriate wrench, clean threads and apply pipe thread sealant or Teflon tape, install and tighten the new valve, refill, restore power, and check for leaks.
Repair options for small tank-body leaks (pinholes or hairline cracks)
For small pinholes or hairline cracks, temporary emergency repairs using epoxy compounds or tank repair kits can stop active leaks long enough to arrange a permanent solution.
Instructions typically call for shutting off power and water, draining the area, cleaning and drying the surface, then applying the epoxy or patch per manufacturer directions.
These fixes carry risks—limited adhesion, pressure or temperature failure—and should be regarded as short-term, often lasting from weeks to a few months depending on conditions.
Emergency temporary fixes (epoxy, tank repair kits) and how to apply
Begin by shutting off the water supply and power source to the tank to limit damage and guarantee safety; then assess the leak to confirm it is a small pinhole or hairline crack suitable for a temporary repair.
Clean and dry the area, sand lightly, apply epoxy or a tank repair kit following manufacturer instructions, allow full cure, then restore water and power and monitor for continued leakage.
Risks and expected lifespan of temporary fixes
When a pinhole or hairline crack in a tank body is temporarily sealed with epoxy or a repair kit, the fix can halt visible leakage but carries limited durability and clear risks: corrosion can continue beneath the patch, thermal cycling and water pressure may reopen the defect, and adhesives may degrade over time or fail at seams.
Such repairs often last weeks to months; replacement of the tank is usually inevitable.
When tank corrosion or large cracks require replacement
When rust eats through the tank walls or cracks are too large to patch, replacement is usually the only practical option and often more economical than repeated repairs.
Indicators that repair is not cost-effective include widespread corrosion, leaks at the tank seams, persistent failures after patching, or an age beyond the unit’s expected service life.
The following section outlines safe procedures for draining, disconnecting, removing, and installing a new water heater to minimize hazard and property damage.
Signs that repair is not cost-effective
If corrosion has eaten through the tank wall or a crack spans more than a few inches, repair is no longer a practical option.
Additional signs include persistent leaks despite repairs, widespread rusted areas, repeated component failures, and interior scale or sediment buildup reducing efficiency.
When estimated repair costs approach or exceed replacement price, replacement is the economically sensible choice.
How to remove and replace the old water heater safely
Having determined that the tank is beyond repair, the next step is safe removal and replacement of the water heater to prevent water damage and meet code.
Disconnect power/gas, shut off water, and drain the tank. Cap supply lines, disconnect venting and flue, remove mounting and tank, and dispose per local regulations.
Install new unit, reconnect water, venting, and power/gas, then test for leaks and proper operation.
Tools, Materials, and Estimated Costs
A concise overview of the tools, materials, and likely costs prepares the reader to assess a leaking hot water tank and decide between DIY repair and professional help.
- Basic tools and safety gear (adjustable wrench, pipe tape, multimeter)
- Common parts and typical price ranges (valves $10–50, anode rods $20–80, heating elements $15–60)
- Signs that budgeting for a plumber or full replacement is prudent (extensive corrosion, large leaks, recurring failures)
The following sections explain what to buy, expected expenses, and when costs exceed DIY practicality.
Essential tools for DIY water heater leak repair
Several basic tools and materials are required to diagnose and repair most water heater leaks safely and effectively.
A homeowner should have an adjustable wrench, pipe wrench, pliers, screwdrivers, tubing cutter, torch (if soldering), plumber’s tape, pipe sealant, replacement valves or fittings, a bucket, rags, and safety gear (gloves, goggles).
Basic measuring tools and a flashlight are also useful.
Common replacement parts and their price ranges
Start by listing the most commonly replaced components on a water heater and their typical cost ranges so homeowners can budget repairs accurately.
Common parts include:
- Thermostats and elements ($15–80)
- Temperature-pressure valves ($20–60)
- Drain valves ($10–35)
- Anode rods ($20–60)
- Heating units or gas control valves ($50–250)
- Inlet/outlet fittings or flex connectors ($5–40)
Include basic sealants and gaskets ($5–20).
When to budget for professional service or full replacement
Recognize when DIY limits are reached: persistent leaks, corroded tanks, or repeated part failures typically warrant professional service or full replacement, and homeowners should budget accordingly for labor, specialized tools, and disposal fees.
Obtain quotes covering diagnostics, parts, installation, permits, and removal. Expect costs ranging from modest service calls to several thousand dollars for a new tank or tankless upgrade; plan contingency for unexpected repairs.
Step-by-Step Drain and Refill Procedure After Repair
The technician begins by safely shutting off power or gas and isolating the cold-water supply before opening the drain valve to empty the tank for repair or element replacement.
After draining, the tank should be flushed thoroughly to remove sediment that can cause corrosion and future leaks.
Once refilled and air is bled from the lines, power or gas is restored and all fittings are inspected for leaks.
How to properly drain the tank for repair or replacement
When repairs or a replacement require an empty tank, a careful drain-and-refill procedure prevents damage and guarantees safe operation.
The following step-by-step guide outlines the sequence, necessary precautions, and checks to complete the job efficiently.
Shut power/gas, close cold inlet, open hot tap, attach hose to drain valve, open valve, monitor flow until empty.
Close valve, refill slowly, purge air, restore power.
Flushing sediment to prevent future leaks
Flush the tank thoroughly to remove sediment that accelerates corrosion and clogs valves.
After draining, open the cold inlet briefly to stir and flush debris, repeating until discharge runs clear.
Use the drain valve and a hose directed to a safe area; inspect and clean the valve screen if present.
Close drains, make certain all fittings are tight before refilling.
Refilling, restoring power/gas, and checking for leaks
With sediment cleared and valves inspected, attention turns to refilling and restoring service while monitoring for leaks.
Close the drain, open the cold inlet slowly until the tank fills; open a hot faucet to vent air.
For electric units, restore breaker power; for gas, relight pilot or restart the gas valve per manufacturer instructions.
Inspect all fittings for any seepage; tighten if necessary.
Preventive Maintenance to Avoid Future Leaks
Preventive maintenance focuses on routine actions that reduce the risk of future tank leaks and extend service life.
Key topics to address include:
- regular inspection checklist and schedule;
- flushing frequency and sediment management
- managing water pressure, installing expansion tanks, and anode rod/corrosion-resistant part selection
A concise maintenance plan and adherence to recommended intervals help prevent common failure modes.
Regular inspection checklist and schedule
A simple, consistent inspection routine helps catch early signs of deterioration before they become leaks.
Inspect tank exterior, fittings, pressure relief valve, drain pan, and nearby piping monthly.
Check for moisture, corrosion, unusual noises, and temperature/pressure readings quarterly.
Record findings, date, and actions taken.
Schedule professional inspection annually and after any significant pressure or performance changes.
Flushing frequency and sediment management
Because sediment buildup reduces heating efficiency and accelerates corrosion, hot water tanks should be flushed regularly to prevent damage and leaks.
Annual full drains suit most households; high-sediment areas or heavy use may require semiannual flushing.
Use the drain valve to remove deposits and inspect for sludge.
Periodic flushing preserves tank integrity, improves performance, and reduces the risk of future leaks.
Managing water pressure and installing expansion tanks
Monitor water pressure and fit an expansion tank to keep a domestic hot water system within safe operating limits.
Excessive pressure stresses tank seams, valves and fittings; install a pressure-reducing valve if incoming pressure exceeds 60 psi.
Choose an appropriately sized expansion tank, mount it on the cold inlet, and check bladder integrity and system pressure periodically to prevent thermal expansion-related leaks.
Choosing corrosion-resistant parts and anode rod maintenance
Following pressure control measures, attention shifts to materials and internal protection to reduce corrosion-related failures.
Homeowners should select stainless steel or brass fittings, dielectric unions, and low-corrosion valves.
Regular inspection and replacement of the sacrificial anode rod—every 3–5 years or when depleted—extends tank life.
Document inspections, flush sediment annually, and replace corroded components promptly to prevent leaks and tank failure.
Troubleshooting Common Problems After Repair
After a repair, the homeowner should verify whether tightening or part replacement actually stopped the drip, since fittings or seals can continue to weep.
They should also watch for new leaks that can appear when the tank is refilled and pressurized, indicating overlooked connections or damaged components.
If hot water is absent or the tank makes unusual noises, electrical or heating-element issues and trapped air should be checked promptly.
Persistent dripping after tightening or replacement
If a hot water tank continues to drip despite tightening fittings or replacing parts, the remaining leak usually indicates a deeper issue—such as a damaged valve seat, a cracked component, improper installation, or mineral buildup preventing a proper seal.
The homeowner should inspect for cracked fittings, corroded seats, misaligned connections, or worn seals; consider professional diagnosis, component replacement, or tank replacement if internal corrosion or cracks are found.
New leaks appearing after refilling or pressurizing
Several homeowners notice new leaks once the tank is refilled or pressurized, a sign that restored water pressure can reveal weak seals, loose fittings, or hairline cracks that were dormant while the system was depressurized.
Inspect all connections, valve bodies, T&P fittings, and drain assemblies.
Tighten or replace compromised components, apply appropriate sealant or tape, and pressure-test gradually to confirm repairs before full restoration.
No hot water or strange noises following repairs
Check the heating system and controls immediately when there is no hot water or when new noises emerge after repairs, as these symptoms often indicate issues such as interrupted power or gas supply, misaligned thermostat settings, trapped air, or loose components.
Inspect power and gas connections, reset breakers, purge air via faucets, tighten mounting and plumbing fittings, verify thermostat calibration, and consult a licensed technician if unresolved.
Signs It’s Time to Replace the Water Heater Instead of Repairing
When evaluating whether to replace a leaking water heater, age, declining efficiency, and a record of recurring leaks are key indicators that repairs may no longer be worthwhile.
A straightforward cost comparison of cumulative repair bills versus the upfront cost of a new unit helps determine financial sense.
If replacement is chosen, selecting the correct tank capacity and compatible fuel type guarantees the new heater meets household needs and operating constraints.
Age, efficiency, and recurring leak history
1. Age, declining efficiency, and repeated leaks signal replacement. When a tank approaches its expected lifespan (typically 8–15 years), performance drops and energy use rises.
Multiple repairs for separate leaks indicate systemic corrosion or component failure. Persistent moisture, higher utility bills, and frequent service calls point toward installing a new, more efficient unit rather than continuing patchwork fixes.
Cost comparison: repeated repairs vs. replacement
Having established that advanced age, falling efficiency, and recurring leaks often warrant replacement, the next consideration is financial: comparing the cumulative cost of repeated repairs against the one-time expense of a new water heater. A clear break-even occurs when repair totals approach replacement plus installation; include downtime, energy loss, and resale value in calculations.
| Repeated Repairs | Replacement |
|---|---|
| Ongoing costs | One-time cost |
| Uncertain lifespan | Predictable warranty |
Selecting the right replacement size and fuel type
Choosing the correct replacement size and fuel type requires balancing household hot-water demand, installation constraints, and operating costs.
The homeowner should assess peak usage, available space, venting and fuel access (electric, gas, propane), and efficiency ratings.
Matching capacity and recovery rate prevents shortages; selecting fuel depends on utility costs, local code, and retrofit complexity.
Professional sizing and permit checks are recommended.
Checklist: Final Inspection Before Leaving the Job Site
A final inspection confirms the repair is secure and the site is left responsibly.
The technician should complete the following checks before departure:
- Leak test and pressure verification
- Proper disposal or recycling of the old unit
- Documentation, warranties, and maintenance notes
Leak test and pressure verification
Begin the leak test and pressure verification by slowly bringing the system up to normal operating pressure while visually and audibly inspecting all fittings, valves, unions, and the tank body for drips, seepage, or hissing.
Monitor the pressure gauge for stability, exercise relief and isolation valves, recheck connections after several minutes, and document readings and observations before declaring the repair complete.
Proper disposal or recycling of the old unit
Before leaving the site, confirm that the old water heater is handled according to local waste and recycling regulations: assess whether it qualifies for metal recycling, hazardous component removal (such as insulation with toxic coatings), or appliance disposal, and document the chosen disposition method, facility name, and any required paperwork.
Arrange transport or pickup, guarantee drains and residual fluids were properly captured, and obtain disposal receipts.
Documentation, warranties, and maintenance notes
Once the installation and disposal steps are complete, the technician compiles the final documentation package—inspection checklist, photos of the installation and leak repair, parts list with serial numbers, and any permits or disposal receipts.
The technician reviews warranty terms, recommended maintenance intervals, and service contact information with the property owner in writing.
The technician files copies, explains claim procedures, schedules the first maintenance reminder, and confirms receipt.
Conclusion
In the hush after tools are set down, the tank stands like an old sentinel, patched and sighing steadier breaths. The homeowner’s careful hands have traced leaks back to their origins, mended what could be mended, and left instruction as a map. Yet water remembers time; vigilance and routine kindness keep betrayal at bay. If cracks return or rust speaks louder, replacement—though mourned—becomes the compassionate choice for future warmth.