How to Fix a Gas Stove Burner: Step-by-Step Troubleshooting and Repair Guide
If your gas stove burner won’t light, follow these troubleshooting steps: First, ensure the gas valve is open and that power is disconnected. Check the igniter or battery functionality. Remove the grates and caps, then clean the burner ports with a soft brush or compressed air. Reseat all components and test the burner for a steady blue flame. If you see persistent sparks or yellow flames, inspect the electrode, air shutter, and gas supply. Document your actions and contact a technician for leaks or complex repairs.
Quick solution summary for a gas stove burner that won’t light
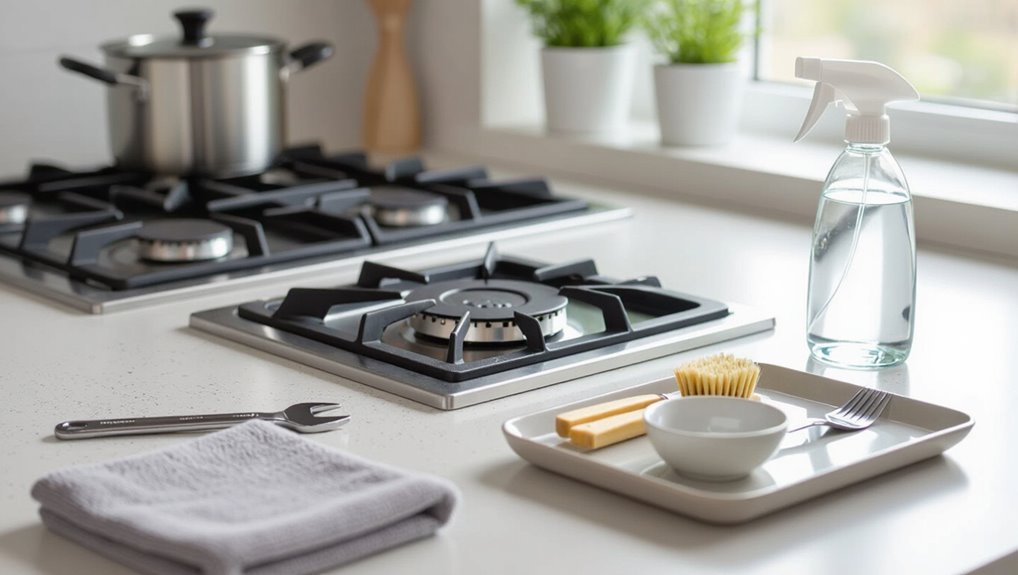
Before troubleshooting, the person should shut off the gas supply, guarantee good ventilation, and confirm no gas odor or leak is present.
Quick fixes under ten minutes include cleaning burner ports, reseating the burner cap, and checking the igniter spark or battery.
If the flame remains absent, unstable, or a leak is suspected, the person should stop and contact a qualified technician.
Immediate safety steps before troubleshooting
When a gas burner fails to light, guarantee the stove and surrounding area are safe before attempting any fixes: turn off the burner control, shut off the gas supply at the appliance or main valve if accessible, open windows or ventilate the room to disperse any odor of gas, and avoid creating sparks by not using electrical switches or open flames.
Then document appliance model, unplug power if present, and call a qualified technician or gas company if smell persists, following basic how to fix gas stove burner guidance without attempting complex repairs.
Fast fixes you can try in under 10 minutes
Several simple checks and adjustments can often restore ignition in under ten minutes: wipe burner caps and ports clear of debris, realign and reseat caps, make sure igniter electrode is dry and free of grease, tighten loose knobs, verify the gas supply valve is open, and try relighting with proper sparking.
If clicking persists without flame, repeat cleaning and drying; many issues resolve quickly.
When to stop and call a professional
Stop and call a professional if basic cleaning and simple adjustments fail to restore ignition.
A technician is needed when there are persistent gas smells, audible hissing, intermittent pilot or spark module failure, damaged valves, or complex ignition assembly faults.
Also seek help if repairs require gas-line work, disassembly beyond user access, or local code permits; prioritize safety and shut off gas until serviced.
How gas stove burners work basic components and operation
A gas stove burner consists of a burner head and cap with ports that mix air and gas to produce a controlled flame.
Ignition is provided by an electrode and spark module, while gas flow is regulated by a valve, supply line, and pressure regulator.
Safety devices such as a thermocouple or shutoff valve prevent gas flow if the flame goes out in ovens or sealed systems.
Burner cap, head, and ports
The burner cap, burner head, and ports form the visible and functional interface where gas is metered, mixed with air, and ignited to produce a controlled flame.
The burner head channels gas from the valve to concentric ports; the cap evens flame distribution and shields ports from spills.
Port size, cleanliness, and alignment determine flame pattern, stability, and heat output efficiency.
Igniter, spark module, and electrode
Once flame formation at the ports is understood, attention shifts to the ignition system that initiates combustion: the igniter assembly, spark module, and electrode.
The electrode produces sparks; the spark module times and distributes high-voltage pulses. Proper gap, secure mounting, and clean, dry connections guarantee reliable ignition.
Faulty electrodes, cracked ceramic insulators, or a failing module cause intermittent or no spark and require replacement.
Gas valve, supply line, and regulator
Control of fuel flow depends on three interconnected components: the gas valve, supply line, and regulator.
The gas valve meters flow from the supply line, which delivers household gas under pressure.
The regulator reduces and stabilizes inlet pressure for safe, consistent burner performance.
Faults include leaks, blockages, or improper pressure; inspection, pressure testing, and valve replacement restore correct operation.
Thermocouple and safety shutoff (for ovens/sealed systems)
Following inspection of valves, supply lines, and regulators, attention shifts to the thermocouple and safety shutoff systems that prevent gas flow when a flame is absent.
The thermocouple senses heat at the pilot or burner; if cool, it signals the valve to close.
Testing involves checking millivolt output, alignment with the flame, and continuity; replacement restores reliable safety operation in ovens and sealed systems.
Tools and supplies needed to diagnose and repair burners
A concise kit of hand tools and cleaning supplies is essential for diagnosing and repairing common burner issues.
Common replacement parts—such as igniters, burner caps, and orifice jets—should be kept on hand to speed repairs.
Proper safety equipment and testing devices, including gloves, a multimeter, and a gas leak detector, are critical for safe, accurate work.
Hand tools and cleaning supplies
Several essential hand tools and cleaning supplies make diagnosing and repairing gas stove burners safer and more efficient.
A compact toolkit and proper cleaners reduce frustration and speed repairs.
Recommended items include:
- Small screwdrivers and nut drivers for precise access, calming confidence.
- Brass brush and soft cloth for thorough, satisfying cleaning.
- Needle probes and canned air for delicate, reassuring diagnostics.
Replacement parts to have on hand
Spare parts streamline repairs and prevent repeat trips to the hardware store by providing immediate replacements for the components most likely to fail.
A compact kit speeds diagnosis: replaceable burner caps, ignition electrodes, and valve stems cover most failures. Keep compatible sizes and manufacturer numbers to guarantee fit. Store parts labeled and dry for quick access.
- Burner caps — relief
- Igniters — confidence
- Valves — control
Safety equipment and testing devices
Proper safety equipment and basic testing devices are essential before attempting any gas burner work to reduce risk and verify repairs.
Recommended items include safety goggles, chemical-resistant gloves, a spark-proof flashlight, and a respirator for fumes.
Diagnostic tools: a multimeter for continuity and voltage, a manometer or gas leak detector, and hose clamps.
A fire extinguisher and first-aid kit should be present.
Step-by-step inspection checklist before repairs
Before any repairs begin, the technician confirms the gas supply and appliance power and inspects burners and surrounding surfaces for debris, spills, or physical damage.
A quick smell test for gas leaks is performed, with immediate shutdown, ventilation, and calling the gas company if a leak is suspected.
Finally, electrical issues are checked by verifying fuses and tripped breakers before proceeding.
Confirm gas supply and appliance power
A concise, systematic check of the gas supply and appliance power helps secure safety and avoid unnecessary repairs.
The inspector verifies the main gas valve is open, checks for active utility service, confirms the stove’s gas shutoff lever is correctly positioned, and verifies the electrical connection and circuit breaker status for electronic ignition.
Record findings before proceeding.
Visual inspection for debris, spills, or physical damage
An initial visual inspection focuses on identifying debris, spills, and physical damage that could impair burner function or pose a hazard.
The technician checks burner caps, heads, ports, and igniters for food residue, grease, or crusted spills; examines porcelain, grates, and gas lines for cracks, warping, or corrosion; and notes loose parts or misalignment before proceeding to cleaning or parts replacement.
Smell test for gas leaks and how to respond
How should a technician proceed if a faint or strong odor of natural gas is detected near the stove?
The technician evacuates occupants, avoids sparks or flames, ventilates by opening windows and doors, and shuts off the gas supply at the appliance or main valve if trained.
They contact the gas utility or emergency services, do not re-enter until the area is declared safe, and document actions taken.
Check for blown fuse or tripped breaker
Before opening the stove or testing components, the technician verifies electrical continuity by checking for a blown fuse or a tripped breaker, since many ignition systems and control modules rely on household power even in gas appliances.
They inspect the home panel, reset tripped breakers, replace blown fuses, and confirm power at the stove outlet with a multimeter before further diagnostics to avoid misidentifying electrical faults.
Cleaning and maintenance procedures to restore burner function
The section covers practical cleaning and maintenance steps to restore burner performance, beginning with safe removal and cleaning of burner caps and heads.
It explains methods for clearing clogged ports, inspecting and cleaning or replacing the igniter and electrode, and reassembling components.
Finally, it outlines testing procedures to confirm proper function and safe operation.
How to remove and clean burner caps and heads
Remove the grates and lift off the burner caps and heads carefully, then inspect each part for food debris, grease, and discoloration.
Soak removable pieces in warm, soapy water; scrub with a nonabrasive brush or cloth.
Wipe the base and surrounding surface.
Rinse parts thoroughly, dry completely to prevent corrosion, then reassemble, ensuring caps seat properly before replacing grates.
Clearing clogged burner ports with safe methods
Several common issues—food particles, grease buildup, and rust—can block burner ports and disrupt flame patterns; clearing them safely restores even gas flow and reliable ignition.
Using a soft brush, toothpick, or compressed air, gently remove debris from ports without enlarging holes. Soak removable parts in warm, soapy water; dry completely before reassembly.
Avoid wire drills or excessive force.
Cleaning or replacing the igniter and electrode
Inspecting and maintaining the igniter and electrode restores reliable spark and consistent burner ignition.
The technician disconnects power, visually inspects for cracks or carbon buildup, cleans gently with a soft brush and isopropyl alcohol, and lightly abrades corroded contacts.
If damaged or nonresponsive, the component is removed and replaced with a compatible part, ensuring correct orientation and secure connections before restoring power.
Reassembling and testing after cleaning
With the igniter and electrode cleaned or replaced and connections verified, reassembly proceeds methodically to restore burner function.
Components are seated in order: cap, burner head, and grates aligned to fit tabs and ports.
Screws or clips are secured snugly.
Gas supply is restored, igniter tested, and flame observed for steady, blue combustion.
Any irregularity prompts shutdown and reinspection.
Diagnosing common burner problems and targeted fixes
The section outlines how to identify and resolve the most common burner faults, separating electrical failures from gas supply problems when a burner will not light.
It then covers weak or uneven flames, continuous clicking igniters, yellow or sooty flames from improper air–gas mixture, and flickering or blown-out flames caused by ventilation or drafts.
For each issue, it points to targeted checks and fixes—cleaning, adjustment, or parts replacement—appropriate to the symptom.
Burner won’t light at all electrical vs. gas causes
When a burner fails to light at all, diagnosing whether the fault is electrical or gas-related narrows the repair path and reduces safety risks.
Electrical issues typically involve the ignition switch, spark module, or wiring, while gas problems center on supply, valves, or clogged ports.
Test for spark, listen for clicking, check power and continuity; verify gas supply, valve operation, and unobstructed orifices.
Weak flame or uneven burner flame causes and fixes
Diagnose weak or uneven burner flames by inspecting airflow, fuel delivery, and component alignment.
Clean clogged ports and caps, remove debris, and guarantee correct burner cap seating.
Check and clean the venturi tube and orifice; clear spider webs or grease.
Verify gas pressure and regulator function; tighten loose connections.
Replace warped burner heads or worn gaskets to restore even combustion and flame height.
Clicking igniter that won’t stop troubleshooting steps
After addressing airflow, fuel delivery, and burner alignment, attention should shift to an igniter that continues clicking—an issue often rooted in electrical faults, moisture, or debris.
Inspect and dry the igniter and surrounding area, clean crumbs and grease with a nonconductive brush, verify electrode gap and secure wiring.
Test the spark module and switch for continuity, and replace faulty components if cleaning and tightening do not stop the clicks.
Yellow or sooty flame air/gas mixture adjustments
Although a properly adjusted burner should produce a steady blue flame, a yellow or sooty flame signals an imbalanced air-to-gas ratio that reduces combustion efficiency and can deposit carbon on cookware.
Technicians check burner ports for clogs, clean with a soft brush, and inspect the air shutter or collar for correct adjustment.
Adjust gradually, test between changes, and consult a pro if soot persists or odor appears.
Flame blows out or flickers ventilation and draft solutions
Check for drafts and ventilation issues when a burner flame repeatedly flickers or blows out, since fluctuating air currents are the most common cause.
Inspect nearby windows, vents, and exhaust fans. Seal gaps, reposition fans, or adjust range hood settings.
Guarantee proper clearance around the stove and verify that vent ducts aren’t obstructed.
If problems persist, consult a technician for airflow assessment.
How to replace common parts
The section outlines step‑by‑step replacement of frequently failing components: burner heads, igniter electrodes, spark modules or switches, and gas valves or regulators.
It highlights basic safety precautions, required tools, and common compatibility checks before removal.
Clear instructions follow for disconnecting parts, testing replacements, and confirming proper operation.
Replacing a clogged or damaged burner head
Start by confirming that the stove is fully disconnected from power and gas before removing the burner head; this prevents accidents and guarantees a safe working environment.
Remove grates and caps, lift off the head, inspect ports for clogging or corrosion.
Clean with a soft brush and mild solvent or replace the head if warped or cracked.
Reassemble, test for even flame and gas smell.
Replacing the igniter electrode
Disconnecting both power and gas, the technician prepares to replace the igniter electrode by first ensuring the appliance is cold and workspace is well-lit.
The technician removes grates and burner cap, unscrews mounting hardware, disconnects the electrode lead, and extracts the ceramic electrode.
A matched replacement is installed, lead reattached, hardware tightened, and components tested for secure fit before restoring power and gas and confirming consistent ignition.
Replacing a faulty spark module or switch
To replace a faulty spark module or switch, a technician first guarantees power and gas are off and the stove is cool.
Then, the technician locates the module or switch—typically beneath the cooktop or behind the control panel—and documents wiring positions before removal.
The technician disconnects connectors, removes mounting fasteners, swaps the new module or switch, restores wiring per documentation, secures housing, and tests ignition.
Replacing the gas valve or regulator
Replacing a gas valve or regulator requires careful attention to safety and correct component matching.
The technician shuts off gas, disconnects supply, labels fittings, removes old valve, installs matched replacement, applies thread sealant, tightens, tests with leak solution, and verifies proper flame adjustment.
If uncertain, contact a qualified technician.
- Relief when the leak stops
- Confidence in restored control
- Quiet satisfaction of safe repair
Testing and confirming a successful repair
After parts are replaced, the technician tests ignition and flame stability using safe procedures such as lighting with the control knob and observing steady reignition and consistent flame height.
A manometer or handheld gas leak detector is then used to confirm correct pressure and absence of leaks at connections.
Normal flames are blue with minimal yellow tipping and steady, non-pulsing edges.
Safe methods to test ignition and flame stability
Begin by ensuring the area is well-ventilated and all safety precautions are in place—gas supply on, ignition source ready, and any nearby flames or heat sources removed—before proceeding to test the burner.
Ignite the burner, observe ignition time, flame color, size, and stability. Check for consistent blue flame without flicker or yellow tips.
Repeat tests across settings and note abnormalities.
Using a manometer or gas leak detector
Use a manometer or a handheld gas leak detector to confirm that the repair holds under normal operating pressure and that no leaks remain.
Measure static and operational pressure at the appliance connection, comparing readings to manufacturer specifications.
Scan all joints, fittings, and valve stems with the detector, observing for persistent readings or audible alerts.
Address any anomaly immediately and retest until readings remain stable and leak-free.
What normal flame characteristics look like
A healthy gas burner produces a steady, mostly-blue flame with a well-defined inner cone and minimal yellow tipping; this indicates proper air-to-fuel ratio, stable pressure, and complete combustion.
After repair, confirm uniform flame height across ports, absence of soot, and no popping or sputtering.
Slight orange flicker at startup is acceptable; persistent yellow or lifting requires further adjustment.
Troubleshooting advanced issues and safety warnings
If a gas odor persists or a leak is suspected, the article directs readers to evacuate the area, shut off the gas at the appliance or main valve if safe, and contact the gas company immediately.
It notes electrical hazards—such as damaged ignition wiring or exposed terminals—and advises disconnecting power before inspecting components.
It also lists conditions that require a licensed technician or the gas company, including stubborn leaks, regulator or line issues, and complex appliance repairs.
Persistent gas smell or suspected leak procedures
Several clear signs—persistent odor of gas, hissing sounds near connections, or dead plants near the stove—indicate a possible leak and require immediate, careful action.
Evacuate occupants, avoid flames or sparks, and ventilate by opening windows and exterior doors.
Shut the gas supply at the manual valve if accessible.
Contact the gas utility or a licensed technician; do not use the appliance until inspected and cleared.
Electrical hazards and when to disconnect power
One critical safety step when diagnosing advanced stove problems is recognizing and mitigating electrical hazards before probing components.
The technician should unplug the appliance or switch off the dedicated circuit at the breaker, confirm power absence with a noncontact tester, and discharge capacitors as applicable.
Avoid wet conditions, insulated tools reduce shock risk, and label disconnected wiring to guarantee safe reassembly.
Situations requiring licensed technician or gas company
When evidence of a gas leak, persistent ignition failure, abnormal odors, or damaged supply components appears, the homeowner should cease further troubleshooting and contact a licensed technician or the gas company immediately.
Only qualified professionals should handle gas line repairs, regulator replacement, complex valve or manifold work, and inspections after suspected leaks.
Document symptoms, evacuate if needed, and follow utility provider instructions for safe resolution.
Preventive maintenance schedule and tips to avoid future problems
A concise preventive maintenance schedule helps keep burners reliable and safe through regular cleaning routines and seasonal checks.
Clear guidelines on handling spills, selecting compatible cookware, and caring for burner parts reduce flame irregularities and clogs.
The schedule should also define service intervals and signs that indicate when components or the entire appliance need replacement.
Regular cleaning routine and seasonal checks
Although small tasks can be easy to overlook, establishing a simple, consistent cleaning and inspection routine prevents most common gas stove issues.
Weekly light cleaning removes debris from grates and burner caps; monthly removal of burners for deeper cleaning guarantees ports remain clear.
Quarterly checks inspect gas connections, ignition performance, and venting.
Record actions and address abnormalities promptly to avoid repairs.
Best practices for spills, cookware, and burner care
Moving from routine cleaning and inspections to daily handling habits helps prevent many stove problems before they start. Owners should wipe spills immediately, match pan size to burners, and avoid abrasive cleaners.
Monthly checks for clogged ports and loose grates keep performance steady.
- Protect cookware and pride by preventing stains.
- Respect burners to prevent flame issues.
- Maintain calm, safe cooking.
When to replace aging components or the appliance
When should components be replaced, and when is the entire stove due for retirement?
Routine checks every 6–12 months identify worn igniters, valves, gaskets, and burners. Replace small parts when performance declines or corrosion appears.
Consider full replacement if repairs are frequent, safety hazards persist, efficiency drops considerably, or the unit is older than 15–20 years.
Keep records and clean regularly to extend life.
Comparison of DIY repair vs. professional service
When weighing DIY repair against professional service, readers should consider cost, time, required skill, and potential risks.
| DIY | Professional |
|---|---|
| Lower monetary cost, higher personal time investment | Higher service fee, faster resolution |
| Requires basic tools and confidence | Requires licensed expertise |
| Higher safety and warranty risk | Lower risk, usually insured |
The choice depends on urgency, competence, and tolerance for risk.
Cost, time, skill level, and risk factors
Although many stove issues can seem straightforward, deciding between DIY repair and hiring a professional hinges on cost, time, required skills, and safety risks. A DIY attempt can save money and time for simple fixes but demands mechanical aptitude and carries gas/leak hazards; professionals cost more yet guarantee safety and warranty coverage.
| Factor | DIY | Professional |
|---|---|---|
| Cost | Low | Higher |
| Time | Variable | Predictable |
| Risk | Elevated | Reduced |
Common mistakes to avoid when fixing gas stove burners
Common mistakes when repairing a gas stove burner include using unsafe testing methods or improper tools that can create fire or gas hazards.
Over-tightening, misaligning parts, or forcing components can damage the burner and impair function.
Ignoring manufacturer instructions and warranty terms often voids coverage and increases the risk of faulty repairs.
Unsafe testing methods and improper tools
Avoiding unsafe testing methods and improper tools is essential for anyone repairing a gas stove burner. Makeshift tests and wrong equipment can cause gas leaks, fires, or injury.
Use manufacturer-approved parts, proper leak-detection solution, calibrated multimeters, and insulated tools.
Never test with open flames, cigarette lighters, or improvised probes. If uncertain, stop and consult a qualified technician to prevent hazards.
Over-tightening or misaligning parts
After addressing unsafe testing and tool choices, attention must turn to mechanical assembly: over-tightening or misaligning burner components can damage threads, warp castings, restrict gas flow, or prevent proper sealing of valves and gaskets.
Technicians should hand-start fasteners, use torque where specified, align parts before tightening, and inspect fittings for distortion. Correct alignment preserves airflow, ignition reliability, and long-term safety.
Ignoring manufacturer instructions and warranties
While technicians may feel confident improvising repairs, disregarding manufacturer instructions and warranty terms can void coverage and introduce safety risks. Service manuals contain specific torque values, part alignments, and sequence steps validated for each model.
Ignoring those guidelines risks improper reassembly, gas leaks, and denied warranty claims. Adherence guarantees safety, preserves legal protection, and maintains appliance performance.
Consult authorized service channels for complex issues.
Recommended replacement parts and where to buy them
When selecting replacement parts, the writer emphasizes weighing OEM reliability against aftermarket cost and confirming exact model numbers or part codes for compatibility.
Buyers should prioritize correct fit and safety over savings when possible. Common considerations include:
- OEM for peace of mind and exact fit
- Aftermarket for lower cost but variable quality
- Matching model numbers/part codes to avoid unsafe or incompatible parts
OEM vs. aftermarket considerations
Although original equipment manufacturer (OEM) parts guarantee exact fit and factory-specified materials, aftermarket alternatives can offer lower cost and wider availability—so the choice depends on priorities like longevity, warranty, and budget.
OEM suits those wanting assured compatibility and maker support; reputable aftermarket brands may provide comparable performance at less cost.
Confirm materials, return policy, and seller reputation before purchasing to reduce risk.
How to match model numbers and part codes
How can a homeowner be sure a replacement part will fit?
They should record the stove’s brand, full model number, and serial number from the rating plate.
Match OEM part codes printed on burners, valves, or manuals.
Cross-reference with manufacturer diagrams, verified online catalogs, or authorized dealers.
Buy from OEM suppliers or reputable aftermarket sellers offering exact-fit guarantees and clear return policies.
Signs it’s time to replace the stove instead of repairing
When burners and parts fail repeatedly, diminished efficiency and mounting safety issues signal that repairs may no longer be practical.
Comparing cumulative repair costs and downtime against the price of a new stove helps determine whether replacement is more economical.
If safety risks persist or efficiency remains poor after multiple fixes, replacement is the prudent choice.
Frequent failures, efficiency loss, and safety concerns
If a gas stove begins to fail repeatedly, shows a marked drop in heating efficiency, or exhibits safety issues such as persistent gas odors, frequent pilot outages, or visible flame irregularities, replacement should be considered rather than continued repairs.
Ongoing malfunction, rising fuel consumption, corrosion, cracked components, or unreliable ignition indicate systemic deterioration and heightened risk, justifying replacement for safety and dependable performance.
Cost comparison: repeated repairs vs. replacement
Calculate the long-term cost implications to decide whether repeated repairs or full replacement is more economical.
Tally repair frequency, parts and labor costs, and estimated remaining lifespan. Factor energy inefficiency and safety risks that raise operating expenses.
Compare cumulative repair expenses against purchase and installation of a new stove, including warranties and efficiency gains.
Choose replacement when repair costs approach or exceed replacement value.
Conclusion
Like a mechanic listening to an old clock, the guide leaves the reader with steady hands and clear eyes: small fixes can coax reluctant flames back to life, while careful cleaning clears the path for reliable heat. When parts show irreparable wear or safety doubts loom like storm clouds, replacing the stove becomes the wiser voyage. Armed with tools, patience, and caution, one navigates between repair and renewal, choosing safety and long-term function.