How to Fix a Garbage Disposal Jam: Quick, Safe Steps to Get It Running Again
When your garbage disposal jams, start by cutting power at both the switch and the breaker. Confirm it’s off before inspecting the chamber with a flashlight. Use pliers or tongs to remove any visible debris. Then, insert a 1/4-inch Allen wrench into the bottom socket to manually turn the motor and free the impellers. After testing the rotation, press the reset button if necessary. Restore power briefly to check if it’s working. For further guidance on specific jams, prevention tips, and when to seek professional help, refer to the follow-up steps.
What to Do First When Your Garbage Disposal Is Jammed
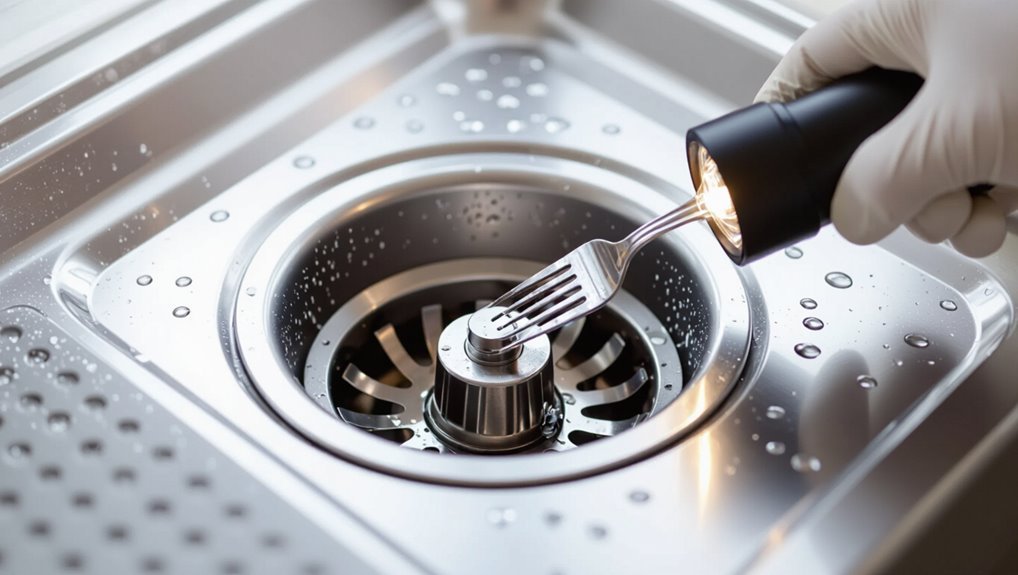
First, confirm the unit is actually jammed by checking for humming, lack of blade movement, and visible obstructions.
Next, prioritize safety by cutting power at the switch and breaker and then using the reset button before any intervention.
Finally, gather basic tools—an Allen wrench, pliers, a flashlight, and gloves—so the job can proceed safely and efficiently.
Confirm the disposal is actually jammed (quick checks)
Before attempting any repairs, verify that the disposal is truly jammed rather than simply unpowered or clogged with water.
Observe motor hum, check sink drain for standing water, and listen for unusual grinding.
Insert a flashlight to inspect the chamber for visible obstructions.
Try turning the flywheel manually with an appropriate tool.
These quick checks clarify whether guidance on how to fix garbage disposal jam applies.
Safety-first shutdown: power, breaker, and reset button
Having confirmed the disposal is stuck rather than merely unpowered or clogged, the next step is to make the unit safe to work on by cutting electrical power.
Turn the wall switch off, then shut off the dedicated breaker in the panel. Confirm power is dead.
If the unit has a red reset button, leave it untouched until the jam is cleared and power restored.
Tools and items to have on hand before you start
A small set of tools and a few safety items make clearing a garbage disposal jam faster and safer: a long-handled flashlight, an Allen wrench (usually 1/4-inch) for manually turning the motor from beneath, needle-nose pliers or tongs for extracting debris, a rubber or wooden stick for probing the chamber, work gloves, and safety goggles.
Also helpful: a bucket, towels for spills, and a nonconductive handle for leverage.
Fast Step-by-Step Guide to Free a Jammed Disposal
The guide provides a concise five-step procedure to free a jammed disposal, starting with cutting power and confirming it is off.
It then covers using an Allen wrench in the bottom hex socket, manually turning the impellers from above with a wooden spoon or pliers, and removing lodged objects through the sink drain.
Finally, it recommends testing rotation and resetting the unit before restoring normal use.
Step 1 Turn off power and verify it’s off
Before touching the disposal, cut power to the unit at the circuit breaker or unplug it and lock or tag the breaker if possible.
Verify power is off by attempting to turn the switch on, and use a noncontact voltage tester at the disposal wiring or switch.
Confirming de-energized circuits prevents accidental startup and reduces electrocution risk before proceeding with any manual or tool-based intervention.
Step 2 Use an Allen wrench at the bottom hex socket
Insert an appropriately sized hex (Allen) wrench into the recessed socket on the disposal’s underside and turn it back and forth to free the impellers.
The technician applies steady, controlled motion until resistance eases, then reverses direction to clear debris and restore rotation.
- Verify power remains off.
- Use firm, even turns.
- Stop if unusual resistance occurs.
Step 3 Manually turn the impellers from above with a wooden spoon or pliers
After freeing some resistance with the Allen wrench underneath, attention shifts to the top of the unit where the impellers can be turned manually. A wooden spoon or long-nosed pliers provide leverage while keeping hands clear of the grinding chamber.
Insert the tool through the sink opening, reach the impeller blades, and apply steady, controlled turns until movement resumes.
Test rotation by hand before restoring power.
Step 4 Remove lodged objects via the sink drain opening
Loosen any remaining debris by shining a flashlight into the drain and using long-nosed pliers or needle-nose tongs to grasp and extract visible objects through the sink opening; keep the disposal power off and hands clear of the chamber at all times.
Work methodically, removing metal, glass, or dense food particles. Use a magnet for small metal fragments.
Inspect with light until no obstruction remains.
Step 5 Test disposal rotation and reset the unit
Check rotation manually and reset the disposal if needed before restoring power.
With the unit still unplugged or circuit off, insert an Allen wrench into the bottom hex recess and turn back and forth to confirm free blade movement.
Press the reset button if tripped.
Re-check rotation until smooth and unobstructed.
Only then restore power to proceed with final testing.
Step 6 Run water and test with a short run of the disposal
Turn on a steady stream of cold water and run the disposal briefly to verify the jam is cleared and the unit operates normally.
Listen for smooth, consistent motor noise and observe that water drains without pooling or sputtering.
If unusual sounds persist or drainage remains slow, stop the unit, disconnect power, and repeat inspection or consult a professional to prevent damage or injury.
Tools and Materials Checklist
Before starting, a clear checklist of tools and materials helps guarantee a smooth repair.
Essential items include an Allen wrench, flashlight, pliers, and protective gloves.
Optional supplies such as a bucket, towels, screwdriver, and plumber’s putty can make the job easier or cleaner.
Essential tools: Allen wrench, flashlight, pliers, gloves
A small set of reliable tools makes a stuck garbage disposal far easier to clear: a properly sized Allen wrench to free the motor shaft, a bright flashlight to inspect the chamber, pliers for gripping and removing debris, and sturdy gloves to protect hands from sharp edges.
- Allen wrench for manual motor rotation.
- Flashlight to locate obstructions.
- Pliers and gloves for safe debris removal.
Optional tools and supplies: bucket, towels, screwdriver, plumber’s putty
After the basic tools are gathered, a handful of optional supplies can make the job cleaner and quicker: a bucket catches water and debris when disconnecting plumbing; absorbent towels protect surfaces and soak spills; a flathead screwdriver helps remove splash guards or mounting rings; plumber’s putty seals connections during reassembly.
These items streamline work and reduce mess without being strictly necessary.
Common Causes of Garbage Disposal Jams
Common jams stem from hard or fibrous food scraps like bones, celery, and corn husks that the blades cannot shred.
Non-food items accidentally dropped into the unit and grease buildup from improper use also commonly cause blockages.
Over time mechanical wear or damage from foreign objects can further impede operation.
Hard or fibrous food scraps (bones, celery, corn husks)
Hard or fibrous food scraps such as bones, celery stalks, and corn husks can wedge between grinding components or wrap around the disposal’s impellers, quickly causing a jam.
These materials resist shredding, strain the motor, and may create imbalances.
Removing such debris promptly and avoiding feeding large or stringy pieces prevents recurrence and reduces wear on blades and bearings.
Non-food items accidentally dropped in
Many households accidentally drop items like silverware, bottle caps, or small toys into the sink. These non-food objects can become lodged in the disposal’s grinding chamber or jam the impellers.
Such obstructions cause sudden stops, humming motors, or unusually loud noises. Inspecting the chamber after disconnecting power and removing visible debris with pliers prevents damage and restores normal operation safely.
Grease buildup and improper use
When homeowners pour cooking oils, greasy scraps, or fibrous food down the sink, the grease cools and congeals on the disposal’s walls and impellers, narrowing the flow and trapping debris.
Over time this buildup and misuse—including forcing large quantities or inappropriate items through the unit—reduces grinding efficiency and leads to jams, motor strain, and foul odors.
Regular flushing with hot water, limiting fatty or stringy wastes, and occasional enzymatic cleaners prevent accumulation and maintain performance.
Mechanical wear or foreign object damage
Inspecting a disposal reveals that mechanical wear and foreign objects are frequent, distinct causes of jams: worn bearings, dulled or bent impellers, and loosened mounting hardware reduce clearance and grinding efficiency, while swallowed utensils, glass, bottle caps, or hard bone fragments physically obstruct rotation and damage components.
Technicians should visually inspect, manually test free rotation with power off, remove debris, and replace damaged parts to restore safe operation.
How to Safely Remove Specific Types of Jams
The section explains safe methods for clearing common obstruction types, including removing silverware, glass, and other metal objects without causing injury.
It then covers best practices for breaking up fibrous or starchy materials and preventing reformation of clogs.
Finally, it outlines approaches for tackling grease-clogged or odor-prone jams and minimizing lingering smells.
Removing silverware, glass, and metal objects
Carefully retrieving metal cutlery, shards of glass, or other metallic debris requires a methodical, safety-first approach to prevent injury and further damage to the disposal.
Power must be disconnected and the unit inspected with a flashlight.
Use long-nose pliers or tongs to extract objects, avoiding hands.
For embedded items, rotate the impeller manually per manufacturer guidance.
Test operation after reassembly.
Dealing with fibrous or starchy materials
How should one handle jams caused by fibrous or starchy scraps?
First, power off and unplug the disposal.
Use pliers or tongs to extract long fibrous items (celery, corn husks) that wrap around the impellers.
For starchy residues (potato, rice), gently loosen with a wooden spoon or brush; avoid chemical drain cleaners.
Restore power and test briefly, repeating extraction if needed.
Handling grease-clogged or odor-prone jams
Address grease-clogged or odor-prone jams by first cutting power and then loosening congealed grease with warm (not boiling) water poured down the sink while running cold water to help solidify and flush residual oils.
After power is off, use a flashlight and pliers or wooden tool to remove softened debris; avoid hands.
Deodorize with baking soda and vinegar, then rinse and restore power to test.
When Not to Attempt a DIY Fix
If the disposal shows signs of electrical or motor failure, a homeowner should stop and seek professional help.
Visible broken parts, or a persistent humming noise with no movement, indicate internal damage beyond simple jam removal.
Likewise, any leaks or burning smells require immediate cessation of DIY attempts and prompt service to avoid hazards.
Signs of electrical or motor failure
Recognize that certain symptoms indicate electrical or motor failure and require professional repair rather than DIY attempts.
Repeated tripping of the circuit breaker, burning smells, visible sparking, or complete loss of power despite a functional outlet suggest internal electrical faults.
Rapid overheating, intermittent operation, or a disposal that won’t reset despite following basic troubleshooting also point to motor or wiring issues needing a licensed technician.
Visible broken parts or persistent humming without movement
When visible components such as seals, grinding impellers, or mounting assemblies are cracked, warped, or missing, or when the unit emits a steady hum without any blade movement, the problem likely extends beyond simple jams and should not be tackled as a DIY repair.
In such cases, power must remain off and a qualified technician should inspect motor integrity, fasteners, and internal damage to guarantee safe repair or replacement.
When the unit leaks or emits burning smells
A leaking garbage disposal or a persistent burning odor signals problems that go beyond a simple jam and should not be handled as a DIY fix.
These signs indicate electrical faults, motor failure, or compromised seals. The unit should be powered off and unplugged, then inspected by a qualified technician.
Continued use risks fire, water damage, and hazardous shock—stop and seek professional repair.
How to Prevent Future Jams
Preventing future jams depends on mindful use, including avoiding fibrous, starchy, hard, and non-food items that can clog or damage the unit.
Consistent habits—running ample cold water before, during, and after use and feeding waste in small, gradual amounts—help the blades grind efficiently.
Routine maintenance, such as checking for wear, tightening mounts, and occasional cleaning, reduces the likelihood of recurring problems.
Foods and materials to never put in a disposal
Several common foods and household items are ill-suited for a garbage disposal and can cause clogs, dull blades, or motor damage.
- Coffee grounds and fibrous peels (potato, banana, onion) — form sludge and wrap impellers.
- Grease, oil, and fat — solidify and stick inside pipes.
- Eggshells, bones, and hard shells — abrade or jam grinding components.
Best practices for running water and grinding techniques
Run a steady stream of cold water before, during, and for 15–30 seconds after using the disposal to flush fragments through the trap and keep fats solidified so blades can shear them more effectively.
Feed small amounts gradually; avoid overloading. Pulse the unit briefly rather than continuous heavy feeding.
Finish with a longer rinse to clear residual particles and verify unobstructed flow.
Regular maintenance tips and inspections
After establishing proper water flow and feeding habits, regular maintenance and inspections keep small issues from becoming jams.
Periodic checks include tightening mounts, inspecting splash guards for tears, and clearing trapped debris with tongs.
Run cold water while grinding ice and citrus to clean blades.
Listen for unusual noises and test the reset switch.
Schedule annual professional inspections for older units.
Troubleshooting and Quick Diagnostics
The troubleshooting section explains what common symptoms — a humming motor, a unit that spins freely but won’t start, and repeated circuit trips — typically indicate about a garbage disposal problem.
It also describes quick checks like pressing the reset button and inspecting the home’s circuit breaker before further intervention.
Brief guidance on different noise types is provided to help distinguish between simple jams, foreign-object damage, and more serious internal failures.
What humming, no-spin, and tripping mean
When a garbage disposal hums without spinning, clicks repeatedly, or causes the circuit breaker to trip, these distinct symptoms point to different underlying issues:
A persistent hum usually indicates a motor stalled by an obstruction;
clicking often signals an overloaded or failing motor starting relay;
repeated tripping suggests electrical faults, overheating, or short circuits.
Proper diagnosis guides safe corrective steps without assuming a single cause.
How to check the reset button and circuit breaker
One straightforward initial step is to check the disposal’s reset button and the home’s circuit breaker to rule out simple overloads or tripped circuits before moving to more involved repairs.
Unplug or turn off power, press the small red reset button on the unit until it clicks, then inspect the breaker panel for a tripped switch and reset if necessary.
Test operation.
Noise types and what they indicate about damage
After checking the reset button and breakers, attention turns to the sounds a disposal makes during operation, since specific noises often reveal the nature of the problem.
A humming motor with no grinding suggests a jammed impeller. Loud clanking or metallic scraping indicates foreign objects or bent components. Screeching or burning smells signals motor bearing failure or overheating requiring replacement.
Cost, Repair, and Replacement Considerations
Typical DIY parts and basic tools for clearing a jam usually run modestly, while more complex or electrical issues increase costs.
A professional technician is recommended for persistent faults, leaks, or safety concerns, and will typically provide diagnosis, parts, and labor estimates upfront.
Persistent grinding noises, frequent jams, or corrosion indicate replacement may be more economical, with options ranging from budget models to higher‑capacity units.
Typical costs for DIY parts and tools
A basic set of DIY parts and tools for clearing a garbage disposal jam generally costs between $10 and $60, depending on whether only a hex key and replacement wrench are needed or if a new flange, snap ring, or starter kit is also required.
Additional items—plumbers’ putty, replacement gasket, or a small replacement impeller—raise cost toward $30–$60; specialty tools increase expense further.
When to hire a pro and what to expect from a technician
Small DIY expenses can add up, but some jams exceed what homeowner tools or skills can safely handle.
A professional should be hired for persistent jams, electrical faults, leaks, or unusual noises. Expect diagnosis, quoted repair or replacement costs, parts and labor estimates, warranty details, and safe disposal of old units.
Ask for licensing, insurance, and a written invoice before work begins.
Signs it’s time to replace the disposal and replacement options
When a disposal shows repeated jams, persistent grinding noises, frequent tripping of the circuit breaker, visible leaks, or foul odors that resist cleaning, replacement should be strongly considered. Evaluate age, repair cost versus new unit price, mounting compatibility, and warranty. Budget, midrange, and premium models vary. Choose a licensed installer if unsure.
| Concern | Emotion |
|---|---|
| Costly repairs | Frustration |
| Leaks | Anxiety |
| Old unit | Acceptance |
| New start | Relief |
Safety Reminders and Final Checklist Before Restarting
Before restoring power, the technician verifies that the unit is reassembled correctly and the electrical supply is reconnected using the switch or breaker rather than plugging in by hand.
A brief operational test is performed with the sink stopper removed and hands clear, listening for normal motor sounds and checking for leaks.
Finally, basic safety do’s and don’ts are reviewed—keep utensils out, avoid grease, and never insert fingers into the disposal while it is powered.
Confirming power is reconnected safely
Verify that the disposal’s electrical supply is restored only after all internal obstructions have been cleared and tools removed.
The person should confirm the unit’s power switch is off, reset any tripped breaker or outlet GFCI, and guarantee the circuit breaker labeling matches the disposal.
Visually inspect the area for loose parts, then re-enable power only when the workspace is clear and hands are away from the drain.
Final operational test steps
Proceed with a methodical final operational test that emphasizes safety and confirms proper function: guarantee the disposal switch remains off, hands and tools are clear of the drain, and the unit’s reset button and circuit are in their normal positions before restoring power.
Restore power briefly, listen for smooth motor operation, check for unusual noises or vibrations, verify water flows freely, and confirm no leaks before resuming normal use.
Quick safety do’s and don’ts after repair
After completing the operational test and confirming the disposal appears to run and drain normally, a brief checklist of safety do’s and don’ts should be consulted before regular use resumes.
- Keep power off when clearing future jams; use tools, not hands.
- Avoid fibrous, starchy, or non-food items; cut large scraps small.
- Verify splash guard intact, no leaks, and reset button functions before routine use.
Conclusion
A homeowner reads, assesses, and acts: first unplugging power, then inspecting the chamber; first loosening lodged debris, then turning the flywheel; first testing the reset, then running water. The steps repeat: observe, remove, test; observe, remove, test. Tools sit ready, precautions remain firm, and habits shift. With careful routine, jams shrink, risks fade, and disposals return to quiet service—steady, safe, and reliable once more.