How to Keep Toilet Pipes From Freezing: 9 Proven Tips to Prevent Burst Pipes
To prevent toilet pipes from freezing, combine insulation, consistent water movement, and draft sealing. Use pipe sleeves, foam wrap, or heat tape to minimize heat loss. During extreme cold, let a slow trickle of water run and keep cabinetry doors open to promote warm air circulation. Seal gaps around exterior walls and utility penetrations, and insulate supply lines and shutoff valves near cold surfaces. For unoccupied properties, drain the lines and shut off the water. More detailed steps and product recommendations are available for further guidance.
What Causes Toilet Pipes to Freeze and Burst
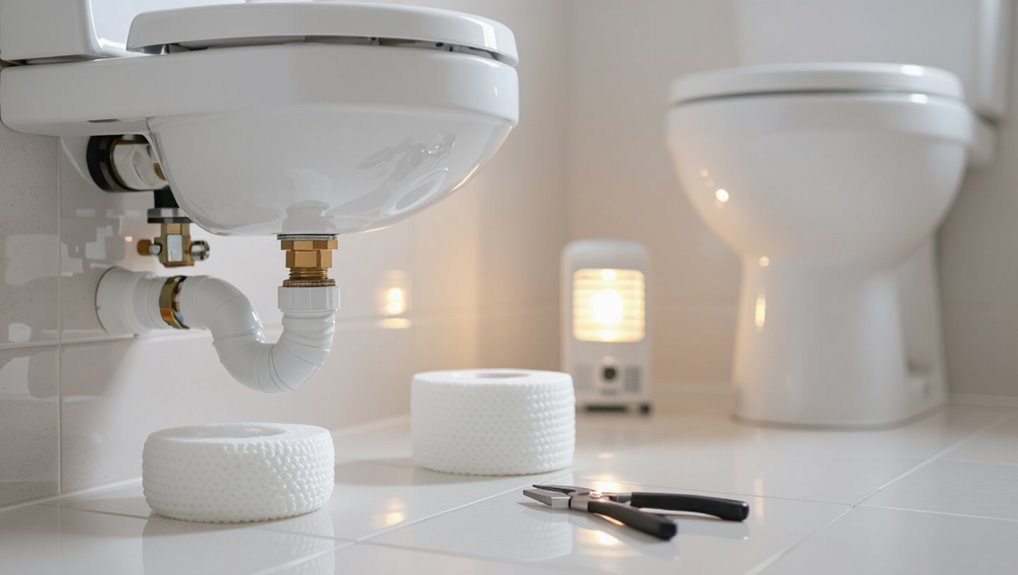
Freezing in toilet supply and drain lines occurs when water inside pipes turns to ice, expands, and creates pressure that can cause cracks or bursts.
Common failure points include exposed sections near exterior walls, uninsulated crawl spaces, and the connections at the tank and shutoff valve.
Warning signs that pipes are at risk include reduced or irregular water flow, visible frost or condensation on pipes, and unusually cold walls or floors near plumbing.
How freezing occurs in toilet supply and drain lines
When exposed to prolonged subfreezing temperatures, water inside toilet supply and drain lines expands as it turns to ice, increasing internal pressure and stressing pipe walls and joints.
Freezing begins at cold spots where heat loss exceeds water’s latent heat, forming ice plugs that block flow and concentrate pressure.
Understanding heat transfer and insulation informs how to keep toilet pipes from freezing and prevent bursts.
Typical failure points in toilet plumbing
Weak points in toilet plumbing commonly occur at joints, bends, and exposed runs where thermal stress and mechanical vulnerability combine.
Supply valves, compression fittings, and copper-to-plastic junctions leak or fracture when frozen.
Wall cavities, uninsulated crawlspaces, and attic-mounted tanks expose lines to cold.
Toilet flange seals and trap connections can split from ice pressure, causing both leakage and structural damage.
Signs that pipes are at risk of freezing
Recognizing the indicators that toilet pipes are at risk of freezing helps homeowners address vulnerabilities identified at joints, bends, and exposed runs.
Cold drafts, frost on pipe surfaces, sluggish flushing, reduced water flow, and unusual noises signal impending ice formation.
Repeated condensation, exterior wall proximity, and subfreezing indoor temperatures increase risk.
Prompt insulation, heat tracing, or localized warming mitigates potential freezing and bursting.
Quick Answer: How to Prevent Toilet Pipes from Freezing
At the first sign of a deep freeze, a homeowner can reduce risk by keeping a steady trickle of water flowing, opening cabinet doors to warm pipes, and adding temporary insulation around exposed lines.
If pipes show signs of freezing, bulging, or leaking despite these measures, a professional plumber should be contacted immediately to prevent burst pipes and water damage.
Routine preventive work and timely professional assessment are recommended for persistent or hard-to-reach plumbing.
Immediate actions to reduce freeze risk during a cold snap
Act quickly when temperatures plunge: during a cold snap, simple, immediate steps can greatly reduce the risk of toilet pipes freezing.
Keep cabinet doors under sinks open to circulate warm air, run a trickle of cold and hot water, raise thermostat a few degrees, add temporary insulation around exposed pipes, and close exterior vents.
Monitor vulnerable areas until temperatures rise.
When to call a professional plumber
Call a professional plumber when preventive measures fail or when signs of a developing freeze appear that the homeowner cannot safely address.
A plumber should be contacted if pipes are visibly bulging, frost-covered, emitting strange noises, showing persistent low flow, or if leaks are suspected.
Professionals can locate hidden freezes, thaw pipes safely, repair damage, and advise on long-term insulation or rerouting to prevent recurrence.
Preparing Toilet Plumbing Before Winter
Before cold weather arrives, a brief inspection of exposed pipes and fittings helps reveal insulation gaps, corrosion, or loose connections.
Attention should focus on toilets in basements, on exterior walls, and in seasonal or seldom-used spaces that are most prone to freezing.
Basic tools and materials to have on hand include pipe insulation, heat tape, pipe sealant, a simple wrench, and a flashlight.
Inspecting exposed pipes and fittings
A quick visual inspection of all exposed toilet supply lines, shutoff valves, and fittings helps identify weaknesses that can lead to freezing.
Look for corrosion, loose connections, hairline cracks, insulation gaps, and signs of prior leaks.
Note metal-to-metal contact that can conduct cold.
Photograph issues, label locations, and prioritize repairs or added insulation before temperatures drop to prevent ice formation and bursts.
Identifying vulnerable toilets (basement, exterior walls, seasonal homes)
When temperatures drop, toilets located in basements, along exterior walls, or in seasonal homes are inherently more at risk of frozen supply lines and tanks. Identifying these vulnerable fixtures requires noting their position relative to unheated spaces, exterior exposures, and the building envelope.
Check for external-facing walls, crawlspace adjacency, uninsulated floors, and rarely used fixtures.
Prioritize areas with poor airflow, cold drafts, or visible condensation.
Tools and materials to have on hand
Essential tools and materials for winterizing toilet plumbing include items that enable insulation, leak prevention, and quick repairs: pipe insulation sleeves or foam wrap sized for supply lines, faucet or line shutoff tools, heat tape with thermostat, pipe joint compound or Teflon tape, a small hand pump or bucket, spare flexible supply lines, and high-quality silicone sealant.
Additionally, a temperature monitor, adjustable wrench, utility knife, spare shutoff valves, and plumber’s tape complete a compact emergency kit.
9 Proven Methods to Prevent Toilet Pipes from Freezing
Practical steps can markedly reduce the risk of toilet supply lines freezing during cold weather. The following concise tactics focus on insulation, controlled heating, and maintaining water movement to protect vulnerable plumbing.
Implementing even a few of these methods can prevent costly damage and disruption.
- Insulate exposed supply lines and shutoff valves, and consider heat tape for weak spots.
- Keep interior temperatures above freezing and open nearby cabinet doors for warm air flow.
- Allow faucets to drip slightly to maintain water movement and reduce freezing risk.
1. Insulate exposed toilet supply lines and shutoff valves
Wrap exposed toilet supply lines and shutoff valves with insulating materials to reduce heat loss and prevent freezing.
Foam pipe sleeves, fiberglass wrap, or pre-slit rubber insulation fit around pipes and valves, sealing gaps with foil tape or weatherproof sealant.
Insulation should cover bends and joints, remain dry, and be checked seasonally for compression or damage to maintain thermal protection and prevent ice formation.
2. Apply heat tape or cable to vulnerable sections
Install heat tape or self-regulating heating cable along vulnerable runs and fittings to provide active, controlled warmth that prevents ice formation.
Select UL-listed products, following manufacturer spacing and overlap guidelines.
Secure cable to pipe with approved tape, protect with pipe insulation or conduit, and route power to a GFCI outlet.
Regularly inspect for wear and replace damaged sections promptly to guarantee reliable freeze protection.
3. Keep interior temps consistent and above freezing
Because steady indoor temperatures eliminate the freeze–thaw cycles that stress plumbing, maintaining living spaces above 32°F (0°C)—and preferably in the 50–65°F range where pipes are safe—is a primary defense against frozen toilet lines.
Consistent heating, programmable thermostats, and sealing drafts reduce cold pockets. Monitor with thermometers in vulnerable rooms and address insulation gaps to maintain steady, above-freezing conditions and prevent localized freezes.
4. Open cabinet doors to allow warm air circulation
Keeping interior rooms warm helps, but localized cold around plumbing can persist even when overall temperatures are adequate.
Opening cabinet doors under sinks and around toilet supply lines permits warmer room air to reach vulnerable pipes, reducing frost risk. This simple, low-cost measure improves circulation and should be employed particularly at night or when exterior walls expose plumbing to colder drafts.
5. Let faucets drip to keep water moving
Let a slow, steady drip from a nearby faucet keep water in the toilet supply line moving, since flowing water is much less likely to freeze than standing water.
Minimal, continuous flow relieves pressure buildup and reduces ice formation. Use a cold-water tap, adjust to a thin stream, and monitor meter/utility usage; this simple, temporary measure protects fixtures during prolonged subfreezing temperatures.
6. Seal drafts around exterior walls and penetrations
A slow faucet drip reduces freezing risk by maintaining flow, but stationary cold air seeping through gaps can still chill nearby supply lines.
Sealing drafts around exterior walls and penetrations protects pipes by eliminating those cold-air pathways. Inspect around vents, utility lines, windows, and sill plates; apply caulk, weatherstripping, foam sealant, or appropriate gaskets.
Prioritize accessible gaps and monitor for settling or deterioration.
7. Install pipe insulation or reroute pipes away from cold zones
Install pipe insulation or reroute vulnerable lines away from unheated spaces to minimize heat loss and prevent freezing.
Foam sleeves, fiberglass wrap, or closed-cell insulation reduce conductive cooling on exposed runs.
When feasible, relocate pipes into conditioned cavities or along interior walls to maintain ambient warmth.
Secure insulation with tape or clamps, seal gaps, and inspect seasonally to guarantee continuous protection against cold-related blockages and bursts.
8. Use frost-proof sillcocks and replace old fixtures
After insulating or rerouting vulnerable lines, attention should turn to upgrading exposed fixtures: frost-proof sillcocks and modern replacement valves considerably reduce the risk of freezing at the point where pipes meet the exterior.
These sillcocks extend the shutoff mechanism inside heated space, preventing standing water in the vulnerable spout.
Replace corroded or worn fixtures and guarantee proper winter-grade seals for reliable performance.
9. Winterize seasonal properties: drain lines and shut off water
Seasonal-shutdown procedures are the most reliable way to eliminate freeze risk in properties left unoccupied for extended periods.
Owners should shut off the main water supply, drain all lines, flush toilets, and open drain valves.
Add antifreeze to traps and appliances where recommended.
Document valve locations and leave written instructions for caretakers.
Periodic inspections during cold snaps further reduce freeze and burst risks.
How to Insulate and Protect Specific Toilet Components
Attention to individual toilet parts can prevent localized freezing and costly repairs.
The discussion compares insulating flexible supply lines with wrapping rigid copper or PVC, and describes protection for the shutoff valve and closet flange.
It also covers insulating behind the tank and around toilets on exterior walls to block cold transfer.
Insulating flexible supply lines vs. rigid copper/PVC
When protecting toilet water lines from freezing, the choice between insulating flexible supply lines and rigid copper or PVC dictates both method and materials: flexible braided or plastic hoses benefit from foam tube sleeves or self-sealing wrap that conform to bends, while rigid copper and PVC are best served by higher-density foam jackets, heat tape where permissible, and careful sealing at joints to prevent thermal bridging.
Flexible lines need snug, continuous coverage.
Protecting the shutoff valve and closet flange
Address the shutoff valve and closet flange as distinct weak points for freeze damage: the shutoff valve’s exposed metal and threaded joints readily conduct cold into the supply line, while the closet flange and the low space around the toilet can allow cold air to reach trap and tank connections.
Insulate valves with foam covers, wrap connections with self-fusing tape, and seal gaps around the flange with foam or caulk to block drafts.
Insulating behind toilet tanks and near exterior walls
A narrow cavity behind a toilet and the adjacent exterior wall present common cold spots where chilled air can reach the tank, supply lines, and trap; insulating these areas reduces heat loss and prevents freeze-related damage.
Install closed-cell foam board or spray foam in the wall cavity, add a fitted foam tank wrap, and insulate exposed supply lines.
Seal gaps to stop drafts and maintain thermal continuity.
Step-by-Step Guide: Installing Heat Tape on Toilet Pipes
The section outlines how to select suitable heat tape and a compatible thermostat based on pipe material and local temperatures.
It then explains preparing and cleaning pipes, applying the tape safely, and following manufacturer installation guidelines.
Finally, it covers initial testing, routine inspections, and seasonal maintenance to guarantee reliable winter performance.
Choosing the right heat tape and thermostat
Select heat tape and a compatible thermostat based on pipe material, exposure, and local low temperatures to guarantee reliable freeze protection without overheating.
Choose self-regulating tape for variable temperatures and metal pipes, constant-wattage for consistent heat zones.
Match thermostat type (ambient, pipe-surface, or integrated) to installation needs.
Verify voltage, amperage, and UL/ETL listings.
Prioritize manufacturer compatibility and warranty.
Preparing pipes and applying tape safely
Begin by shutting off water to the toilet and draining the supply line to prevent leaks while working.
Inspect pipes for corrosion or damage; clean and dry surfaces thoroughly.
Determine tape routing, avoiding overlaps and fixtures.
Secure heat tape per manufacturer instructions with non-compressive fasteners and temperature-rated electrical tape.
Maintain clearance from insulation edges and combustible materials.
Restore water and check connections before powering the heater.
Testing and maintaining heat tape through winter
Verify heat tape operation and inspect its installation before the first freeze and at regular intervals thereafter to guarantee continuous protection.
Check for frayed insulation, secure fastenings, and unobstructed contact with pipe. Test electrical continuity and thermostat function per manufacturer instructions.
Replace damaged tape immediately. Clear debris and snow from exposed sections and monitor power supply and GFCI trips throughout winter to prevent failures.
Cost, Time, and Effectiveness Comparison of Prevention Methods
A concise comparison of common prevention methods helps readers weigh upfront cost, installation time, durability, and best use cases before choosing. The table below summarizes these factors for typical options. The following discussion and examples clarify trade-offs and recommendations.
| Method | Typical Upfront Cost | Typical Installation Time |
|---|---|---|
| Heat tape | $20–$100 | 30–90 minutes |
| Pipe insulation | $5–$30 | 15–60 minutes |
| Cabinet warming/heating pad | $10–$60 | 10–30 minutes |
| Professional pipe heat/relocation | $200–$1,500+ | 2–8+ hours |
Upfront cost, installation time, durability, and recommended use cases
Cost comparison, required installation time, expected lifespan, and situational suitability determine which freeze-prevention method is best for a given property. A concise comparison follows to weigh upfront cost, installation time, durability, and ideal use cases for common options.
| Method | Upfront Cost | Best Use Case |
|---|---|---|
| Pipe insulation | Low | Short exterior runs |
| Heat tape | Medium | Vulnerable exposed pipes |
| Heated enclosure | High | Remote or extreme cold |
Common Mistakes and What to Avoid
Common mistakes that lead to frozen toilet pipes include unsafe use of space heaters and extension cords, which create fire and shock hazards.
Incorrect choice or sloppy installation of insulation can leave gaps that allow freezing to occur.
Failure to address nearby cold areas—such as exterior walls, crawl spaces, or unheated adjacent rooms—often negates other preventive efforts.
Unsafe use of space heaters and extension cords
Many homeowners rely on portable space heaters during cold snaps, but improper placement and the use of overloaded or damaged extension cords greatly increase fire and electrocution risks.
Heaters should remain on stable, noncombustible surfaces, away from combustibles and water.
Extension cords are temporary only; using heaters with grounded, dedicated outlets and checking cords for damage prevents overheating, sparks, and costly accidents.
Improper insulation materials and installation errors
Choose materials and methods carefully when insulating pipes; using the wrong products or installing them incorrectly can negate protection and create hazards.
Common errors include undersized or non-weatherproof insulation, gaps at joints, compressing foam, and failing to secure or seal seams.
Improper adhesives, exposed vapor barriers, and blocking access for maintenance also reduce effectiveness and may cause moisture-related damage.
Overlooking adjacent cold areas that affect toilet pipes
Because cold travels through walls and floors as easily as it does through pipes, neglecting nearby unheated spaces can undermine any insulation effort on toilet supply lines and drain vents.
Ignoring crawlspaces, basements, exterior walls, or adjacent closets allows cold bridges to form.
Effective prevention addresses the whole envelope: seal gaps, add cavity insulation, reroute or heat vulnerable lines, and maintain consistent interior temperatures.
How to Respond If a Toilet Pipe Freezes or Bursts
If a toilet pipe freezes or bursts, the first priority is to minimize water damage by shutting off valves, collecting water, and moving valuables away.
Next steps include safe thawing methods—such as applying heat with a hair dryer or heat tape to exposed sections—while avoiding open flames and electrical hazards.
If the leak is large, the main water supply should be shut off and an emergency plumber contacted immediately.
Immediate steps to minimize damage
Act quickly to limit water damage and prevent further pipe failure: shut off the toilet’s water supply at the shutoff valve and, if possible, turn off the home’s main water supply.
Drain the toilet tank and bowl, mop up visible leaks, place buckets under active drips, and move valuables away.
Notify a licensed plumber and document damage with photos for insurance.
Thawing frozen toilet pipes safely
After shutting off water and containing leaks, attention turns to thawing frozen toilet pipes safely to restore service and prevent bursts from worsening.
Begin by warming the area with space heaters or a hair dryer directed along exposed pipes; avoid open flames.
Apply gentle, even heat and monitor nearby materials for overheating.
Once thawed, inspect for cracks and slowly restore water to check for leaks.
When to shut off the main water supply and call an emergency plumber
When visible water is pooling, pipes are visibly bulging, or a rapid drop in household water pressure occurs, the main water supply should be shut off immediately and an emergency plumber contacted.
These signs indicate a high risk of a burst or significant leak that can cause major water damage if not isolated and repaired promptly.
After shutting off, document damage, stop power to affected areas, and await professional assessment.
Long-Term Solutions to Prevent Recurring Freezing
Long-term prevention focuses on durable changes rather than temporary fixes.
Recommended measures include reconfiguring plumbing and using freeze-resistant materials, adding automatic temperature controls and freeze alarms, and following a seasonal maintenance checklist.
Implementing these steps reduces the risk of repeat freezing and simplifies ongoing upkeep.
Upgrading plumbing layout and materials
Reconfiguring the plumbing layout and selecting more resilient materials provide the most reliable defense against recurring frozen toilet pipes.
Strategies include rerouting supply lines away from exterior walls, consolidating valves and manifolds inside conditioned space, and increasing insulation clearance.
Replacing brittle iron or older PVC with PEX or copper sized for adequate flow reduces vulnerability.
Durable fittings and proper slope minimize standing water and freeze risk.
Installing automatic temperature controls and alarms
After rerouting lines and upgrading materials, adding automatic temperature controls and freeze alarms brings active monitoring and response to the system.
Thermostatic controllers regulate trace heating and space heaters to maintain safe pipe temperatures.
Wireless sensors detect rapid drops and send alerts or trigger pumps and heaters.
Integrated systems record history for diagnostics, reducing freeze risk and enabling targeted interventions before damage occurs.
Routine seasonal maintenance checklist
A seasonal maintenance checklist outlines the specific inspections and actions required before and during cold months to prevent recurring toilet-pipe freezes.
It specifies inspection frequency, insulation integrity, shutoff valve operation, and corrective steps. Routine records track trends and trigger professional service when deterioration appears.
Clear responsibilities reduce missed tasks and recurring failures.
- Inspect insulation and heat cables
- Exercise and label shutoff valves
- Document checks and schedule repairs
Resources and Recommended Products
This section lists practical resources and product types for preventing toilet pipe freezes, including common pipe insulation materials, popular heat tape models, and compatible thermostats.
It also outlines when to hire professional services, what qualifications to look for, and typical scope and costs of a service visit.
The aim is to help readers compare options and decide between DIY installs and contractor-led solutions.
Types of pipe insulation, heat tape models, and thermostats
When selecting materials to prevent frozen toilet supply lines, homeowners should prioritize insulation R-value, installation ease, and reliable heat-tracing options. The following section outlines common pipe insulations, proven heat-tape models, and compatible thermostats to help match product performance to specific pipe types and exposure conditions.
Closed-cell foam, fiberglass wrap, and rubber sleeves suit various pipes.
Self-regulating heat tape (e.g., Raychem), silicone-adhesive options, and simple line-voltage or low-voltage thermostats provide control.
Professional services to consider and what to expect
While minor pipe wraps and heat-tape installations can suit many DIYers, engaging qualified professionals is advisable for complex systems, hidden supply lines, or repetitive freeze issues.
Licensed plumbers and HVAC contractors assess vulnerability, recommend insulation upgrades, install thermostatic heat cable, and reroute or add access points.
Expect diagnostics, written estimates, permits when needed, and warranties.
Request references, proof of insurance, and clear maintenance guidance.
Summary Checklist: Winter-Proofing Your Toilet Plumbing
Although freezing temperatures can strike suddenly, a concise checklist helps confirm toilet plumbing remains functional and damage-free throughout winter.
A compact plan assures routine inspections, insulation, and timely professional help to prevent freezes and bursts.
- Inspect and insulate exposed pipes and valves.
- Maintain minimal heat and allow slow water flow during cold snaps.
- Schedule pre-winter professional inspection and repairs.
Conclusion
Approximately 40% of homeowners experience some form of plumbing freeze each winter, underscoring the importance of preventive measures. Implementing insulation, maintaining gentle heat, and using pipe sleeves or heat tape greatly reduces risk. Quick fixes and long-term upgrades protect fixtures and avoid costly repairs. With basic winterization steps—insulating exposed pipes, sealing drafts, and monitoring temperatures—homeowners can dramatically lower the chance of frozen or burst toilet pipes and associated water damage.