How to Replace a Yard Hydrant Head: Step-by-Step DIY Guide for Fast Repairs
To replace a yard hydrant head, you can complete the task in about one to three hours using basic tools and a compatible replacement head. Start by shutting off and draining the line, then expose the riser. Next, loosen the retaining nuts and lift the old head straight up. Inspect the riser and packing, then install new gaskets along with the replacement head. Finally, torque the fasteners, apply thread sealant, and test for leaks. Moderate wrenching skills and safety precautions are necessary. Detailed steps and troubleshooting tips follow below.
Fast Overview: When to Replace a Yard Hydrant Head and What to Expect
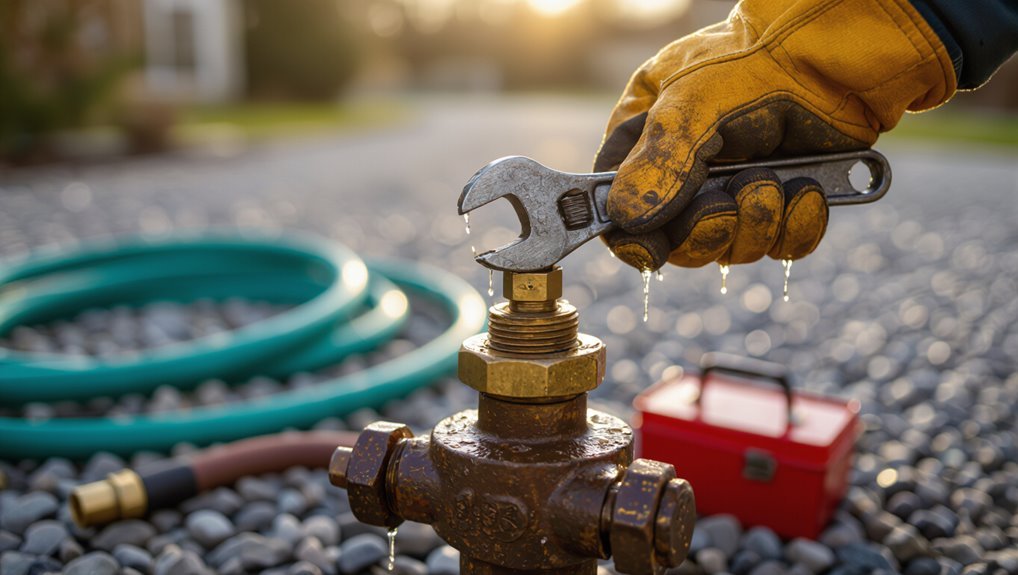
Signs such as persistent leaks, a stiff or stuck handle, or visible corrosion indicate the hydrant head may need replacing.
The replacement is often a straightforward DIY task that typically requires basic hand tools, a replacement head kit, and about one to two hours for a competent homeowner.
Expected difficulty ranges from easy to moderate depending on freeze damage and buried pipe conditions.
Common signs the hydrant head needs replacing
Several clear indicators show when a yard hydrant head requires replacement: persistent leaking at the spout or packing nut, difficulty opening or closing the valve, water spurting from joints, recurring freezing damage, or visible corrosion and cracking.
Other signs include reduced flow, muddy discharge, or a loose handle. Recognizing these helps determine when to learn how to replace yard hydrant head promptly.
Time, difficulty, and tools needed for a DIY replacement
A straightforward yard hydrant head replacement typically takes one to two hours for a homeowner with basic plumbing skills. More time may be needed if the hydrant is corroded, buried deep, or frozen.
Difficulty is moderate: basic mechanical ability, wrenching, and pipe sealing skills suffice.
Essential tools: adjustable wrench, socket set, replacement head, plumber’s tape, pipe dope, penetrating oil, and safety gloves; optional shovel.
Safety Precautions and Prep Before Beginning
Before starting work, the water supply should be shut off and the line drained to prevent flooding or freezing.
The worker must wear appropriate PPE, follow safe digging practices, and expose only the area necessary to reach the hydrant.
Underground utilities must be located and 811 contacted to avoid strikes and guarantee a safe repair.
Shutting off water supply and draining the line
Shut off the supply at the main valve and confirm the house shutoff is fully closed to isolate the yard hydrant; then relieve pressure by opening a downstream faucet or the hydrant itself until water stops flowing.
After flow ceases, drain the line by opening the hydrant and any low-point drains.
Verify no residual pressure remains before disassembly to prevent leaks or spraying during replacement.
Personal protective equipment and safe digging practices
Wear appropriate personal protective equipment and use safe digging techniques to prevent injury and utility strikes.
Protective gear includes safety glasses, durable gloves, steel-toe boots, and hearing protection if using power tools.
Use hand tools near the hydrant, dig slowly, and shore trench walls to prevent collapse.
Maintain clear footing, control loose soil, and keep a first-aid kit and communication device nearby.
Locating underground utilities and calling 811
Any excavation should begin with locating underground utilities and contacting the local 811 service to request a mark-out; this guarantees buried gas, electric, water, sewer, and telecommunications lines are identified before digging.
Waiting the required period, confirming marks, and respecting color codes prevents strikes. If marks are unclear, request a field visit.
Never assume maps are current; hand digging near marks reduces risk.
Tools and Replacement Parts Required
A concise list of essential tools—adjustable wrench, pipe wrench, screwdriver set, plumber’s tape, and channel-lock pliers—should be gathered before starting.
The replacement head package and its components must be inspected for model compatibility, seat size, and included gaskets or screws.
Optional aids like penetrating oil, a small torch, or a basin wrench can speed removal and reassembly but are not always necessary.
Essential tools list
Preparation requires the right tools and replacement parts to remove the old head, inspect the riser, and install the new assembly quickly and correctly.
Essential tools include wrenches, sealant, and inspection gear for safe, efficient work.
- Adjustable wrench set for nuts and packing
- Pipe wrench for stubborn fittings
- Plumber’s tape and thread sealant
- Flashlight and inspection mirror for riser checks
Replacement head components and compatibility checklist
With the right tools on hand, attention turns to the replacement head itself and ensuring all components match the existing riser and supply conditions.
- Confirm thread size and type (NPT/pipe) match riser.
- Verify valve seat and plunger dimensions.
- Check packing gland and O-ring sizes for seal compatibility.
- Match material (brass/bronze/stainless) to water chemistry and local codes.
Optional tools that speed the job
Gathering a few optional but time-saving tools can cut the job’s duration and frustration markedly.
A compact inspection camera helps locate internal debris. A cordless impact driver speeds fastener removal. A strap wrench protects polished fittings. Thread-cutting lubricant eases frozen parts. A magnetic pickup retrieves dropped screws. A small propane torch aids stuck joints, used cautiously.
These items streamline replacement and reduce downtime.
Identifying Your Yard Hydrant Type and Measuring for Parts
The reader should first distinguish whether the hydrant is an above-ground, frost-free, or buried model, since each type requires different replacement parts.
Next, they must measure stem length, note the flange style, and confirm thread size to guarantee a proper fit.
Finally, verifying the manufacturer and model number against parts diagrams or replacement catalogs will confirm exact compatibility.
Above-ground vs frost-free vs buried hydrants
Identifying the type of yard hydrant is the first step before ordering parts or starting repairs.
Above-ground hydrants sit entirely visible, easy to access and replace.
Frost-free hydrants extend below frost line with a long stem and internal drain to prevent freezing.
Buried hydrants have most components underground, requiring excavation and different seals and mounting considerations for replacement.
How to measure stem length, flange type, and thread size
Once the hydrant type is confirmed, measuring the stem length, flange style, and thread size guarantees replacement parts fit properly.
Measure stem from flange face to stem end; record in inches.
Note flange: round, square, or welded pad and bolt hole count and diameter.
Determine thread type (UN/UNF or BSP) and pitch using a thread gauge or compare sample fittings for an exact match.
How to verify manufacturer/model for exact parts
How can a homeowner be certain a replacement head will fit? Inspect nameplate, casting marks, or stamped model numbers on the riser.
Photograph the hydrant and note stem diameter, thread pitch, flange bolt pattern, and valve type.
Contact manufacturers or authorized dealers with images and measurements to confirm compatible heads or part numbers.
Keep receipts and part codes for future reference.
Step-by-Step Guide to Replacing a Yard Hydrant Head
The procedure begins with shutting off the water, relieving pressure, and clearing the work area.
Next, the hydrant head is exposed, retaining hardware removed, and the old head carefully extracted for inspection.
Finally, the riser, packing, and valve stem are checked for damage before installing the new head with correct gaskets and packing.
Step 1 Turn off water, depressurize, and clear the area
Shut off the supply at the main valve before any work begins.
Then open the hydrant to relieve residual pressure and drain standing water.
Confirm no flow and tag the valve if possible.
Clear vegetation, debris, and tools from the work zone to guarantee safe access.
Wear gloves and eye protection.
Keep a bucket or towels handy to catch residual drips.
Step 2 Expose the hydrant head and remove retaining hardware
Begin by uncovering the hydrant head to gain clear access: remove soil, gravel, or mulch until the flange and riser are visible and there is room to work.
Clear debris, then inspect for corrosion or frozen fittings. Use penetrating oil on seized fasteners, allow soak time, and select the correct wrench or socket.
Loosen and remove retaining bolts or nut(s), keeping hardware organized for reference.
Step 3 Extract the old hydrant head safely
Lift the hydrant head straight up, keeping movements steady to avoid twisting the riser.
The technician grips the head, lifts evenly, and withdraws it from the riser while watching for resistance.
If stuck, gentle rocking and a penetrating lubricant help free seized parts.
Place the removed head on a protected surface and collect dropped components for inspection and reuse or replacement.
Step 4 Inspect the riser, packing, and valve stem for damage
With the head removed and parts set aside, the technician inspects the riser, packing, and valve stem for wear or damage before fitting the new head.
They look for corrosion, cracks, pitting, bent stem, and compressed or frayed packing.
Threads and seating surfaces are checked for deformation.
Any compromised components are noted for replacement to guarantee a reliable, leak-free repair.
Step 5 Install new head, gaskets, and packing correctly
Carefully position the new head over the riser, ensuring the seating surfaces align and the valve stem passes cleanly through the head opening; this prevents cross-threading and uneven compression of gaskets.
Install new gaskets in specified order, seat packing evenly around the stem, and compress just enough for a watertight seal without binding.
Verify smooth stem movement and visible gasket alignment before proceeding.
Step 6 Reassemble, torque specifications, and thread sealing tips
After confirming the head seats correctly and the stem moves freely, the technician proceeds to reassemble the remaining components and apply specified torque and thread sealing practices.
Components are reinstalled in order, fasteners tightened to manufacturer torque values with a calibrated wrench.
Threaded joints receive appropriate tape or compound applied in the correct direction.
Final checks verify alignment and secure, leak-resistant connections before restoring service.
Step 7 Slowly restore water, test for leaks, and adjust packing
Restore water slowly to pressurize the line while observing all joints and the hydrant head for leaks.
Then operate the handle to cycle water through the assembly; if seepage appears at the stem or packing area, stop, relieve pressure, and adjust the packing nut incrementally until leakage ceases while maintaining smooth valve action.
After repair, recheck under pressure, verify proper drainage, and tighten or back off packing as needed.
Troubleshooting During and After Replacement
After replacement, common problems such as minor leaks, loose fittings, or misaligned packing should be checked and corrected with simple adjustments or replacement parts.
If the hydrant continues to leak, the procedure recommends isolating the supply, rechecking seat and washer condition, and replacing damaged seals or the entire bonnet assembly if necessary.
For seized or corroded components, the guide advises applying penetrating lubricant, using appropriate extraction tools, or cutting and replacing the affected parts to restore proper function.
Common problems and quick fixes
When issues arise during or after replacing a yard hydrant head, a methodical troubleshooting approach helps isolate causes quickly. Common problems include persistent leaks, low flow, difficulty operating the handle, and frozen or noisy operation.
- Check tightened connections and new packing for leaks.
- Clear debris from inlet screens and supply lines to restore flow.
- Inspect piston, spring, and handle linkage for binding.
- Drain, insulate, or replace worn seals to reduce noise and freeze risk.
What to do if the hydrant still leaks
If a yard hydrant continues to drip or gush after replacing the head, proceed with systematic troubleshooting to pinpoint the source and severity of the leak.
Verify tightness of connections, inspect new seals for damage, and confirm the riser and packing nut are properly seated.
Isolate the line to test for supply-side leaks.
If leakage persists, document observations before consulting a plumber or replacing additional parts.
Dealing with seized or corroded components
Persistent leaks can signal more than a failed seal; corroded or seized components often complicate repair and require targeted approaches.
The technician inspects threads, packing, and shutoff parts for rust, mineral buildup, or deformation. Penetrating oil, gentle heat, and appropriate wrenches free stuck parts; severely corroded items are replaced.
Reassemble with anti-seize compound and test under pressure to confirm integrity.
When to Repair vs Replace the Entire Hydrant
A concise comparison of repair versus full replacement weighs projected parts and labor costs against the expected lifespan and performance of the existing hydrant.
Observable signs such as persistent leaks, extensive corrosion, frozen or stripped stems, or damage to the riser typically favor complete replacement.
Upgrading to a modern model can offer improved durability and freeze protection but requires higher upfront expense and installation effort.
Cost and labor comparison
Comparing the cost and labor of repairing a yard hydrant head versus replacing the entire unit hinges on scope of damage, accessibility, and parts availability. Repair often requires fewer hours and cheaper parts; replacement demands more excavation, time, and higher material cost. Evaluate complexity, downtime tolerance, and long-term reliability when choosing.
| Task | Typical Hours | Typical Cost |
|---|---|---|
| Repair | 1–3 | $20–$150 |
| Replace | 3–8 | $150–$600 |
Signs that indicate full replacement is necessary
When recurring leaks, fractured or corroded components, extensive underground damage, or repeated failures despite repairs are present, full replacement is usually warranted; these signs indicate compromised structural integrity, unreliable seals, or wear beyond economical repair.
Other indicators include persistent freezing damage, bent or broken risers, severe mineral buildup obstructing flow, and inability to obtain compatible replacement parts for safe, reliable operation.
Pros and cons of upgrading to a new model
How should one decide between repairing an existing yard hydrant and upgrading to a new model? The decision weighs cost, frequency of failures, and performance.
Repairing saves money for isolated issues; replacement offers modern materials, improved freeze protection, warranty, and reliability.
Consider age, parts availability, labor complexity, and long-term maintenance costs.
Choose replacement when repairs are recurrent or parts are obsolete.
Maintenance Tips to Extend Hydrant Head Life
Routine seasonal winterizing and summer checks help prevent freeze damage and identify leaks before they worsen.
A regular inspection schedule—typically spring and fall, with quick visual checks monthly during active seasons—keeps wear manageable.
Periodic lubrication, timely packing replacement, and corrosion prevention treatments further extend the hydrant head’s service life.
Seasonal winterizing and summer checks
Although the yard hydrant head is built for seasonal use, preparing it for winter and inspecting it at the start of summer greatly reduces wear and failure.
Winterize drains, remove and store removable parts, and insulate exposed fittings.
Summer checks restore function and spot corrosion:
- Drain and blow out lines.
- Lubricate stem and packing.
- Tighten fittings and replace seals.
- Test operation under pressure.
Recommended inspection schedule
A simple, regular inspection schedule helps catch wear before it becomes failure: inspect the hydrant head visually at least once per month during the active season.
Perform a hands-on operational check and lubrication every three months, and carry out a full seal and packing inspection with any necessary replacements annually.
Record findings, note leak sources, verify shutoff function, and schedule repairs promptly to prevent escalation.
Lubrication, packing replacement, and corrosion prevention
Maintain lubrication and packing on a yard hydrant head to preserve smooth operation, prevent leaks, and slow corrosion.
Periodically apply silicone or NSF-approved lubricant to the stem, replace packing with braided PTFE or flax packing when seepage appears, and tighten gland nut to specification.
Remove rust, coat exposed metal with corrosion inhibitor, and guarantee drainage and winterization to extend service life.
Estimated Time, Cost, and Materials Checklist for the Project
A concise time estimate, typical costs, and a materials checklist help frame the yard hydrant head replacement before work begins.
A DIY replacement commonly takes one to three hours depending on accessibility and corrosion, while parts usually range from $30 to $150 and additional fittings or tools can add more.
The writer should note conditions—extensive corrosion, buried damage, or plumbing code concerns—when hiring a professional is advisable.
Typical time breakdown for DIY replacement
Efficiency matters when planning a DIY yard hydrant head replacement, so this section outlines realistic time estimates, expected costs, and a concise materials checklist.
Typical breakdown:
- prep and shutoff 10–20 minutes;
- removal and inspection 20–40 minutes;
- part selection and fitting 15–30 minutes;
- installation and leak test 20–40 minutes;
- cleanup 10–15 minutes.
Expected minimal tools, replacement head, plumber’s tape, basic hand tools.
Material and part cost ranges
Typical replacement heads, seals, and fasteners for a yard hydrant generally fall into three price tiers:
budget (basic replacement head and seals) around $15–$35,
mid-range (brass or stainless components with better seals) $35–$75,
and premium (heavy-duty or specialty heads) $75–150+.
- Replacement head: $15–$150+
- Seals and washers: $2–$20
- Fasteners and gaskets: $1–$15
- Specialized parts/tools: $10–$60
When to call a professional plumber
Call a professional plumber when the job exceeds basic head-and-seal replacement or when time, tools, or confidence are lacking.
Hire help for frozen or burst lines, extensive digging, corroded or welded components, unclear pipe configurations, or persistent leaks after replacement.
Expect higher labor and diagnostic costs but reduced risk.
Professionals provide permits, pressure testing, and durable repairs beyond typical DIY scope.
Visual Reference and Step Photos to Follow

Begin by presenting a clear sequence of photos that correspond directly to each repair step, with close-ups of key components (handle, packing nut, riser, and diaphragm) and wider shots showing tool placement and overall setup.
Include numbered captions, scale references, and brief notes on orientation and safety.
Highlight common trouble spots with arrows and before/after comparisons for quick verification.
Conclusion
Replacing a yard hydrant head is straightforward and satisfying, restoring water access without full replacement. Some may worry it’s too technical or costly, but with basic tools, a compatible head, and this guide’s clear steps, the job is affordable and manageable for most DIYers. Completing the repair brings relief—no more frozen or leaking fixtures—and confidence in maintaining outdoor plumbing, saving time and money while protecting your property’s water supply.