How to Test a Pressure Water Line at Home: Step-by-Step Guide for Accurate Results
To test a pressure water line at home, isolate a segment of the line, attach a calibrated gauge at a designated test point, and record the static pressure with the upstream valve open. Next, run your fixtures to check dynamic pressure and monitor for any rapid drops, which can indicate leaks. A normal performance shows a stable static pressure between 40–60 psi and a drop of 10–15 psi under demand. Small leaks or regulator issues can often be fixed DIY, but if problems persist, it’s best to consult a professional. This guide will take you through the necessary steps for accurate testing and troubleshooting.
How to Tell If You Need to Test a Pressure Water Line Now
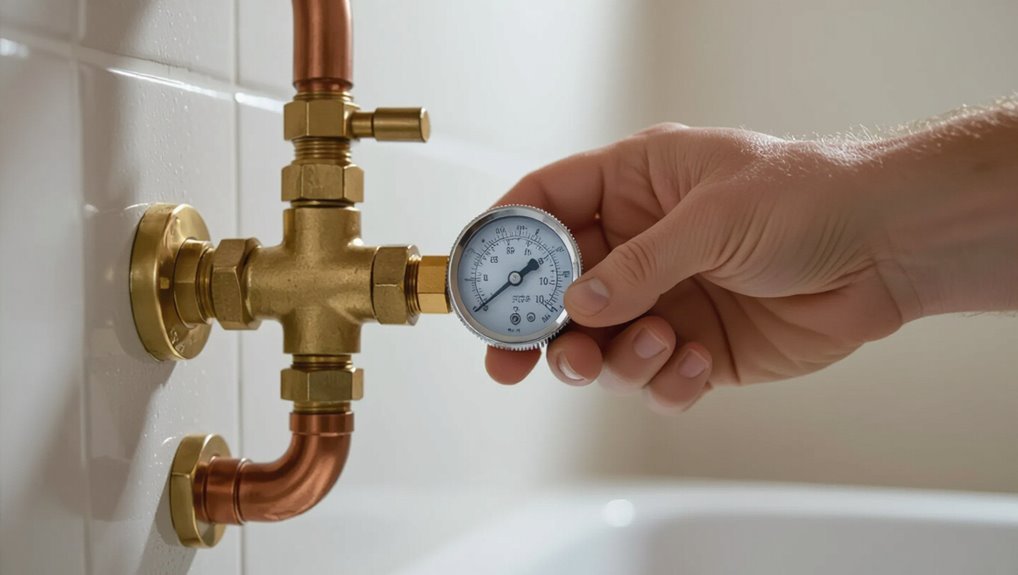
Visible indicators such as fluctuating flow, banging pipes, or unusually high water bills can signal pressure problems that warrant testing.
Ignoring these signs risks burst pipes, water damage, and safety hazards from malfunctioning appliances.
Minor pressure anomalies may be tested by a homeowner, but persistent, severe, or unclear issues should prompt a professional inspection.
Common signs of pressure problems in home water lines
Several clear indicators can signal a pressure problem in a home’s water line and warrant immediate testing. Homeowners may notice fluctuating or weak flow, sudden surges, banging pipes, or reduced hot water performance.
Visible leaks, frequent tripped pressure switches, and abnormal meter readings also suggest issues. These signs prompt actions such as how to test pressure water line using a gauge and basic diagnostics.
Safety and property risks of ignoring pressure issues
Any prolonged deviation from proper water pressure can quickly escalate from a minor nuisance to serious safety hazards and costly property damage.
Low pressure can indicate leaks that promote mold, structural rot, and contaminated backflow.
High pressure stresses pipes, fittings, appliances, and fixtures, increasing rupture risk and scalding potential.
Ignoring changes raises repair costs, health risks, insurance complications, and long-term deterioration.
When to call a professional vs. when to test yourself
When should a homeowner attempt a DIY pressure check and when is a professional call warranted?
A homeowner can test when pressure fluctuations are intermittent, fixtures are affected, and basic tools and shutoff access exist.
Call a professional if leaks, mold, persistent low or high pressure, multiple affected zones, weak plumbing knowledge, or visible pipe damage occur.
Safety and long-term system integrity dictate escalation.
Quick Overview: What a Pressure Water Line Test Shows
A pressure water line test primarily reveals whether the system maintains adequate pressure, contains leaks, or has blockages affecting flow.
It typically reports static, dynamic (working), and residual pressures, each indicating supply strength, performance under use, and pressure loss during operation.
For most residential systems, acceptable readings usually fall between about 40–60 psi static and a drop no greater than 10–15 psi under normal demand.
Direct answer: purpose and expected outcomes of testing
Confidence in a home’s plumbing integrity comes from a pressure water line test, which verifies whether pipes hold system pressure and reveals leaks, weak joints, or pressure loss that could indicate hidden damage.
Its purpose is to confirm system tightness, locate failing sections, and validate repairs.
Expected outcomes include stable pressure (pass), measurable drop (fail), or identification of specific leak locations for remediation.
Types of pressure measurements and what they indicate
Following confirmation that a system holds or loses pressure, the next step is to interpret specific measurement types to pinpoint issues.
Static pressure reveals baseline supply and closed-system integrity.
Differential (drop) rate indicates leak size or consumption.
Dynamic pressure under flow shows pump performance and restrictions.
Pressure spikes or fluctuations suggest water hammer, valve failure, or intermittent pump cycling requiring targeted inspection and repair.
Typical pressure ranges for residential water lines
When evaluating a residential pressure water line, typical household static pressures usually fall between 40 and 80 psi, with 50–60 psi considered ideal for most fixtures and appliances.
Pressure below 40 psi can cause weak flow and appliance issues; above 80 psi risks pipe stress, leaks, and premature fixture wear.
Consistent readings indicate stable supply; fluctuations suggest regulator faults or system leaks.
Tools and Materials Required for Accurate Home Testing
A brief inventory of tools and materials sets the stage for accurate home pressure testing, highlighting essentials such as a pressure gauge, shutoff keys, and appropriate fittings.
Optional instruments like a manometer or pressure logger can improve measurement precision, while safety gear and a simple preparation checklist reduce risk.
Guidance on selecting the correct gauge range and compatible fittings guarantees meaningful, reliable results.
Essential tools (pressure gauge, shutoff keys, fittings)
Essential tools for testing a home pressure water line include a reliable pressure gauge, appropriate shutoff keys, and a selection of fittings to match the system’s connectors.
The gauge should read household pressure ranges and include adapters for hose, garden, or threaded plumbing.
Shutoff keys guarantee isolation for safe testing.
Fittings must seal properly to prevent leaks and enable accurate, repeatable measurements.
Optional tools that improve accuracy (manometer, pressure logger)
To improve measurement precision beyond standard gauges and fittings, homeowners may opt for higher-grade instruments such as a manometer or a pressure logger.
A manometer provides immediate, highly accurate static and differential readings; a pressure logger records time-stamped fluctuations for trend analysis and leak detection.
Both require proper fittings and calibration; their data improves diagnosis, documentation, and decisions about repairs or plumber consultation.
Safety gear and preparation checklist
Several items should be gathered before testing a pressure water line to confirm accuracy and personal safety.
Recommended safety gear includes safety glasses, work gloves, and hearing protection if using powered tools.
Prepare shutoff valve access, drain pans, rags, and a reliable wrench set.
Ascertain clear workspace, good lighting, and a phone for emergencies.
Verify water supply is isolated before starting.
How to choose the correct pressure gauge and fittings
When selecting a pressure gauge and fittings for home testing, the user should prioritize compatibility with the system’s maximum expected pressure, connection size and thread type, and appropriate accuracy class.
A gauge rated above the system’s normal operating pressure with a clear scale and ±2% or better accuracy is ideal, while fittings must match pipe material (copper, PVC, or iron) and thread standard (NPT, BSP, compression) to guarantee a leak-free, safe connection.
Choose brass or stainless fittings, use thread sealant or PTFE tape rated for potable water, and prefer a 0–100 psi dial for residential systems unless higher pressure is expected.
Preparing Your Home for a Pressure Test
Before testing, the main shutoff, water meter, and suitable test points should be identified to control and monitor flow.
Systems that must be drained or isolated should be addressed and vulnerable appliances or fixtures protected to prevent damage.
The homeowner should verify whether the supply is from a public system or a well and check any applicable local regulations.
Locating the main shutoff, water meter, and test points
Although often tucked away in basements, utility closets, or near the foundation, the main shutoff valve, water meter, and convenient test points should be identified and accessed before any pressure test begins.
Locate the street-side meter, interior shutoff, and visible hose bibs or cleanouts that allow gauge attachment.
Note valve types, orientation, and any obstructions for rapid access during testing.
Draining and isolating systems before testing
Having identified the main shutoff, meter, and accessible test points, the next step is to drain and isolate the section of plumbing to be tested.
Close branch valves, open nearby faucets and hose bibs to release trapped water, and vent high points.
Cap or plug downstream fixtures and confirm isolation by checking zero flow at the main and test gauges before pressurizing.
Protecting appliances and fixtures during the test
When pressure testing a water line, appliances and fixtures must be isolated and protected to prevent damage from overpressure, backflow, or debris. This includes shutting off appliance supply valves, disconnecting or bypassing sensitive equipment (water heaters, softeners, filtration units), and draining or capping fixtures that could be harmed.
Label isolated items, use pressure-rated caps and plugs, and place strain-protection or filters where debris risks remain.
Confirming system type (public supply vs. well) and any local rules
If the water source is a municipal supply versus a private well, different procedures, permits, and responsibilities apply.
Therefore, the homeowner should verify the system type before testing. Confirm ownership, contact the utility or well service records, and check local plumbing codes or permit requirements.
Note any backflow prevention, pressure-reducing valves, or well pressure tank specifics that affect test setup and legal obligations.
Step-by-Step Procedure to Test a Cold Water Pressure Line at Home
The procedure begins by shutting off fixtures and isolating the section to be tested, then attaching a pressure gauge at the designated test point.
Next, the service is opened to record a static pressure reading, followed by a dynamic test where fixtures are opened to measure flow pressure.
Finally, a pressure drop test is performed to identify any leaks.
Step 1 Turn off fixtures and isolate the test section
Begin by shutting off all faucets, appliances, and valves that draw from the cold-water line so only the section to be tested remains pressurized.
Verify isolation by opening a nearby tap; no flow should occur. Cap or close any lateral branches and label shut valves.
Confirm the main supply to that segment is stable and record valve positions before proceeding to testing to guarantee reproducibility.
Step 2 Attach the pressure gauge to the appropriate test point
Attach a calibrated pressure gauge to the nearest accessible test point on the isolated segment, typically a hose bib, service valve, or a designated test port.
Confirm fittings match and use thread tape to seal connections. Hand-tighten then wrench snugly to prevent leaks.
Verify the gauge face is visible and the valve upstream remains closed. Note gauge calibration date before proceeding.
Step 3 Open service to pressurize and take a static reading
Open the upstream service valve slowly to pressurize the isolated segment while watching the gauge for a steady rise.
Once pressure stabilizes, note the static pressure value and record time.
Observe for any unexpected drops over several minutes indicating leaks.
Close any nearby fixtures and confirm no pumps or controllers activate.
Label the reading with date, location, and test conditions for comparison.
Step 4 Run a dynamic test (open fixtures) and measure flow pressure
With the isolated segment pressurized and a stable static reading documented, proceed to a dynamic test by gradually opening one or more downstream fixtures to simulate normal flow and measure the pressure under load.
Record pressure at varying flow rates, note any drops or fluctuations, and compare readings to expected system values.
Use a calibrated gauge, avoid sudden valve actions, and log results for analysis.
Step 5 Perform a pressure drop test to detect leaks
Begin the pressure drop test by isolating the tested section, ensuring all valves are closed and fixtures disconnected so the segment is sealed.
Then pressurize it to the previously recorded static pressure using a calibrated gauge.
Monitor the gauge for a defined interval (commonly 10–30 minutes).
Any significant pressure decline indicates a leak; if pressure remains stable, the section is likely leak-free.
Step 6 Record results and return system to normal
Document the test outcomes clearly and restore the system to normal operation.
Record pressure readings, duration, valve positions, and any observed leaks with timestamps.
Note ambient conditions and tester details for future comparison.
Gradually reopen isolated valves, bleed trapped air, and verify steady pressure at fixtures.
Secure test fittings, label changes made, and file the report for maintenance or warranty purposes.
How to Test a Well Pressure System (Including Pressure Tank)
The section describes how to identify well components and verify pressure switch settings to establish a baseline for testing.
It outlines procedures for checking the pressure tank pre-charge and measuring cut-in and cut-out pressures at the gauge.
Common well-related pressure readings and their typical causes are summarized to guide basic troubleshooting.
Identifying well components and pressure switch settings
Frequently, homeowners overlook the individual parts that make a well pressure system work, so a clear identification of the pump, pressure tank, pressure switch, check valve, and associated piping and gauges is essential before testing.
Technicians note switch label markings for cut-in/cut-out, inspect wiring and terminals for corrosion, confirm gauge placement is readable, and verify accessible shutoffs and visible leaks prior to any diagnostic steps.
Testing tank pre-charge and cut-in/cut-out pressures
After confirming component locations and switch settings, attention shifts to measuring the pressure tank’s air pre-charge and verifying the pump’s cut-in and cut-out points.
With the tank isolated and drained to tank pressure, a tire gauge measures air pre-charge at the Schrader valve.
Cycle the pump to record cut-in and cut-out values at the pressure gauge, comparing to switch ratings.
Troubleshooting common well-related pressure readings
Why are certain pressure readings persistent or erratic? Causes include failing pressure switches, clogged or leaking well lines, sedimented pump intake, air leaks in bladder tanks, or malfunctioning pressure gauges.
The observer should verify wiring, test pump cycle times, inspect tank pre-charge, and measure static versus running pressure.
Systematic elimination identifies component faults and prevents misdiagnosis.
Interpreting Test Results: What Each Reading Means
Readings are categorized as normal, low, or high static pressure, each pointing to different system conditions and necessary actions.
Attention to fluctuations and transient spikes helps distinguish temporary events from chronic problems, while measuring pressure drop rates reveals thresholds that suggest leaks.
Fixture-specific tests further isolate whether issues are localized or affect the entire supply.
Normal, low, and high static pressure explanations
Static water pressure readings are categorized as normal, low, or high to indicate whether a home’s supply is functioning within expected parameters; each category points to different likely causes and fixes.
Normal (40–60 psi) implies proper supply and regulator function.
Low (<40 psi) suggests supply issues, closed valves, or leaking pipes.
High (>60 psi) indicates regulator failure or excessive municipal pressure requiring correction.
Understanding pressure fluctuations and transient spikes
When pressure does not hold steady, brief fluctuations and transient spikes reveal different problems than a simple high or low steady reading.
Small, regular oscillations often point to pump cycling or pressure regulator hunting, while sudden sharp spikes usually indicate water hammer or rapid valve closures.
Interpreting patterns helps isolate faulty controllers, worn check valves, air in lines, or intermittent supply issues requiring targeted inspection.
Pressure drop rate thresholds that indicate leaks
How quickly pressure falls during a closed-line test reveals whether a minor drip or a significant leak is present. A loss under 1 psi per hour generally indicates negligible leakage or thermal effects. Between 1–5 psi per hour suggests a small leak needing inspection. Over 5 psi per hour denotes a substantial leak requiring immediate repair. Record duration and ambient conditions for accuracy.
How fixture-specific tests help isolate problem areas
Testing individual fixtures narrows the search to specific branches of the system, making it clear whether a pressure drop originates at a single outlet, a grouped supply line, or the main line.
Common Problems Found During Pressure Testing and How to Fix Them
The pressure test commonly uncovers a few recurring issues that require straightforward fixes.
Small leaks are often confirmed by a drop-test and sealed before retesting, while low incoming pressure can stem from municipal supply problems or clogged filters and is usually remedied by flushing, filter replacement, or contacting the supplier.
High system pressure may call for installing or adjusting a pressure regulator, and malfunctions in well pumps, pressure tanks, or switches should be diagnosed and repaired or replaced by a qualified technician.
Small leaks detected by drop-test repair and verification
When a pressure drop during a home water line test indicates a small leak, careful isolation and a methodical drop-test repair and verification process pinpoints and confirms the fix.
The technician isolates sections, pressurizes one segment, watches pressure stabilization, locates weeps or fittings for targeted repair, replaces or tightens fittings, re-pressurizes, and observes consistent pressure to verify leak elimination before restoring normal service.
Low incoming pressure causes and homeowner remedies
Investigate low incoming pressure by first distinguishing supply-side issues from internal plumbing faults. Common causes include municipal supply restrictions, partially closed curb or main shutoff valves, clogged service filters or pressure-reducing valves, corroded or partially blocked service pipes, and simultaneous high demand in the neighborhood.
Homeowner remedies include checking and fully opening service valves, cleaning or replacing inlet screens and PRV filters, flushing short service runs, and contacting the utility for supply problems.
High pressure when to install or adjust a pressure regulator
Why is unusually high household water pressure a concern? Excessive pressure damages fixtures, shortens appliance life, and risks pipe leaks.
During testing, readings above 80 psi indicate regulator installation or adjustment. A licensed plumber should set a regulator to 50–60 psi, calibrate downstream gauges, and recommend pressure relief when spikes persist.
Proper adjustment prevents failures and reduces water waste.
Issues with well pumps, pressure tanks, and switches
Although pressure testing often focuses on visible plumbing, failures in well pumps, pressure tanks, and switches are frequent culprits behind abnormal readings and intermittent supply.
Diagnosis includes checking pump cycling, tank air charge, and switch contacts.
Common fixes: adjust tank precharge, replace bladder or switch, clean or service pump.
When uncertain, consult a licensed well technician to prevent damage and guarantee safe repairs.
Preventative Measures and Maintenance to Keep Water Pressure Stable
Routine checks and a clear monitoring schedule help catch pressure fluctuations early and guide when to act.
Simple DIY fixes like clearing aerators or tightening fittings can resolve many minor issues, while persistent problems or complex leaks warrant professional maintenance.
Long-term reliability is improved by targeted upgrades such as pressure regulators or installing a larger service line where capacity is insufficient.
Routine checks and monitoring schedule
When performed on a regular schedule, simple inspections and quick measurements can prevent most pressure-related problems before they escalate.
The homeowner should record baseline PSI, note flow changes, check visible fittings monthly, and schedule valve and gauge checks quarterly. Consistent logs reveal trends, enabling timely parts replacement and avoiding surprises.
- Record baseline pressure and flow
- Inspect fittings monthly
- Log anomalies immediately
- Schedule quarterly gauge checks
Simple DIY fixes vs. when to schedule professional maintenance
After establishing baseline pressures and keeping a log of abnormalities, homeowners can handle several common fixes themselves while recognizing limits that warrant professional help.
Simple tasks include tightening visible fittings, replacing worn hose washers, clearing aerators and supply valves, and flushing sediment from accessible fixtures.
Call a licensed plumber for persistent low pressure, suspected main leaks, complex valve replacements, or when diagnostic tests are inconclusive.
Upgrades that improve long-term pressure reliability (regulators, larger service lines)
Several targeted upgrades can greatly improve long-term water pressure reliability and reduce the need for frequent repairs.
Installing a pressure-reducing regulator stabilizes excessive municipal supply pressure and protects plumbing.
Replacing undersized or corroded service lines with larger-diameter piping increases flow capacity.
Adding a pressure booster or variable-speed pump addresses persistent low-pressure zones.
Periodic inspection and professional sizing guarantee these upgrades perform reliably over time.
Cost, Time, and When to Hire a Plumber
A basic DIY pressure test usually takes 30–90 minutes and requires only a pressure gauge, hose bib adapter, and possibly thread seal tape.
Common fixes—like replacing a faulty regulator or repairing a section of pipe—range from modest parts-only expenses to several hundred dollars when labor is added.
Persistent low pressure, sudden drops, gurgling, or visible leaks indicate a professional diagnosis and repair is warranted.
Estimated time and materials for a DIY pressure test
Most homeowners can complete a basic DIY pressure test with a modest set of tools and about 30–90 minutes of hands-on work, depending on system complexity and access to shutoffs.
Required materials: pressure gauge, hose bib adapter, adjustable wrench, Teflon tape, bucket, and notebook.
Expect minimal costs for parts; allow extra time for locating valves.
Hire a plumber if unsure or if leaks appear.
Typical repair costs for common pressure problems
Repair costs for common water pressure issues vary by cause, complexity, and region but generally fall into predictable ranges.
Typical DIY fixes are inexpensive and quick; more complex pipe, valve, or pump repairs increase labor and parts costs. Homeowners should weigh time, skill, and safety before proceeding.
- Clogged aerator/fixture: $0–$30, 10–30 minutes
- Pressure regulator replacement: $150–$400, 1–2 hours
- Leaky pipe repair: $100–$600, 1–4 hours
- Well pump/service: $300–$1,200+, several hours
Signs that professional diagnosis or repair is required
Following the cost ranges and typical DIY fixes, certain symptoms indicate that professional diagnosis or repair is warranted rather than homeowner intervention.
Persistent low or fluctuating pressure, visible leaks inside walls or ceilings, discolored water, sewer odors, repeated pressure regulator failure, or sudden total loss of service require a licensed plumber.
Consider time, permit needs, and potential damage when hiring pros.
Quick Reference: Common Pressure Values and Actions
A concise table of common pressure readings, likely causes, and recommended actions helps homeowners interpret test results quickly. Below is a quick reference for typical measurements and what to do next. Use it to decide whether a simple fix is possible or professional help is needed.
| Pressure reading | Likely cause | Recommended action |
|---|---|---|
| 20–40 psi | Low supply or closed valve | Check main valve and contact supplier |
| 40–60 psi | Normal range | No action needed |
| 60–80 psi | High pressure | Install/adjust pressure regulator |
| Fluctuating | Leaks or failing pump | Inspect for leaks; test pump |
| 0 psi | Shutoff or major failure | Verify shutoff and call plumber |
Table: Pressure reading, likely cause, recommended action
The quick-reference table below summarizes typical static and dynamic pressure readings, the most likely causes associated with those values, and clear recommended actions to take.
| Pressure reading | Likely cause | Recommended action |
|---|---|---|
| <20 psi | Main supply failure or closed valve | Contact utility or check valve |
| 20–40 psi | Low supply or partially closed regulator | Adjust regulator or call plumber |
| 50–80 psi | Normal to high | Monitor; reduce if >80 psi |
Conclusion
A homeowner discovers a slow drip just after testing the cold water line, and the coincidence—finding the leak while checking pressure—underscores the value of routine checks. The result shows that simple tools and steps can reveal hidden issues before they worsen. Regular testing, basic fixes, and knowing when to call a plumber together turn a small discovery into long-term savings and peace of mind, reminding readers that attention now prevents crisis later.