How to Cut Brass Pipe Cleanly and Safely: Tools, Techniques, and Tips
To cut brass pipe cleanly and safely, use the appropriate tools such as tube cutters for thin walls and chopsaws, hacksaws, or angle grinders for thicker sections. Ensure the pipe is securely clamped to prevent distortion, mark your cut clearly, and maintain a steady feed while cutting. After cutting, deburr the edges with a file or chamfer tool to eliminate sharp edges. Control the speed and cooling during the process to prevent discoloration and work hardening. For further guidance, refer to detailed tool choices, step-by-step instructions, and troubleshooting tips.
Overview of Cutting Brass Pipe Safely and Cleanly
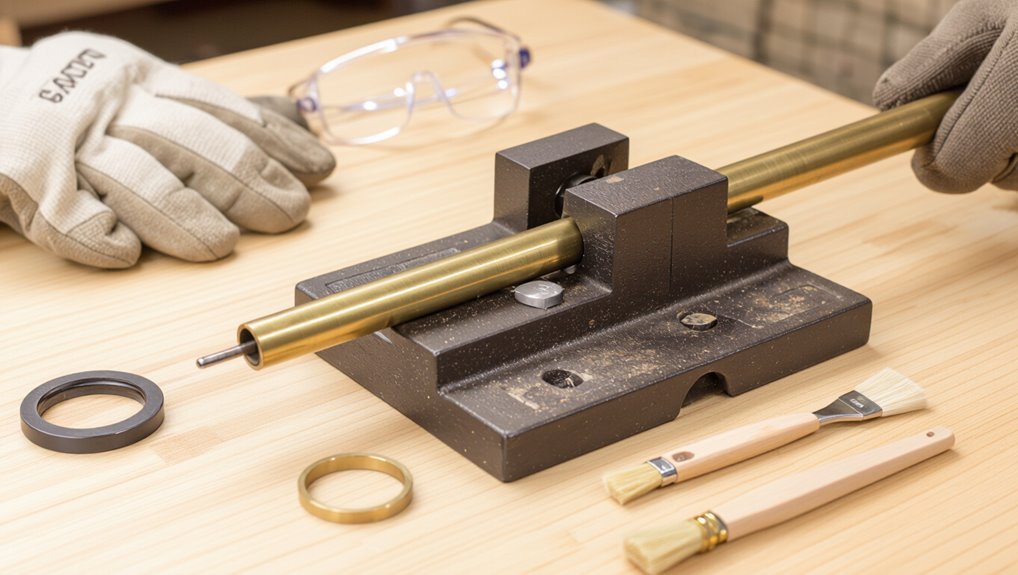
Proper cutting technique preserves brass pipe integrity and reduces the risk of weak joints, leaks, and premature wear.
Following best practices—secure clamping, correct blade or cutter selection, steady feed, and thorough deburring—yields square, clean ends ready for fitting.
When done correctly, the result is reliable performance and longer service life for the plumbing assembly.
Why cutting technique matters for brass pipe performance and longevity
Accuracy in cutting determines how well a brass pipe performs and how long it lasts; clean, square cuts guarantee tight seals, reduce stress concentrations, and prevent deformation that can lead to leaks or joint failure.
Proper technique—alignment, steady feed, correct tooling, and deburring—affects flow, joint integrity, and corrosion resistance.
Learning how to cut brass pipe minimizes rework and extends system lifespan.
Quick summary of best practices and expected results
Follow a few core practices to cut brass pipe safely and cleanly: secure the workpiece, mark and square the cut, choose the appropriate cutter or saw, use steady, controlled strokes, and deburr all edges.
Consistent technique prevents deformation, jagged edges, and tool damage. Expect smooth, square ends ready for fitting, minimal material loss, and reliable joints when measurements, tooling, and finishing are applied correctly.
Types and Properties of Brass Pipe That Affect Cutting
Different brass alloys exhibit varying hardness levels that influence blade selection and cutting speed.
Wall thickness and pipe diameter affect support, clamping method, and the likelihood of burrs or deformation.
Whether a pipe is seamless or seamed changes cutting behavior and the need to address seam distortion or internal irregularities.
Common brass alloys and hardness levels
Brass comes in a range of alloys—most notably C260 (free‑cutting), C360 (free‑machining), C377, C464, and naval/brass bronzes—each with distinct copper‑zinc ratios and alloying additions that alter strength, ductility, and work‑hardening behavior.
Hardness ranges from soft annealed (~60–90 HB) to cold‑worked or alloyed types approaching ~120–160 HB; harder alloys require sharper cutters, slower feeds, and greater cutting forces.
Pipe wall thickness and diameter considerations
Alloy and hardness influence cutting behavior, but tube geometry—specifically wall thickness and diameter—directly governs clamp setup, tool engagement, and heat dissipation during sawing or turning.
Thicker walls require slower feeds, stiffer fixturing, and more aggressive cutting angles to prevent chatter.
Larger diameters need supports to avoid deflection and concentricity errors; both factors affect chip control and cooling strategy.
Seamless vs. seamed brass pipe differences
When produced without a welded seam, tubing exhibits more uniform microstructure and consistent mechanical properties along its circumference, which impacts how it responds to cutting forces and heat.
Seamless brass yields cleaner cuts, less burring, and predictable tool wear.
Seamed (welded) pipe can harden at the weld zone, produce uneven chips, and require slower feeds, deburring, and inspection for weld defects before cutting.
Tools for Cutting Brass Pipe
A concise overview of the tools used to cut brass pipe highlights hand tools, power tools, measuring/marking/clamping implements, and essential safety equipment.
Each category has specific strengths and limitations depending on pipe size, wall thickness, and the required finish.
Proper selection and setup reduce deformation and guarantee accurate, safe cuts.
Hand tools
The section reviews common hand tools for cutting brass pipe, comparing tube cutters, hacksaws, and finishing tools.
It outlines tube cutter types with their advantages and limitations, recommends hacksaw blade choices and cutting techniques, and describes files and deburring tools for clean edges.
Practical tips and trade-offs are provided to help select the right tool for the job.
Tube cutter: types and pros/cons
Tube cutters come in several styles—mini, rotary, ratcheting, and tubing-specific models—each designed to score and rotate around brass pipe for a clean cut.
Mini blades suit tight spaces; rotary offers smooth, even cuts; ratcheting provides faster advancement with less effort. Tubing-specific cutters match diameter ranges.
Advantages: precision, minimal burrs, repeatability.
Limits: blade wear, size constraints, and lower speed than power tools.
Hacksaw: blade selection and technique
Choose the correct hacksaw blade and adopt a steady sawing rhythm to cut brass pipe cleanly and avoid deformation.
Use a fine-tooth blade (18–32 TPI) for thin-walled tube and a coarser blade for thicker sections.
Secure the pipe in a vise with soft jaws, mark the cut, and maintain light, even pressure and full strokes.
Pause to clear chips and avoid binding.
Files and deburring tools for finishing
Finish cuts on brass pipe with appropriate files and deburring tools to remove burrs, square the ends, and create smooth mating surfaces.
Use a round or half-round file for internal and curved profiles; a flat file for faces. A carbide deburring tool or chamfering cutter quickly cleans edges.
Work gently, rotating the pipe for even removal. Inspect fit and re-debur if needed for leak-free joints.
Power tools
Power tools offer faster, cleaner cuts for brass pipe when used with appropriate metal-cutting accessories.
Chop saws or miter saws fitted with metal blades and angle grinders with cutoff wheels handle larger sections, while rotary tools (Dremel) suit precise or small jobs.
Proper fixturing, eye and hearing protection, and slow feed rates help prevent burrs and heat damage.
Chop saws and miter saws with metal blades
Chop saws and miter saws fitted with metal-cutting blades offer fast, straight cuts for brass pipe, making them a common choice when many identical lengths are needed.
They require secure clamping, blade selection rated for nonferrous metals, and appropriate speed. Cuts are clean with minimal burrs, but chip evacuation and eye, ear, and respiratory protection remain essential to prevent injury and contamination.
Angle grinders with cutoff wheels
An angle grinder fitted with a thin cutoff wheel provides a quick, versatile method for slicing brass pipe, especially in tight spaces or on-site jobs where portability matters.
It cuts rapidly and handles larger diameters but demands steady clamping, controlled feed, and correct wheel selection to minimize burrs and heat.
Use guards, eye and hearing protection, and light lubricant or intermittent cutting to prevent distortion.
Rotary tools (Dremel) for small jobs
A rotary tool such as a Dremel offers precise, low-power cutting for small-diameter brass pipe and fittings, making it ideal for hobby, repair, and detailed plumbing tasks.
It excels on thin-walled tubing, tight spaces, and trim cuts using reinforced cutoff wheels or diamond bits.
Secure the work, use light pressure, wear eye and hearing protection, and deburr edges with a file or abrasive.
Measuring, marking and clamping tools
Accurate measurement and clear scribe marks are essential; calipers, a tape measure, and scribing tools provide the precision needed for clean cuts.
Secure workholding with a pipe vise, clamps, or support stands prevents movement and guarantees square ends.
Together these measuring and clamping tools set the foundation for safe, repeatable brass pipe cutting.
Calipers, tape measure, and scribing tools
Several essential measuring and marking tools—calipers, a tape measure, and a scribe—ensure brass pipe is cut to the correct length and orientation before any clamp is applied.
Calipers verify outer and inner diameters and wall thickness for fittings. A tape measure sets overall length; a scribe marks a precise cutting line.
Fine-point markers and center-finding gauges aid alignment for accurate, repeatable cuts.
Pipe vises, clamps, and support stands
When positioning brass pipe for a clean cut, secure holding devices—pipe vises, C-clamps, and adjustable support stands—prevent movement and keep the cutting line true.
Choose a vise with soft jaws or protect the pipe with leather to avoid marring. Use multiple clamps for long runs, set supports near the cutting point, and verify alignment before sawing or using a tubing cutter.
Safety equipment
Appropriate safety equipment is essential when cutting brass pipe to protect eyes, hands, lungs, and ears from shards, dust, and noise.
Protective eyewear, cut-resistant gloves, a suitable respirator, and hearing protection should be selected based on the cutting method and workspace ventilation.
The following section outlines recommended gear and proper use to reduce injury risk.
Eye, hand, respiratory, and hearing protection
Personal protective equipment (PPE) is essential to prevent eye injuries from flying brass shards, hand lacerations from sharp edges, inhalation of metal dust or oil residues, and hearing damage from power tools.
Safety glasses or a face shield, cut-resistant gloves, a fitted NIOSH-approved respirator when grinding, and earmuffs or earplugs for noisy cutting guarantee protection and reduce accident risk.
Step-by-Step: Cutting Brass Pipe Cleanly
Before cutting, the work area should be cleared, the brass pipe secured in a vise or clamp, and cut lines measured and marked precisely.
The appropriate cutting tool is chosen based on pipe diameter and desired finish, with tube cutters preferred for thin-walled tubing and a hacksaw for larger or thicker sections.
Clear, steady cutting technique for each tool—rotating and tightening a tube cutter incrementally, or using long, even strokes with a hacksaw—produces clean ends ready for deburring.
Preparing the work area and securing the pipe
Several clear, level surfaces should be cleared to provide an uncluttered workspace, with adequate lighting and nearby access to tools and safety gear.
The pipe should be supported on padded blocks to prevent rolling.
Use a vice with soft jaws or a pipe clamp to hold the workpiece firmly without deforming it.
Keep cutting debris contained and maintain clear egress paths.
Measuring and marking accurate cut lines
With the pipe secured and debris contained, attention shifts to measuring and marking the cut line with precision.
The technician measures twice using a steel ruler or caliper, accounting for wall thickness and any required allowance for fittings. A fine-tip permanent marker or scribe creates a clear, thin line.
Confirm alignment visually and rotate the pipe to verify the mark remains straight before cutting.
Choosing the right tool for pipe size and finish
Selecting the appropriate cutting tool depends primarily on pipe diameter, wall thickness, and the desired edge finish.
Small-diameter thin-wall tubing favors a tubing cutter for smooth, square cuts; thicker or larger-diameter brass may require a hacksaw with a fine-tooth blade or a powered cutoff wheel for efficiency.
Consider access, burr risk, and required smoothness when deciding.
Cutting technique for tube cutter
Begin by securing the brass tube in a vise or clamp so it cannot rotate, leaving enough exposed length for the cutter and the planned cut. This stable setup guarantees consistent pressure and a square cut.
Position the tube cutter, tighten the wheel until it contacts the tube, then rotate the cutter around the pipe, tightening slightly after each full revolution until the tube separates cleanly.
Cutting technique for hacksaw
After securing the brass tube as described for a tube cutter, a hacksaw offers a faster, more versatile method for thicker or oddly shaped pieces.
Use a fine-tooth blade, steady two-handed grip, and slow, even strokes. Score the cut line first, maintain square alignment, and support the pipe to prevent vibration.
Deburr edges with a file or chamfer tool when finished.
Cutting technique for power saws and grinders
Use a chop saw, miter saw with a metal-cutting blade, or an angle grinder fitted with a thin abrasive or carbide wheel to cut brass pipe efficiently and cleanly.
Secure the pipe in a vise or clamp, mark the cut, and align blade. Apply steady, light pressure; avoid forcing.
Allow the tool to reach full speed, then make the cut in a single smooth pass.
Deburring, reaming, and dressing the cut edge
Remove burrs and smooth the cut face to guarantee a proper fit and prevent injury or flow disruption.
Use a deburring tool or round file to remove sharp edges, then ream the interior to eliminate curled metal.
Lightly chamfer the outside edge for easier insertion of fittings.
Finish with a fine file or emery cloth, ensuring a clean, uniform edge free of metal fragments.
Final inspection and fit check
With edges smoothed and the bore cleared of fragments, a final inspection and fit check confirms the cut meets dimensional and functional requirements.
The inspector verifies length, roundness, and square with calipers and a set square, checks for remaining burrs, and trial-fits coupling or fitting.
Any discrepancy prompts light dressing and recheck until alignment, sealing surface, and flow are satisfactory.
Techniques to Prevent Common Problems
Practical techniques address common cutting problems such as squashed or ovalized ends, excessive burrs, and metal fragmentation.
Controlling tool selection, feed rate, and support prevents heating, discoloration, and deformation during cutting.
Different approaches are required for thin-walled versus thick-walled brass to maintain dimensional integrity and surface finish.
Avoiding squashed or ovalized pipe ends
Clamp the brass tube firmly and cut with a tool that maintains roundness to prevent squashing or ovalizing the end.
Support the pipe close to the cut, use tubing cutters or a fine-toothed saw with steady pressure, and rotate evenly.
Avoid excessive clamping force, misaligned jaws, or angled cuts.
Inspect for deformation and resecure before re-cutting to restore true circular shape.
Reducing burrs and metal fragmentation
Minimize burrs and metal fragmentation by using sharp, appropriate cutting tools, controlled feed rates, and proper support so the brass shears cleanly rather than tearing.
Follow with light deburring using a file, deburring tool, or fine-grit abrasive to remove remaining sharp edges.
Inspect cut edges for fragments, rotate and recut if necessary, and clean with compressed air or brush before assembly to guarantee a safe, precise fit.
Preventing workpiece heating and discoloration
Control heat buildup and prevent discoloration by selecting the right cutting speed, tool geometry, and cooling strategy.
Use sharp carbide tools, minimize dwell time at each cut, and apply intermittent feed to allow cooling.
Employ light, consistent coolant or compressed air directed at the cutting zone.
Inspect for temper colors and back off parameters if blueing appears to maintain metallurgical integrity and finish.
Strategies for cutting thin-walled vs thick-walled brass
Different wall thicknesses demand distinct cutting approaches to avoid deformation, collapse, or chatter:
Thin-walled brass benefits from light clamping, backing support (wood or mandrel), sharp blades, and slower feed to prevent collapse and burrs.
Thick-walled sections require rigid fixturing, higher cutting forces, coolant, and robust tooling to avoid chatter and glazing.
Adjust cutting speed, tool geometry, and deburring accordingly for consistent results.
Comparison of Cutting Methods and When to Use Each
Several common cutting methods are compared by speed, finish quality, cost, and recommended pipe sizes to guide selection for specific tasks. The table below summarizes key trade-offs to help choose the right tool for a given brass pipe job. Practical examples following this table illustrate when each method is most appropriate.
| Method | Notes |
|---|---|
| Hacksaw | Slow, low cost, good for small diameters and rough cuts |
| Tube cutter | Moderate speed, clean finish, inexpensive, best for small–medium pipes |
| Rotary tool with cutoff wheel | Fast, moderate finish, low–medium cost, good for medium pipes |
| Bandsaw/Chop saw | Fastest, best for large pipes or many cuts, higher cost |
Speed, finish quality, cost, and recommended pipe sizes
When selecting a cutting method for brass pipe, the tradeoffs among speed, finish quality, cost, and suitable pipe sizes determine the best choice; rotary cutters are cheap, clean for small diameters; abrasive saws are fast but need deburring; band saws balance speed and finish for larger tubing.
| Method | Speed | Finish |
|---|---|---|
| Rotary cutter | Low | Smooth |
| Band saw | Medium | Good |
Maintenance and Care of Tools After Cutting Brass
After cutting brass pipe, tools should be cleaned of metal filings and residue to prevent buildup on blades and cutters.
Consumables like cutting wheels and tips require timely replacement or sharpening to maintain clean cuts.
Finished tools benefit from proper storage and light corrosion prevention to extend their service life.
Cleaning blades and cutters to prevent brass buildup
Regularly removing brass shavings and residue from blades and cutters prevents buildup that dulls edges and impedes cutting performance.
After each session, brush and blow out chips, then wipe metal surfaces with a solvent-dampened cloth to dissolve oils and fine particles.
Inspect teeth and pivots for embedded debris, clear crevices with a pick, and apply light lubricant to prevent corrosion while avoiding excess that attracts filings.
Replacing consumables and sharpening tips
Once blades and cutters are free of brass buildup, attention shifts to replacing worn consumables and sharpening cutting tips to restore cutting accuracy and prevent damage to stock.
Inspect cutting wheels, burrs, and files for chips or roll-over; replace per manufacturer intervals.
Hone carbide tips with appropriate stones or diamond tools, maintain correct angles, and test on scrap brass before resuming precision cuts.
Storage and rust prevention
Store tools in a dry, well-ventilated area and apply light protective coatings to metal surfaces to prevent corrosion.
After use, clean chips and debris, dry components thoroughly, and remove cutting fluids.
Use desiccants or rust inhibitors in toolboxes and cabinets.
Inspect periodically for early signs of oxidation, reapply lubricant or coating as needed, and keep blades and cutters lightly oiled for immediate readiness.
Common Mistakes and How to Avoid Them
Common errors during brass pipe cutting often lead to damaged fittings, uneven cuts, or unsafe joints if not recognized and corrected early.
Attention to tool pressure, correct blade selection, secure workholding, and post-cut inspection prevents most problems. The following highlights three frequent pitfalls to watch for and avoid.
- Over-tightening tube cutters or using the wrong blade type
- Failing to secure the pipe properly before cutting
- Skipping deburring and final inspection
Over-tightening tube cutters
Over-tightening a tube cutter can crush thin-walled brass and leave a jagged, uneven edge that complicates fitting and sealing.
Excessive pressure also increases blade wear and risks scoring the bore.
Proper technique uses just enough compression to engage the cutter, advancing gradually with rotations.
Stop when a clean groove forms, inspect the edge, and deburr lightly to restore roundness before joining.
Using incorrect blade types
Choose the correct blade for the metal and cutter: using the wrong wheel or blade can score, tear, or deform brass pipe, producing rough edges and compromised fits.
Blades rated for ferrous metals or abrasive discs wear quickly on brass, causing chatter and melting. Use fine-toothed saws or carbide/abrasive blades specified for nonferrous metals, replace dull blades, and match RPM to blade type for clean cuts.
Failing to secure the pipe properly
Failing to clamp brass pipe securely leads to slipping, vibration, and misaligned cuts that ruin fittings and waste material.
Workpieces should be held with a proper vise or pipe clamp, padded to prevent marring, and positioned so the cutting area is accessible.
Check tightness before cutting, support long lengths with stands, and avoid overtightening that deforms the pipe.
Skipping deburring and inspection
Inspect the cut end and remove burrs immediately to prevent leaks, poor fits, and injury from sharp edges.
Skipping deburring and inspection risks compromised joints, concealed metal shards, and assembly failures. A quick visual check, light filing, or use of a deburring tool guarantees proper fit and seal.
Final inspection confirms dimension, smoothness, and readiness for soldering or fitting, avoiding costly rework.
Practical Project Examples and Scenarios
Practical scenarios illustrate how cutting technique and tool choice change with the work: sizing brass tubing for plumbing fittings requires clean, square cuts and deburring, while preparing brass rod for jewelry demands fine finishes and minimal material loss.
For long runs of pipe, batching cuts, consistent marking, and jig use improve speed and uniformity.
Examples compare methods, tools, and quality checks for each case.
Cutting brass tubing for plumbing fittings
When preparing brass tubing for plumbing fittings, a clear plan and the right tools guarantee clean cuts and reliable joints. Common projects include shortening supply lines for sink installations, trimming lengths for radiator connections, and fabricating custom risers for appliance hookups.
Measure twice, mark clearly, secure tubing in a vice or clamp, use a tube cutter or fine-tooth hacksaw, deburr, and test fit before soldering or compression assembly.
Preparing brass rod for jewelry or DIY fittings
After cutting and deburring plumbing tubing, attention may turn to smaller-diameter brass rod used for jewelry or DIY fittings, which requires finer techniques and tools.
Workpieces should be clamped in a vise or jeweler’s block; use a fine-tooth jeweler’s saw or rotary tool with appropriate cutoff wheel.
File, sand, and polish with progressively finer abrasives; finish with a polishing compound for smooth edges.
Cutting long runs of pipe: batching tips
Plan the run and set up an efficient workflow before cutting begins: measure and mark all lengths from a single layout, group identical cuts into batches, and arrange clamps, supports, and cutting stations to minimize handling.
Use jigs or stop blocks for repeatable lengths, sequence cuts to balance material handling, deburr each batch immediately, and label bundles to maintain order and reduce rework.
Quick Troubleshooting Guide
The guide outlines steps to address uneven or jagged cuts, including smoothing techniques and when to re-cut for a clean face.
It explains how to repair or re-cut a damaged end with files, emery cloth, or a proper cutting tool.
It also specifies criteria for replacing the pipe rather than attempting further fixes.
What to do if the cut is uneven or jagged
If a brass pipe cut comes out uneven or jagged, inspect the edge to determine whether the problem is a misaligned cut, a dull blade, or excessive cutting speed.
Stabilize the pipe, verify tooling alignment and clamping, and check blade sharpness without attempting major correction.
Remove burrs with a file or deburring tool, clean the area, and reassess technique before proceeding.
How to repair or re-cut a damaged end
Re-cutting a damaged brass pipe end begins with evaluating the extent of deformation and deciding whether a simple cleanup or a fresh cut is required.
Remove burrs with a deburring tool or file, then mark a new square line.
Secure the pipe in a vise, cut with a tubing cutter or saw, deburr and chamfer, then test fit fittings for proper seal and alignment.
When to replace the pipe instead of fixing it
After evaluating whether a cleanup or a fresh cut will restore a damaged end, determine if repair is still practical by checking for signs that indicate replacement.
Replace the pipe when corrosion penetrates the wall, multiple damaged sections exist, fittings no longer seal, internal scoring compromises flow, or prior repairs weaken integrity.
Prioritize replacement for safety, reliability, and long-term cost-effectiveness.
Conclusion
Coincidentally, the neatest cuts often follow the quietest preparation: measuring twice, securing once, and choosing the right blade. As the blade meets brass, care and patience coincide with technique to yield clean, burr-free edges. When tools are kept sharp and workflows deliberate, accidents become rare companions rather than inevitable outcomes. Consequently, careful planning and routine maintenance align by chance and design, ensuring safe, precise results every time.