How to Hide Pipes in a Bathroom: 9 Stylish, Practical Solutions
Exposed bathroom pipes can be stylishly hidden using various practical solutions that ensure both accessibility and moisture safety. Options range from quick fixes like paint, fabric skirts, and decorative wraps to more integrated solutions such as vanities, box-outs, and recessed access panels. Renters can utilize tension mounts, magnetic panels, or freestanding enclosures for a temporary solution. It’s essential to choose the right materials and ensure proper ventilation to prevent damage. Continue reading for detailed methods and step-by-step guidance.
Stylish and Practical Ways to Hide Bathroom Pipes
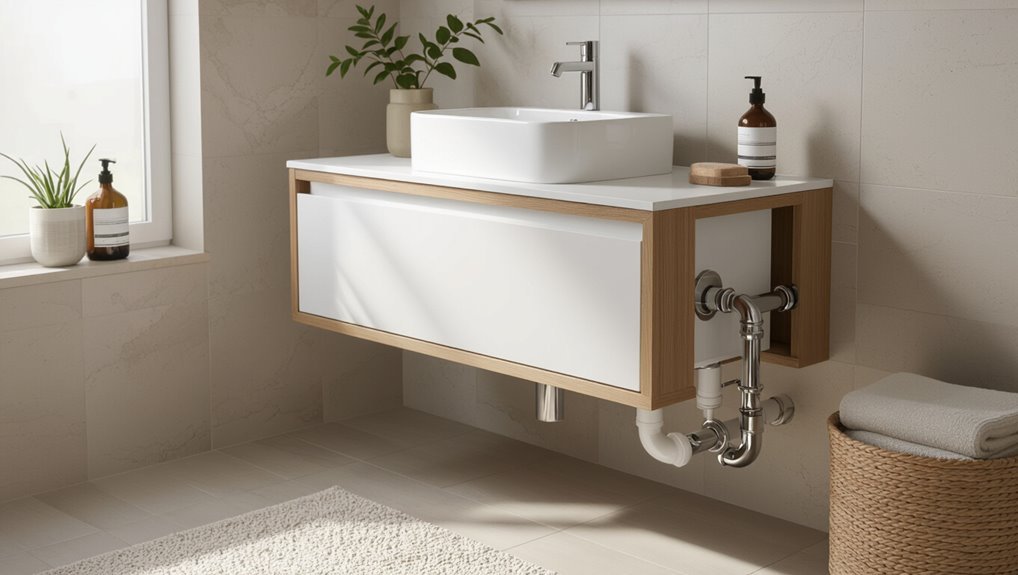
Common exposed pipe locations—under sinks, behind toilets, along shower walls and floors—are identified first to guide concealment choices.
The discussion contrasts fully hiding pipes with solutions that keep them accessible for maintenance, noting which locations typically require access.
Practical and stylish options are then matched to each situation to balance appearance, cost, and serviceability.
Overview of common exposed bathroom pipe locations
Exposed plumbing in bathrooms typically appears in a few predictable areas: beneath sinks, along vanity backsplashes, around toilets and bidets, under bathtubs, and beside shower stalls where supply and drain lines run.
Attention focuses on visible trap assemblies, shutoff valves, risers and waste stacks. Identifying these spots helps prioritize how to hide pipes in bathroom layouts while maintaining access for maintenance.
When to hide pipes vs. when to leave them accessible
When should pipes be concealed and when should they remain reachable depends on balancing aesthetics, maintenance needs, and local code requirements.
Practical choices prioritize access for valves, traps, and shutoffs; concealment suits long runs, exposed supply lines, or decorative mismatches.
Removable panels, access doors, or false walls reconcile appearance with serviceability.
Decisions should consider frequency of repairs and inspector accessibility.
Quick visual solutions for immediate improvement
Quick visual fixes can transform exposed plumbing without major work.
Decorative pipe covers or wraps and simple fabric skirts or curtains around pedestal sinks provide immediate polish.
Painting pipes to blend with walls or to become a deliberate accent offers a fast, budget-friendly option.
Use decorative pipe covers and wraps
Add decorative pipe covers and wraps to transform visible plumbing into a deliberate design element without major work.
Metal sleeves, paintable PVC covers, or woven wraps provide quick, removable concealment. Choose finishes that match fixtures or contrast for interest.
Measure pipe diameters and lengths for neat installation. Opt for rust-resistant materials in humid bathrooms and secure covers with discreet clips or adhesive-backed fasteners.
Install fabric skirts or curtains around pedestal sinks
Install a tailored fabric skirt or curtain around a pedestal sink to conceal plumbing instantly while adding color, texture, or pattern to the bathroom.
Measured to fit beneath the basin, skirts attach with adhesive Velcro, tension rods, or discreet clips.
Choose water-resistant, washable fabrics and simple hems for durability.
Removable designs allow access for maintenance and quick style updates.
Apply paint to match walls or create a feature pipe color
When pipes are painted to match the walls, they recede visually and make the bathroom feel cleaner and more cohesive.
Choosing a bold, contrasting hue can turn plumbing into an intentional design accent.
Preparation matters: clean, sand, and prime metal or PVC.
Use moisture-resistant paint and suitable brushes.
Test color, protect surrounding surfaces, and allow proper drying for a durable, polished finish.
Built-in and carpentry solutions for a seamless look
Built-in carpentry offers durable ways to conceal exposed plumbing without sacrificing access.
Typical approaches include framing a vanity or cabinet around pipe runs, constructing a box-out or chase for wall and floor services, and fitting recessed access panels for required maintenance.
These solutions can be tailored to match the bathroom’s style while preserving functionality.
Build a simple vanity or cabinet around pipes
Constructing a simple vanity or cabinet around exposed bathroom pipes provides a clean, integrated appearance while maintaining access for maintenance.
A tailored cabinet conceals plumbing while offering storage and matching decor. Design with removable panels or hinged access doors to reach shutoffs and trap connections.
Use moisture‑resistant materials, proper ventilation, and accurate measurements to avoid obstructing pipe movement or future repairs.
Construct a box-out or chase for wall and floor pipes
If plumbing lines must run through finished walls or floors, a boxed chase provides a precise, concealed route that integrates with the room’s surfaces.
Framers build a slim stud or plywood enclosure around pipes, aligning with studs and floor joists. Finish with drywall, tile, or trim to match surroundings.
Guarantee slope, ventilation, and access for repairs while concealing supply and waste lines neatly.
Install recessed access panels for maintenance
Install recessed access panels to keep maintenance points reachable without disrupting the bathroom’s finished surfaces.
Recessed panels fit flush into walls or cabinets, painted or tiled to match surrounding finishes for discreet integration.
Choose durable, moisture-resistant materials and tamper-proof fasteners.
Size panels for clear service access to valves and traps.
Proper framing and sealing guarantee a seamless, functional solution that preserves aesthetics and facilitates repairs.
Space-saving fixtures and replacements
Space-saving fixtures and strategic replacements offer practical ways to conceal plumbing while increasing storage and floor space.
Examples include swapping pedestal or wall-hung sinks for furniture-style vanities, replacing bulky exposed traps with compact or concealed trap options, and installing wall-mounted toilets paired with in-wall cisterns.
Each choice reduces visible pipework and creates a cleaner, more functional bathroom layout.
Replace pedestal or wall-hung sinks with furniture-style vanities
Swapping a pedestal or wall-hung sink for a furniture-style vanity transforms exposed plumbing into concealed storage without sacrificing bathroom footprint.
The vanity encloses supply lines and the trap behind accessible panels or drawers, creating countertop and cabinet space.
Choose moisture-resistant materials and sizes that fit circulation paths.
Installation may require minor pipe repositioning; plan for access to shutoffs and maintenance.
Swap exposed traps for compact or concealed trap options
After enclosing most plumbing inside a vanity, attention often turns to the remaining visible trap beneath the basin.
Homeowners can replace bulky S- or P-traps with compact bottle traps or concealed trap adapters that fit within cabinetry.
These low-profile alternatives free floor space, improve aesthetics, and maintain plumbing codes when installed correctly.
Choose durable finishes and verify access for cleaning and maintenance.
Use wall-mounted toilets with in-wall cisterns
Consider wall-mounted toilets with in-wall cisterns to reclaim floor area and create a cleaner visual line in a bathroom.
These fixtures conceal waste pipes and the cistern within a stud wall or frame, simplifying cleaning and enhancing minimal aesthetics.
Installation requires sturdy wall framing and access panels for maintenance, but yields significant space savings and a streamlined appearance, ideal for small or modern bathrooms.
Decorative and design-forward concealment ideas
A tiled or wood-clad chase that matches the bathroom’s finishes can neatly enclose exposed runs while keeping the aesthetic cohesive.
Shelving or narrow ledges built around pipes provide storage and visually disguise plumbing without major reconstruction.
Strategic placement of plants, baskets, or decorative screens further redirects focus and softens the overall look.
Create a tiled or wood-clad chase that matches bathroom finishes
Build a slim chase around exposed plumbing and finish it with the same tile or wood as the rest of the bathroom to create a seamless, design-forward concealment that reads as an intentional architectural element rather than a retrofit.
Proportions should be minimal to retain access; include removable panels or discreet access points.
Match grout lines or grain direction to integrate the chase visually with surrounding surfaces.
Incorporate shelving or ledges that disguise pipes
Several narrow shelves or a continuous ledge can be installed to conceal exposed plumbing while adding usable surface area and visual interest. This approach frames pipes, offers storage, and integrates with decor.
Shelves can be removable for access and finished to match materials.
- Slim floating shelves aligned to pipe runs
- Continuous ledge with access panels
- Recessed shelf boxes
- Durable, water-resistant finishes
Use plants, baskets, or decorative screens to divert attention
Moving from built-in ledges and shelves that frame plumbing, decorative elements can redirect focus and soften the presence of exposed pipes.
Strategically placed plants add organic texture and vertical interest; woven baskets conceal valves or cleaning supplies; slim folding screens or laser-cut panels create visual barriers without heavy construction.
Color, scale, and repetition unify the scheme, turning necessary infrastructure into intentional styling.
Plumbing-safe methods and materials
Selection of materials and methods should prioritize resistance to moisture, with PVC, treated wood, and moisture‑resistant boards recommended for bathroom pipe enclosures.
Adequate ventilation and access panels are necessary to prevent trapped humidity and mold growth behind covers.
Installations must also meet fire‑safety and local building‑code requirements to guarantee both safety and compliance.
Materials safe for damp environments (PVC, treated wood, moisture-resistant board)
When plumbing runs through a bathroom, choosing materials that resist moisture and do not compromise pipe integrity is essential.
PVC enclosures resist water, are lightweight, and allow easy access.
Treated or rot-resistant timber offers structural warmth if sealed and elevated from wet zones.
Moisture-resistant boards (cement, greenboard) provide stable backing for tiles or cladding while minimizing swelling and decay around pipes.
Ensuring ventilation and preventing mold behind covers
Provide controlled airflow and moisture-resistant barriers to keep concealed plumbing dry and mold-free.
Install discreet vents or gaped panels to allow circulation, use breathable backing materials, and apply mildew-resistant paint or sealant.
Guarantee access panels for inspection and occasional dehumidification if needed.
Regularly check for leaks and promptly repair them to prevent persistent dampness that fosters mold behind covers.
Fire safety and building-code considerations
Although hidden plumbing improves aesthetics, concealment must never compromise fire safety or code compliance. Installers should use materials and methods rated for both plumbing and fire performance, maintain required clearances, and confirm that any enclosures preserve firestopping, access for inspection, and approved ventilation paths.
Contractors must follow local codes, use noncombustible or fire-retardant panels, label service routes, and guarantee easy removal for emergency access.
Step-by-step: Building a simple box-out for exposed pipes
The section lists the essential tools and materials, from studs and screws to waterproof backer board and sealant.
It outlines measuring and planning to guarantee access panels and future maintenance clearance.
Clear construction steps cover framing, sheathing, finishing, and practical tips on sealing and painting for effective waterproofing.
Tools and materials checklist
A concise, organized list of tools and materials guarantees the box-out is built safely and efficiently.
Essential tools: tape measure, spirit level, pencil, saw (hand or jigsaw), drill, screwdriver, stud finder, clamps, caulking gun, utility knife, and safety gear (gloves, goggles).
Materials: moisture-resistant plywood or MDF, 2×2 framing timber, screws, wood glue, silicone sealant, waterproof paint or tile backer, hinges and magnetic catches if an access panel is included.
Measuring and planning for access and future maintenance
Measure twice and plan deliberately: determine exact pipe locations, clearances for fittings and insulation, and the width of any required access panel before cutting materials.
Record measurements, note valves, junctions and service points. Allow removable panel access and ventilation.
Include future-proofing: extra space for repairs, simple fasteners for easy removal, and clear labeling of concealed pipes to simplify maintenance and reduce disruption.
Construction steps: framing, sheathing, finishing
With measurements and access points recorded, attention moves to constructing a simple box-out to enclose exposed pipes while preserving future serviceability.
A stud frame is cut and secured to floor and ceiling, allowing clearances for valves.
Sheathing of moisture-resistant board is fastened, joints taped.
Removable access panel is installed, edges trimmed and sanded for neat integration with surrounding finishes.
Tips for sealing and painting for waterproofing
Begin by inspecting all seams, joints, and fastener heads on the newly built box-out to identify gaps, cracks, or recessed screws that could allow moisture intrusion.
Apply a flexible acrylic or silicone caulk to gaps, bed fiberglass mesh tape over joints, then skim with waterproof joint compound.
Prime with a mildew-resistant primer and finish with a high-quality bathroom-grade semi-gloss enamel for durable waterproofing.
When to hire a professional plumber or carpenter
Signs that concealment will affect water lines, vents, or access points indicate a plumber should be consulted, while structural or trim work beyond basic carpentry calls for a carpenter.
Homeowners should ask contractors about necessary permits, experience with similar projects, warranty on work, and request itemized quotes.
Typical costs and timelines vary by scope—minor box-outs may be a few hundred dollars and a day or two, while rerouting pipes can cost thousands and take several days to a week.
Signs that concealment requires plumbing modification
Several clear indicators mean concealment will require professional plumbing or carpentry work rather than simple cosmetic covering.
Persistent leaks, visible corrosion, unusual noises, inadequate access for valves or cleanouts, insufficient slope on drain runs, or pipe movement when fixtures operate all signal the need for modification.
Structural conflicts, vents or pressure issues also necessitate qualified assessment before any concealment proceeds.
Questions to ask contractors and getting quotes
When should a homeowner engage a professional rather than tackle pipe concealment as a DIY task?
A contractor is advisable for structural changes, complex plumbing, unfamiliar local codes, or multitrade work.
Ask about licenses, insurance, references, warranty terms, timeline, and whether subcontractors will be used.
Request multiple itemized quotes, clarify materials and access for future maintenance, and confirm permit responsibilities.
Typical costs and timelines for common concealment projects
Although smaller cosmetic covers or simple boxing can often be completed in a single day by a handyman or competent DIYer, projects that alter walls, relocate supply or waste lines, or require fixture removal typically demand a licensed plumber or carpenter and may take several days to a week depending on scope and inspections. Costs vary: DIY low, tradesperson moderate, major reroutes costly.
| Quick | Moderate | Major |
|---|---|---|
| $50–$200 | $200–$800 | $800–$3000+ |
| 1 day | 1–3 days | 3–7+ days |
| Low stress | Moderate worry | High anxiety |
| Minimal permits | Sometimes required | Often required |
Common mistakes and how to avoid them
Common mistakes when concealing bathroom pipes include blocking shut-off valves or cleanouts, choosing non-waterproof materials in wet zones, and neglecting ventilation and insulation.
Each error increases the risk of water damage, mold, or difficult repairs.
Practical planning and correct material selection prevent these issues and preserve access for maintenance.
Blocking access to shut-off valves or cleanouts
Blocking access to shut-off valves or cleanouts can turn a minor leak or clog into a major emergency by preventing quick isolation or service of the plumbing.
Designers should plan removable access panels, hinged doors, or discrete traps that align with valve locations.
Guarantee clear labels and unobstructed clearance for tools and hands.
Verify accessibility for routine maintenance and emergency shutoff without dismantling permanent finishes.
Using non-waterproof materials in wet zones
Many bathroom failures trace back to choosing materials that cannot withstand constant moisture exposure; tile backer boards, wall panels, adhesives, and trim rated for dry areas will deteriorate quickly in wet zones, inviting mold, rot, and costly repairs.
Professionals recommend moisture-rated backer, cement board, waterproof membranes, and corrosion-resistant fixtures.
Test product specifications, seal joints properly, and allow for future access when concealing pipes to prevent premature failure.
Ignoring ventilation and insulation needs
While hiding pipes can improve a bathroom’s appearance, neglecting ventilation and insulation around those runs often leads to condensation, mold growth, and heat loss.
Install breathable access panels, guarantee airflow with vents or extractor fans, and wrap cold-water lines with appropriate insulation.
Maintain clearance for inspection and use vapor-resistant materials.
Regularly check for dampness to prevent structural damage and costly repairs.
Maintenance and long-term care
Maintenance and long-term care prioritize access and durability by planning concealments that allow quick inspections and straightforward repairs.
Regular checks for leaks, corrosion, and mold are recommended to catch issues early and protect finishes.
When renovating, concealment solutions should be updated or replaced to match new layouts and maintain serviceability.
How to design for easy inspections and repairs
Because routine inspections and occasional repairs extend a bathroom’s lifespan, the design should prioritize access and visibility of plumbing routes and service points.
Removable panels, access doors behind vanities, and labeled shutoffs reduce disruption.
Locate fixtures to allow frontal access, use inspection-friendly junctions, and route pipes within chaseways with clear mapping.
Durable, replaceable finishes simplify repairs and minimize demolition.
Routine checks to prevent leaks and mold
Establishing a simple, regular inspection routine helps catch small leaks and early mold growth before they become costly problems.
Inspect visible joints, valves, exposed sections and concealment access panels monthly. Check for dampness, discoloration, musty odors and soft surfaces.
Promptly tighten fittings, replace seals and dry affected areas. Record findings and actions to track trends and prevent recurrence.
Updating concealment solutions when renovating
When renovating, homeowners should reassess pipe concealment to align with updated layouts, finishes, and building codes.
Professionals evaluate access panels, removable coverings, and ventilation to guarantee serviceability and moisture control.
Materials and methods are chosen for durability and compatibility with new finishes.
Plans incorporate future maintenance access, insulation upgrades, and compliance checks to prevent concealed damage and preserve aesthetic integrity over time.
Cost-effective ideas for renters and temporary solutions
Renters can use removable covers and tension-mounted solutions to conceal pipes without permanent alterations.
Simple, low-cost DIY options—such as foam insulation wrapped in decorative fabric or freestanding panels—provide quick results that are easy to remove and unlikely to damage walls.
Clear communication with landlords and written approval for any visible changes helps avoid disputes and guarantees compliance with lease terms.
Removable covers and tension-mounted solutions
Consider removable covers and tension-mounted solutions as quick, low-cost ways to conceal bathroom pipes without permanent alterations.
They offer renter-friendly concealment using snap-on box covers, magnetic panels, or adhesive-free tension rods with fabric sleeves. Installation is fast, tools are minimal, and removal leaves surfaces intact.
Selections prioritize fit, moisture resistance, and accessibility for maintenance or inspections.
Low-cost DIY options that won’t damage walls
Several simple, low-cost DIY approaches conceal bathroom pipes without damaging walls, making them ideal for temporary or rental situations.
Options include fabric wraps secured with Velcro, decorative peel-and-stick panels around exposed runs, and freestanding enclosures built from lightweight plywood or foam board.
Removable magnetic covers suit metal pipes; adhesive cable clips route and hide small lines.
All remain reversible and affordable.
Communicating with landlords and getting approval
When seeking approval to conceal bathroom pipes, a tenant should present clear, low-cost proposals that emphasize reversibility and no permanent alterations to the rental unit.
The tenant should supply photos, material samples (peel-and-stick panels, fabric skirts, freestanding covers), a simple installation plan and timelines.
Offer to restore original condition, obtain written consent, and propose splitting modest costs or using refundable security arrangements.
Inspiration gallery and style pairings
Seeking visual cues and clear pairings, the inspiration gallery presents compact bathroom setups that mask pipes without sacrificing style.
Photographs and palettes demonstrate material choices, concealment tactics, and mood combinations to suit varying budgets. Examples pair finishes with fixtures to guide selections and illustrate scale.
- Matte black fixtures with white subway tile
- Timber panels with exposed brass accents
- Painted boxing matching wall color
- Minimalist floating vanities with hidden traps
Conclusion
Like a well-tailored coat hiding a winter sweater, concealing bathroom pipes transforms function into finish. One homeowner once wrapped exposed plumbing with reclaimed wood and watched guests run fingers along it, mistaking it for a built-in vanity; studies show simple aesthetic upgrades can raise perceived room value by up to 20%. Small, thoughtful choices—paint, boxing, cabinetry, or creative fixtures—make pipes disappear while preserving access and practicality for years of maintenance.