How to Fix a Leaking Bathtub Faucet: Step-by-Step Repair Guide for Beginners
To fix a leaking bathtub faucet, start by identifying the faucet type, turning off the water supply, and replacing any worn washers, O-rings, cartridges, or seals. Basic repairs can typically be completed in 15 to 90 minutes with common tools and inexpensive parts. If the valve or seat is corroded, it may require professional assistance. Before reassembling, inspect for mineral buildup, loose fittings, and hidden damage. Remember to lubricate seals and test the faucet carefully after repairs. Regular maintenance can help prevent future leaks, so keep learning about step-by-step procedures and troubleshooting techniques.
What to expect when fixing a leaking bathtub faucet
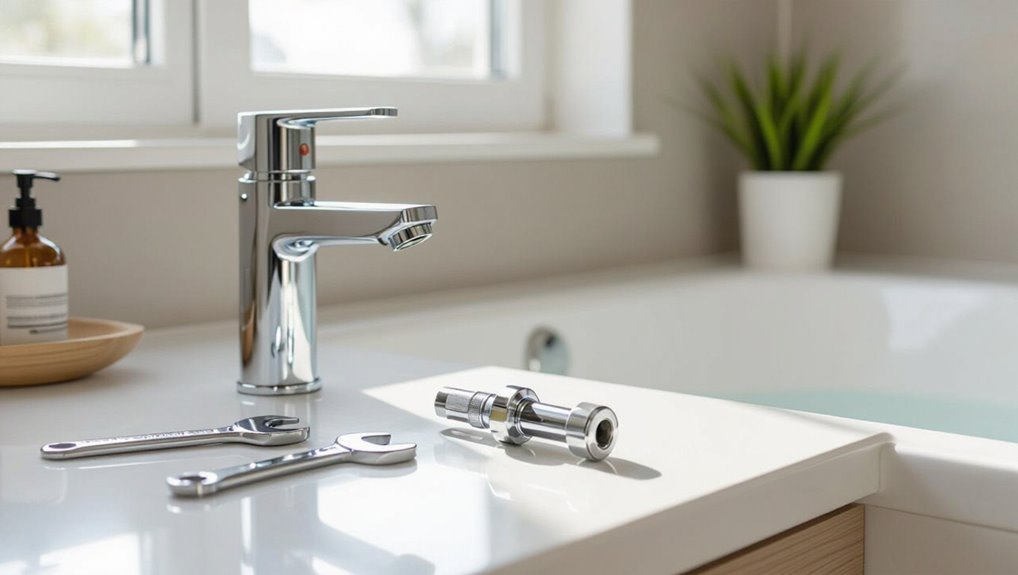
Typical causes of a leaking bathtub faucet include worn washers, corroded valve seats, or loose connections.
Repairs can often be completed in under an hour with modest parts costs, though more extensive cartridge or valve replacements raise time and price.
If the leak persists after basic repairs or if plumbing access is complex, a licensed professional should be contacted.
Common causes of bathtub faucet leaks
Begin by identifying the most common failure points: worn washers, deteriorated O-rings, corroded valve seats, and loose or damaged cartridges or stems.
These issues cause dripping, reduced shutoff, or intermittent leaks. Mineral buildup and age-related wear worsen seals.
Knowing these causes helps prioritize inspections and informs how to fix a leaking bathtub faucet by targeting specific parts for replacement or cleaning.
How much time and cost to expect
Repair time and cost vary with the underlying cause and the faucet type: simple washer or O-ring replacements often take 15–45 minutes and cost $5–30 in parts.
Cartridge or stem repairs typically require 30–90 minutes and $20–100, while corroded valve seats, mixed-hardware issues, or full faucet replacements can take 1–3 hours and run $100–400 or more when labor is included.
Parts availability, tools, and experience affect time and expense; expect modest variability for specialty fixtures and higher costs for vintage or hard-to-match components.
When to call a professional
When should a homeowner call a professional? A professional is recommended for persistent leaks after basic troubleshooting, complex valve or cartridge replacements, corroded plumbing, hidden pipe damage, or uncertain diagnostics.
Expect an assessment, parts estimate, and labor quote; possible teardown, replacement, and pressure testing.
Timely professional repair prevents water damage and higher future costs.
Safety and preparation before you start
Before beginning work, a clear checklist of tools and replacement parts should be assembled to avoid interruptions.
The water supply must be shut off and the lines briefly drained to prevent flooding and guarantee a dry workspace.
The tub, fixtures, and surrounding area should be protected with towels or drop cloths to prevent scratches and contain any debris.
Tools and materials checklist
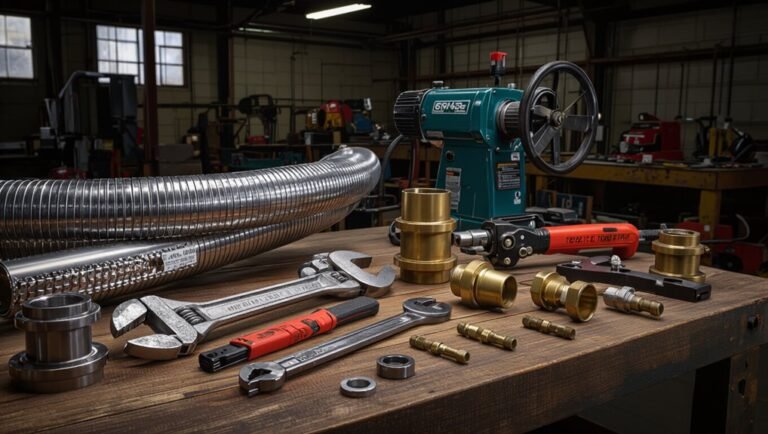
Because water and tools are involved, it is essential to gather the correct tools, materials, and safety gear before attempting any work on a leaking bathtub faucet.
Essential items reduce delays and risk; select quality parts matching the fixture. Check seals, sizes, and instructions before beginning.
- Adjustable wrench and pliers
- Screwdrivers (flat and Phillips)
- Replacement washers/cartridges
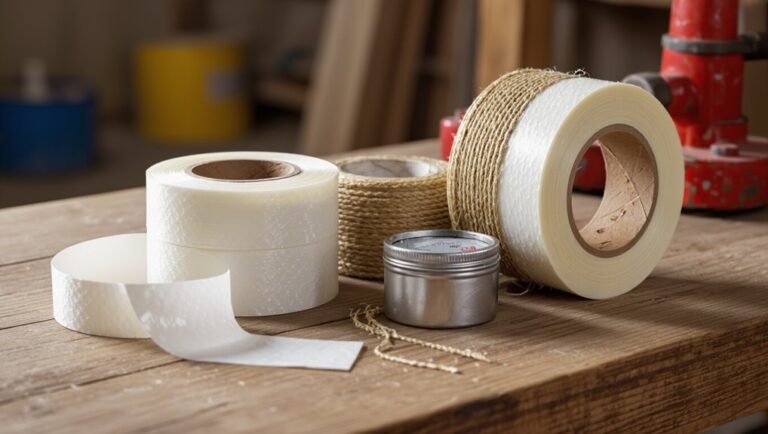
- Plumber’s tape and silicone grease
- Safety glasses and gloves
How to shut off water supply and drain the lines
With tools and replacement parts ready, the next step is to shut off the water and clear the lines to prevent spills and pressure-related injuries.
Locate and close the tub’s local shutoff valves or the main house valve. Open the faucet to relieve residual pressure and drain remaining water.
If no local valves exist, notify household members before closing the main supply.
Protecting the tub, fixtures, and surrounding area
A clean, well-lit workspace protects the tub and surrounding fixtures from accidental damage while repairs are underway.
Lay down thick towels or a foam pad to cushion tools and prevent chips. Cover faucets and overflow with painter’s tape and plastic sheeting.
Remove personal items and electronics. Keep a bucket for small parts, a flashlight, and absorbent rags to control drips and debris.
Identifying your faucet type and valve system
The next step is to identify whether the tub uses a single-handle or double-handle faucet, since that determines the internal valve configuration.
Common valve types include cartridge, ball, ceramic-disk, and compression, each with distinct repair parts and failure modes. Knowing the specific valve guides the parts list and tools required for a correct repair.
Single-handle vs. double-handle faucets
Although both control water flow and temperature, single-handle and double-handle bathtub faucets use different valve mechanisms and require different diagnostic steps.
Single-handle units adjust flow and mix with one control; leaks often trace to a single internal cartridge or seal.
Double-handle setups separate hot and cold, making it easier to isolate which side leaks and to inspect individual stems, seats, and packing.
Cartridge, ball, cartridge, ceramic-disk, and compression valve differences
Identifying the specific valve type narrows diagnostic steps and replacement parts after determining whether a fixture is single- or double-handle. Cartridge: cartridge piece, common in modern faucets. Ball: single-handle, spherical valve. Ceramic-disk: durable disks, smooth operation. Compression: two-handle, seat-and-washer design, older systems.
| Type | Handle | Key trait |
|---|---|---|
| Cartridge | Single/double | Replaceable cartridge |
| Ball | Single | Spherical valve |
| Compression | Double | Washer/seat mechanism |
How to determine which parts you’ll need
Which parts are required depends on accurately matching the faucet’s valve type and handle configuration.
The inspector identifies external handle style, number of handles, and access plate. After turning off water, removing trim reveals the valve—cartridge, ball, ceramic-disk, or compression.
Photograph and measure the exposed component, then source an exact replacement kit (valve, seals, seats, O-rings) for compatibility.
Step-by-step repair for common faucet types
The following section provides concise, step-by-step repair instructions for the most common bathtub faucet types.
It begins with general disassembly tips and then covers fixes for compression (two-handle), cartridge (single or double handle), ball-type, and ceramic-disk faucets.
Each subsection highlights the parts to inspect, common failure points, and the typical replacement or adjustment needed to stop leaks.
General disassembly tips and tricks
Begin by shutting off the water supply and relieving residual pressure by opening the faucet.
Then gather basic tools—screwdrivers, adjustable wrench, hex keys, and penetrating oil—on a towel to protect surfaces and catch small parts.
Remove decorative caps, carefully note screw and part order, and photograph each stage.
Apply penetrating oil to stuck fasteners, use controlled force with proper tools, and keep parts organized.
Fixing a leaking compression faucet (two handles)
The procedure begins with removing the handles and escutcheons to access the valve stems and inner components.
The stems and seats are then inspected and worn seat washers and O-rings are replaced to stop leaks.
Finally, the faucet is carefully reassembled and tested for proper operation and tightness.
Removing handles and escutcheons
Loosen the decorative cap or set screw to expose the handle assembly before attempting cartridge or stem access; this prevents damage to chrome finishes and internal parts.
After shutting off water, pull or twist handles straight off; use penetrating lubricant for stuck parts.
Remove escutcheon screws, then lift or slide escutcheons away from the wall.
Keep fasteners organized for reassembly.
Inspecting and replacing seat washers and O-rings
With handles and escutcheons removed and fasteners set aside, attention turns to the valve assembly where worn seat washers and O-rings commonly cause drips in two-handle compression faucets.
Inspect rubber washers for flattening, hardening, or grooves; check O-rings for cracks or distortion.
Remove old components with appropriate tools, match sizes, install replacements lubricated with plumber’s grease, and seat them properly before continuing.
Reassembling and testing
Begin reassembly by confirming each replacement part matches its original position and orientation: seat washers should sit flush against the valve face and O-rings must fit snugly on their stems.
Reinstall stems, packing, and bonnet nuts, torque evenly. Replace handles and trim.
Restore water, open valves slowly, check for leaks at stems and spout. Tighten minimal increments until drip-free.
Repairing a cartridge faucet (single or double handle)
Next, the guide addresses cartridge-style faucets, covering both single- and double-handle models.
It describes how to extract the cartridge safely, inspect and clean or replace worn components, and re-lubricate seals before reassembly.
Clear steps and tips help guarantee a watertight finish and proper operation.
Extracting the cartridge safely
To extract the cartridge safely, first verify the water supply is fully shut off and the area around the faucet is dry and cleared.
Remove handle and trim, noting screw and part placement. Use an appropriate-size wrench or cartridge puller, protect finishes with cloth, and apply steady, even force.
Work slowly to avoid damaging the valve body or dislodging surrounding plumbing.
Cleaning, inspecting, and replacing the cartridge
With the cartridge removed, attention turns to cleaning, inspection, and—if needed—replacement to stop leaks and restore smooth operation.
Rinse mineral deposits with vinegar, scrub gently with a soft brush, and flush passages.
Inspect O-rings, seals, and valve surfaces for wear or corrosion.
If damage or persistent leakage appears, match model numbers and replace the cartridge with an identical unit to guarantee proper fit.
Re-lubricating seals and reassembly
Begin re-lubricating seals and reassembling by applying a thin, even layer of plumber’s grease to O-rings, rubber seats, and cartridge surfaces to guarantee smooth movement and watertight seals.
Reinsert the cartridge, aligning tabs or notches. Seat retaining clips or nuts, torque to manufacturer specs.
Replace handle, trim, and escutcheon. Restore water, test for leaks and smooth operation, tighten if needed.
Repairing a ball-type faucet
The section outlines the procedure for servicing a ball-type bathtub faucet, beginning with removal of the ball assembly and cam to access internal parts.
It then covers replacement of the springs, seats, and seals that commonly cause leaks.
Finally, it explains reassembly and how to balance the ball and cam to restore proper hot and cold flow.
Removing the ball assembly and cam
To access the internal components, the technician first removes the handle and escutcheon to expose the faucet body.
Once visible, attention turns to the ball assembly and cam, which control water flow and mixing.
The technician unscrews retaining clips and lift-out pins, then carefully extracts the ball and cam, noting orientation and wear patterns for proper reinstallation and parts identification.
Replacing springs, seats, and seals
Once the ball and cam are removed, the technician inspects and replaces the four seats, springs, and any worn O-rings to restore proper sealing and pressure balance.
Each seat is pulled with pliers or a seat tool; springs are swapped for matched replacements.
Damaged seats are driven out and new ones tapped in flush.
All parts are lubricated with plumber’s grease before reassembly.
Reassembling and balancing water flow
With the ball, cam, seats, springs, and O-rings replaced and greased, reassembly begins by positioning the ball cartridge into the valve body and aligning the cam to the ball’s notch so movement is smooth without binding.
The retainer, spring clips, and handle are reinstalled.
After restoring water, the technician adjusts hot/cold limit stops and tests flow and temperature, fine-tuning stop positions for balanced pressure.
Repairing a ceramic-disk faucet
Attention turns to ceramic-disk faucets, where the disk cylinder must first be exposed by removing the handle and escutcheon.
Worn seals are replaced and the disk surfaces inspected for scratches or pits that cause leaks.
Careful reassembly and proper torque on fasteners help restore a watertight fit.
Accessing the disk cylinder
Before any internal parts are exposed, the water supply must be shut off and the faucet area cleared to prevent mess and loss of small components.
Remove handle trim and retaining screws, then lift off the handle.
Unscrew the bonnet or retaining clip to free the cartridge housing.
Carefully extract the ceramic-disk cylinder, noting orientation and any washers or clips for correct reassembly.
Replacing seals and checking for surface damage
Begin by inspecting the removed ceramic-disk cylinder and the surrounding bore for worn or damaged seals, mineral buildup, or scoring that could compromise a watertight fit.
Remove old O-rings and seat seals, clean mating surfaces with vinegar or a soft brush, and replace seals with manufacturer-specified parts.
If scoring or pitting is present, the cartridge or housing may require replacement to restore proper sealing.
Reassembly tips to prevent leaks
Reinstall the ceramic-disk cartridge and associated seals with steady, even pressure, ensuring each O-ring and seat aligns squarely in its groove to avoid pinching or misplacement.
Tighten retaining screws to manufacturer torque, not over-tightening. Apply plumber’s grease sparingly to O-rings.
Refit escutcheon and handle, check hose connections, restore water slowly, and observe for leaks while exercising the valve through full rotation.
How to diagnose persistent or hard-to-find leaks
When a faucet continues to drip after basic repairs, the next step is to check hidden connections and supply lines for loose fittings or corrosion.
The shower diverter and tub spout should be inspected separately, since leaks can originate there rather than at the visible valve.
To pinpoint elusive leaks, use dye in the tub, tissue at likely seams, and pressure tests on the supply lines.
Checking hidden connections and supply lines
Inspecting hidden connections and supply lines requires methodical tracing of the water path from the shutoff valves to the faucet, since persistent leaks often originate behind walls, under floors, or inside the valve body.
Access access panels, trace supply tubing and compression fittings, check flexible hoses for hairline splits, examine soldered joints and PEX crimps, and use a moisture meter or dye to pinpoint concealed seepage.
Inspecting shower diverter and tub spout leaks
Start by isolating the diverter and tub spout as potential leak sources, since leaks here can mimic valve or supply-line failures and often hide behind the spout or inside the diverter assembly.
Remove the spout to check for corrosion, cracked seals, or loose fittings.
Operate the diverter while observing internal seals and pop-up mechanisms for drips or backflow.
Note obvious wear requiring replacement.
Using dye, tissue, and pressure tests to locate leaks
Several simple techniques—dye tracing, tissue checks, and pressure testing—help pinpoint elusive bathtub leaks that evade visual inspection.
Apply food coloring or leak detector dye to the filled tub; watch seepage paths around fittings.
Use tissue to detect small drips at joints and drains.
Employ a pressure or isolation test by shutting off valves and observing pressure drop or dye migration to confirm hidden leaks.
Parts replacement and where to buy components
A concise list of essential replacement parts—seats, springs, O-rings, washers, cartridges and escutcheons—helps clarify what is commonly needed for bathtub faucet repairs.
Technicians check part numbers and brand markings on removed components or reference manufacturer cross‑lists to guarantee exact matches.
Common sources for parts include manufacturer dealers, plumbing supply stores, and reputable online retailers that specialize in OEM cartridges and fittings.
Essential replacement parts list
Necessary replacement parts vary by faucet type but typically include cartridges or valve stems, O-rings, seat assemblies, washers, and escutcheons.
Common additional items: packing grease, retaining clips, replacement screws, trim kits, and inlet screens. Parts are found at hardware stores, plumbing suppliers, or online retailers; bring the old part for comparison.
- Cartridge or valve stem
- O-rings and seals
- Seat assembly
- Washers and clips
- Escutcheon/trim kit
How to read part numbers and match brands
How can a homeowner confidently match a replacement part to an existing faucet?
The guide advises photographing the faucet, recording stamped part numbers, and noting model or brand logos.
Cross-reference numbers with manufacturer catalogs or online parts lookup tools.
Measure cartridge dimensions and port counts.
When codes differ, compare physical features rather than relying solely on names to guarantee compatibility.
Best places to buy parts and cartridges
Where should homeowners look when sourcing faucet parts and cartridges? Homeowners can check local hardware stores, plumbing supply shops, and big-box retailers for common cartridges and O-rings.
Manufacturer websites and authorized dealers offer exact-match parts. Online marketplaces and specialty plumbing e-retailers provide wide selections and model filters.
For obscure valves, consider salvage yards or contacting a licensed plumber for sourcing and verification.
Preventive maintenance to avoid future leaks
A regular inspection schedule helps catch wear and small leaks before they require parts replacement.
Simple upkeep—periodic cleaning of aerators and cartridge areas plus light lubrication of moving parts—can substantially extend a faucet’s service life.
Attention to water quality, such as mineral buildup from hard water, further reduces corrosion and malfunction over time.
Routine inspection schedule
Regular, scheduled inspections can catch small issues before they become leaks, preserving fixtures and reducing repair costs.
A simple quarterly checklist includes checking handle operation, observing spout and cartridge areas for drips, examining visible connections and escutcheons for corrosion, and feeling for dampness under the tub or in adjacent cabinets.
Document findings and schedule repairs promptly to prevent escalation.
Tips for extending faucet life (cleaning, lubrication)
Maintain faucets through simple preventive care to extend their lifespan and reduce the chance of leaks.
Clean aerators and spouts monthly to remove mineral buildup; wipe external surfaces to prevent corrosion.
Apply silicone-based grease to O-rings and cartridge seals during annual maintenance to preserve pliability.
Tighten loose fittings and replace worn washers promptly.
Keep drain strainers clear to avoid pressure-related stress on fixtures.
Water quality and its effect on faucet longevity
Beyond routine cleaning and lubrication, water quality plays a direct role in how long faucets remain leak-free.
Hard water deposits accelerate wear on cartridges, seats, and seals, causing premature leaks. Corrosive or acidic water undermines metal components.
Regular testing, installing a water softener or filter, and flushing supply lines reduce mineral buildup and corrosion, extending faucet life and delaying repairs.
Common mistakes to avoid during repair
The repair guide highlights several common mistakes that can undo progress or cause new problems.
Over-tightening fittings can strip threads or crack components, while using incorrect replacement parts often leads to poor seals and repeat leaks.
Failing to test the faucet after reassembly leaves unnoticed faults that may worsen over time.
Over-tightening and damaging fittings
Avoid excessive force when tightening fittings, because overtightening can strip threads, crack valve bodies, or deform seals, turning a simple repair into a larger problem.
Use hand-tightening plus a quarter turn with a wrench when specified.
Inspect threads and components before reassembly, replace damaged parts, and test for leaks gradually.
Stop if resistance feels abnormal to prevent further damage.
Using incorrect replacement parts
Choose replacement parts that match the original specifications and plumbing standards to prevent fitment failures or recurring leaks.
Using incompatible cartridges, seals, or connectors can cause poor sealing, accelerated wear, or mechanical interference.
Verify model numbers, thread types, and material compatibility. Prefer OEM or certified equivalents, inspect new parts for defects, and avoid makeshift adapters that compromise integrity or void warranties.
Neglecting to test after reassembly
Finish reassembly and immediately perform a thorough test to confirm the repair holds under normal operating conditions.
The technician checks cold and hot flow, cycles handles, inspects for drips, and monitors pressure changes.
Failure to test can conceal leaks, loose fittings, or misaligned parts, causing water damage and repeated repairs.
Document results and address any issues before finishing the job.
Troubleshooting quick-reference guide
A compact troubleshooting guide pairs common symptoms with straightforward fixes to speed repairs.
It presents clear symptom-and-solution pairs so readers can identify problems and apply appropriate remedies quickly.
The following quick-reference list highlights five frequent issues and their typical fixes.
- Dripping spout: replace worn cartridge or washer
- Low flow: clean aerator or clear supply line debris
- Water only hot or cold: adjust or replace mixing cartridge
- Handle hard to turn: lubricate stem and replace corroded parts
- Spray or leak from diverter: replace diverter assembly
Symptom-and-solution pairs for fast fixes
Consult this quick-reference guide to match common bathtub faucet symptoms with immediate, practical fixes; each pair lists likely causes and stepwise remedies so the user can diagnose and repair leaks rapidly.
Dripping after shutoff — worn seat/washer: replace cartridge or washer, clean valve seat.
Constant flow — broken cartridge/o-ring: shut water, remove handle, replace cartridge/o-rings.
Spray from spout — loose diverter: tighten or replace diverter assembly.
Final verification and cleanup
A brief series of tests should confirm the repair: run both hot and cold, check for steady flow and inspect for any residual drips or leaks.
Used cartridges, O-rings, and sealant should be discarded according to local disposal rules and recycled when possible.
If leaks persist or water damage is suspected, schedule a professional follow-up promptly.
How to test for successful repair
Begin by restoring water and observing the faucet under normal operating conditions to verify the repair.
Test hot and cold separately, operate flow and stop positions, and check for steady, drip-free output.
Inspect around handles and spout for leaks and dampness.
Monitor for several minutes, then run water at higher pressure to confirm seals hold.
Note any irregularities for further adjustment.
Proper disposal of old parts and materials
Gather discarded cartridges, O-rings, damaged seats, corroded screws, old plumber’s putty, and any contaminated rags for proper disposal and cleanup.
Sort items: recyclable metals separate from mixed waste; plastics and rubber per local guidelines.
Dispose oily or chemical-soaked rags in sealed bags.
Take hazardous materials or large quantities to a municipal disposal site.
Record used parts for warranty or recycling documentation.
When to schedule a professional follow-up
Schedule a professional follow-up when leaks persist, water pressure remains uneven, unusual noises continue, or repairs involved corroded valves or compromised seals.
A plumber should inspect hidden damage, verify cartridge or valve replacement integrity, test water lines for pressure and air, and confirm no hairline fractures or loose fittings remain.
Schedule promptly if mold, damp odor, or recurring drips appear.
Conclusion
Careful, calm completion creates confidence: after completing the corrective course, the bathtub faucet should cease its steady seep. Consistent checks can curb creeping corrosion and crystalline crud, conserving cold cash and costly callbacks. Remember routine rinses, replacement of worn rings, and respectful reassembly to reduce recurring rumbles. When repairs require rare resources or risky removal, refer to reliable resources or a reputable repairperson to restore restful runs and retain reliable waterwork.