How to Fix a Crack in the Bathtub: Step-by-Step Repair Guide for Porcelain, Fiberglass & Acrylic
To fix a crack in your bathtub, start by evaluating the crack’s size, location, and the tub’s material—porcelain, fiberglass, or acrylic. If minor, you can repair it instead of replacing the tub. Clean and dry the area thoroughly, then sand the crack to create a smooth edge. Use the appropriate repair kit: epoxy or glaze for porcelain, layered resin and fiberglass cloth for structural fiberglass repairs, and acrylic welds or fillers for acrylic tubs. Allow it to cure, then sand and polish or repaint to match the tub’s surface. Finally, test with water and monitor the repair for effectiveness. For detailed troubleshooting and further steps, consult the full guide.
Overview of Bathtub Crack Repair
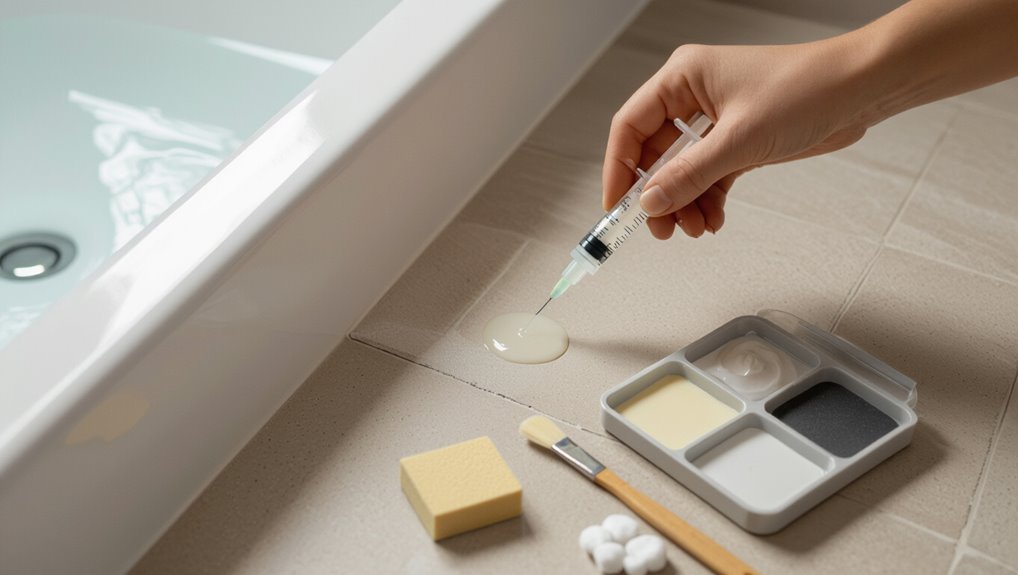
An assessment of damage determines whether a repair will suffice or a full replacement is necessary based on crack size, location, and bathtub age.
Different materials—acrylic, fiberglass, cast iron, and enamel-coated steel—have distinct failure modes and require specific repair approaches.
Before any work begins, basic safety precautions and a concise preparation checklist (ventilation, protective gear, and surface cleaning) should be observed.
When to repair vs. replace a bathtub
When does a cracked bathtub warrant repair rather than replacement? The decision hinges on crack size, location, structural integrity, and water intrusion risk.
Small, non-structural surface cracks that don’t leak and match instructions for how to fix a crack in the bathtub can be repaired.
Extensive damage, multiple fissures, persistent leaks, or underlying support failure typically justify full replacement for safety and longevity.
Types of bathtub materials and common crack causes
Bathtubs are made from a handful of common materials—cast iron with enamel, acrylic, fiberglass-reinforced plastic (FRP), cultured marble, and steel—that each respond differently to stress, impact, and age.
Cast iron chips can expose rust; enamel crazes with thermal cycling. Acrylic and FRP crack from impact or flexing, while cultured marble may fracture along seams.
Corrosion and improper installation also provoke failures.
Safety precautions and preparation checklist
Following the material-specific failure modes described above, safety and proper preparation determine whether a repair will be effective and safe.
Wear gloves, eye protection, and a respirator for dust or fumes. Confirm ventilation, shut off water, and remove loose debris.
Gather appropriate repair kit, sandpaper, cleaners, and masking tape.
Inspect surrounding structure for hidden damage before proceeding.
Identifying Your Bathtub Material and Crack Type
First, the surface should be identified—porcelain feels cool and hard with a glossy glaze, fiberglass has a textured fibrous look, and acrylic is smooth, warm, and slightly flexible.
Next, cracks are classified as hairline, surface scratches, stress cracks, or holes, each indicating different severity and repair methods.
Finally, the damage must be assessed for depth, length, location, and whether it has been exposed to water to determine urgency and the appropriate fix.
How to tell porcelain, fiberglass, and acrylic apart
How can a homeowner quickly determine whether a tub is porcelain, fiberglass, or acrylic?
Inspect finish, weight, and sound:
- Porcelain feels cool, heavy, and rings when tapped; its glaze chips to reveal metal.
- Fiberglass is lightweight, slightly flexible, with visible woven texture under thin gelcoat.
- Acrylic is warm, uniformly smooth, and more flexible without fabric pattern beneath the surface.
Hairline cracks, surface scratches, stress cracks, and holes what they mean
Different crack types convey distinct causes and repair needs: hairline cracks are fine, superficial lines often limited to the finish; surface scratches mar only the top layer without penetrating the substrate; stress cracks are narrow but deeper, typically radiating from points of repeated load or temperature change and can indicate structural weakening.
Holes are through-and-through breaches that require patching or replacement of the damaged material. Identification guides appropriate repair choices.
Assessing damage: depth, length, location, and water exposure
A careful assessment of a bathtub crack begins by determining depth, length, location, and whether the area is regularly exposed to water.
Inspect whether the crack is superficial or penetrates substrate, measure its length, note placement (rim, floor, joint), and check for moisture, staining, or soft spots beneath.
Document findings to choose appropriate repair materials and methods.
Tools, Materials, and Estimated Costs
A concise list of essential tools—such as sandpaper, utility knife, cleaning solvent, putty knife, and clamps—forms the foundation for any bathtub repair.
Material-specific repair kits and compounds (epoxy for acrylic and fiberglass, polyester filler for older enamel, or porcelain touch-up for cast iron) affect both technique and cost, with estimated time and price varying by material and crack severity.
Supplies can be purchased at hardware stores, specialty bath suppliers, or online marketplaces; buyers should compare product reviews, manufacturer specs, and warranty information to choose quality items.
Essential tools for all repairs
Gathering the right tools and materials before starting guarantees repairs proceed efficiently and safely.
Essential items include safety gear (gloves, goggles, respirator), cleaning supplies (acetone, rags), abrasion tools (sandpaper, sanding block), cutting/drilling tools (utility knife, rotary tool), filler application tools (putty knife, mixing spatula), clamping tape, and measuring tools.
Estimated costs range $20–80 depending on quality and reuse potential.
Material-specific repair kits and compounds
When the bathtub material is identified—porcelain-enameled steel, cast iron, acrylic, fiberglass, or cultured marble—the appropriate repair kit and compound can be selected to match adhesion, color, and curing requirements.
Porcelain and cast iron need enamel touch-up or epoxy; acrylic and fiberglass require polyester or acrylic-repair kits with reinforcing cloth; cultured marble uses gelcoat or polyester fillers.
Include matching pigments, sandpaper, applicators, and curing accelerators.
Estimated time and cost by material and crack severity
After selecting the correct kit and matching pigments, estimating the time and cost for repairing a crack depends on both the bathtub material and the crack’s size and location.
Porcelain hairline chips: 1–2 hours, $15–40.
Porcelain deep cracks: 2–4 hours, $30–80.
Fiberglass small cracks: 1–3 hours, $20–50.
Fiberglass or acrylic large structural cracks: 3–8 hours, $50–200.
Where to buy supplies and how to choose quality products
A few well-chosen suppliers and the right product specs make the difference between a long-lasting repair and a repeat job. Sources include big-box home centers, specialty plumbing stores, online marketplaces, and manufacturer-authorized retailers.
Choose epoxy or polyester fillers matched to material, branded repair kits, and fine-grit sandpaper; compare VOC, cure time, and color match.
- Smooth repair paste
- Sanding block
- Touch-up paint
Preparing the Bathtub for Repair
Before any filler or patching is applied, the repair area should be thoroughly cleaned and disinfected to remove soap scum, oils, and bacteria.
Loose or flaking material must then be sanded away to create a solid, feathered edge for adhesion.
Finally, surrounding surfaces are masked and protected to prevent accidental damage or contamination during the repair.
Cleaning and disinfecting the repair area
Start by removing loose debris, soap scum, and any peeling finish from the cracked area using a non-abrasive scraper and a soft brush; this guarantees the repair materials will bond to solid, clean surfaces.
Follow with a mild detergent rinse, then apply a disinfectant (isopropyl alcohol or a diluted bleach solution) to eliminate mildew and bacteria.
Rinse thoroughly and allow to air dry.
Sanding and removing loose material
Using medium-grit sandpaper and a flexible sanding block, the technician gently abrades the crack and its immediate surroundings to remove loose enamel, flaking finish, and any feathered edges that could prevent a solid bond.
Remaining dust and particles are wiped away with a clean, lint-free cloth and solvent as appropriate. The surface is inspected for stable edges and uniform texture before proceeding.
Masking and protecting surrounding surfaces
Once the crack is clean and stable, the technician isolates the repair area by covering adjacent tiles, fixtures, and hardware with painter’s tape, plastic sheeting, and drop cloths to prevent adhesive, filler, or solvent from contacting and damaging surrounding surfaces.
Edges are sealed with tape, seams overlapped, and ventilation maintained; nonstick pads protect drains and faucets while work proceeds cleanly and safely.
Repairing Porcelain Bathtub Cracks
The next step addresses common porcelain repairs, starting with methods for treating hairline and surface cracks before progressing to techniques for filling deeper cracks and chips.
It outlines touch-up painting and glazing options to blend repairs with the surrounding finish.
Finally, it notes typical curing times and the importance of post-repair polishing to achieve a smooth, durable result.
Repairing hairline and surface cracks in porcelain
Repairing hairline and surface cracks in porcelain requires careful cleaning, inspection, and the right filler to restore both appearance and water resistance.
After degreasing and drying, the practitioner buffs the crack lightly, removes dust, then applies a thin porcelain repair epoxy or acrylic filler.
Smooth, cure per instructions, sand gently if needed, and finish with matching touch-up paint or glaze for seamless protection.
Filling deeper cracks and chips in porcelain
After addressing hairline and surface imperfections, attention turns to deeper cracks and chips that compromise both structure and waterproofing.
The procedure involves cleaning and drying the area, undercutting loose enamel, and filling voids with a two-part epoxy or porcelain repair compound.
After curing, sand smooth and blend edges. Confirm repairs extend slightly below glaze to restore strength and prevent moisture intrusion.
Touch-up painting and glazing for a seamless finish
Begin by matching paint and glaze to the bathtub’s original finish to guarantee the repair blends invisibly.
Apply thin, even coats with a fine brush or airbrush, feathering edges into surrounding enamel. Allow recommended flash time between coats.
After final glaze application, inspect under varied light for color and texture consistency.
Touch up minor imperfections with microbrushes before proceeding to curing steps.
Curing time and post-repair polishing
While the applied glaze and filler set, they must be left undisturbed for the manufacturer’s specified curing period to achieve full hardness and adhesion.
After curing, inspect for high spots and lightly wet-sand with fine-grit paper to blend edges.
Clean residue, then apply a final polish or buffing compound to restore gloss.
Allow additional cure before regular use.
Repairing Fiberglass Bathtub Cracks
Repairing fiberglass bathtub cracks typically begins with a purpose-made repair kit and clear, step-by-step preparation.
For structural breaks, the procedure often involves applying resin and layers of fiberglass cloth, followed by sanding, filling, and color-matching gelcoat to blend the finish.
Large or load-bearing cracks may require additional reinforcement beneath the surface to restore strength.
Using fiberglass repair kits: step-by-step
Gather the necessary materials—fiberglass repair kit, sandpaper, acetone, applicator, and protective gloves—before starting the process, as preparation guarantees a smooth, durable repair.
Clean and degrease the area, sand surrounding glaze to roughen surface, and remove dust.
Mix compound per kit instructions, apply thinly to the crack, smooth level, allow curing time, then sand and finish with touch-up paint or polish.
Applying resin and fiberglass cloth for structural cracks
Begin by preparing a clean, dry work area and masking off surrounding surfaces to protect finishes.
For structural cracks, the technician will cut fiberglass cloth to size, mix a polyester or epoxy resin according to manufacturer instructions, and plan layered application so the repair restores strength rather than just appearance.
The technician applies resin, seats cloth into wet resin, smooths bubbles, repeats layers, and allows full cure before any further surface work.
Sanding, filling, and color-matching gelcoat
Once the fiberglass layers have fully cured and any excess resin trimmed, the next stage is sanding, filling, and matching the gelcoat to restore the tub’s surface both structurally and visually.
Sand progressively from coarse to fine, feathering edges.
Apply gelcoat filler or two-part polyester putty, cure, then wet-sand to blend.
Use matched pigment or aerosol touch-up to achieve uniform color and gloss.
Reinforcement for large or load-bearing cracks
Reinforcing large or load-bearing cracks requires building a strong, multilayered backing that restores structural integrity beneath the gelcoat surface.
The procedure typically involves cleaning and beveling the crack, applying epoxy resin and multiple fiberglass cloth layers, allowing full cure between layers, and trimming/sanding flush.
Final gelcoat or epoxy finish restores waterproofing and appearance while preventing flex and future propagation of the damage.
Repairing Acrylic Bathtub Cracks
Acrylic tubs require different techniques and products than fiberglass, starting with purpose-made acrylic repair kits and compatible adhesives.
Small cracks may be heat-welded for structural strength, while larger or surface-only damage is often best addressed with filler followed by careful sanding.
Final steps include buffing and polishing to restore gloss and using UV-resistant coatings and proper cleaning to prevent yellowing.
Using acrylic repair kits and adhesives
Begin by choosing a repair kit or adhesive formulated specifically for acrylic tubs, since these products bond to the material and match surface finish and flexibility.
Clean and dry the area, sand lightly to promote adhesion, then apply the recommended primer if included.
Use the supplied filler or adhesive to fill the crack, smooth to level, cure per instructions, and sand/polish for a seamless finish.
Heat welding small cracks vs. using filler
Decide between heat welding and using a filler by weighing crack size, location, and desired finish:
Heat welding suits hairline or structural acrylic splits where substrate alignment and strength matter; it fuses material for durable repair.
Fillers work for wider gaps, non-structural surface damage, or uneven edges, offering easier application and color matching.
Choose method based on strength needs and accessibility.
Finishing: sanding, buffing, and polishing acrylic
Once the repair—whether welded or filled—is set and cured, finishing work brings the surface back to a smooth, uniform appearance.
Begin with fine-grit wet sanding to feather edges, progressing to finer grits until scratches vanish.
Follow with a rotary buffing pad and non-abrasive polishing compound to restore gloss.
Finish by cleaning residue and inspecting for uniform texture and sheen.
Preventing yellowing and maintaining gloss
Acrylic tubs’ long-term appearance depends on both protection from UV and proper routine care to prevent yellowing and preserve gloss.
Use UV-resistant coatings or clear topcoats after repair, avoid abrasive cleaners, and rinse soap residue promptly.
Wipe dry after use, apply gentle polish periodically, and maintain bathroom ventilation to reduce heat and humidity that accelerate discoloration and dulling.
Testing and Verifying Repair Integrity
After the repair is complete, a controlled water test over several hours confirms watertightness and reveals any slow leaks.
Visual inspection and gentle pressure probing can detect soft spots, bubbling, or new cracks that indicate incomplete bonding.
If persistent seepage, spreading damage, or uncertainty remains, a professional should be consulted for re-evaluation and possible remediation.
Water test procedures for repaired areas
Several simple water tests can confirm whether a repaired bathtub area is watertight and properly bonded.
First, fill the tub to a normal level and inspect for immediate seepage around the repair and underside if accessible.
Next, run a steady stream with varied pressure for several minutes.
Finally, leave standing water for 24 hours and recheck for dampness, discoloration, or dripping.
How to spot leaks or weak spots after repair
How can one reliably detect lingering leaks or weak spots once a bathtub repair appears complete?
Inspect surrounding ceilings, walls, and flooring for dampness or staining.
Run several water-test cycles at varying depths and temperatures, watching repaired area and adjacent seams.
Feel for soft spots or flex underfoot.
Use a tissue or paper towel to reveal slow seepage and monitor over 48–72 hours.
When to call a professional for re-evaluation
When should a professional be consulted for re-evaluation of a bathtub repair?
A professional should reassess if persistent leaks appear, cracks widen, surrounding flooring shows water damage, or repairs feel unstable.
Re-evaluation is recommended after multiple DIY attempts, for complex structural or plumbing involvement, or when warranty/insurance documentation requires certified inspection to verify integrity and prevent concealed damage.
Preventing Future Cracks and Long-Term Maintenance
The article then outlines preventative care tailored to common bathtub materials, including recommended cleaners and maintenance routines to preserve finishes.
It also summarizes environmental and usage practices—such as controlling water temperature, avoiding heavy impacts, and using bath mats—that reduce the risk of stress cracks.
Finally, it explains when reglazing or full replacement becomes more practical than repeated spot repairs.
Recommended cleaning and care practices by material
Because different bathtub materials respond uniquely to cleaning agents and wear, maintenance routines should be tailored to the specific surface to minimize stress and prevent future cracks.
Porcelain: mild, nonabrasive cleaners and soft cloths.
Fiberglass: gentle, nonacidic cleaners, avoid scourers.
Acrylic: pH-neutral cleaners, soft sponge, avoid waxes and solvent-based products.
Rinse thoroughly and dry to reduce residue and deterioration.
Environmental and usage tips to avoid stress cracks
Reduce thermal and mechanical stress to extend a bathtub’s service life by controlling water temperature changes, minimizing heavy impacts, and maintaining supportive fixtures.
Regularly inspect seals, caulking, and mounting for looseness. Use bath mats and avoid dropping hard objects.
Keep humidity and ventilation balanced to prevent material fatigue. Follow manufacturer weight limits and avoid prolonged exposure to strong chemicals that weaken finishes.
When to consider reglazing or full replacement
After adopting careful use and regular inspections to minimize stress cracks, homeowners should next weigh whether a reglaze or full replacement will better prevent future problems.
Reglazing suits superficial wear, small chips, and cosmetic aging at lower cost but has limited longevity.
Replacement is advisable for structural damage, pervasive cracking, persistent leaks, or when substrate corrosion compromises safety and warranty coverage.
Common Repair Mistakes and How to Avoid Them
Common mistakes during bathtub crack repairs—using the wrong materials, skipping surface preparation, and applying uneven or insufficient filler—often lead to failed fixes and recurring damage.
- Cracked, discolored patch with rough edges from poor sanding.
- Bubbling or peeling finish where moisture was trapped under filler.
- Visible seam or ridge from excess filler and inadequate smoothing.
Comparison of Repair Options by Material and Severity
Different bathtub materials and crack severities call for varied repair approaches; this section provides a compact comparison to guide selection based on best method, durability, cost, and DIY difficulty. The following table summarizes typical recommendations for common scenarios. Readers can use it as a quick reference before choosing a specific repair technique.
| Material/Severity | Best method | DIY difficulty |
|---|---|---|
| Acrylic — hairline | Epoxy patch | Low |
| Cast iron — large | Professional welding and refinishing | High |
Quick reference: best method, durability, cost, DIY difficulty
Choose the repair method based on bathtub material and crack severity:
Minor surface hairline cracks in acrylic or fiberglass are usually best addressed with a DIY epoxy or acrylic patch (low cost, moderate durability, easy skill level).
While larger structural cracks or damage in cast iron, steel, or severely compromised tubs require professional welding or replacement (high cost, permanent durability, high skill).
For porcelain, use filler and touch-up enamel (moderate cost, variable durability, moderate skill).
Real-World Examples and Troubleshooting
The article presents three real-world repair scenarios to illustrate practical outcomes and decision-making.
Case one describes a small surface crack in porcelain, the procedural steps taken, and the successful cosmetic outcome.
Cases two and three contrast a structural fiberglass fracture requiring reinforcement with multiple acrylic hairline cracks where prevention and targeted sealing are emphasized.
Case 1: Small surface crack in porcelain steps and outcome
Inspecting a fine hairline across a porcelain step reveals a common, mostly cosmetic issue that rarely compromises structural integrity.
The owner cleaned, sanded lightly, applied epoxy filler matched to glaze, sanded smooth when cured, and polished to blend.
Results showed restored appearance, no water ingress, and normal use continued.
Routine monitoring recommended to catch any progression early.
Case 2: Structural fracture in fiberglass advanced repair approach
Moving from cosmetic hairline repairs to a structural fracture in fiberglass requires a different methodology: where porcelain surface fixes focus on appearance, fiberglass failures demand restoration of strength and waterproofing.
Technicians assess damage, remove weakened material, reconstruct with layered fiberglass cloth and resin, feather edges, sand, and apply gelcoat.
Load-bearing support and leak testing guarantee longevity; improper bonding risks repeat failure.
Case 3: Multiple hairline cracks in acrylic prevention and repair strategy
When multiple hairline cracks appear across an acrylic tub, they typically indicate stress patterns rather than isolated surface damage.
So a combined prevention and repair strategy should address underlying causes as well as sealed appearances.
Inspect mounting, supports and subfloor for movement, relieve stress points, sand and clean cracks, inject acrylic-compatible filler, sand flush, apply color-matched polish, and monitor for recurrence.
Final Checklist Before Finishing the Project
A brief, systematic walk-through guarantees all repairs are complete and surfaces are ready for final sealing.
The technician inspects cured filler, smoothness, adhesion, and cleaned edges. Masking is confirmed and ventilation set. Final surface readiness is documented before finishing.
- Smoothness check — no ridges, feathered edges.
- Adhesion test — no lifting.
- Cleanliness — dust‑free, solvent‑wiped.
Conclusion
In closing, the guide distills complex choices into clear steps so a homeowner can mend a crack with confidence; like a careful surgeon, each repair—whether porcelain’s delicate glaze, fiberglass’s layered weave, or acrylic’s resilient sheet—demands the right tools, patience, and judgment. When material and severity are correctly matched to technique, small flaws yield to restoration rather than replacement, preserving both function and value without unnecessary expense or drama.