How to Repair Drip Line: Step-by-Step Fixes for Leaks, Clogs, and Broken Emitters
To effectively repair a drip line, start by identifying issues such as wet spots, dry areas, reduced flow, or spurting jets. First, shut off the water supply and depressurize the system. Inspect the tubing and emitters for cracks or mineral buildup. For pinhole leaks, use sealant or barbed couplers; for damaged sections, cut them out and replace. Flush the lines, clean or replace clogged emitters, and maintain filters and regulators. Finally, conduct pressure tests to confirm repairs. For long-term maintenance, follow additional guidelines for ongoing care.
How to Quickly Diagnose Common Drip Line Problems
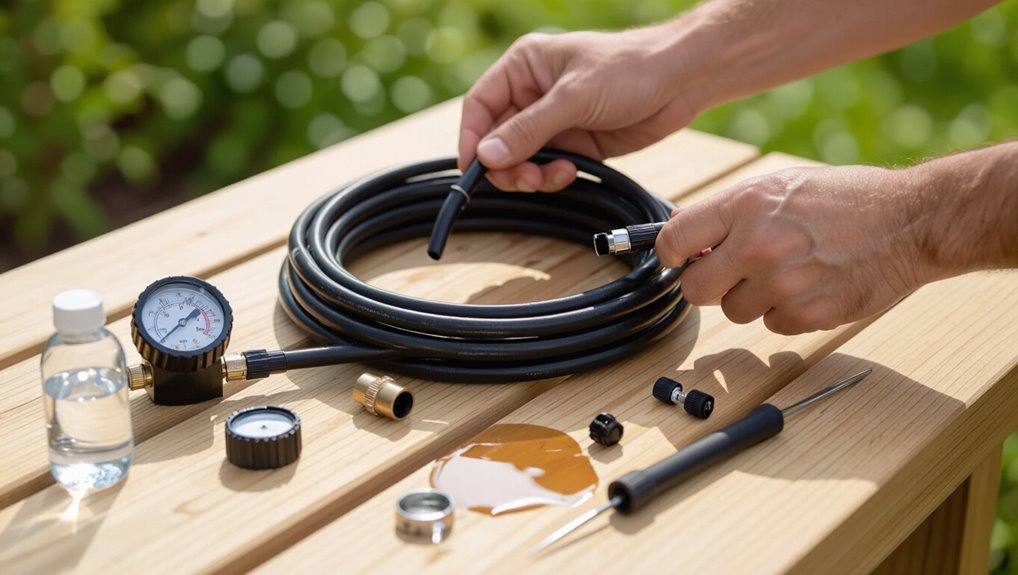
The reader is guided to recognize common signs of a leaking, clogged, or broken drip line, such as wet spots, reduced flow, or visible cracks.
Necessary tools and materials for inspection and repair—including a pressure tester, replacement emitters, tubing cutters, and sealant—are listed.
Basic safety precautions, like shutting off the water supply and wearing gloves and eye protection, are emphasized before any work begins.
Signs of a leaking, clogged, or broken drip line
When irrigation output falls, puddles form, or plants show uneven growth, these are clear indicators that a drip line may be leaking, clogged, or broken.
Visible wet spots, dry stretches, reduced emitter flow, spurting jets, and soggy soil over joints point to leaks.
Mineral crusts, absence of flow, or sudden pressure loss signal clogs or ruptures.
This aids decisions on how to repair drip line.
Tools and materials needed for inspection and repair
After identifying signs of leaks, clogs, or breaks, technicians move on to gather specific tools and materials that make quick diagnosis and repair possible.
Essential items include a pressure gauge, multimeter for solenoid valves, tubing cutters, replacement emitters and couplers, assortment of barbed fittings, plumber’s tape, flush key, compressed air or water source, small brushes/snakes for clogs, marker and gloves.
Safety precautions before starting repairs
Before any hands touch the drip line, technicians confirm system shutoff, depressurization, and electrical isolation to prevent water sprays, electrical shocks, or unintended valve activation.
They wear gloves, eye protection, and nonconductive footwear, check for buried utilities, and mark work zones. Pressure gauges and lockout tags verify safe status.
Emergency shutoff and first aid plans are reviewed before repairs begin.
How to Isolate and Test Your Drip Irrigation System
First, the main water supply is shut off and the line is depressurized to create a safe baseline for testing.
Then the system is isolated section by section while flow rates are measured to pinpoint underperforming zones.
Pressure gauges and dye tests are used to confirm hidden leaks and verify repairs.
Shutting off main water and depressurizing the line
Shut off the main supply valve and relieve pressure in the drip line to create a safe, leak-free workspace; this isolates the system for accurate testing and prevents water loss or injury during repairs.
Then open a downstream faucet or use the system’s manual bleed to drain residual water.
Confirm pressure drop at test points and lock or tag the valve to prevent accidental reopening during repair.
Section-by-section isolation and flow testing
Begin by isolating the drip system into individual zones or laterals using the zone valves or manual shutoffs.
Then test each section independently to pinpoint leaks, blockages, or pressure issues. Open one zone at a time, observe emitter output and line pressure, inspect fittings and tubing for visible drips, and run short-duration flow checks.
Record anomalies for targeted repair and rerun tests after fixes.
Using pressure gauges and dye tests to find hidden leaks
Pressure gauges and dye tests provide complementary ways to locate hidden leaks: gauges quantify pressure drops that indicate a breach or restriction, while dye reveals seepage at joints, underground lines, and slow-emitting fittings.
Technicians isolate sections, attach gauges at upstream and downstream points, note PSI changes during operation, then introduce nonstaining dye and inspect emitters, fittings, and soil for color traces to confirm leak locations.
Step-by-Step Fixes for Leaks in Drip Lines
The following steps outline practical repairs for common drip-line leaks, from sealing pinhole and sidewall punctures to replacing damaged segments with couplers and barbed fittings.
Procedures also cover fixing loose socket or emitter connections and testing repairs under pressure.
Guidance will indicate when localized spot fixes suffice and when mainline replacement is warranted.
Repairing pinhole and small sidewall leaks with sealant and connectors
To fix pinhole and small sidewall leaks in drip lines, a technician first locates the leak, shuts off the water, and drains the affected section.
Once dry, appropriate sealant or a small connector can be applied to restore watertight integrity.
The technician cleans the area, applies flexible PVC or silicone sealant, presses a repair sleeve or small barb over the hole, and tests under low pressure.
Replacing a damaged section using couplers and barbed fittings
After sealing small pinholes and testing for integrity, attention shifts to sections too damaged for patching. Replacing a length of drip line with couplers and barbed fittings restores reliable flow and prevents repeated failures.
The technician measures and cuts out the damaged segment, deburrs ends, installs barbed couplers with clamps or compression fittings, confirms alignment and slope, then pressure-tests the repair for leaks before burying.
Repairing socket or emitter connection leaks
Inspecting socket and emitter connections reveals whether leaks stem from loose fittings, degraded O‑rings, or cracked sockets. Identifying the exact failure mode guides the repair approach.
Tighten loose sockets, replace worn O‑rings or rubber seals, and swap cracked emitters. Use compatible replacement parts, clean mating surfaces, apply gentle heat to soften stiff tubing for reseating, and pressure-test repairs before burying or resuming regular irrigation.
When to replace mainline vs. spot repairs
Having fixed or ruled out socket and emitter issues, the next decision is whether a failing drip system requires isolated spot repairs or full mainline replacement.
Evaluate age, material degradation, multiple leaks, root intrusion, and water pressure loss.
Opt for spot repairs when issues are localized and tubing is sound; choose mainline replacement for widespread deterioration, persistent clogs, or frequent, scattered failures.
Clearing and Preventing Clogs in Drip Lines and Emitters
Effective clog management begins with a systematic flush of the mainline and laterals, followed by removal and physical cleaning of blocked emitters and drippers.
Routine use of inline filters, pressure regulators, and inspection/cleaning of screens greatly reduces particulate and sediment buildup.
For stubborn mineral deposits, a combination of chemical treatment and manual scrubbing is recommended, with procedures chosen to match emitter type and water chemistry.
Flushing the system: step-by-step flush procedure
Begin the flush by closing valves to isolate the drip zone. Then open the downstream end or flush cap to allow full water flow; this forces accumulated debris and sediment out of the lines.
Gradually open the supply valve to flush for several minutes, watching for clear water. Close supply, remove flushed debris, reseal the end, and reopen valves slowly to restore normal operation.
Removing and cleaning clogged emitters and drippers
After flushing the line to remove loose sediment, attention turns to individual emitters and drippers that still restrict flow.
Technicians remove emitters, inspect for debris, and rinse or soak parts in clean water. Use a soft wire or pick to dislodge deposits, then reassemble and test.
Severely damaged or persistently clogged emitters are replaced to restore consistent output.
Using filters, pressure regulators, and screen maintenance to prevent clogs
Install and maintain proper filtration and pressure regulation to prevent particles and mineral buildup from reaching emitters.
Use mesh or disc filters sized for source water and flow, and install a pressure regulator to keep system pressure within emitter specifications.
Inspect and clean filter screens regularly, replace worn elements, and flush lines after maintenance.
Proper upkeep minimizes clogs and extends emitter lifespan.
Chemical and manual cleaning options for persistent mineral buildup
Persistence of mineral deposits requires targeted chemical or manual action to restore flow.
Professionals recommend flushing lines, soaking removable emitters in vinegar or weak muriatic solutions, and using citric acid for gentler descaling.
Mechanical brushing or gentle high-pressure jetting clears stubborn buildup.
After cleaning, neutralize and thoroughly rinse chemicals.
Regular monitoring and periodic treatments prevent recurrence and protect system components.
Fixing and Replacing Broken Emitters and Micro-Sprayers
Different types of emitters and micro-sprayers are identified to match flow rates and replacement options with system needs.
Procedures for removing and installing inline emitters and stake-style emitters are outlined step by step.
Guidance on adjusting flow rates and spacing during replacement guarantees uniform coverage and prevents over- or under-watering.
Identifying different emitter types and replacement options
A brief visual and functional assessment will quickly reveal the type of emitter in a drip system—inline drip tubing, stake-mounted drippers, pressure-compensating emitters, or micro-sprayers—each requiring different repair or replacement methods.
Once identified, match flow rate, connection style, and pressure rating to compatible replacements.
Consider material durability, clog resistance, and manufacturer compatibility; keep spare emitters and simple tools for rapid onsite swaps.
How to remove and install inline and stake emitters
Begin by shutting off the water and locating the damaged emitters; this prevents pressure-driven spraying and makes access safer.
Remove stake emitters by pulling gently from tubing, cutting if stuck, and replacing with barbed stakes or adapters.
For inline emitters, cut out the faulty section, insert a replacement emitter or coupler, and secure with barbed fittings and clamps.
Test for leaks before restoring full flow.
Adjusting flow rates and spacing when replacing emitters
With damaged emitters replaced and leaks checked, attention shifts to matching flow rates and spacing to plant needs.
The technician measures output per emitter, swaps in higher- or lower-flow units as required, and adjusts spacing for root zones.
Zones are balanced by counting emitters per plant and calculating total GPH; timers and pressure regulators are fine-tuned to guarantee uniform irrigation.
Repairing Leaks at Fittings, Valves, and Connectors
Attention to fittings, valves, and connectors prevents small leaks from becoming system failures.
The section covers tightening, reseating, or replacing threaded and barbed fittings, repairing faults at valves, backflow preventers, and pressure regulators, and selecting durable replacement parts and connection methods.
Practical tips and criteria for part selection are provided to guarantee reliable, long‑term seals.
Tightening, reseating, and replacing threaded and barb fittings
Tightening, reseating, and replacing threaded and barb fittings focuses on stopping leaks where components join by ensuring proper fit, sealant application, and component integrity.
Inspect for cracks, worn threads, or loose barbs.
Tighten with appropriate tools, reseat fittings using new PTFE tape or thread sealant, replace damaged connectors, and trim tubing for snug barb engagement.
Test under pressure for remaining leaks.
Fixing leaks at valves, backflow preventers, and pressure regulators
Although valves, backflow preventers, and pressure regulators serve different functions, leaks at their connections are commonly caused by worn seals, loose fastenings, or debris interference.
Inspect seals, O-rings, and gaskets for cracks; tighten mounting bolts and hose clamps to specification; flush debris from ports and screens; replace damaged seals or corroded fasteners; test under normal pressure and observe for persistent seepage before returning the system to service.
Choosing durable replacement parts and connection methods
Choosing durable replacement parts and proper connection methods begins with matching component materials and sizes to the system’s operating pressure, water chemistry, and expected UV or abrasive exposure.
Select UV-stabilized polyethylene tubing, brass or stainless fittings for longevity, and compatible barbed or compression connectors.
Use quality clamps, thread sealant on threaded joints, and consider quick‑disconnects for maintenance.
Test under pressure after installation.
Preventive Maintenance Plan for Reliable Drip Irrigation
A concise preventive maintenance plan keeps a drip system reliable and reduces emergency repairs.
It should include a seasonal checklist, a regular inspection schedule with record-keeping, and clear winterization and startup procedures to prevent freeze and debris damage.
Establishing routine tasks and logs enables timely repairs and extends system life.
Seasonal maintenance checklist
Seasonal maintenance for a drip irrigation system consists of a concise checklist of inspections and tasks timed to spring startup, midsummer monitoring, fall winterization, and occasional repairs to keep emitters, filters, tubing, and valves operating efficiently.
The plan prioritizes debris removal, pressure checks, and component replacement to prevent failures and conserve water.
- Clean or replace filters
- Flush and test lines
- Winterize and cap exposed tubing
Regular inspection schedule and record-keeping
One clear inspection schedule, paired with concise records, transforms drip irrigation from reactive fixes into proactive care.
Inspect lines weekly for leaks, flow changes, and emitter performance; log date, location, findings, and corrective actions.
Monthly system-wide checks verify pressure and filters.
Maintain a simple, searchable log (paper or digital) to track patterns, prioritize repairs, and justify parts or professional service.
Winterization and startup procedures to avoid damage
Every irrigation system benefits from a clear winterization and startup routine that prevents freeze damage and guarantees reliable spring operation.
The plan drains lines, removes and stores aboveground components, inspects valves and filters, and documents repairs.
In spring, lines are flushed, pressure tested, emitters checked, and any leaks fixed before planting.
Seasonal checks minimize failures and extend system lifespan.
Troubleshooting Complex or Recurring Problems
When problems recur or resist basic fixes, a systematic diagnosis is required to identify low pressure, uneven watering patterns, or root intrusion.
The discussion should outline when root pruning or trenching becomes necessary and what signs indicate each remedy.
It should also define clear criteria for choosing professional help versus a DIY repair.
Diagnosing low pressure, uneven watering, and root intrusion
Begin by systematically evaluating the system: measure pressure at the supply, inspect emitters for clogs or misalignment, and check lines for visible leaks or root intrusion.
Record pressure at several points, compare flow rates, and map uneven zones.
Test filters and pressure regulators, isolate sections to locate restrictions, and look for soil dampness patterns indicating hidden leaks or emitter failure before corrective repairs.
When root pruning or trenching is necessary
If mapping and isolating problems shows repeated line damage, persistent leaks beneath roots, or chronic emitter blockage caused by root intrusion, root pruning or trenching may be required.
Assess root size, tree value, and irrigation layout. Prune roots selectively or dig a trench to reroute tubing, reinstall emitters, and apply root barrier.
Monitor for regrowth and repair any disturbed soil promptly.
Criteria for professional help vs. DIY repair
Although many drip-line issues can be resolved with basic tools and part replacements, certain signs—extensive underground leaks, repeated failures after repairs, tree-root involvement requiring heavy excavation, electrical component faults in automatic controllers, or system age exceeding typical service life—indicate a professional irrigator should be consulted.
Homeowners should weigh the cost and risk of further damage against the expense of expert assessment and targeted repair. A professional is advised when diagnostics exceed homeowner skill, when system downtime threatens plants, or when permits, trenching, or major component replacements are required.
Materials, Tools, and Cost Estimates for Common Repairs
A concise list of typical parts, required tools, and average repair times helps set realistic expectations for common drip line fixes. Below is a quick comparison of common items and repair-time estimates alongside typical DIY and professional cost ranges. This information enables readers to choose the most efficient and cost-effective approach.
| Items / Estimates | Typical Values |
|---|---|
| Parts & Tools | Tubing, emitters, couplers, punch, clamps, slip repair kit |
| Time & Cost Range | 10–60 min per repair; DIY $5–$40, Pro $50–$150+ |
Typical parts, tools, and average repair time
Repairing a drip irrigation line typically requires a small set of common parts—emitters, couplers, tees, end caps, and replacement tubing—along with basic tools such as pruning shears, a utility knife, barbed fittings pliers, and a pressure gauge.
Typical repairs also use plumber’s tape, hose clamps, and small solderless connectors. Most straightforward fixes take 10–45 minutes depending on access, damage, and system complexity.
Estimated costs for DIY vs. professional repairs
Frequently, homeowners choose between DIY fixes and hiring a professional by weighing material and tool costs against labor and expertise; DIY expenses typically include replacement tubing, emitters, connectors, and basic tools totaling $20–$100 for simple repairs.
Professional service fees range $75–$250 for diagnostics and labor, higher for complex system work.
Cost depends on scope, accessibility, and warranty considerations.
Quick Tips to Extend the Life of Your Drip System
Maintaining a drip system requires attention to water quality, proper control, and thoughtful layout to prevent clogging and uneven wear.
Simple steps—filtration, smart controls and sensors, and correct emitter placement—can greatly reduce repairs and extend component life. The following quick tips summarize practical measures to keep a system running reliably.
- Install appropriate filters and flush lines regularly to prevent sediment and mineral buildup.
- Use a smart controller and soil or rain sensors to avoid overwatering and reduce system strain.
- Place emitters and design zones for even coverage, minimizing pressure-related stress and root intrusion.
Water quality tips and filtration recommendations
Water quality directly affects drip system performance, so filtering particulate matter, removing dissolved salts, and preventing biological growth are essential to reduce emitter clogging and extend component life.
Use inline screen filters, pressure‑compensating filters for fine sediments, and periodic acid or enzymatic flushing for mineral and biofilm buildup.
Test source water annually and adjust filtration and maintenance frequency based on turbidity and salinity readings.
Smart controller and sensor integration to reduce strain
Good filtration and routine flushing reduce the physical causes of emitter clogging, but smarter control and sensing further lower strain by preventing overwatering, pressure spikes, and run-on events.
Smart controllers schedule shorter, targeted cycles; pressure sensors detect surges and trigger shutoffs; soil moisture and rain sensors suspend irrigation when unnecessary.
Integration reduces emitter wear, conserves water, and shortens maintenance intervals.
Best practices for emitter placement and system design
Place emitters deliberately and design lines to match plant needs and site conditions to minimize stress and extend system life.
Emitters should target root zones, use appropriate flow rates, and space according to plant maturity.
Group plants with similar water needs on dedicated zones.
Route tubing to avoid physical damage, minimize long runs to reduce pressure loss, and include accessible flush and isolation points for maintenance.
Conclusion
A well-tended drip line rewards patience with steady growth; like a patient clock, each repaired emitter and cleared clog restores quiet rhythm to the garden. Following systematic diagnosis, timely isolation, and straightforward fixes keeps leaks at bay and clogs from returning. Routine inspections and simple preventive steps save time and money, while careful replacement of damaged parts guarantees efficient water delivery. Small, regular efforts sustain a reliable system and healthier plants.