How to Connect SharkBite to PEX: Step-by-Step Guide for a Leak-Free Fit
To connect SharkBite fittings to PEX, follow these steps for a secure, leak-free fit:
- Cut the PEX: Ensure a square cut.
- Deburr the Edge: Smooth any rough edges.
- Check Roundness: Confirm the end is round.
- Mark Insertion Depth: Use a marker to indicate how far the PEX should be inserted.
- Insert the PEX: Push the tube straight into the fitting until it seats against the shoulder.
- Pressurize: Slowly turn on the water and check for leaks.
Always follow local plumbing codes, replace any damaged parts, and use the correct tools to ensure reliable connections. For detailed preparation and troubleshooting, continue with further instructions.
What SharkBite Fittings Are and Why They Work with PEX
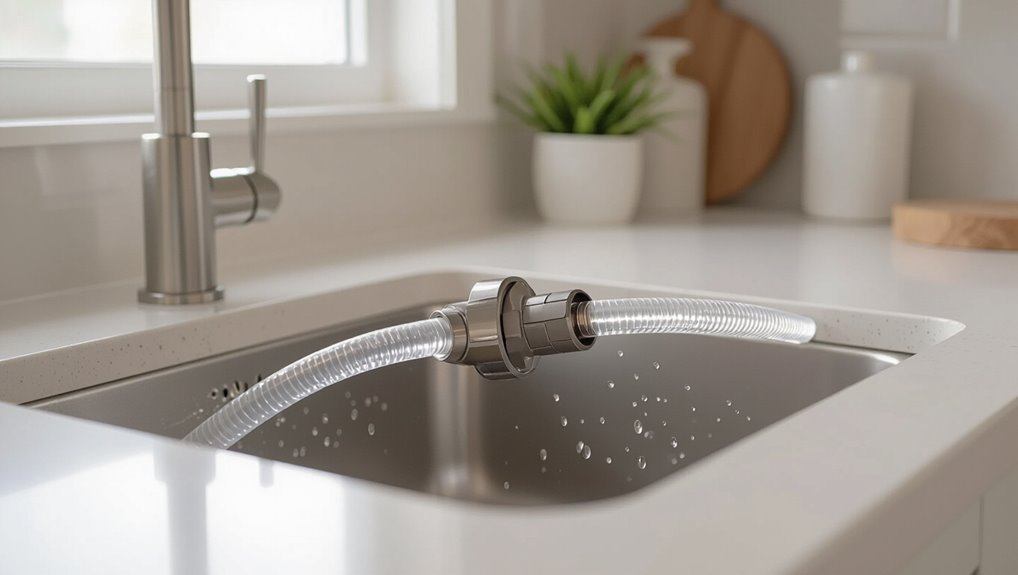
SharkBite fittings use a push-to-connect mechanism with an internal stainless steel grab ring and O-ring to create an immediate, watertight seal on PEX tubing.
A range of compatible SharkBite types—couplings, elbows, tees, adapters, and valves—fits PEX sizes and common plumbing configurations.
Their advantages include tool-free installation, reusability, and reliable performance on PEX without soldering or crimping.
How SharkBite Push-to-Connect Technology Works
Push-to-connect fittings use a simple mechanical design that creates a secure, watertight joint without soldering, crimping, or glue.
A stainless steel grab ring bites into PEX while an O-ring seals around the pipe.
Installation guidance on how to connect sharkbite to pex emphasizes full insertion depth and clean cut ends.
Pressure holds the connection; disassembly uses a release collar.
Types of SharkBite Fittings Compatible with PEX
After outlining how the push-to-connect mechanism forms a secure seal with PEX, attention turns to the specific fittings compatible with that pipe.
SharkBite offers couplings, elbows, tees, adapters, and stop valves sized for PEX. Each fitting combines an O-ring and stainless steel grab ring to grip PEX without soldering or crimping, enabling quick changes between PEX and copper or threaded connections.
Advantages of Using SharkBite on PEX Pipes
Because they combine a simple mechanical grip with a reliable elastomeric seal, SharkBite fittings provide a fast, tool-free way to join PEX that preserves the pipe’s flexibility and pressure ratings.
They offer corrosion resistance, reversible connections for maintenance, and compatibility with common plumbing materials.
Installation reduces labor time, minimizes leak risks when installed correctly, and supports retrofits without soldering or glue.
Quick Checklist Before You Start Connecting SharkBite to PEX
Before beginning, the preparatory checklist should list the specific tools and materials required, including PEX cutter, deburring tool, and the correct SharkBite fittings.
It should note basic safety steps and remind the reader to verify local plumbing codes or permit requirements.
Finally, it should briefly compare scenarios where SharkBite is appropriate versus when soldering, crimping, or press fittings are preferable.
Tools and Materials You’ll Need
A concise set of tools and materials guarantees a smooth, leak-free connection when joining SharkBite fittings to PEX piping.
Essential items are listed for quick preparation and confidence.
- PEX tubing, SharkBite fittings, and suitable adapters
- PEX cutter and deburring tool
- Tape measure, marker, and emery cloth
- Bucket, rags, and plumber’s wrench
Safety Precautions and Local Code Considerations
With tools and materials assembled, attention turns to safety measures and local code requirements that govern SharkBite-to-PEX connections.
Inspect workspace for hazards, depressurize and drain lines, wear eye and hand protection, and guarantee proper ventilation.
Verify local plumbing codes, permitted materials, and required permits; consult inspectors when unsure.
Follow manufacturer installation guidelines and use approved fittings to maintain compliance and safety.
When to Choose SharkBite vs. Other Connection Methods
Consider project scope, permanence, and budget when deciding between SharkBite and alternative PEX connection methods.
SharkBite suits quick repairs, temporary setups, and locations needing future disassembly.
For long-term, buried, or high-vibration installations, crimp, clamp, or cold-expansion fittings often provide greater durability and code compliance.
Evaluate accessibility, expected lifespan, and installer skill before selecting the connection type.
Step-by-Step Guide to Preparing PEX for a SharkBite Connection
First, the installer measures and cuts the PEX to the required length using a suitable cutter for a square, clean cut.
Next, the pipe end is deburred and wiped to remove burrs and debris so the SharkBite seat and O-ring can seal properly.
Finally, the technician checks the pipe for roundness and removes any internal support insert before pushing the PEX fully into the fitting.
Measuring and Cutting PEX to Length
Measure the run carefully to guarantee the PEX reaches between fittings with enough slack for movement and expansion.
Mark the cut point, accounting for fixture depths, bends, and clamp placements.
Use a proper PEX cutter held square to produce a straight, even cut.
Re-measure after cutting to confirm length.
Label lengths if multiple runs exist to prevent installation errors.
Deburring and Ensuring a Clean Pipe End
With the PEX cut to length and labeled, attention turns to preparing the pipe end for a reliable SharkBite connection.
The installer removes burrs and rough edges with a deburring tool or chamfering blade, wipes away debris, and guarantees the outside surface is clean and dry.
Properly finished ends prevent seal damage and guarantee full insertion for a leak-free fit.
Checking Pipe Roundness and Removing Inserts if Present
Inspect the PEX end for roundness and check for any internal stiffening insert before attempting the SharkBite fit.
Verify the tube retains its circular profile; squeezed or oval sections must be trimmed back to true roundness.
If a support insert is present, remove it fully or follow manufacturer guidance.
Re-measure diameter after trimming to confirm a proper, leak-free connection.
How to Install a SharkBite Fitting on PEX
The procedure begins with measuring and marking the correct insertion depth on the PEX to guarantee proper engagement with the SharkBite.
The pipe is then pushed squarely into the fitting using a steady, straight technique, with specific tips for elbows, tees, and straight runs to prevent misalignment.
Finally, the connection is checked for secure seating and tested for leaks before completing the installation.
Marking Insertion Depth Accurately
Accurate marking of insertion depth guarantees a secure, leak-free connection when installing a SharkBite fitting on PEX.
Measure the fitting’s published depth, transfer that measurement to the tubing, and mark with a single visible line around the circumference.
Verify the mark is flush and unobstructed by burrs or debris.
Recheck measurement before insertion to prevent under- or over-insertion.
Inserting the PEX into the SharkBite: Technique and Tips
Push the prepared PEX firmly and evenly into the SharkBite fitting until the insertion mark aligns with the fitting shoulder; proper seating guarantees the stainless steel teeth grip the pipe and the O-ring forms a watertight seal.
Maintain axial pressure, avoid angling or twisting, and insert steadily until the mark disappears.
Inspect visually for full insertion and remove any burrs or debris before pressurizing the line.
Verifying a Secure, Leak-Free Connection
Confirming a secure, leak-free SharkBite connection begins with a visual and tactile inspection to guarantee full insertion and proper alignment.
Then, slowly pressurize the line and observe the joint for any drips. Feel for movement or looseness.
Check surrounding pipe for moisture. If no leaks appear after several minutes under normal pressure, the connection can be considered secure.
Making Straight, Elbow, and Tee Connections with PEX
Begin by cutting and deburring the PEX to a square, clean end and marking the insertion depth for the chosen SharkBite fitting.
Then, install straight couplings, 90° elbows, or tees by aligning the pipe with the fitting’s stop and pushing until the mark meets the collar.
Confirm engagement visually and by gentle pull.
Support with clamps or hangers, avoid excessive bending, and pressure-test the assembly.
Connecting SharkBite to Existing Plumbing Materials
When integrating SharkBite fittings into an existing system, proper matching of materials and fittings guarantees a reliable seal.
The discussion covers joining PEX to copper, connecting PEX to CPVC, PVC, and other plastic pipes, and selecting the correct adapters or connector fittings.
Attention to pipe preparation, fitment compatibility, and manufacturer guidance prevents leaks and code issues.
Joining PEX to Copper with SharkBite
To join PEX to existing copper with a SharkBite fitting, the installer must prepare the copper pipe by cutting it square, deburring the inside and outside edges, and cleaning any corrosion or scale so the push-fit seal seats properly.
The PEX end requires a clean, straight cut and insertion depth marking.
Insert both pipes fully into the SharkBite, ensuring secure engagement and testing for leaks.
Connecting PEX to CPVC, PVC, and Other Plastics
Although plastics vary in composition and solvent-resistance, connecting PEX to CPVC, PVC, or other plastic pipes with a SharkBite push-fit follows the same basic principles: confirm material compatibility, prepare clean, square cuts, deburr or chamfer edges where needed, and insert each pipe to the manufacturer’s depth mark for a secure seal.
Test connections under low pressure first, inspect for proper engagement, and follow local codes.
Using Adapters and Transition Fittings
Because existing plumbing often mixes materials and sizes, adapters and changeover fittings become essential for integrating SharkBite connections into an established system. The installer selects material-compatible adapters (copper, CPVC, PEX), correct sizes, and pressure-rated fittings, ensuring clean cuts and deburring before push-fit installation to prevent leaks and galvanic corrosion.
| Material | Adapter type |
|---|---|
| Copper | Copper-to-SharkBite |
| CPVC | CPVC-to-SharkBite |
| PEX | PEX-to-SharkBite |
| Galvanic barrier | Dielectric fitting |
Testing and Troubleshooting SharkBite Connections
Once fittings are installed, the installer conducts pressure testing to confirm there are no leaks and to locate any weak points.
If leaks appear, common causes such as insufficient pipe insertion, damaged O-rings, or debris in the fitting are inspected and corrected.
When removal is required, the proper use of a disconnect clip or tool is described to safely extract the SharkBite from PEX without damaging the pipe.
Pressure Testing Procedures for Leak Detection
Begin by isolating the section of PEX line joined with SharkBite fittings and preparing it for a controlled pressure test.
Use a calibrated gauge and a pump to raise pressure to recommended levels. Monitor for pressure drop over a set dwell time, and inspect all fittings and joints visually.
Record results, relieve pressure slowly, and retest if anomalies appear.
Common Causes of Leaks and How to Fix Them
After completing pressure testing and documenting any anomalies, attention turns to diagnosing and repairing common leaks at SharkBite-to-PEX connections.
Causes include miscut tubing, debris in the fitting, insufficient insertion depth, and damaged O-rings.
Remedies: clean and recut, flush and reinsert, mark depth and seat firmly, replace O-ring or fitting. Emphasize retest after each repair.
- Mis-cut tubing
- Debris contamination
- Shallow insertion
- O-ring damage
How to Remove a SharkBite from PEX Safely
To remove a SharkBite from PEX safely, the technician should first depressurize the line and verify no residual pressure remains.
Then, mark orientation, hold the pipe steady, and use a proper disconnect tool or a sturdy screwdriver to depress the stainless steel grab ring while pulling the fitting straight off.
Inspect PEX for damage; cut back slightly if needed before rejoining.
Best Practices for Long-Term Performance
Long-term reliability of SharkBite fittings on PEX requires attention to the manufacturer’s temperature and pressure ratings to prevent premature failure.
Proper pipe support and allowances for thermal expansion and contraction reduce stress on fittings and joints.
Decisions to repair or replace a SharkBite connection should be based on visible damage, recurrent leaks, and the age and service history of the installation.
Temperature and Pressure Limits for SharkBite on PEX
Temperature and pressure limits are critical factors in determining the reliability of SharkBite fittings on PEX piping, as exceeding manufacturer specifications can lead to leaks or premature failure.
Installers must adhere to rated maximums—typically 200°F (93°C) and 200 psi for short durations, lower for continuous service.
Avoid thermal cycling beyond ratings and confirm compatibility with system pressure, water heater settings, and local codes.
Proper Support, Expansion, and Contraction Considerations
Beyond adhering to temperature and pressure limits, attention to mechanical support and movement control determines the durability of SharkBite fittings on PEX.
Properly secure runs with clamps every recommended interval, avoid tight bends near fittings, and allow PEX to expand and contract with uncompressed fastening.
Provide slip joints or expansion loops where thermal movement is expected and isolate fittings from vibration to prevent stress and leaks.
When to Replace vs. Repair a SharkBite Connection
Assess whether to repair or replace a SharkBite connection by inspecting the fitting and surrounding pipe for signs of permanent damage, repeated leaks, or compromised integrity.
Repair is appropriate for minor, isolated leaks or loose fittings if seals and tubing remain sound.
Replace fittings when corrosion, crack, deformation, persistent leaks, or prior multiple repairs suggest failure risk.
Prioritize long-term reliability and code compliance.
Cost, Time, and Project Considerations
Typical DIY SharkBite-to-PEX installations often cost mainly for fittings and pipe, with most small jobs completed in an hour or two by a competent homeowner.
Professional labor increases total expense but can shorten project time and provide guaranteed work for complex runs, code compliance, or concealed connections.
Hiring a plumber is recommended for multi-story systems, gas or potable-water tie-ins, permit-required work, or when access and pressure-testing present challenges.
Typical Costs and Time Estimates for DIY vs. Professional Installation
One key decision when connecting SharkBite fittings to PEX is whether to tackle the job as a DIY project or hire a professional, since costs and time vary considerably between the two approaches. DIY typically saves labor but adds time; pros cost more upfront yet finish faster and guarantee work.
| Option | Typical Cost | Typical Time |
|---|---|---|
| DIY | $20–$100 | 1–4 hours |
| Pro | $150–$500+ | 0.5–2 hours |
| Materials only | $10–$50 | N/A |
Scenarios Where Hiring a Plumber Is Recommended
After weighing cost and time differences between DIY and professional work, certain situations clearly favor hiring a licensed plumber.
Complex layouts, concealed leaks, multi-branch systems, or main shutoff challenges justify professional rates.
Limited time, lack of proper tools, local code requirements, or warranty needs also tip the balance.
For high-risk or nonstandard installations, hiring a plumber minimizes delays, permits issues, and costly rework.
Common Mistakes to Avoid When Using SharkBite with PEX
Mistakes with SharkBite and PEX are often avoidable but can lead to leaks or code violations if ignored. Common pitfalls include improper insertion depth, failing to prepare the pipe, reusing damaged fittings or tubing, and overlooking local codes or manufacturer warnings:
- Incorrect insertion depth and pipe preparation
- Reusing damaged fittings or pipes
- Ignoring local code or manufacturer warnings
- Assuming all fittings and situations are interchangeable
A clear checklist and attention to manufacturer guidance prevent most problems.
Incorrect Insertion Depth and Pipe Preparation
Improper insertion depth and inadequate pipe preparation are frequent causes of leaks and failed connections when using SharkBite fittings with PEX.
Installers must cut squarely, deburr, and verify pipe ends are clean and free of oxidation.
Mark insertion depth, fully seat the pipe until it meets the fitting’s stop, and inspect alignment.
Partial insertion or rough edges compromise the O-ring seal and grip.
Reusing Damaged Fittings or Pipes
Reusing damaged SharkBite fittings or compromised PEX pipe sections often leads to leaks and system failures because worn O-rings, deformed teeth, or micro-cracks reduce sealing and grip.
Inspect components; discard fittings with visible deformation, corrosion, or hardened seals.
Replace PEX showing cuts, kinks, or stress fractures.
Using new, certified parts guarantees predictable compression, reliable bite, and long-term leak-free joints.
Ignoring Local Code or Manufacturer Warnings
After stressing the need to discard damaged fittings and compromised PEX, attention must turn to the regulatory and manufacturer guidance that governs proper installation.
Ignoring local codes or SharkBite warnings risks voided warranties, failed inspections, and unsafe systems.
Installers should verify code compatibility, follow temperature/pressure limits, use approved materials, and document compliance.
When in doubt, consult local authorities or manufacturer technical support before proceeding.
Useful Accessories and Complementary Products
Proper tools and complementary fittings greatly improve SharkBite-to-PEX installations.
Essential accessories include quality pipe cutters, deburring tools, and depth gauges to guarantee clean, accurate cuts and reliable connections.
In addition, shutoff valves, adapters, and isolation options offer control and flexibility for maintenance and layout changes.
Pipe Cutters, Deburring Tools, and Depth Gauges
Cutting PEX squarely and preparing the pipe ends are critical steps before installing SharkBite fittings, and the right set of accessories streamlines those tasks.
Essential tools guarantee clean, reliable joins:
- Sharp PEX cutter for precise, burr-free cuts.
- Deburring tool to remove ragged edges and prevent leaks.
- Depth gauge to guarantee proper insertion length.
- Marker for consistent alignment.
Shutoff Valves, Adapters, and Isolation Options
Install shutoff valves and adapters to make routine maintenance and emergency isolation straightforward when working with SharkBite and PEX systems.
Ball valves, angle stops, and isolation valves allow sectioned repairs without draining entire systems. Use compatible SharkBite adapters for conversions to copper or threaded fittings.
Consider keyed or tagged isolation points for quick identification and include check valves where backflow prevention is required.
Quick Reference: Steps Summary and Insertion Depth Chart
Refer to this concise checklist and insertion-depth chart for a fast, reliable SharkBite-to-PEX connection: measure and mark the PEX tube at the specified depth, deburr and square the cut, slide the fitting fully onto the pipe until the mark aligns with the fitting face, and verify a secure, flush engagement before pressure testing.
| PEX Size | Depth (in) | Notes |
|---|---|---|
| 1/2″ | 7/8″ | Standard |
| 3/4″ | 1-1/8″ | Verify mark |
| 1″ | 1-3/8″ | Support pipe |
| 1-1/4″ | 1-5/8″ | Larger fittings |
Conclusion
The guide confirms that SharkBite fittings reliably join to PEX when correct prep and insertion depth are observed. Investigating the theory that push-fit creates a foolproof seal reveals nuance: cleanliness, straight cuts, and proper support matter. This measured inquiry establishes a steady rhythm—procedure, check, install—underscoring that skillful attention, not mere faith in the product, yields a leak-free fit. Consequently, methodical practice validates the promise of SharkBite on PEX.