How to Winterize Plumbing in a Vacant House: Step-by-Step Guide to Prevent Frozen Pipes and Water Damage
To winterize plumbing in a vacant house and prevent frozen pipes and water damage, follow these essential steps: shut off the main water supply, drain all water lines and the water heater, and open faucets and toilets to relieve pressure. Disconnect and drain exterior hoses and irrigation systems. Insulate fixtures and exposed pipes, and add antifreeze to traps as needed. To enhance protection, consider installing remote leak sensors and scheduling regular inspections. For a comprehensive guide, including detailed procedures and checklists, continue reading.
Why winterizing plumbing in a vacant house is critical
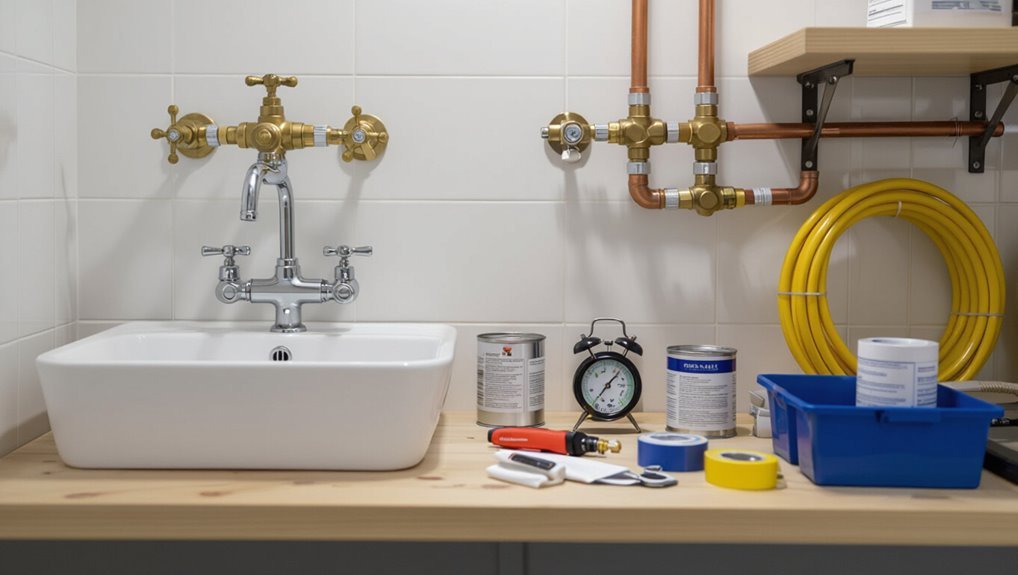
Unoccupied homes face a high risk of frozen pipes that can rupture and cause extensive water damage when temperatures drop.
Repairing burst pipes and addressing ensuing mold can be costly and time-consuming, often exceeding preventive measures.
Local climate severity and sudden cold snaps further increase a vacant property’s vulnerability and should guide winterization priorities.
Risks of frozen pipes and water damage in unoccupied homes
Because pipes left without regular heat are exposed to prolonged freezing, a vacant house faces a high risk of burst lines and consequential water damage.
Observers note that expanding ice splits pipes, floods finished spaces, and damages structures and belongings.
Preventive guidance about how to winterize plumbing in a vacant house reduces leak probability, limits structural harm, and preserves insurance eligibility and resale value.
Cost and time implications of burst pipes and mold growth
When a pipe ruptures in a vacant house, the immediate repair costs—ranging from plumbing labor and parts to demolition and reconstruction of affected walls, floors, and ceilings—can quickly escalate into tens of thousands of dollars.
Unchecked moisture accelerates secondary expenses as mold colonies establish within 48–72 hours, necessitating professional remediation, prolonged drying, and often replacement of porous materials.
Subsequent financial burdens include temporary housing, insurance claims, and lost property value.
Local climate factors that increase vulnerability
If regional temperatures regularly drop below freezing, exposed and poorly insulated plumbing becomes markedly more vulnerable to freezing and rupture. Wind chill, duration of cold snaps, and sudden temperature swings further increase the risk.
Additional climate factors—proximity to large bodies of water, elevation, and shade patterns—affect freeze severity.
Humidity and repeated freeze-thaw cycles accelerate material fatigue, raising likelihood of leaks and costly damage.
Quick overview: Essential winterizing steps at a glance
A concise checklist summarizes the core winterizing actions homeowners and property managers should follow, from shutting off water and draining lines to protecting exposed pipes and maintaining minimal heat.
A companion list identifies essential tools and supplies—shop vacuum or compressor, antifreeze for traps, pipe insulation, drain plugs, and a reliable shutoff key.
These quick references set expectations before proceeding to step-by-step instructions.
One-paragraph checklist for homeowners and property managers
Several key tasks should be completed before freezing temperatures arrive:
shut off the main water supply, drain lines and water heater, open faucets and flush toilets, disconnect and drain external hoses, insulate exposed pipes and vents, set thermostat to a safe minimum, install temporary heat or smart sensors if needed, and document shutoff locations and procedures for emergency responders or property managers.
Tools and supplies needed for a basic winterization
With main shutoffs identified and fixtures drained, attention turns to the tools and supplies required to perform a basic winterization safely and effectively.
Required items include a reliable wrench set, bucket, hand pump or wet/dry vacuum for draining, non-toxic antifreeze for traps, pipe insulation, heat tape, plumber’s tape, replacement washers, flashlights, batteries, and safety gloves and goggles.
Preparing before you arrive at the property
Before arriving at the property, one should review prior maintenance records and check local weather forecasts to identify vulnerabilities.
They should also establish an access and communication plan with caretakers or contractors to coordinate entry and tasks.
Finally, assess whether the scope of work requires a professional winterization crew or can be handled by the homeowner.
Inspecting prior maintenance records and local weather forecasts
Review prior maintenance records and check local weather forecasts to form a concise plan before arriving at the property.
The inspector notes past winterization actions, leak histories, valve locations, and equipment ages to prioritize tasks.
Forecasts determine urgency, temperature trends, and freeze risk windows. Together these sources guide necessary supplies, timing, and whether interim measures or professional intervention are required.
Creating an access and communication plan with caretakers or contractors
After assembling maintenance histories and weather data, the inspector establishes an access and communication plan with caretakers or contractors to guarantee timely entry and clear responsibilities.
The plan lists authorized contacts, key or code locations, preferred arrival windows, emergency protocols, and photo verification requirements.
It specifies notification methods, frequency of status updates, and contingency steps for missed visits, ensuring accountability and rapid response during cold snaps.
Determining whether professional winterization is required
How much risk does the property present and can on-site personnel safely and effectively manage it, or is a certified winterization specialist required?
Assess age, layout, insulation, boiler complexity, and known leaks.
Evaluate access, liability, and local code requirements.
If risks exceed staff skills or insurance limits, hire a licensed professional.
Document decisions, obtain estimates, and schedule verification upon completion.
Step-by-step shutdown and drainage procedure for a vacant house
The technician locates and closes the main shutoff, then systematically drains interior fixtures, the water heater, and outdoor lines to prevent freeze damage.
The procedure includes flushing and isolating the water heater, using compressed air to clear irrigation and sprinkler lines, and winterizing any well or pump systems per manufacturer guidance.
Clear checklists and pressure tests confirm all lines are empty and pumps are secured before leaving the property.
How to locate and shut off the main water supply
Where is the main shutoff and what steps reliably prevent freeze damage in a vacant house?
The homeowner locates the valve at the meter, inside basement, crawlspace, or exterior box. Turn clockwise to close; use an adjustable wrench if stiff.
Verify by opening a faucet—flow stops. Notify municipality if meter valve is inaccessible.
Tag and document shutoff for future access and inspections.
How to drain the system: interior fixtures, water heater, and outdoor lines
Begin by isolating water sources and relieving pressure: after the main shutoff is closed, open all interior cold and hot faucets (highest and lowest floors), flush toilets to empty tanks and bowls, and open any utility sinks.
Then shut off and drain the water heater according to manufacturer instructions, opening its drain valve and a hot-side faucet to encourage flow.
Finish by blowing out or draining outdoor hose bibs and irrigation lines using their drain valves or a shop vacuum/blower as needed.
Close interior faucets, cap or winterize fixtures, and verify no standing water remains in exposed traps or external lines.
Properly flushing and isolating the water heater
Isolate power and supply, then follow a clear shutdown-and-drain sequence to prevent damage and residual water in a vacant house:
Turn off electrical/gas supply, close cold-water inlet, open pressure-relief and drain valves, and attach a hose to direct water to a safe drain.
Flush tank until clear, close valves, and leave the drain slightly open and relief valve cracked for complete winter isolation.
Using compressed air to blow out irrigation and sprinkler lines
Prepare to clear irrigation and sprinkler lines by using compressed air to force remaining water out of pipes, valves, and sprinkler heads before freezing temperatures arrive.
Close the main supply, attach an air compressor to the system’s blowout port, and set pressure to recommended psi.
Open zones sequentially, purge until dry, then close and cap lines.
Remove debris and store equipment safely.
How to deal with wells and pump systems
After blowing out irrigation lines, attention turns to well and pump systems, which require a different shutdown approach to prevent freezing and equipment damage.
Isolate power at breaker, drain pressure tank and open tank drain.
Close intake valve, relieve line pressure, and open faucets to vent system.
If freezing risk persists, remove pump or insulate/heat the pump house; label controls for future reactivation.
Protecting specific plumbing components
The text now turns to protecting individual fixtures and systems that are vulnerable to freezing.
It outlines measures for toilets, sinks, tubs, faucets, shower valves, exposed pipes, and appliances such as dishwashers, washing machines, and ice makers.
It also covers safe use of non-toxic antifreeze in traps and drains to prevent damage without harming plumbing or the environment.
Winterizing toilets, sinks and tubs
Winterizing toilets, sinks, and tubs requires isolating and draining each fixture to prevent trapped water from freezing, expanding, and damaging pipes or porcelain.
Shut supply valves, flush toilets until tanks empty, and remove residual bowl water with a sponge or use RV antifreeze.
Open drain stoppers, pour antifreeze into traps, and leave vents slightly open for airflow.
Record completed fixtures.
Protecting faucets, shower valves and exposed pipes
Begin by insulating and securing all exposed plumbing fixtures to prevent freeze damage: wrap outdoor and basement faucets with foam covers or heat tape, drain and shut off garden hose bibs, and apply faucet protectors to wall-mounted spigots.
Inside, insulate shower valves and visible pipe runs with foam sleeves or pipe wrap, seal gaps where pipes enter walls, and label shutoffs for quick access.
Steps to winterize appliances: dishwasher, washing machine, ice maker
After insulating exposed faucets and pipes, attention should move to appliances with internal water lines that can freeze or cause floods when a house sits empty.
Shut off and disconnect water supply lines, drain hoses and cartridges, and run brief cycles to expel water.
Empty and prop open dishwasher and washer doors.
For ice makers, disconnect supply, remove ice, and leave the door ajar.
Safe use of non-toxic antifreeze in traps and drains
Use non-toxic, propylene glycol-based antifreeze specifically labeled for plumbing to protect traps and drains in a vacant house; pour recommended amounts into sinks, tubs, floor drains, and toilet traps after draining lines.
Follow manufacturer directions, avoid automotive ethylene glycol, ventilate when pouring, and document locations treated.
Inspect periodically and refill before cold snaps to maintain freeze protection and prevent sewer gas intrusion.
Insulation and heat strategies to prevent freezing
The section outlines practical insulation and active-heat options to keep pipes from freezing, comparing common materials and recommended R-values for different locations.
It also reviews heat tape, self-regulating cable and thermostatically controlled devices, plus the importance of sealing gaps and wall penetrations to stop cold air intrusion.
Finally, guidance is offered on when to maintain a low heat setting versus performing a full shutdown to balance protection and energy use.
Choosing and installing pipe insulation (materials and R-values)
When preparing vacant-house plumbing for winter, selecting appropriate pipe insulation and installing it correctly are the most direct ways to prevent freezing and burst pipes.
Use closed-cell foam, fiberglass with vapor barrier, or foam rubber; match thickness to R-value needs (R2–R6 typical).
Fit snugly, seal seams with tape or mastic, insulate elbows and valves, and secure with zip ties or clamps to maintain continuous coverage.
Heat tape, cable, and thermostatically controlled solutions
Consider electric heat tape and self-regulating heating cables as targeted solutions for pipes at high freeze risk; these products provide direct warmth along pipe surfaces and are often paired with thermostatic controllers or built-in sensors to activate only when temperatures approach freezing.
Proper installation follows manufacturer guidelines, overlaps avoided, and cables secured under insulation.
Hardwired or plug-in controllers conserve energy and reduce freeze risk.
Sealing gaps, vents and exterior wall penetrations to prevent drafts
Because even small openings can channel cold air directly to vulnerable plumbing, sealing gaps, vents, and exterior wall penetrations is a primary defense against pipe freezing in a vacant house.
Inspect foundation vents, dryer and exhaust flues, utility entry points, and around window frames.
Use foam sealant, weatherstripping, vent covers, and exterior-grade caulk.
Guarantee temporary closures remain accessible for maintenance and ventilation requirements.
When to keep a low heat setting versus full shutdown
After sealing exterior gaps and vents, the decision between maintaining a low heat setting and shutting off heat entirely hinges on insulation quality, local climate, and plumbing layout.
If walls, attic and pipe insulation are robust and winters mild, keep heat at 45–55°F and open cabinet doors.
In poorly insulated homes or severe cold, drain systems and shut off heat to avoid costly freeze damage.
Exterior and landscape measures
Attention to exterior components and yard layout is essential for preventing frozen pipes in a vacant house.
Outdoor hose bibs, irrigation lines, meters, and backflow preventers should be shut off, drained, and insulated or enclosed.
Strategic landscaping—such as removing shallow-rooted plants near lines or adding soil/mulch to increase insulation—can further reduce cold exposure to vulnerable pipes.
Shutting off and draining outdoor hose bibs and irrigation systems
Shut off and drain all outdoor hose bibs and irrigation lines to prevent freeze damage and costly repairs; this includes closing any exterior shutoff valves, disconnecting hoses, and using built-in drains or blowout compressors for sprinkler systems.
After isolating supply, open bibs and drain cocks, purge low spots, and cap or insulate exposed fittings.
Verify systems remain dry before leaving the property.
Protecting exterior meters and backflow preventers
Inspect and insulate exterior meters and backflow preventers to prevent freeze damage and secure reliable operation during vacancy.
Technicians or homeowners should remove debris, wrap devices with approved insulating covers or heat tape, and secure enclosures against wind.
Confirm electrical connections for heat tapes are weatherproof.
Label components for inspectors, document insulation steps, and schedule periodic visual checks throughout cold spells to catch failures early.
Landscaping adjustments to reduce cold exposure to pipes
Careful landscaping can markedly lower the risk of pipe freezing by reducing wind exposure, improving sun access, and creating insulating ground cover around vulnerable exterior plumbing.
Strategically placed shrubs and berms block prevailing winds, while deciduous plantings allow winter sun.
Add mulch or gravel over shallow service lines, reroute irrigation away from exposed pipes, and maintain clear access for inspection and heat-tape installation.
Monitoring and maintenance while the house is vacant
Remote monitoring systems—water leak sensors, temperature probes, and smart shutoff valves—provide immediate alerts and remote control to reduce freeze and flood risk.
Regularly scheduled in-person inspections by a caretaker, with a clear checklist for checking pipes, drains, and heating, complements electronic surveillance.
A predefined alarm response plan including who to contact and how to perform an emergency shutoff guarantees rapid action when issues arise.
Remote monitoring options: water sensors, temperature sensors and smart valves
Installers and homeowners can pair water leak detectors, ambient and pipe-temperature sensors, and internet-connected shutoff valves to create a layered alert and mitigation system for an unoccupied house.
Remote options enable immediate notifications, automatic shutoff, and trend tracking to prevent freeze-related damage.
- Leak sensors under fixtures
- Temperature probes on vulnerable pipes
- Wi‑Fi or cellular hubs
- Motorized shutoff valve with app control
Scheduled inspections: frequency and checklist for caretakers
When a house is left vacant, a regular inspection schedule guarantees minor issues are caught before they become costly failures.
Caretakers should visit weekly to check interior temperatures, visible pipes, and the boiler/heat source; inspect exterior spigots, gutters, and crawlspaces monthly; test sump pumps and battery backups quarterly.
Document findings, photograph problems, and report defects promptly for scheduled repairs.
Responding to alarms and emergency shutoff procedures
Responding swiftly to alarms and executing emergency shutoffs can prevent minor issues from becoming major damage in a vacant house. Caretakers should treat every alert as a potential real event until proven false.
Caretakers must verify alarm source, follow documented shutoff steps for main and zone valves, notify owner, and log actions.
If unsure, contact licensed plumber or emergency services immediately.
Common mistakes and how to avoid them
A few recurring errors undermine winterizing efforts and create avoidable damage.
Common pitfalls include incomplete drainage that leaves hidden traps and pockets of water to freeze, improper use of antifreeze or non-suitable products, and neglecting secondary systems such as irrigation lines, gas-fired heaters, and sump pumps.
Addressing each of these specifically reduces freeze risk and long-term repair costs.
Incomplete drainage and hidden water traps that freeze
Overlooking small pockets of retained water is a frequent error that leads to frozen traps and burst pipes in vacant houses. Drains, low spots in supply lines, and appliance connections can all harbor enough water to freeze and cause damage.
Inspect floor drains, clear P-traps, disconnect and drain appliances, blow out lines or tilt fixtures.
Verify outdoor hose bibs and irrigation valves for trapped water.
Misuse of antifreeze and incorrect products
Misusing antifreeze or choosing the wrong product is a common cause of failed winterization efforts in vacant houses. This is because automotive or non-potable formulations can corrode plumbing, contaminate potable water, or provide insufficient freeze protection.
Professionals recommend using EPA-approved, propylene-glycol-based RV/boiler antifreeze for potable systems, following manufacturer dosages, and flushing thoroughly before reoccupying to avoid damage and health risks.
Overlooking secondary systems like irrigation, gas-fired heaters, and sump pumps
After addressing proper antifreeze selection, attention must shift to secondary systems that are often neglected during winterization: irrigation lines, gas-fired heaters, and sump pumps each have unique failure modes and require specific preventive steps.
Inspect and drain irrigation, winterize backflow assemblies, shut gas and follow manufacturer heater winter procedures, and test/maintain sump pump and battery backup.
Document actions and schedule checks.
Signs of damage to check when reopening the house
Upon reopening, the homeowner should scan for visual signs such as warped drywall, water stains, frost-cracked pipes, and listen for drips or unusual plumbing noises that indicate past freezing or active leaks.
Water should be restored slowly with valves opened incrementally while monitoring pressure and visible joints for leakage.
If evidence of pipe rupture, persistent leaks, or unclear sources of damage appears, a licensed plumber should be contacted for inspection and repairs.
Visual and auditory indicators of past freezing or leaks
When reopening a vacant house, a careful visual and auditory survey quickly reveals evidence of past freezing or leaks: cracked or bulging pipes, warped baseboards, water stains on ceilings and walls, and mineral deposits around fittings are clear visual cues.
Meanwhile, the subtle sounds of dripping, hissing, or running water can indicate active leaks or compromised valves.
Inspect insulation gaps, frost lines, mold, and rusty fixtures.
How to safely restore water and check for leaks after winter
Begin by turning the main supply valve on slowly while watching the meter or a nearby fixture for immediate flow; a sudden surge, hissing, or unexpected meter movement signals a significant leak.
Inspect exposed pipes, joints, water heater, toilets, and under-sink areas for drips, corrosion, bulging, or dampness.
Run cold then hot taps, flush toilets, and check ceilings and floors for new stains or pooling.
When to call a licensed plumber for inspection and repairs
How can one tell whether a professional inspection is needed before restoring full service?
Visible leaks, low water pressure, discolored water, persistent odors, or sounds of running water suggest damage.
Frozen or bulging pipes, cracked fittings, damaged water heaters, or mold growth around fixtures warrant immediate plumber attention.
If shutoff valves malfunction or multiple issues appear, schedule a licensed inspection and repairs before full use.
Cost estimates and decision guide: DIY vs. professional winterization
Cost considerations can sway the decision between a homeowner tackling winterization and hiring a professional, with typical price ranges reflecting scope and risk. Below is a quick emotional snapshot of costs and situations that often prompt professional help:
| DIY (approx.) | Professional (approx.) |
|---|---|
| $0–$150 — basic draining, insulating | $150–$500 — full drain and anti-freeze service |
| $50–$200 — insulation, faucet covers | $200–$800 — pipe tracing, heat tape |
| $0–$100 — simple winterizing kit | $300–$1,200 — full system winterization |
| Low stress for small rentals | Peace of mind for long vacancies |
| Suitable if comfortable with tools | Recommended for complex plumbing, inaccessible systems |
Typical price ranges and what’s included
A clear understanding of typical price ranges helps homeowners weigh the pros and cons of DIY versus professional winterization.
DIY kits and supplies commonly cost $25–$150 (insulation, pipe sleeves, antifreeze, basic tools).
Basic professional services range $150–$400 (drain and blowout, antifreeze, inspection).
Thorough winterization with repairs or extensive systems typically runs $400–$1,200, often including labor, materials, and follow-up checks.
Situations where professionals are recommended
Consider hiring a professional when the property has complex systems, extensive piping, or unresolved maintenance issues that increase freeze risk.
Professionals are recommended for multi-zone HVAC, hard-to-access lines, outdated plumbing, prior freeze damage, or when liability and insurance compliance matter.
They provide thorough drain-downs, verified antifreeze fills, controlled shutoffs, documentation, and cost-estimate clarity, reducing risk compared with limited DIY efforts.
Quick-reference checklists
The article presents two concise checklists to streamline winterization tasks: a pre-winter checklist for property owners and a technician handoff checklist for contractors.
Each checklist lists essential actions, checkpoints, and timing to reduce missed steps and liability.
Clear, separable responsibilities improve consistency and speed during turnover and seasonal preparation.
Pre-winter checklist for property owners
Before temperatures drop, property owners should follow a concise pre-winter checklist to reduce freeze risks, prevent water damage, and limit liability while the house is vacant.
- Shut off main water; drain lines and open taps.
- Insulate exposed pipes and seal gaps around penetrations.
- Set thermostat to maintain minimal heat or arrange monitored heat.
- Inspect sump pump, exterior drains, and winterize irrigation systems.
Technician/contractor handoff checklist for professionals
Several clear checkpoints help guarantee a smooth technician-to-contractor handoff for winterizing plumbing in a vacant house: confirm shut-off and drainage status, verify insulation and heat settings, document sump pump and exterior drain condition, and note any temporary measures or access limitations.
The professional checklist records actions, locations, parts, and follow-up tasks for accountability and continuity.
- Confirm shut-offs
- Verify insulation
- Document pumps/drains
- List follow-ups
Resources and templates
A sample winterization log and inspection form is provided to standardize documentation of steps taken, dates, and responsible parties.
Guidance on local code requirements and any needed permits is summarized to guarantee compliance before work begins.
Together, these templates and regulatory notes help streamline planning and create an auditable record.
Sample winterization log and inspection form
Provide a concise, dated winterization log and inspection form to document each step taken, components checked, and any issues found during preparation of a vacant house for freezing conditions.
Use a clear template capturing:
- Date, inspector, and scope.
- Actions performed (drain, antifreeze, shutoffs).
- Components inspected (pipes, valves, heaters, insulation).
- Findings, repairs needed, and follow-up.
Local code and permit considerations for winterization work
Compliance with local codes and permitting forms the legal framework guiding winterization work, ensuring safety, environmental protection, and liability mitigation.
The practitioner must verify municipal requirements, obtain permits when altering plumbing or draining systems, and document approvals.
Resources and templates should include permits, inspection checklists, contractor credentials, and record templates.
- Permit checklist
- Inspection form
- Contractor proof
- Record template
Conclusion
As winter’s breath creeps through empty rooms, a well-winterized plumbing system stands as a hushed guardian, keeping pipes from becoming glassy ice sculptures and basements from turning into thawing ponds. By methodically draining, insulating, and sealing, the vacant house sleeps through cold spells untroubled. When stewardship and foresight meet simple steps, the property awakens intact come spring—no frantic repairs, just the quiet relief of structures preserved against frost’s slow, patient siege.