How to Fix a Broken Shower Handle Stem: Step-by-Step DIY Repair Guide
To fix a broken shower handle stem, start by shutting off the water supply. Then, remove the handle and escutcheon to inspect the stem or cartridge for any signs of wear, such as damaged splines, seals, or corrosion. If you find minor issues, you can replace O-rings and seals, applying plumber’s grease for a smooth operation. For more severe damage, you will need to install a new stem or cartridge. After reassembling everything, test for leaks and ensure proper alignment. This guide includes the necessary tools, detailed step-by-step instructions for extraction and installation, troubleshooting tips, cost estimates, and maintenance advice to help you restore your shower’s functionality.
What to know before you start repairing a broken shower handle stem
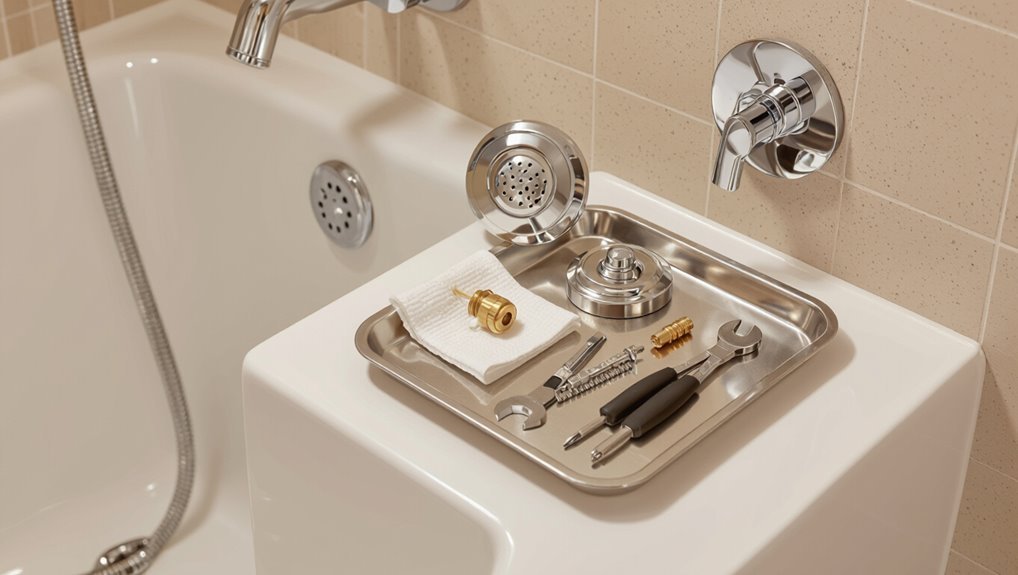
Before beginning repairs, the article explains how a shower handle stem functions and identifies common stem types to help diagnose the problem.
It then outlines essential safety precautions and signs that professional assistance is warranted.
Finally, it lists the basic tools and materials needed for a typical stem repair so the reader can prepare in advance.
How a shower handle stem works and common stem types
Understanding how a shower handle stem operates and recognizing common stem types helps diagnose problems and choose the correct replacement parts.
The stem translates handle rotation into valve movement; cartridge, ball, and compression stems are common. Identifying type guides parts and procedures when attempting how to fix a broken shower handle stem.
Inspect stem shape, mounting, and seals to determine required repair or replacement.
Safety precautions and when to call a professional
Having identified the stem type and inspected its components, a homeowner must assess safety risks and determine whether the repair is within their skill set.
Turn off water and power if applicable, check for leaks, corrosion, and fragile finishes.
Minor cartridge swaps suit confident DIYers; complex valve work, persistent leaks, or unknown plumbing layouts warrant a licensed plumber to prevent damage or code violations.
Tools and materials checklist
A concise checklist of tools and materials helps guarantee the repair proceeds smoothly and safely.
Essential items include basic hand tools, replacement parts, sealing supplies, and safety gear. Prioritize correct stem cartridge, compatible O-rings, and thread sealant.
Verify water shutoff access and spare towels. Gather parts before starting to avoid delays.
- Screwdrivers, Allen keys, adjustable wrench
- Replacement stem/cartridge and O-rings
- Plumber’s grease, PTFE tape, silicone sealant
- Gloves, goggles, rags, bucket
Quickly identify the problem: Diagnosing a broken shower handle stem
A quick diagnosis distinguishes a damaged stem from other faucet issues by noting specific signs like wobbling, stripped splines, or leaking around the handle versus mineral buildup or cartridge wear.
The inspector should remove the handle and escutcheon to visually check the stem and cartridge, testing movement and sealing surfaces for corrosion or damage.
If the stem shows minor wear or replaceable seals it may be repairable, but broken splines, deep corrosion, or a warped stem usually require replacement.
Signs of a damaged stem vs. other faucet problems
Often overlooked, the stem produces distinct symptoms that separate its failure from issues with cartridges, seats, or external trim.
Indicators include wobbling or misaligned handle rotation, persistent leaks at the valve body despite cartridge replacement, unusual play when turning, and inconsistent shutoff or temperature control limited to specific handle positions.
These signs point to stem wear, bent splines, or stripped threads rather than accessory faults.
How to inspect the handle, escutcheon, and valve cartridge
Having identified symptoms that suggest stem damage rather than cartridge or trim faults, the next step is a focused inspection of the handle, escutcheon, and cartridge to confirm the diagnosis.
Remove trim to view stem for cracks, stripped splines, or wobble.
Check escutcheon alignment and hidden screws.
Extract cartridge and inspect seals, ceramic discs, and stem fitment; note wear patterns for accurate troubleshooting.
When the stem is repairable vs. when replacement is required
When should a stem be repaired instead of replaced?
A stem is repairable if damage is limited to worn O-rings, minor corrosion, stripped splines, or buildup causing stiffness; these can be cleaned, lubricated, or have seals swapped.
Replacement is required for cracked stems, severe corrosion, warped shafts, or irreparable spline damage that compromises valve alignment or safety.
Preparing the work area and shutting off water
Before any repairs begin, the homeowner locates and shuts off the correct water valves to prevent leaks and flooding.
They protect nearby finishes and lay a towel or tray to catch small screws and parts.
Trim pieces are then removed carefully to expose the stem for inspection and repair.
Locating and turning off the correct shutoff valves
Where is the water supply and how will it be isolated: locate the individual shutoff valves for the shower (usually angled stops behind an access panel or the home’s main shutoff if none exist) and confirm which controls hot and cold.
Close the appropriate valve(s) fully, then open the shower handle briefly to relieve residual pressure.
Verify no flow before proceeding with repairs.
Protecting finishes and catching small parts
Lay down a towel or soft cloth around the tub or shower base and place a rubber sink mat or painter’s tape over nearby surfaces to prevent scratches and protect finishes.
Position a magnetic tray or small container to catch screws, springs, and clips. Work with good lighting and a flashlight.
Keep replacement parts separated and label containers to avoid confusion during reassembly.
Removing trim and accessing the stem
How should the work area be prepared and the water supply secured before removing trim to reach the stem?
The technician clears space, lays towels and a tray for parts, and covers finishes.
They turn off the shower’s water supply at the shutoff valve or main, open the faucet to relieve pressure, and confirm no flow.
With tools organized, trim screws are removed to expose the stem.
Step-by-step repair: Fixing a common broken shower handle stem
The following steps guide removal of the handle and retaining hardware, safe extraction of the stem or cartridge, and thorough cleaning and inspection of the stem and valve body.
They also cover repairing worn parts—rebuilding the stem or replacing seals and O‑rings—and when to fit a new cartridge.
Finally, clear instructions for reinstalling the stem or new cartridge complete the repair sequence.
Removing the handle and retaining hardware
Begin by shutting off water to the shower and verifying no residual pressure remains; this guarantees a safe workspace before touching the handle assembly.
Remove decorative caps, expose screws, and carefully loosen fasteners with the correct screwdriver or hex key.
Gently pull the handle straight off, avoiding prying.
Remove retaining clips, nuts, or bonnet screws and place hardware in labeled containers for reassembly.
Extracting the stem or cartridge safely
With water already shut off and handle hardware removed, the technician inspects the valve area to determine whether a stem or cartridge is used and which extraction method will apply.
Appropriate pullers, pliers, or spindle wrenches are selected. Corrosion is noted; penetrating oil is applied briefly.
The technician secures the valve body, uses steady, controlled force, and removes the stem or cartridge without twisting or damaging surrounding components.
Cleaning and inspecting the stem and valve body
Carefully clean the removed stem and valve body to reveal wear, mineral buildup, and damaged seals.
Use a soft brush, vinegar or a mild descaler, and a lint-free cloth to remove debris and corrosion.
Inspect bores, threads, splines, and mating surfaces for scoring, pitting, or distortion.
Note leaks, loose fittings, and trapped sediment for targeted repairs or parts replacement.
Repairing worn parts (rebuilding stem, replacing seals and O-rings)
After cleaning and inspecting the stem and valve body, attention shifts to repairing or replacing worn components so the assembly will operate smoothly and leak-free.
The technician removes corroded springs, replaces hardened seals and O-rings with exact-size nitrile or silicone parts, polishes or rethreads the stem where needed, and applies plumber’s grease.
All parts are rechecked for fit and smooth movement before reassembly.
Reinstalling the stem or new cartridge
Begin by orienting the stem or cartridge to the valve body so splines or tabs align precisely with their mating slots; proper alignment prevents binding and guarantees smooth operation.
Slide the unit straight in, seating it fully against the valve shoulder. Secure with the retaining clip or nut, torque to specification, and wipe away debris.
Restore water flow briefly to check for smooth rotation and no immediate leaks.
Reassembling handle, trim, and testing for leaks
With the stem or cartridge secured, the handle, trim, and escutcheon can be reinstalled in reverse order of removal, ensuring each piece aligns and seats properly before fastening.
Tighten screws and retainers snugly without over-torquing. Restore decorative caps.
Turn water on slowly, observe for leaks around trim and connections.
Cycle handle through full range, confirm smooth operation and watertight seals.
Replacing the shower stem entirely: When and how
When a stem is irreparably corroded or parts are unavailable, replacement is the practical option and requires selecting a matching stem or compatible cartridge by make, model, and valve type.
The procedure follows a clear sequence: shut off water, remove trim, extract the old stem or cartridge, fit the new unit with appropriate seals, and test for leaks.
If the existing valve body is older, the text will outline how to adapt universal cartridges or use adapter kits to guarantee proper fit and function.
Choosing the correct replacement stem or cartridge
If the existing stem is badly corroded, cracked, or incompatible with available seals, it should be replaced rather than repaired; selecting the correct replacement requires identifying the valve brand and model, measuring the stem length and diameter, and determining whether a cartridge or traditional stem assembly is required.
- Match manufacturer and model number.
- Measure exposed stem and overall length.
- Check spline count and diameter.
- Verify cartridge type (ball, ceramic, or stem).
Stepwise replacement procedure
Begin by shutting off the water to the shower at the main valve or local shutoff and relieve residual pressure by opening the shower handle briefly.
Remove trim, escutcheon, and retaining clip or nut. Extract the old stem straight out, inspect valve bore and seals.
Install matched replacement, secure fasteners, reassemble trim, turn water on, test for proper operation and leaks, adjust as needed.
Adapting universal cartridges to old valve bodies
Assess compatibility before fitting a universal cartridge into an older valve body: many universal cartridges offer broad fitment, but differences in spindle shape, mounting flanges, and sealing surfaces can prevent a proper seal or operation.
Measure dimensions, compare inlet/outlet alignments, and verify cartridge rotation and stop positions.
Use adapters or trim plates if available; otherwise replace the valve body to guarantee reliable sealing and function.
Troubleshooting common issues after repair
After replacing the stem, common post-repair problems may still appear and require systematic checks.
Technicians should inspect persistent leaks at the handle or showerhead, assess whether the handle is too tight or too loose after reassembly, and test for drips when the valve is off or for inconsistent temperature control.
Each symptom usually points to specific causes—seated seals, cartridge alignment or worn cartridges, and improper valve calibration—that guide the next corrective steps.
Persistent leaks at handle or showerhead
When leaks persist at the handle or showerhead after replacing a stem, the problem usually stems from an incomplete seal, misaligned components, or overlooked damaged parts.
Technicians should inspect packing, O-rings, valve seats, and cartridge alignment to pinpoint the source.
Replace worn seals, seat damaged cartridges, clean mineral buildup, torque retaining nuts correctly, and test under pressure.
Recheck connections and trim for hidden cracks.
Handle too tight or too loose after reassembly
Tighten or loosen the handle cautiously, as improper reassembly often leaves it binding or slopping on the stem.
Inspect the stem, splines, and retaining clip for burrs or misalignment.
Verify cartridge seating and washer placement.
Adjust the set screw incrementally, test rotation and centering, then secure handle.
If play or stiffness persists, disassemble and realign components before reinstalling.
Drips when valve is off or poor temperature control
Inspecting the valve and cartridge is the first step when a repaired shower drips with the control in the off position or fails to maintain consistent temperature.
Mineral buildup, worn seals or a damaged cartridge often cause leaks and temperature swings.
Clean or replace cartridge, inspect O-rings and seats, and verify correct assembly and water pressure.
Test operation and adjust or replace components as needed.
Parts comparison and cost considerations
A comparison of OEM and aftermarket stems and cartridges helps determine fit, reliability, and warranty differences before purchase. Typical price ranges vary by brand and material, and parts are commonly available at hardware stores, plumbing supply shops, and online retailers. The table below summarizes common options and expected costs.
| Part Type | Typical Price Range | Where to Buy |
|---|---|---|
| OEM cartridge/stem | $40–$120 | Manufacturer, authorized dealers |
| Aftermarket replacement | $10–$60 | Big-box stores, online marketplaces |
| Premium/branded options | $80–$200+ | Specialty plumbing suppliers, online |
OEM vs. aftermarket stems and cartridges
When choosing replacement stems or cartridges, homeowners must weigh OEM parts against aftermarket alternatives based on fit, warranty, and price.
OEM units typically guarantee exact fit and manufacturer backing but cost more.
Aftermarket options lower initial expense and may offer broader compatibility, yet risk imperfect tolerances and shorter warranties.
Selection depends on confidence in fit, desired longevity, and tolerance for potential adjustments.
Typical price ranges and where to buy
Having weighed OEM versus aftermarket options, cost becomes a primary factor in the replacement decision.
Typical stems range from $15–$40 for basic aftermarket units; OEM cartridges often cost $40–$120.
Local hardware stores, plumbing supply shops, and big-box retailers stock common models; online marketplaces and manufacturer sites offer wider selection and model-specific parts.
Consider return policies and compatibility before purchasing.
Maintenance tips to prevent future stem failures
Routine maintenance extends stem life: regular cleaning to remove mineral buildup, periodic lubrication of moving parts, and hard-water prevention all reduce wear.
Seasonal checks can catch corrosion or stiffness early.
Replace seals proactively when signs of cracking or persistent leaks appear to avoid sudden failure.
Regular cleaning, lubrication, and hard-water prevention
Regular cleaning, timely lubrication, and hard-water prevention form the most effective defense against future shower stem failures.
Remove mineral buildup with vinegar or descaler, rinse thoroughly, and dry components.
Apply plumber-approved silicone or lithium grease sparingly to moving parts.
Install or maintain a water softener or anti-scale filter to reduce deposits.
Regular attention prolongs stem life and preserves smooth operation.
Seasonal checks and when to replace seals proactively
Because temperature changes and seasonal water chemistry can accelerate wear, performing simple seasonal checks helps catch deteriorating seals before they fail.
Inspect O-rings and rubber seats quarterly, feel for cracking or flattening, and replace seals every 1–3 years or sooner if elasticity is lost.
Use compatible materials (EPDM or silicone) and keep records of replacement dates to anticipate future maintenance.
Quick reference: Tools, parts, and repair time estimates
A concise checklist lists necessary tools, replacement parts, and realistic time estimates so a homeowner can quickly decide whether to tackle a shower handle stem repair or call a pro.
Essential items, typical part options, and estimated durations are summarized for quick judgment.
- Screwdrivers, Allen keys, adjustable wrench — 15–30 min.
- Replacement stem/cartridge, O-rings — 30–60 min.
- Plumber’s grease, thread sealant — 10–20 min.
- Optional puller, basin wrench — add 15–30 min.
Conclusion
With the right tools and a little patience, repairing a broken shower handle stem is a manageable task that saves time and money. Like untangling a knot, diagnosing the issue first makes each next step clearer, whether tightening a retaining clip, replacing a worn O‑ring, or swapping the entire stem. Follow safety steps, double‑check seals, and test thoroughly; routine maintenance will keep the handle functioning smoothly and extend the life of the valve assembly.