How to Fix My AC Unit in My Apartment: A Step-by-Step Troubleshooting Guide
If your apartment AC unit has stopped working, follow these steps to troubleshoot the issue safely and effectively. Begin by ensuring safety: check the power supply, reset any breakers, and confirm that the thermostat is set correctly and has functioning batteries. Inspect the air filter, vents, and outdoor unit for any debris that might obstruct airflow.
Next, look for signs of problems such as leaks, ice on the coils, unusual noises, or burning smells, and document what you find. If you notice frozen coils, thaw them out, replace a dirty filter, and clear any clogged condensate drains. Avoid attempting to service sealed refrigerant lines or electrical components unless you are qualified.
If these steps do not resolve the issue, it’s best to contact your building maintenance or a licensed HVAC technician for further diagnosis and repair. The following sections will provide more detailed troubleshooting advice and next steps.
What to Do First When Your Apartment AC Stops Working
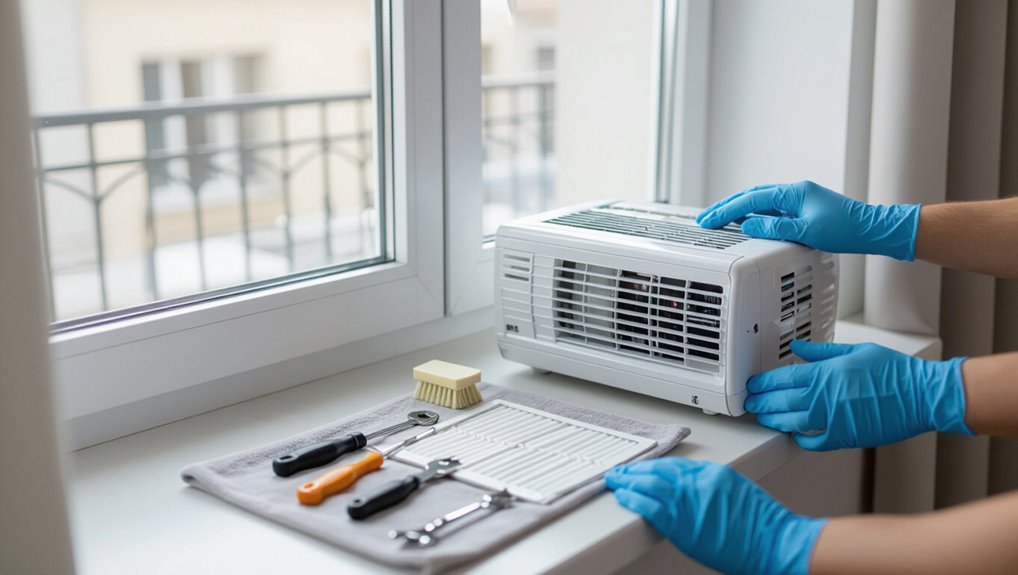
When an apartment AC stops working, the occupant should first run basic safety checks such as confirming the unit is plugged in, the breaker hasn’t tripped, and the thermostat has fresh batteries.
Next, they should check neighboring units or the building’s common areas and the building’s service panel to determine whether the outage is isolated or building-wide.
If the problem appears beyond simple fixes or affects multiple units, the tenant should promptly notify building maintenance or the landlord.
Quick safety checks to perform immediately
A few quick safety checks can prevent injury and further damage before any troubleshooting begins.
Inspect power: make certain the unit is unplugged or breaker is off before touching.
Look for burning smells, frayed cords, water pooling, or ice buildup.
Confirm windows and vents are closed to avoid strain.
Document findings for landlord or repair technician when attempting how to fix my ac unit in my apartment.
How to determine if the problem is yours or building-wide
How can one quickly tell whether a malfunctioning apartment AC is isolated or affects the whole building?
Check neighboring units: listen for running compressors, knock or ask neighbors if their units cool.
Inspect visible building systems (rooftop units, condenser fans) if accessible.
Verify breakers and thermostat settings in the apartment.
If neighbors report the same issue or exterior equipment is idle, the problem is building-wide.
When to call building maintenance or your landlord
If neighbors report the same lack of cooling or exterior equipment appears idle, the resident should notify building maintenance or the landlord promptly.
They should describe symptoms, note times, and mention any unusual sounds or smells.
The resident should avoid tampering with communal units, document responses, and request a timeline for repairs.
If no timely action occurs, escalate via written notice or tenant-rights channels.
Quick Troubleshooting Steps You Can Do Yourself
The reader is advised to start with simple checks that often restore cooling without professional help.
First, verify thermostat settings and confirm the unit has power, then inspect and reset any tripped breakers.
Next, show how to clean or replace the air filter, clear vents and registers, and flush or clear the condensate drain line.
Check the thermostat settings and power source
Many homeowners can resolve simple cooling failures by first verifying the thermostat settings and confirming the power supply to the AC unit.
The thermostat should be set to “cool” with a lower target than room temperature and fresh batteries if battery-powered.
Confirm the unit displays power and any inline switches or cords are connected.
If settings and power are correct, proceed to further diagnostics.
Inspect circuit breakers and reset safely
Check the home’s electrical panel for tripped breakers that may have cut power to the air conditioner.
The technician or resident should identify any breakers in the middle or off position, switch them fully off, then back on to reset.
If the breaker trips again immediately, stop and arrange professional service.
Use a flashlight and avoid wet conditions when accessing the panel.
Clean or replace the air filter step-by-step
Begin by locating the air filter housing—usually inside the return-air duct or the blower compartment of the indoor unit—and removing the filter to assess its condition.
If visibly dirty or clogged, replace disposable filters with the correct size and MERV rating.
For reusable filters, vacuum debris, wash with mild soap and water, dry completely, then reinstall.
Note replacement intervals and document date.
Clear vents, registers, and condensate drain lines
Clear vents, registers, and condensate drain lines to restore proper airflow and prevent water damage: remove grilles and vacuum or wipe away dust from vents and registers, and inspect the condensate drain and its pan for clogs or algae.
Confirm the drain line is clear by flushing with distilled white vinegar or a mild bleach solution, then rinse with water and reassemble grilles securely.
Step-by-Step Guide to Common AC Problems and Fixes
The guide outlines clear diagnostic steps and remedies for an AC that won’t turn on, as well as causes and fixes when the unit runs but fails to cool.
It also covers weak airflow and restoration techniques, identification and thawing of frozen evaporator coils, and methods to diagnose rattles, buzzing, and grinding noises.
Each section presents concise, actionable steps a homeowner or technician can follow.
AC won’t turn on diagnostic steps and remedies
If an air conditioner fails to power on, a focused, sequential diagnostic approach helps isolate the cause and prioritize safe remedies.
Check power: breaker, outlet, and cord.
Inspect thermostat settings and batteries.
Verify condensate overflow switch and safety interlocks.
Listen for humming or clicks indicating capacitor or compressor issues.
Tighten connections, reset breakers, replace fuses, or call a licensed technician for electrical or component repairs.
AC runs but doesn’t cool causes and how to fix
Diagnose systematically: when an air conditioner runs but fails to cool, technicians and homeowners should follow a concise checklist to distinguish airflow, refrigerant, mechanical, and control issues.
Check thermostat settings and mode, verify condenser and evaporator coils are clean, inspect refrigerant lines for oil stains or hissing, listen for compressor cycling, examine capacitor and contactor condition, and call certified HVAC for refrigerant or compressor repairs.
Weak airflow how to restore proper circulation
Inspecting airflow begins with identifying simple, common causes that restrict circulation so repairs can be targeted efficiently.
The technician checks and replaces dirty filters, clears blocked vents and registers, verifies fan speed and blower motor operation, and inspects ductwork for disconnections or leaks.
Minor obstructions and loose panels are fixed; persistent issues prompt professional duct sealing or blower replacement for restored airflow.
Frozen evaporator coils identification and thawing procedure
When weak airflow has been ruled out or corrected, attention should shift to the evaporator coil, which can freeze and further restrict cooling.
Inspect for ice buildup by removing the access panel and visually checking coils.
Turn off the system and air handler; allow natural thawing or accelerate with a fan.
Clean coils, replace filters, and verify refrigerant levels or call a qualified technician if freezing recurs.
Strange noises diagnosing rattles, buzzing, and grinding
Several distinct noises—rattling, buzzing, and grinding—point to different component issues in an AC system and should be assessed methodically.
Rattles often indicate loose panels, mounting brackets, or debris; tighten fasteners and clear obstructions.
Buzzing suggests electrical issues or failing capacitors; inspect wiring and contactors.
Grinding usually signals worn bearings in fans or motors; stop unit and replace faulty motor components.
Water leaking from unit locating source and stopping leaks
A few common causes produce visible water around an air conditioning unit, and identifying the source quickly prevents damage and mold growth.
Technician-style inspection checks condensate drain clogs, disconnected drain pan, frozen evaporator coils, and blocked condensate pump.
Clear blockages, realign or replace pans, thaw coils safely, and test pump operation.
Confirm proper unit tilt and secure condensate lines to stop recurring leaks.
Foul odors from vents cleaning and odor-removal techniques
Detecting foul odors from vents signals biological growth, trapped debris, or HVAC component issues that require targeted cleaning and deodorizing.
The guide recommends inspecting and vacuuming grilles, cleaning duct-accessible surfaces with antimicrobial solution, replacing filters, and disinfecting the drain pan and condensate line.
For persistent smells, schedule professional duct cleaning and HVAC coil treatment; avoid masking odors with sprays.
Tools and Supplies You’ll Need for Apartment AC Repairs
A brief inventory of tools and supplies clarifies what an apartment resident can reasonably use for common AC repairs.
Basic hand tools and safety gear, plus recommended replacement parts and consumables, should be listed before any work begins.
The distinction between DIY-friendly items and tasks that require specialized tools or refrigerant-handling certification will guide safe decision-making.
Essential basic tools and safety gear
Several basic tools and safety items are essential before attempting apartment AC repairs: insulated screwdrivers, a multimeter, needle-nose pliers, a refrigerant gauge set (if handling refrigerant), a vacuum pump for system evacuation, slip-joint pliers, and a utility knife.
Additionally, wear safety glasses, insulated gloves, a respirator for dust or chemical exposure, and knee pads; use a flashlight, non-contact voltage tester, and a sturdy ladder.
Recommended replacement parts and consumables
Common replacement parts and consumables for apartment AC repairs include air filters, capacitors, contactors, fan motors, refrigerant, O-rings and gaskets, copper tubing, and electrical connectors.
Additionally, stock sealants, insulation tape, and threaded fasteners.
It’s important to have common filter sizes, a range of capacitor values, spare contactors, basic fan motor types, and assorted fittings and wiring terminals to address typical apartment-unit failures quickly and safely.
When specialized tools or refrigerant handling are required
When repairs require access to sealed refrigerant circuits or complex diagnostics, specially calibrated tools and certified refrigerant-handling procedures become essential to guarantee safety, legal compliance, and system integrity.
Only trained technicians should use recovery machines, manifold gauges, vacuum pumps, and leak detectors.
Apartment owners should call licensed professionals for refrigerant service, electrical diagnostics beyond basic testing, or any task requiring permits or specialty calibration.
When to Call a Professional HVAC Technician
Serious issues—such as refrigerant leaks, electrical faults, compressor failures, or anything requiring permit-backed work—should prompt a call to a licensed HVAC technician.
Tenants should prepare a concise symptom list (unusual noises, odors, exact temperatures, error codes, and when the problem began) and ask the technician about licensing, warranties, turnaround time, and itemized estimates before work begins.
Expected costs and whether repairs fall under rental/landlord responsibility should be clarified up front to avoid surprises.
Problems that require licensed intervention
Certain malfunctions and safety-related issues exceed typical DIY repair and should prompt contacting a licensed HVAC technician.
Refrigerant leaks, electrical faults, compressor failures, motor replacements, and persistent overheating require licensed tools and expertise.
Structural refrigerant recovery, sealed-system repairs, gas line or combustion concerns, and code-required permits are beyond tenant repair.
Schedule professional assessment promptly to guarantee safety, warranty compliance, and regulatory adherence.
How to describe symptoms to expedite repair
After recognizing issues that need licensed intervention, tenants should prepare clear, specific symptom descriptions before calling a professional HVAC technician.
Note onset time, frequency, unusual noises, odors, visible leaks, thermostat behavior, airflow changes, and any recent maintenance or events.
Include unit model and location. Concise, factual notes help technicians diagnose faster, order parts, estimate time, and prioritize safety.
Questions to ask before hiring a technician
When should a tenant call and what should they ask? A tenant should call when basic troubleshooting fails, unusual noises, leaks, or safety concerns occur.
Ask about technician credentials, HVAC licenses, insurance, estimated diagnosis time, warranty on repairs, parts quality, and expected timeline.
Request a written estimate before work and clarify whether permits or landlord approval are required.
Expected costs and rental/landlord responsibility considerations
Many tenants and landlords face a narrow range of typical expenses for AC repairs or replacements, so understanding cost expectations and responsibility boundaries is essential before calling a professional.
Typical small repairs cost $100–$400; compressor or replacement ranges $1,500–$6,000. Lease terms and local laws determine responsibility: landlord usually covers major systems, tenant covers damage from misuse.
Document requests, obtain estimates, and confirm written authorization.
Temporary Fixes to Stay Comfortable Until Repairs Are Done
The text outlines practical temporary fixes to remain comfortable while waiting for AC repairs, focusing on cooling strategies and airflow optimization.
It covers effective use of fans, dehumidifiers, and window shading to reduce indoor temperature.
It also notes short-term safety measures for electrical issues to prevent hazards until a technician arrives.
Cooling strategies and airflow optimization
Implement short-term cooling tactics and optimize airflow to maintain comfort until professional repairs are completed.
Occupants should close unused rooms, open interior doors for cross-ventilation, and direct vents toward occupied areas.
Elevating air movement with portable devices and positioning sleeping areas on lower floors help.
Monitor indoor humidity and avoid heat-generating activities.
Rotate tasks to minimize overheating and check that vents and registers remain unobstructed.
Using fans, dehumidifiers, and window shading effectively
Combine fans, dehumidifiers, and window shading to lower perceived temperature and curb humidity while awaiting repairs.
Position fans for cross-ventilation, use box or tower fans to pull cooler night air in and push warm air out.
Run a dehumidifier in the most humid room, empty regularly.
Close blinds or reflective shades during peak sun, open them after sunset to release heat.
Short-term safety measures for electrical issues
Several simple precautions can keep occupants safe and reasonably comfortable when an AC’s electrical components act up.
Turn power off at the breaker before inspecting or adjusting the unit. Unplug the unit if accessible.
Use battery fans and portable coolers instead of HVAC. Avoid DIY electrical repairs; report issues to building management.
Keep a fire extinguisher nearby and clear vents and cords.
Preventive Maintenance for Apartment AC Units
Preventive maintenance for apartment AC units focuses on regular checks and simple tasks that keep systems running efficiently.
A concise monthly and seasonal checklist helps tenants and managers spot issues early, while clear procedures for scheduling routine service with building management guarantee timely professional attention.
The overview also outlines straightforward DIY tasks tenants can safely perform, such as filter changes and keeping vents clear.
Monthly and seasonal maintenance checklist
When maintained on a regular schedule, apartment AC units run more efficiently, last longer, and require fewer emergency repairs.
This monthly and seasonal checklist outlines essential tasks for tenants and property managers to follow.
- Replace or clean filters monthly; inspect airflow.
- Clear debris from outdoor unit and check condensate drain.
- Test thermostat settings and calibrate if needed.
- Inspect coils, fan, electrical connections; report abnormalities.
How to schedule routine service with building management
Coordinate routine AC service through clear, documented requests to building management that specify preferred timing, observed issues, and access instructions.
Tenants should follow building procedures: submit work orders, keep copies, and confirm scheduling.
Request written confirmation of vendor identity, scope, and estimated arrival.
Track completed services and receipts, report unresolved issues promptly, and request periodic preventive inspections to reduce emergency repairs and guarantee lease compliance.
Simple DIY maintenance tasks tenants can perform
Tenants can perform a few simple, safe tasks to keep an apartment AC running efficiently and to reduce service calls.
Regularly replace or clean filters, vacuum vents and coils gently, clear debris from exterior units (if accessible), verify thermostat batteries are fresh, and keep curtains or blinds closed during peak sun.
Report persistent issues to building management promptly.
Common Mistakes That Make AC Problems Worse
Tenants and DIY enthusiasts sometimes attempt repairs that can void a lease or further damage an apartment AC unit.
Incorrect diagnoses—such as blaming the compressor for a simple refrigerant leak—can lead to unnecessary parts replacement and higher costs.
The following section highlights common missteps and how to avoid them.
DIY repairs to avoid that can void lease or damage unit
Many common DIY attempts—like tampering with sealed refrigerant lines, bypassing electrical safety devices, or replacing components without proper certification—can void a lease, violate local codes, or cause permanent damage to an AC unit.
Avoid opening sealed panels, altering wiring, charging refrigerant, or installing non‑OEM parts.
Instead, document issues, notify the landlord, and hire licensed HVAC technicians for repairs requiring tools or certifications.
Misdiagnosis pitfalls and unnecessary expenses
After documenting issues and contacting a landlord or licensed technician, incorrect DIY diagnoses can still lead to costly mistakes.
Misidentifying symptoms prompts unnecessary parts replacement, wasted service calls, and voided warranties.
Overlooking electrical hazards or refrigerant rules increases liability and expense.
Tenacious DIY attempts that ignore proper tools or experience often prolong downtime and raise final repair bills, burdening tenants and landlords alike.
Comparison of Repair Options and Costs
When choosing how to address an AC problem, the options—DIY, building maintenance, or licensed HVAC—vary widely in cost, time, and risk. The table below summarizes typical price ranges and estimated time-to-fix for common scenarios to help compare trade-offs. Readers are encouraged to weigh upfront cost, warranty/liability, and expected repair duration before deciding.
| Option | Typical Price Range | Time-to-Fix Estimate |
|---|---|---|
| DIY (parts + tools) | $10–$200 | 30 min–4 hours |
| Building maintenance | $0–$150 (often included) | 1 hour–2 days |
| Licensed HVAC service | $75–$500+ (parts extra) | 1 hour–1 day |
| Major component replacement | $400–$3,500+ | 2 hours–2+ days |
DIY fixes vs. building maintenance vs. licensed HVAC service
Weigh repair options by comparing scope, risk, and cost: simple tasks such as replacing filters or resetting breakers are often cost-effective for a competent homeowner or building maintenance staff.
Routine preventive work typically falls to on-site teams, and complex diagnostics or refrigerant handling require a licensed HVAC technician.
Responsibility, warranty implications, and safety determine whether tenants, maintenance, or professionals should act.
Typical price ranges and time-to-fix estimates
Cost and repair time for common AC issues vary widely based on complexity, parts, and labor rates: minor DIY fixes (filter, reset, thermostat) typically cost $0–$100 and take 15–60 minutes.
Building maintenance often charges $50–$150 and completes routine tasks in 30–120 minutes.
Licensed HVAC service for refrigerant, compressor, or motor repairs runs $200–$2,500 and requires 1–6+ hours.
Signs It’s Time to Replace the Unit Instead of Repairing
When an air conditioner is nearing the end of its expected service life, shows declining energy efficiency, or requires frequent repairs, replacement often becomes the more economical choice.
Tenants and homeowners should prepare concise documentation of age, efficiency losses, and repair history before approaching a landlord or property manager.
Clear presentation of costs, safety concerns, and long-term savings helps facilitate a timely decision on replacement versus repair.
Age, efficiency, and recurring repair indicators
Although occasional fixes can extend service life, there comes a point when age, declining efficiency, and frequent breakdowns indicate replacement is the more practical choice.
Units older than 10–15 years, steadily rising energy bills, diminished cooling capacity, and repeated component failures (compressor, capacitor, refrigerant leaks) signal diminishing returns on repairs and higher lifetime costs, favoring replacement for reliability and efficiency.
How to discuss replacement with your landlord or property manager
If recurring failures, rising bills, or reduced cooling make repairs impractical, tenants should present clear, documented evidence to their landlord or property manager and request replacement rather than another repair.
Include dates, invoices, technician reports, energy bills, and photos.
Explain safety or habitability concerns, cite lease or local housing codes if applicable, propose timelines, and request written confirmation of the decision and schedule.
Resources and Checklists to Keep Handy
A concise printable tenant troubleshooting checklist helps document symptoms, basic fixes tried, and dates of occurrence.
A simple contact template for reporting AC issues to a landlord or maintenance guarantees clear, consistent communication and speeds response.
Together, these resources reduce confusion and create a paper trail for follow-up.
Printable tenant troubleshooting checklist
Several simple items and step-by-step checks compiled on a single page help tenants diagnose common AC issues before contacting maintenance.
A printable checklist streamlines troubleshooting: record symptoms, basic inspections, actions taken, and thermostat settings. Keep it near the unit for quick use and to document patterns over time.
- Note symptom and time
- Inspect filter and vents
- Check breaker and thermostat
- Record actions taken
Contact template for reporting AC issues to landlord or maintenance
One concise template helps tenants report AC problems clearly and consistently to landlords or maintenance teams.
It lists:
- unit location
- symptom description
- onset date/time
- troubleshooting steps tried
- photos or videos
- urgency level
- preferred access times
- contact information.
Suggested tone: factual and polite.
Include permission to enter for repairs and request for estimated response time.
Save copies for records.
Conclusion
Cool, competent care calms common complaints: cautiously check filters, circuits, and condensate; clean components; tighten connections; and consult credible contractors when complications compound. Conserving comfort costs little when considered early, yet chronic collapse calls for careful cost comparisons and complete replacement. Keep concise checklists, basic tools, and contact cards close at hand to curb crises, cut costly callbacks, and create consistent, cool convenience in the apartment’s air.