
How to Find the Shut-Off Valve for an Outdoor Faucet: Quick Steps to Stop Leaks and Winterize
To find the shut-off valve for your outdoor faucet, trace the supply line from the faucet back into your home. Look in areas such as basements, crawlspaces, utility rooms, and meter boxes. Once located, open the outdoor faucet to drain any remaining water, and then test the valve to ensure the flow stops. If the valve is stuck, apply penetrating oil. For winterizing, insulate or drain the lines. Follow these steps for effective locating, troubleshooting, and preparing your faucet for colder months.
How to Locate the Shut-Off Valve for an Outdoor Faucet Quickly
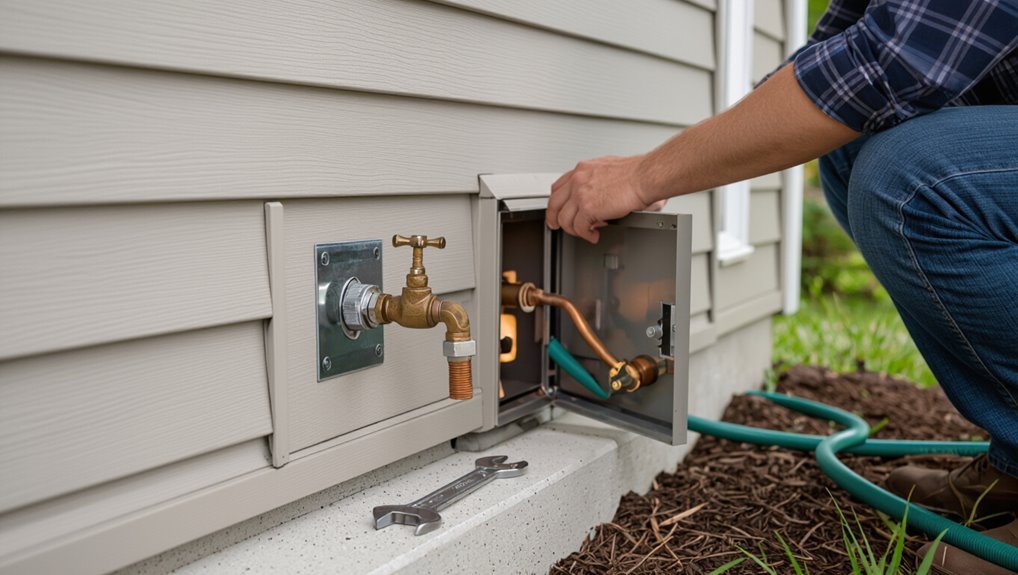
First, the fastest way to stop a leaking outdoor faucet is to shut off the nearest valve or the main water supply to prevent damage.
Next, they should gather basic tools—adjustable wrench, flashlight, and pliers—and safety items like gloves and eye protection before searching.
With the shut-off secured and tools at hand, locating the specific valve becomes a controlled, efficient task.
Immediate steps to stop a leaking outdoor faucet now
Locate the shut-off valve immediately to stop a leaking outdoor faucet: this can be a simple in-line valve near the exterior wall, an interior valve in a basement or crawlspace, or the home’s main water shut-off if no local valve exists.
Once closed, open the outdoor faucet to drain residual water.
If flow persists, recheck valves and contact a plumber.
Keywords: how to find shut off valve for outdoor faucet
What to have on hand before you start (tools and safety)
After shutting off the appropriate valve and relieving pressure at the outdoor spigot, gather the small set of tools and safety items that streamline finding and accessing an in-line or interior shut-off.
Essential items: adjustable wrench, pliers, flashlight or headlamp, screwdriver set, portable mirror, marker or tape, work gloves, safety glasses, tarp, bucket, and phone.
Have insulation or repair parts ready if needed.
Where Outdoor Faucet Shut-Off Valves Are Commonly Located
Shut-off valves for outdoor faucets are most often found inside the home—near the basement, in a crawlspace, or in a utility room—or outside in accessible enclosures such as a meter box, wall access panel, or recessed valve box.
Common valve types encountered include angle stops, ball valves, and gate valves, each with distinct handles and shut-off actions. Knowing these typical locations and valve styles helps narrow the search quickly.
Interior locations: basement, crawlspace, utility room
Many homeowners will find the outdoor faucet’s shut-off valve inside the house, typically in the basement, crawlspace, or utility room where the main water lines and branch piping are accessible.
Valves are usually near the wall corresponding to the exterior faucet, mounted on a pipe with a small lever or round stop.
Inspect along the line for individual shutoffs serving hose bibs; label when found.
Exterior locations: meter box, wall access panel, valve box
When outdoor shut-offs are not inside the home, they are often placed in exterior enclosures such as the meter box, a wall access panel, or a buried valve box near the property line.
Inspect these sites for labeled covers or small handles.
Meter boxes often share space with water utility components; wall panels sit near hose bibs; buried valve boxes require lifting lids and may be near the sidewalk.
Valve types you might find (angle stop, ball valve, gate valve)
After checking meter boxes, wall panels, and buried valve boxes, attention turns to the types of valves commonly used to control outdoor faucets.
Angle stops sit near the wall, compact and right-angled.
Ball valves use a quarter-turn handle for quick shutoff.
Gate valves feature rising or non-rising stems and require multiple turns.
Identification aids proper operation and winterization.
Step-by-Step Guide to Finding and Operating the Shut-Off Valve
The guide outlines a concise, practical sequence for locating and operating an outdoor faucet shut-off valve.
It advises tracing the faucet line visually and by touch, following the pipe toward the house, and checking near the main water line and meter.
The instructions also cover accessing valves via basements, crawlspaces, or access panels.
Then, turn off the correct valve and test the faucet.
Step 1 Trace the faucet line visually and by touch
Begin by visually following the faucet’s exterior pipe or hose back toward the house, noting any visible joints, fittings, or where the line disappears into siding or landscaping.
Then run a gloved hand along the exposed line to feel bends, frozen sections, or insulation.
Mark suspicious spots with tape or chalk for later inspection.
Move slowly to avoid missing concealed connections.
Step 2 Follow the pipe from the faucet toward the house
Following the taped or chalked markers, the homeowner should trace the faucet’s pipe where it enters the house, keeping attention on bends, insulation, and any visible fittings.
They then follow that pipe inward, noting where it disappears behind siding or into a utility area, checking for inline shut-offs, unions, or frost-free faucet tails.
Additionally, they should mark any valves or access panels for later inspection.
Step 3 Check near the main water line and meter
Next, inspect the area where the main supply enters the property—typically near the water meter or where the utility pipe rises from the ground—and look for shut-off valves, curb stops, or service boxes that control flow to the house.
Note valve types (wheel, lever, or buried key-operated curb stop), confirm accessibility, and identify whether the meter belongs to the homeowner or utility for proper permission before operating.
Step 4 Access valves through basements, crawlspaces, and access panels
Move through basements, crawlspaces, and utility closets with the intention of tracing indoor supply lines to their shut-off points; these confined areas often conceal gate, ball, or washer-type valves near where the main line enters the building, under sinks, or behind access panels.
Inspect pipe runs, follow insulation and clamps, and remove small panels or insulation carefully to expose valve handles, noting valve orientation and any corrosion or leaking signs.
Step 5 Turn off the correct valve and test the faucet
Locate the identified shut-off valve, confirm it controls the outdoor faucet by checking its position relative to the traced supply line, and carefully operate it to stop water flow.
Turn the valve slowly—clockwise for gate/ball valves—until fully closed.
Return to the outdoor spigot, open briefly to verify flow has ceased, then relock or label the valve for future reference.
Step 6 Drain and open the outdoor faucet after shutting the valve
With the shut-off valve closed, the outdoor faucet should be opened and any remaining water drained to prevent trapped liquid from freezing or causing corrosion.
After opening, allow runoff until flow stops, then close drain plugs if present.
Leave the spigot slightly open if winterizing with an empty line.
Inspect for drips and tighten packing nuts or replace washers as needed.
How to Identify the Right Valve When Multiple Valves Exist
When several valves are present, the correct one is often identified by markings, orientation toward the outdoor line, or its proximity to the branch serving the faucet.
Having a helper slowly operate each valve while someone at the faucet watches for flow or pressure changes confirms which controls the outdoor spigot.
Once found, a temporary tag can be used during testing and a durable, permanent label applied to simplify future shut-offs.
Markings and positions that indicate supply to the outdoor faucet
Identifying which valve controls an outdoor faucet usually relies on visual cues and placement: valves feeding exterior spigots are often labeled, positioned near the branch of pipe running toward the outside wall, or oriented so their handle aligns with that branch.
Additional indicators include arrows or tags, painted or taped pipes leading outdoors, nearby hose bib notation, and valve stems angled toward the exterior line.
Using a helper to isolate valves by turning and observing flow
If visual clues and markings do not make the supply valve obvious, having a helper operate valves while another watches the outdoor spigot is the most reliable method.
One person slowly closes or opens each candidate valve while the observer notes flow changes. Pause between adjustments to allow pressure equalization.
Repeat until the spigot stops or resumes flow, confirming the correct isolation point.
Temporary tagging and permanent labeling suggestions
Because multiple valves can look similar and be spaced close together, temporarily tagging the one that stops the flow and adding a durable permanent label prevents future confusion.
Use a brightly colored zip-tie or adhesive tag for testing, then replace with a weatherproof metal or laminated label noting “Outdoor Faucet” and shut-off location.
Record the valve position on a home map for quick reference.
Troubleshooting Common Problems While Locating the Valve
If no valve is visible inside or outside the structure, the search may require tracing the supply line or checking basements, crawlspaces, and meter boxes.
Corroded, stuck, leaking, frozen, or otherwise inaccessible valves demand different responses—penetrating lubricants, gentle thawing, careful excavation, or professional repair—to avoid further damage.
Partial shutoff often indicates a worn or multi-turn valve and should prompt testing upstream and considering valve replacement.
No visible valve inside or outside
A missing shut-off valve can leave a homeowner unsure where to begin when no control is apparent inside or outside the house.
Inspect basements, crawlspaces, and utility rooms for hidden stop valves on the supply line.
Trace the outdoor faucet feed from inside, check meter area and property line for curb stops, and consult building plans or a plumber if the valve remains undetectable.
Valves that are corroded, stuck, or leaking
Corroded, stuck, or leaking shut-off valves require systematic inspection and cautious handling to avoid water damage or injury.
Examine visible fittings for corrosion, mineral buildup, or active drips.
Apply penetrating oil to seized stems and allow time before gentle operation.
Replace severely corroded or leaking valves; use a temporary clamp or shut-off upstream if immediate replacement isn’t possible to stop flow safely.
Frozen pipes or inaccessible valves
When valves are frozen or buried behind drywall, concrete, or landscaping, locating and accessing the shut-off requires extra care to prevent damage and further freezing.
Use thermal imaging or infrared thermometer to locate cold spots, probe gently with a screwdriver or inspection camera, and thaw frozen sections gradually with a hair dryer or heat lamp.
Call a plumber if access risks structural harm or pipe rupture.
When the valve shuts off only partially
Inspect the shut-off valve operation closely if water continues to trickle after turning it off.
Partial shut-off often indicates a worn seat, debris, or a failing washer.
Verify the valve is fully closed, then flush and clean internal parts if accessible.
If obstruction or corrosion persists, replace the valve or call a plumber to prevent leaks and guarantee reliable winterization.
Tools and Techniques for Stubborn or Hidden Valves
When a shut-off valve is hard to find or operate, using basic tools like a flashlight, mirror, or inspection camera can reveal hidden locations and access points.
Listening for water flow, feeling for pressure changes, and noting warm or cool pipe sections help trace lines without excavation.
If a valve is stuck, targeted use of lubricant, penetrating oil, or an extender for the valve stem can restore operation while minimizing damage.
Tools to help find and operate hidden valves (flashlight, mirror, inspection camera)
A few simple tools can make locating and operating a hidden outdoor shut-off valve far easier: a bright flashlight to penetrate dark crawl spaces, a small inspection mirror to reveal hard-to-see angles, and a compact inspection camera for deep or confined areas.
Gloves, a long screwdriver or valve key, and a magnetic pickup help manipulate or retrieve fasteners. Carry spare batteries and a cloth for lens cleaning.
Using sound, pressure, and thermal cues to trace pipes
After flashlight, mirror, and camera checks come non-visual methods that help follow buried or concealed lines: sound, pressure, and thermal cues reveal a pipe’s path without needing direct sight.
Tapping along suspected routes while listening with a stethoscope or makeshift probe pinpoints runs.
Feeling for pressure changes at fixtures, and using an infrared thermometer or hand to detect temperature differentials, confirms flow direction and joints.
When to use lubricant, penetrating oil, or valve extenders
Apply penetrating oil sparingly to seized or corroded valve stems, then allow sufficient dwell time before attempting movement; lubricant reduces friction and loosens mineral deposits, while a dedicated penetrating spray breaks corrosion bonds without displacing necessary valve grease.
Use silicone or food‑grade lubricants for drinking‑water systems.
Choose valve extenders when handles are recessed or frozen, ensuring secure clamps and periodic testing after installation.
Winterizing Outdoor Faucets After Shutting Off the Valve
After closing the shut-off valve, the homeowner should drain the outdoor lines and leave the faucet spouts open to prevent trapped water from freezing.
Exposed pipes and the spigot itself can be protected with foam insulation and fitted faucet covers to reduce freeze risk.
For irrigation systems, a compressed-air blow-out or professional service is recommended to clear remaining water from supply lines.
Draining lines and opening faucet spouts
With the supply shut off, the next step is to remove water from the outdoor lines and open the faucet spout to prevent freezing.
Drain remaining water by opening the faucet fully and any attached hose bibs.
If present, open upstream bleeder valves or disconnect hoses to let water exit.
Leave spouts open until spring to guarantee lines stay dry and pressure-free.
Insulating exposed pipes and faucet covers
Insulate exposed pipes and fit faucet covers to block cold air and prevent residual moisture from freezing; doing so reduces the risk of split pipes and costly repairs.
Apply foam pipe insulation secured with tape or zip ties, and choose insulated, weatherproof faucet covers that seal around fittings.
Inspect insulation for gaps, replace degraded materials, and guarantee covers remain snug throughout freezing conditions.
Using blow-out methods for irrigation systems
Proceed to clear remaining water from the irrigation lines using a blow-out method to prevent freeze damage once the outdoor shut-off valve is closed.
A compressor or specialized irrigation blower forces air through zones, expelling water. Each zone runs briefly until only dry air emerges.
Use regulator and moisture trap, keep pressure below manufacturer limits, and follow safety procedures to protect pipes, valves, and sprinkler components.
When to Call a Professional Plumber
If the shut-off valve cannot be located, major leaks are present, or pipes appear frozen or burst, a professional plumber should be contacted promptly.
The homeowner should be ready to describe the faucet location, visible damage, and any steps already taken to shut water off to speed diagnosis.
The plumber can assess causes, propose typical fixes—such as valve replacement, pipe repair, or thawing—and provide an estimate of labor and parts costs.
Signs you need professional help (no shut-off found, major leaks, frozen burst pipes)
Recognize when the task exceeds basic homeowner repairs: lack of any identifiable shut-off, uncontrolled or rapidly worsening leaks, and pipes that are frozen and then burst all signal the need for a professional plumber.
Immediate contact is warranted for structural water intrusion, persistent pressure loss, visible pipe rupture, or when temporary measures fail.
Professionals prevent further damage, assess systemic risks, and perform safe, code-compliant repairs.
What to tell the plumber to speed diagnosis
Prepare a concise summary of the situation to help the plumber diagnose and resolve the problem quickly.
Include the following details:
- Location of the outdoor faucet
- Whether the inside shut-off was found
- Observed leak type and rate
- Any visible pipe damage or frost
- Recent temperature extremes
- Actions already taken (turned valves, drained lines)
Note access constraints and request arrival with necessary freeze-repair tools.
Estimated costs and typical fixes
Having summarized the location, shut-off status, leak behavior, visible damage, temperature history, and actions taken for the plumber, the homeowner should also understand common fixes and likely costs so realistic expectations can be set before a professional arrives.
Typical repairs:
- packing replacement or faucet swap ($75–$250)
- valve isolation or repair ($150–$400)
- pipe thawing or replacement ($200–$800).
Emergency or labor windows increase fees.
Preventive Measures and Simple Maintenance
Preventive measures and simple maintenance help guarantee quick access to the outdoor faucet shut-off and reduce winter damage.
Homeowners are advised to label valves, create a water shut-off map, and exercise valves seasonally to confirm operation.
When valves show wear or susceptibility to freezing, replacement or upgrading to frost‑proof spigots is recommended.
Labeling valves and creating a home water shut-off map
One clear step homeowners can take is to label every shut-off valve and assemble a simple home water shut-off map, so anyone can quickly locate and operate the correct control during a leak or winterizing task.
A concise map and durable labels reduce confusion and speed response.
- Mark main and branch valves
- Note valve type and location
- Use waterproof labels
- Store map near main panel
Routine valve operation and seasonal checks
With valves labeled and a simple shut-off map in place, routine operation and seasonal checks keep the system reliable and reduce emergency repairs.
Periodic exercise and inspection prevent seizure and leaks; document findings and schedule fixes.
Recommended tasks:
- Turn each shut-off annually to confirm movement
- Inspect for corrosion or drips
- Test outdoor faucet after winterization
- Note any stiffness or leaks for prompt repair
Replacing old valves and upgrading to frost-proof spigots
Upgrade or replace aging outdoor valves to reduce freeze-related damage and ongoing leaks. A homeowner can swap worn shutoffs for frost‑proof spigots, ensuring the stem retracts inside heated walls. Proper sizing, thread type, and insulation prevent future problems. Hire a plumber for soldered connections or follow manufacturer instructions for DIY installations.
| Benefit | Action | Tip |
|---|---|---|
| Prevents freezing | Replace valve | Insulate pipe |
| Stops leaks | Use frost‑proof spigot | Check threads |
Quick Reference Checklist Before Trying to Find the Valve
Before searching for an outdoor faucet shut-off valve, gather basic information and tools: a flashlight, a screwdriver or wrench set, a property map or house plan if available, and a notepad to record valve locations and any markings.
The technician checks these items and notes conditions before inspecting.
Helpful reminders:
- Confirm water shutoff responsibilities
- Note basement and crawlspace access
- Look for freeze protection
- Photograph valve tags and orientations
Conclusion
Locating and using an outdoor faucet shut-off valve protects homes from costly water damage and freezing. Studies show that neglected exterior plumbing contributes to over 250,000 burst-pipe insurance claims annually in the U.S., underscoring the financial and emotional toll of inaction. By promptly finding the valve, following basic winterizing steps, and performing simple maintenance, homeowners can prevent leaks, avoid emergency repairs, and gain peace of mind through proactive care.
