How to Measure for a New Toilet: Step-by-Step Guide to Get the Right Fit
To measure for a new toilet accurately, start with the rough-in measurement, which is the distance from the finished wall to the center of the flange. Next, measure the bowl depth from the wall to the rim and the overall toilet depth to ensure a proper fit. Also, check side and front clearances, seat height, and tank width to prevent any obstructions. For wall-hung units, note the carrier or wall depth and consider flange and trim thickness. Always double-check your measurements and consult local codes to avoid costly errors. Follow these steps for precise measurements and installation guidance.
Why Accurate Toilet Measurements Matter
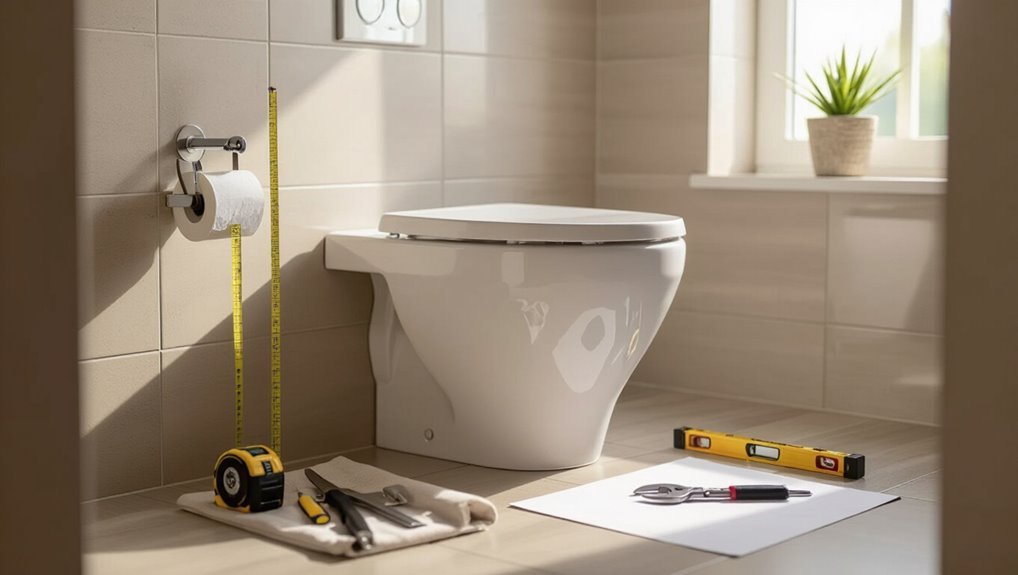
Incorrect measurements often lead to problems such as leaks, misaligned bolt holes, and toilets that do not fit the space.
Precise dimensions determine which bowl shape, rough-in size, and seat height will work with existing plumbing and bathroom layout.
Understanding these impacts helps guarantee a smooth selection and installation process.
Common problems from incorrect measurements
Because small measurement errors compound during installation, inaccurate toilet measurements commonly lead to functional and cosmetic problems that are costly to fix.
Poor clearance, misaligned flange, uneven sealing, and obstructed access often result when one ignores guides on how to measure for new toilet.
These issues cause leaks, noise, unstable fixtures, and extra labor or replacement expenses if not corrected promptly.
How measurements affect toilet selection and installation
When precise measurements are taken, they directly determine which toilet models will fit the space, how the unit interfaces with existing plumbing, and what installation steps are required.
Accurate rough‑in, flange height, floor clearance, and doorway width prevent model mismatches, costly modifications, and code violations.
Installers can select compatible bowls, tanks, and mounting methods, reducing labor, parts returns, and project delays.
Quick Checklist: Measurements to Take Before Buying
A concise checklist lists the essential measurements needed before purchasing a replacement toilet, including rough-in distance, bowl length, and overall height.
It also specifies the tools and materials required for accurate measuring, such as a tape measure, level, and notepad.
The checklist provides a quick reference to guarantee compatibility and avoid installation issues.
Essential measurements overview
Measuring a toilet area requires three quick, accurate dimensions to guarantee a correct fit: the rough-in distance from the wall to the center of the waste flange, the toilet’s overall depth from wall to front rim, and the clear floor space around the fixture for comfort and code compliance.
- Rough-in: center of flange to finished wall.
- Depth: wall to front rim.
- Clearance: side and front clearances per code.
Tools and materials you’ll need
Now that the three key dimensions are understood, gathering the right tools and materials will guarantee measurements are fast and accurate.
The checklist includes a tape measure (25–30 ft), carpenter’s square, pencil and notepad, level, masking tape, camera or phone for photos, and a flashlight.
Optional: digital caliper for precise gaps and safety gloves.
Verify batteries and clear workspace before measuring.
Measuring the Critical Toilet Rough-In
The center of the waste flange is located by identifying the drain opening or the visible flange bolts on the floor.
The rough-in is measured as the straight distance from the finished wall to that flange center, typically taken with a tape measure along the floor.
Understanding standard rough-in sizes — commonly 10″, 12″, and 14″ — helps determine which toilet models will fit without modification.
How to locate the center of the waste flange
Locating the center of the waste flange is the single most important step in determining the toilet rough-in because it establishes where the bowl will sit relative to the finished wall.
The flange center is found by visual inspection: remove the old toilet, clear debris, identify bolt slots or circular opening, then mark the exact midpoint.
Verify alignment with framing and floor plane before recording measurements.
Step-by-step: measuring rough-in from wall to flange center
Before measuring, verify the finished wall surface and floor around the flange are clean and unobstructed so the reference points will be accurate; then use a tape measure to record the distance from the finished wall to the center of the waste flange, measuring along the floor and keeping the tape straight and level.
- Align tape at wall base.
- Read center mark at flange.
- Repeat for accuracy.
How standard rough-in sizes (10″, 12″, 14″) impact choices
Many bathrooms conform to one of three standard rough-in dimensions—10″, 12″, or 14″—and that single number dictates which toilet styles will fit, how much bowl offset is available, and whether adapters or special fixtures are required; choosing the correct size from the start prevents costly adjustments to the flange or waste line and guarantees proper clearance for the tank and seat.
| Rough‑In | Impact |
|---|---|
| 10″ | Limits tank depth, may need compact bowls |
| 12″ | Standard; widest selection |
| 14″ | Few models; often requires special fixtures |
| Adapter | Moves flange; check codes |
Measuring Toilet Height and Bowl Dimensions
Next, the focus shifts to measuring toilet height and bowl dimensions to guarantee comfort and proper fit.
Measure seat height from the finished floor to the rim, then note whether the measurement aligns with standard (around 15 inches), comfort (16–17 inches), or chair-height (17–19 inches) models.
Also measure bowl depth and width to confirm the fixture will fit the available space and clear nearby obstacles.
How to measure seat height (floor to rim)
To measure seat height (floor to rim), place a tape measure vertically from the finished floor directly up to the top edge of the toilet bowl rim where the seat will rest; record that distance in inches or centimeters for accurate comparison with replacement seats or ADA guidelines.
Repeat measurement at left and right sides to verify levelness, note any discrepancy, and document the final averaged value.
Differences between standard, comfort, and chair-height toilets
After recording the seat height from floor to rim, compare that measurement to common toilet height categories: standard, comfort, and chair-height.
Standard toilets sit about 14–15 inches, comfort (also called comfort-height) around 16–17 inches, and chair-height models reach 17–19 inches.
Choose based on user mobility, ease of sitting/standing, and bathroom accessibility requirements; taller seats aid transfer and reduce strain.
Measuring bowl depth and width for fit
When measuring bowl depth and width for a new toilet, one should record the distance from the tank-facing lip to the front rim (bowl depth) and the widest exterior points of the bowl base or rim (bowl width) to guarantee the replacement will fit the room layout and clear surrounding fixtures.
Measure at floor level and rim height, note offsets for base bolts, and compare with manufacturer specs.
Measuring Tank and Clearance Requirements
The next step addresses tank placement and clearance needs to guarantee proper fit and code compliance.
Measure the distance from the finished wall to the back of the tank (or mounting plane for wall-hung models) and verify required side and front clearances specified by local codes or manufacturer instructions.
Also note different measurement points and mounting requirements for tankless and wall-hung toilets to avoid interference with plumbing or fixtures.
How to measure tank-to-wall clearance
If a replacement toilet is to fit and function properly, measuring the tank-to-wall clearance is essential.
Measure from the finished wall to the rear of the tank at its widest point. Note any baseboard, moulding, or outlet protrusions.
Compare this dimension with tank depth of prospective models, ensuring sufficient room for lid removal and plumbing access without binding against the wall.
Required side and front clearances for code compliance
Although local codes vary, most require specific side and front clearances around a toilet to guarantee accessibility and safe use.
Typically a minimum of 15 inches from the centerline to each side wall and 21 inches of clear floor space in front are specified.
Confirm local jurisdiction rules and account for door swing, adjacent fixtures, and any grab bar or mobility requirements before final placement.
Measuring for tankless or wall-hung models
Because tankless and wall-hung toilets eliminate or relocate the bulky tank, measuring shifts focus to in-wall carrier dimensions, rough-in height, and clearance behind the bowl.
Measure wall depth, stud spacing, and carrier mounting height to guarantee structural support.
Confirm water supply, drain outlet location, and service access panels.
Verify manufacturer-recommended clearance beneath and around the bowl for cleaning and ADA compliance.
Measuring for One-Piece vs Two-Piece Toilets and Elongated vs Round Bowls
Choosing between one-piece and two-piece toilets, and between elongated and round bowls, affects the measurements a homeowner must take because each combination changes overall length, height, and footprint.
One-piece models often occupy slightly more room at the base while elongated bowls add several inches to the front-to-back dimension.
For small bathrooms or tight spaces, precise measurement of rough-in, clearance to walls and fixtures, and usable floor area determines which shape and style will fit comfortably.
How shape affects measurement needs
When planning measurements, the toilet’s shape—whether a one-piece or two-piece design and whether the bowl is elongated or round—changes which dimensions are critical and how they are taken.
One-piece units often require measuring overall length and mounting clearances; two-piece toilets need separate tank-to-bowl junction and bolt spacing checks.
Elongated bowls add length; round bowls reduce it, affecting rough-in and seat placement.
Sizing considerations for small bathrooms and tight spaces
How much space is truly available dictates which toilet configurations will fit comfortably in a small bathroom; one-piece models can save inches by eliminating the tank-to-bowl seam, while two-piece units sometimes allow easier maneuvering during installation or repair.
- Measure rough-in, clearance, and doorway widths.
- Prefer round bowls for tighter aisles; elongated for comfort if space permits.
- Check wall-hugger and compact models for reduced footprint.
Measuring for Specialized Installations
Specialized installations require different measurement points than standard floor-mounted toilets.
For corner models, measure the distance from each adjoining wall to the waste outlet; for back-to-wall and wall-mounted units, record wall-to-center measurements and finished wall thickness.
Comfort-height and ADA-compliant options also need seat height and clear floor space measured to guarantee accessibility and code compliance.
Measuring for corner toilets
Corner toilets require a different set of measurements than standard installations because the tank and bowl sit at a 45-degree angle to adjacent walls.
Start by identifying the exact corner apex and measure out along each wall to establish clear reference points for the fixture’s centerline and clearance.
Measure rough‑in from apex to waste outlet, height to supply, and side clearances for user space and access.
Measuring for back-to-wall and wall-mounted installations
When installing a back‑to‑wall or wall‑mounted toilet, measurements must focus on carrier location, finished wall thickness, and service access rather than the floor rough‑in alone.
Measure carrier centerline height from finished floor, depth from finished wall to outlet, and lateral clearances for pan and access panels.
Confirm carrier load rating and verify concealed cistern dimensions to guarantee proper fit and maintenance access.
Measuring for comfort-height and ADA-compliant toilets
For comfort-height and ADA-compliant toilets, precise measurement centers on seat height, clearance zones, and approach dimensions rather than just rough‑in spacing.
Measure finished floor to seat rim (17–19 inches for comfort, 17–19 inches minimum for ADA), guarantee 60 inches clear in front for transfers, 36 inches side clearances, and confirm grab bar locations and door swing to maintain accessibility and maneuvering space.
How to Record and Compare Measurements When Shopping
A simple measurement spec sheet helps keep recorded dimensions organized and accessible while shopping.
The spec sheet should list key measurements — rough-in, bowl projection, seat height, and trapway type — so each product can be checked against actual needs.
Shoppers compare product specifications directly to the sheet to confirm fit before purchase.
Creating a simple measurement spec sheet
A simple spec sheet lists only the critical toilet measurements—rough-in, bowl length, seat height, trapway type, and outlet position—so shoppers can compare models quickly and accurately.
It should be a single page with fields for each measurement, notes, and photo reference.
- Record measured values
- Note tolerances and constraints
- Attach photo or sketch
Matching product specs to your measurements
Start by aligning each entry on the spec sheet with the manufacturer’s listed dimensions and features: check rough‑in, bowl length, seat height, trapway type, and outlet position against the recorded values, noting any discrepancies or required tolerances.
Then mark compatibility, adjustments, or exclusions clearly for shopping decisions.
| Spec | Recorded value |
|---|---|
| Rough‑in | |
| Bowl length | |
| Seat height | |
| Outlet position |
Common Measurement Mistakes and How to Avoid Them
Common measurement errors often stem from misreading the rough-in distance when baseboards or trim push the tape measure away from the wall.
Installers also forget to include flange thickness or offsets, which can shift the toilet’s final position.
Additionally, neglecting clearance for doors, cabinets, and accessories can result in a fixture that interferes with room function.
Misreading rough-in due to baseboards or trim
When baseboards or trim extend past the plane of a toilet flange, the rough-in measurement can be misread, producing an installation that doesn’t fit the bowl or forces awkward cuts.
The accurate distance must be measured from the finished wall surface to the center of the flange, not from the face of the trim.
Inspect trim profile, temporarily remove molding if needed, and mark the true wall line before measuring.
Forgetting to account for flange thickness or offsets
Measure carefully: flange thickness and any offset hardware change the effective rough-in and can make a perfectly sized toilet sit too close or too far from the wall.
Inspect the flange height relative to finished floor and note offset adapters or thick wax rings.
Add or subtract their dimensions when measuring rough-in.
Document measurements and bring flange details when shopping for a replacement toilet.
Overlooking clearance for doors, cabinets, and accessories
After noting flange height and offsets, attention must shift to the surrounding clearance: doors that swing inward, nearby cabinets, towel bars, and other accessories can block access or prevent the tank or lid from opening fully.
Measure door swing, cabinet overhang, and accessory placement.
Guarantee at least recommended clearances on both sides and front, marking obstructions and choosing a toilet profile that maintains functional access.
Final Steps Before Purchase and Installation
Before finalizing a purchase, measurements should be rechecked on-site to confirm rough-in, height, and clearances.
If unusual plumbing layouts, floor damage, or uncertain drain connections are found, a plumber or contractor should be consulted.
The bathroom should be cleared, water shut off, and the area prepared to ease installation and avoid delays.
Double-checking measurements on-site
Though the installer has already noted dimensions from plans or a previous visit, a final on-site check verifies those figures match actual conditions immediately prior to purchase and installation.
The installer measures rough-in, flange height, clearances, door swing, and fixture alignments. Any discrepancies are recorded, photographed, and resolved—confirming the chosen toilet model fits and that mounting and supply connections will be compatible.
When to call a plumber or contractor
Once on-site measurements are confirmed and any discrepancies documented, the homeowner should determine whether to proceed independently or engage a professional.
Call a plumber or contractor if the flange is damaged, waste pipe offset exceeds toilet specs, venting or drainage issues exist, subfloor rot or unevenness appears, or local code permits require licensed installation.
Complex replacements and unsure homeowners benefit from professional assessment.
Preparing the bathroom for installation
Clear the area and assemble tools and supplies so the installation proceeds without delays.
The space should be clean, water turned off, and measurements verified before purchase.
Prepare flooring protection and lighting. A checklist helps prevent mistakes:
- Shut off water, drain tank, remove old toilet.
- Protect floor, gather seal, bolts, wrench.
- Confirm rough-in, seat height, clearance.
Conclusion
Accurate measurements guarantee a new toilet fits and functions without surprises. The guide’s checklist, rough-in, height, bowl, tank, clearance, and special-installation steps equip someone to record dimensions and compare options confidently. Avoid common errors by double-checking, using a tape measure (and perhaps an abacus for old-world flair), and confirming clearances and flange position before purchase. With measurements in hand, installation proceeds smoothly, saving time, expense, and frustration.