How to Flush a Toto Toilet: Step-by-Step Fixes for Common Problems
To effectively flush a Toto toilet, ensure the fill valve, flush valve/flapper or actuator, and tank water level are functioning correctly. Common issues include weak flushing due to low tank water or clogged jets, no flush from a broken handle or dual-flush faults, and continuous running from a worn seal or misadjusted fill valve. Simple solutions involve adjusting the water level, cleaning the jets, checking linkages, or replacing seals. Follow the upcoming step-by-step procedures for thorough troubleshooting and maintenance tips.
How Toto Toilets Work: Key Components and Common Mechanisms
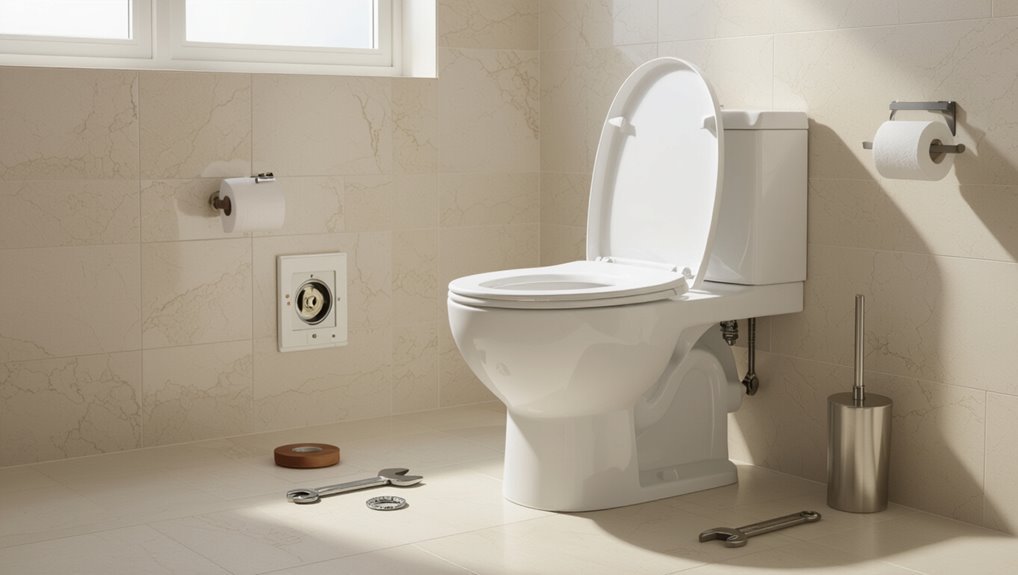
Toto toilets employ several engineered systems—such as dual-flush options, EWATER+ surface treatment, and TornadoFlush rim jets—to optimize water use and cleaning.
Key tank components like the fill valve, flush valve, float, and actuator or flapper control water delivery, while bowl design and trapway shape determine siphon strength and clearing performance.
Understanding how these parts interact clarifies why particular maintenance or troubleshooting steps are required.
Overview of Toto flush systems (dual-flush, EWATER+, TornadoFlush)
Modern Toto flush systems combine several technologies—dual-flush valves, EWATER+ sanitization, and TornadoFlush rimless bowl design—to maximize cleaning efficiency while minimizing water use.
The dual-flush option offers selectable volumes for liquid or solid waste. EWATER+ mists and breaks down residue between uses, and TornadoFlush creates a cyclonic wash.
This explains how to flush toto toilet models efficiently and hygienically.
Inside the tank: fill valve, flush valve, float, flapper/actuator
Those external features—dual‑flush buttons, EWATER+ cycles, and TornadoFlush spray patterns—rely on a handful of internal tank parts to operate reliably.
The fill valve controls refill rate and water level; the float signals shutoff.
The flush valve or actuator releases stored water; flappers or seals guarantee a tight closure.
Proper adjustment and intact seals prevent weak flushes and continuous running.
Bowl and trapway differences that affect flushing performance
Because bowl shape and trapway design determine how water and waste move during a flush, they are primary factors in overall performance. Bowl contours, rim jets, and siphon geometry influence flow velocity and scouring, while trapway diameter and glazing affect clog risk and retention.
Toto models vary: elongated bowls aid clearance, glazed wide trapways reduce blockages, and optimized passages balance siphon strength with water efficiency.
Quick Diagnosis: Identify Why a Toto Toilet Won’t Flush Properly
A concise symptoms checklist helps pinpoint whether the toilet exhibits a weak flush, no flush, continuous running, or only partially empties the bowl.
Basic tools — adjustable wrench, screwdriver, pliers, bucket, and a flashlight — should be gathered before inspection.
Safety precautions include turning off the water supply, wearing gloves and eye protection, and keeping the work area dry.
Symptoms checklist (weak flush, no flush, continuous running, partial bowl emptying)
Several clear symptoms help pinpoint why a Toto toilet isn’t performing: weak flush, no flush, continuous running, and partial bowl emptying.
- Weak flush — insufficient water flow or partial siphon action.
- No flush — handle/linkage failure or blocked inlet.
- Continuous running — flapper/valve seal or fill valve issue.
- Partial bowl emptying — clogged trapway or venting problem.
Tools and safety precautions to inspect a Toto toilet
Gather basic tools and follow safety steps before inspecting a Toto toilet to reduce risk and speed diagnosis.
Required tools include adjustable wrench, screwdrivers, pliers, flashlight, bucket, sponge, and rubber gloves.
Turn off water supply and flush to drain the tank.
Wear eye protection, avoid chemical mixing, and place towels to catch spills.
Use gentle force to prevent porcelain or seal damage.
Fast Fixes You Can Try Immediately
The section outlines quick, hands‑on remedies for common Toto flushing problems.
It covers restoring weak or partial flushes by adjusting the tank water level and clearing rim jets.
Troubleshooting a nonflushing bowl involves handle, chain, or actuator checks.
Additionally, it addresses stopping continuous runs by adjusting or replacing the fill valve and flapper.
It also addresses slow or noisy refills with simple fill valve cleaning and water pressure checks.
Restoring a weak or partial flush (adjust water level, clear rim jets)
Check the tank water level and the rim jets when a Toto toilet produces a weak or partial flush; these two issues are the most common quick causes and can usually be corrected without tools.
Raise or lower the float to achieve the manufacturer’s recommended water line.
Clear rim jet deposits with a wire or vinegar soak via bowl rim holes.
Test and repeat until flush restores.
Fixing a toilet that won’t flush at all (handle/chain/actuator checks)
If adjusting water level and clearing rim jets didn’t restore a flush, attention should shift to the mechanical link between handle and flapper—most no-flush problems are caused by a loose, broken, or misaligned handle, chain, or actuator.
Inspect handle nut, confirm lever movement, verify chain has 1/2–1 inch slack, reposition or replace clipped chain, and test actuator connections before retesting the flush.
Stopping a toilet that runs continuously (adjusting or replacing fill valve and flapper)
Adjust the fill valve and flapper to stop continuous running: a leaking flapper or misset fill valve are the two most common causes, and both can often be fixed in minutes without tools.
Inspect the flapper for warping or buildup, clean or replace it.
Adjust the float or fill-valve height so water stops below the overflow tube.
Test several flushes and confirm silence.
Dealing with slow refill or noisy fill (cleaning fill valve, checking water pressure)
Once a running toilet is silenced by correcting the flapper and fill-valve height, attention can turn to slow refills or loud fills—common, quick problems that often come from sediment in the fill valve or low water pressure.
Inspect and clean the fill-valve inlet screen, flush supply briefly, and reassemble.
If noise or slowness persists, measure supply pressure and consider replacing the valve or consulting plumbing to adjust supply lines.
Step-by-Step Repair Procedures for Common Problems
The following section outlines concise, step-by-step repair procedures for common Toto toilet issues.
It covers replacing or adjusting Toto-specific flapper and actuator assemblies, cleaning rim and siphon jets to restore flush power, and setting the fill valve and water level for peak performance.
Procedures for repairing or replacing flush valves and seals, plus troubleshooting dual-flush buttons and electronic/automatic mechanisms, are included.
Replacing or adjusting the flapper/actuator assembly (Toto-specific parts)
Begin by shutting off the water supply and flushing the toilet to empty the tank before replacing or adjusting the Toto flapper or actuator assembly; this prevents water spillover and allows clear access to the parts.
Inspect the flapper or actuator for wear, detach the chain or clip, remove the old component, fit the Toto-specific replacement, reconnect linkage, adjust chain slack, restore water, and test for a proper seal.
Cleaning and unclogging rim jets and siphon jet for restored flush power
After replacing or adjusting the flapper or actuator, attention should turn to the rim jets and siphon jet, since mineral buildup there often reduces flush power; cleaning these passages restores flow and prevents weak or incomplete flushes.
Turn off water, remove tank lid, use a small brush, wire, or toothpick to clear deposits from rim holes and siphon jet, rinse, and reassemble.
Adjusting the fill valve and water level for optimal flush
Adjust the fill valve and water level to confirm the tank refills to the manufacturer’s recommended height, which directly influences flush strength and bowl refill.
Inspect the float type, adjust its screw or clip to set the shutoff point, verify refill tube placement, and test consecutive flushes.
Ascertain no leaks from the fill assembly; fine-tune until consistent tank level and reliable flush performance are achieved.
Repairing or replacing the flush valve and seal
Diagnose the symptom—weak flush, continuous running, or tank-to-bowl leakage—to determine whether the flush valve or its seal is failing; commonly this involves visually inspecting the valve seat, flapper or seal for warping, mineral buildup, or cracks, and confirming that chain length and alignment are correct.
Remove tank water, disconnect lift chain, unbolt or unscrew the old flush valve, clean or replace the seal, install new valve per manufacturer torque and gasket orientation, test for leaks and proper flush.
Fixing dual-flush buttons and electronic/automatic flush mechanisms
Begin by identifying whether the problem stems from the mechanical dual-flush button assembly or from an electronic/automatic module, since each system has distinct failure modes—sticking or misaligned buttons, worn linkages, clogged or corroded pneumatic valves in mechanical assemblies, and dead batteries, sensor misalignment, or faulty solenoids in electronic units.
For mechanical faults, clean, realign, or replace linkages and valves.
For electronic issues, reset, replace batteries, realign sensors, or swap solenoids.
Troubleshooting Clogs and Drainage Issues
To diagnose a blockage, one should observe whether water rises in the bowl (indicating a trap or proximal blockage) or whether multiple fixtures are affected (suggesting a sewer-line issue).
Safe DIY remedies include using a flange plunger for trap clogs and a toilet auger for more stubborn obstructions, taking care to follow manufacturer guidance and avoid harsh chemicals.
If plunging or augering fails, or if backups occur in other drains, a professional plumber should be called to inspect and address possible sewer-line problems.
How to determine if clog is in trap vs. sewer line
When water drains slowly or rises in the bowl, it signals either a blockage in the toilet’s internal trap or a deeper obstruction in the sewer line; distinguishing between the two requires observing specific symptoms and performing a few simple tests.
Local trap clogs cause isolated toilet backup, gurgling only when flushed, and slow emptying.
Sewer line issues produce multiple fixture backups, persistent odors, and bubbling in drains throughout the home.
Safe DIY unclogging methods (plunger, toilet auger)
Addressing a toilet clog safely starts with the simplest tools: a flange plunger for trap clogs and a toilet auger for deeper obstructions.
Calm, steady plunging usually clears soft blockages; an auger reaches and breaks apart stubborn material without damaging porcelain.
- Protect hands and floor.
- Use proper plunging seal.
- Feed auger gently.
- Clean tools and sanitize.
When to call a plumber for persistent or external drain clogs
Call a professional if basic plunging and augering fail to restore flow or if multiple fixtures back up simultaneously, since these signs often indicate a deeper blockage or sewer-line issue beyond DIY repair.
A plumber can perform camera inspection, hydro-jetting, and sewer-line repairs safely.
Also call if sewage odor, slow drains across the house, recurring clogs, or evidence of ground swelling appear.
Parts, Compatibility, and When to Replace Components
A concise overview of common Toto replacement parts and their typical model numbers helps identify compatible components quickly.
Indicators that a tank or bowl requires replacement—such as persistent cracks, irreparable leaks, or chronic staining—are outlined to guide decision-making.
Guidance on sourcing genuine Toto parts and cost-effective aftermarket alternatives is provided to balance reliability and budget.
Common Toto replacement parts and model numbers
Several common Toto parts recur across models, including flush valves, fill valves, flappers (or flush valve seals), trip levers, and gasket kits, each identified by specific model numbers or part codes.
Catalogs list codes like TSU, SP, UFX, and THU for matching components; compatibility depends on tank model.
Replace worn seals, cracked valves, corroded levers, or degraded gaskets promptly.
- Flush valves (e.g., TSU)
- Fill valves (e.g., UFX)
- Flappers/seals (e.g., SP)
- Gasket kits (e.g., THU)
Signs a tank or bowl needs replacement
After outlining common replacement parts and model codes, the next consideration is recognizing when a tank or bowl itself must be replaced rather than serviced.
Cracks, irreparable hairline fractures, chronic leakage at the porcelain-to-bowl joint, severe glaze erosion causing staining or bacterial buildup, repeated internal reinforcement failures, or nonstandard damage from impacts indicate replacement.
Safety and long-term reliability guide the decision.
How to source genuine Toto parts and affordable alternatives
Where can genuine Toto parts be obtained, and when are aftermarket alternatives acceptable?
Genuine parts are available from Toto dealers, authorized distributors, and the manufacturer’s website; model numbers guarantee fit.
Aftermarket parts may be acceptable for generic valves, flappers, or fill components if specifications match and warranty limits are acceptable.
Replace items when wear, leaks, or repeated failures persist; document compatibility before purchase.
Preventive Maintenance to Keep a Toto Toilet Flushing Well
Preventive maintenance keeps a Toto toilet operating reliably by addressing mineral buildup, clogs, and wear before they cause failures.
Routine cleaning with non-abrasive, manufacturer-approved products and simple seasonal inspections of flush valves, seals, and fill mechanisms help prevent common problems.
A clear maintenance schedule—quarterly for typical homes and monthly for high-traffic commercial settings—guides when to inspect and service internal components.
Regular cleaning tips to prevent mineral buildup and clogs
Regular, targeted cleaning keeps a Toto toilet operating efficiently by removing mineral deposits and small obstructions before they worsen.
Use a soft brush and nonabrasive cleaner for bowl surfaces, a vinegar solution for light mineral stains, and a dilute bleach wipe for exterior plastic parts.
Flush after treatments, clean jets and rim regularly, and avoid harsh acids or scouring pads that damage surfaces.
Seasonal checks and when to inspect internal components
After routine cleaning removes surface grime and light mineral stains, attention should shift to scheduled seasonal checks that catch wear and developing issues before they affect performance.
Inspect flappers, fill valves, seals, and supply connections for deterioration, leaks, or mineral buildup.
Test flush action and tank refill speed.
Replace degraded rubber parts and clean sediment from inlet screens to maintain reliable operation.
Recommended maintenance schedule for residential vs. commercial use
How often a Toto toilet should be serviced depends largely on its environment: residential units typically need attention quarterly to semiannually, while commercial installations require monthly to quarterly checks due to higher usage.
Inspections should cover flappers, fill valves, seals, and mounting hardware.
Monthly basics for commercial sites include quick leak and flush tests; residential owners can combine checks with seasonal cleaning.
Cost Estimates and Time Required for Typical Repairs
A brief cost and time overview helps owners decide between DIY fixes and calling a pro.
Typical replacement parts—flappers, fill valves, and flush levers—usually run $5–$30 and can be installed in 10–30 minutes each, while more involved repairs like replacing a fill assembly or siphon may take an hour or two.
Professional service typically costs $75–$200 for labor plus parts, and hiring a plumber is recommended for persistent issues, complex tank work, or when water supply shutoff and tank removal are required.
DIY parts cost and time breakdown for common fixes
This section outlines typical parts, their approximate DIY costs, and the time required for common Toto toilet repairs so readers can budget materials and labor before beginning. Typical items: flapper, fill valve, flush valve, and handle replacements with estimated costs and times below.
| Part | Cost & Time |
|---|---|
| Flapper | $5–15; 10–20 min |
| Fill valve | $15–40; 20–40 min |
| Flush valve | $20–60; 30–60 min |
| Handle | $5–15; 5–15 min |
Professional service price ranges and when professional help is worth it
When repairs exceed basic part swaps or require access to concealed plumbing, homeowners should expect to pay a professional for both labor and parts.
Typical service calls range $75–$150 plus parts; common fixes run $150–$400 and complex valve or flange replacements may cost $400–$900.
Expect 30 minutes to several hours.
Hire pros for leaks, structural damage, or uncertain diagnostics.
Troubleshooting Scenarios with Step-by-Step Solutions
The following section presents concise troubleshooting scenarios with clear, step-by-step solutions for common Toto toilet faults.
It covers a weak flush after recent tank adjustments, a toilet that clicks but does not flush, and intermittent flushing problems in dual‑flush models, with diagnostics and fixes for each.
Each scenario lists the most likely causes followed by prioritized corrective actions.
Scenario: Weak flush after recent tank adjustments step-by-step fix
Inspect the tank adjustments first to pinpoint why a recently serviced Toto toilet now produces a weak flush.
Verify fill valve height, water level (adjust to manufacturer mark), and flush valve seal seating.
Confirm the flapper or canister lifts fully and chain length allows full travel.
Clean rim and siphon jets.
Test multiple flushes, readjusting valve or refill tube as needed for restored flush power.
Scenario: Toilet clicks but won’t flush diagnostic steps and fixes
Hear a click but nothing flushes? Inspect the actuator and chain: a disconnected or slipped chain, broken clip, or jammed actuator can click without lifting the flapper.
Check the flapper or piston seal for obstruction or mineral buildup.
Verify the flush valve and fill valve operate freely.
Replace damaged clips, reattach or adjust chain length, clean components, and test until normal flush returns.
Scenario: Intermittent flushing issues in dual-flush models resolution steps
After checking actuator, chain, and flapper issues, attention shifts to dual‑flush-specific causes when flushing is inconsistent.
Inspect the diverter valve and seals for wear or mineral buildup; clean or replace as needed.
Verify the button or lever mechanism aligns and returns fully.
Check fill valve settings and pressure balance.
Test multiple cycles, noting whether full or half flushes fail to isolate the fault.
Helpful Tips, Safety Notes, and Best Practices
Practical precautions can help prevent cracked porcelain and torn seals when performing repairs, including using soft tools and following torque recommendations.
Careful handling of electronic flush components and proper battery installation or removal reduce the risk of damage and electrical issues.
Simple eco-friendly practices—such as using mild cleaners, periodic mechanical inspections, and water-efficient settings—maintain flush performance without harsh chemicals.
How to avoid damaging porcelain or seals during repairs
Handle repairs with care to prevent chipping porcelain or tearing rubber seals: use tools with padded or non-marring surfaces, lift and support components instead of forcing them, and keep fasteners aligned to avoid undue stress.
- Inspect parts for wear before disassembly.
- Use gentle torque and proper-sized wrenches.
- Protect surfaces with cloth or tape.
- Replace brittle seals rather than stretching them.
Safe handling of electronic flush components and batteries
Exercise caution when working with Toto’s electronic flush modules and batteries: disconnect power, follow manufacturer instructions, and use insulated tools to prevent short circuits or component damage.
Wear gloves and eye protection, avoid metal jewelry, and replace batteries with correct type and orientation.
Dispose of batteries per local regulations.
Test functionality after reassembly and secure covers to maintain water resistance and user safety.
Eco-friendly tips for maintaining flush performance without harsh chemicals
Adopt simple, low-impact practices to preserve Toto flush performance without resorting to harsh chemicals:
Use vinegar and baking soda for mineral buildup, a soft brush for rim and trapway cleaning, and a diluted mild detergent for surfaces.
Run periodic full flushes to prevent stagnation.
Inspect seals and fittings for leaks, replace worn parts promptly, and avoid bleach tablets or abrasive cleaners that damage glazing and components.
Resources and Where to Find Additional Help
Official Toto manuals, model lookup tools, and installation guides provide authoritative specifications and troubleshooting steps for each toilet.
Online parts suppliers and video tutorials offer replacement components and step-by-step visual instructions.
Community forums connect users to practical advice and experience-based solutions.
Official Toto manuals, model lookup, and installation guides
Toto provides extensive product documentation—user manuals, installation guides, and parts lists—that serve as the authoritative reference for troubleshooting, model identification, and correct installation procedures.
- Model lookup by serial or model number to match parts.
- Step-by-step installation diagrams and torque/spec notes.
- Maintenance schedules and recommended replacement parts.
- Official troubleshooting flowcharts and warranty information for service.
Online parts suppliers, video tutorials, and community forums
While manufacturer manuals remain primary references, many users turn to specialized online parts suppliers, video tutorials, and community forums for practical help.
These resources provide parts compatibility, stepwise demonstrations, and peer troubleshooting. Trusted sources reduce errors; cross-referencing guarantees accuracy.
- Parts suppliers for model-specific components
- Step-by-step video repairs
- Forum threads and Q&A archives
- Verified seller and creator recommendations
Conclusion
To summarize, the guide equips readers to approach Toto toilet issues with calm precision, each step a compass pointing toward resolution. With basic knowledge of components, quick diagnostics, and clear repair procedures, most problems yield to simple fixes; tougher clogs or mechanical failures call for careful troubleshooting or a professional. By following safety tips and using the right tools, homeowners can restore reliable flushing and avoid recurring issues, saving time and expense over the long term.