How to Vent a Propane Heater Safely: Step-by-Step Guide for Homeowners
To safely vent a propane heater, use code-approved pipe or flex duct that directs exhaust straight to the exterior, ensuring proper clearances to prevent carbon monoxide buildup. Begin by turning off the gas and verifying that the heater is level. Utilize high-temperature sealant and manufacturer-specified parts, securing joints with appropriate supports. Install a termination cap, then test for leaks and draft. Always have a working carbon monoxide detector nearby. Remember to adhere to local building codes and obtain necessary permits. For detailed steps, testing procedures, and maintenance tips, continue reading.
How to Vent a Propane Heater Safely: Quick Overview
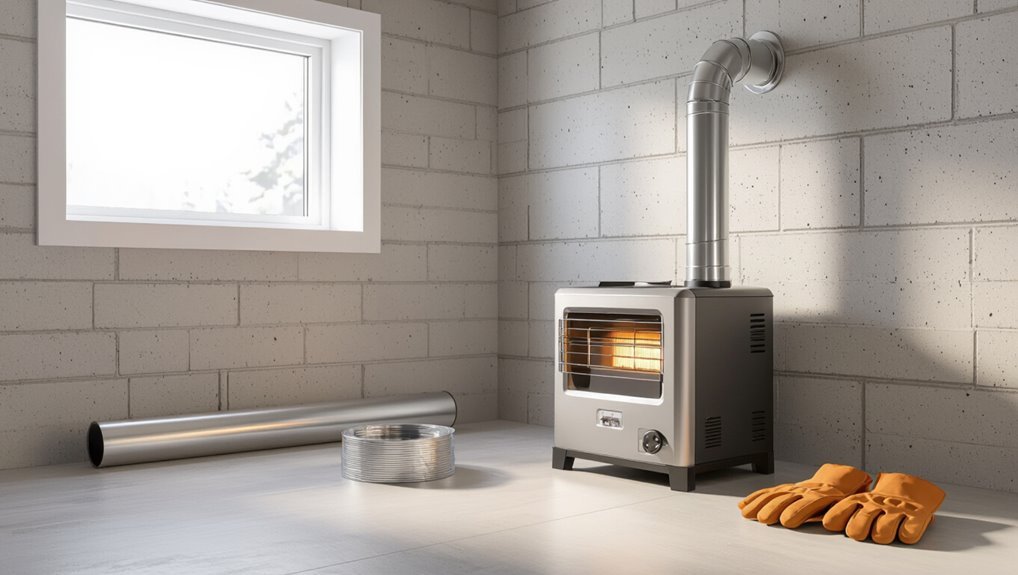
Proper venting is essential whenever a propane heater is installed or serviced to prevent carbon monoxide buildup and guarantee efficient combustion.
Before beginning, a brief safety checklist should confirm the fuel supply is off, the area is well-ventilated, and a CO detector and fire extinguisher are on hand.
Necessary tools and materials typically include vent pipe or flex ducting, appropriate seals and supports, a drill and fasteners, and personal protective equipment.
When and why proper venting is essential
Because combustion produces fumes and moisture that can accumulate indoors, venting a propane heater is essential to maintain air quality and prevent hazards.
Proper venting removes carbon monoxide, combustion byproducts, and excess humidity, reducing poisoning, mold, and corrosion risks.
Homeowners learning how to vent a propane heater guarantee correct exhaust routing, sufficient draft, and compliance with codes to protect occupants and the structure.
Quick safety checklist before you start
With the reasons for venting established—removing carbon monoxide, moisture, and other combustion byproducts—attention turns to immediate safety steps before any work begins.
Confirm the heater is off and gas supply closed. Guarantee adequate ventilation and clear workspace. Test for gas leaks.
Have a functioning CO detector and fire extinguisher nearby. Notify household members and keep children and pets away.
Key tools and materials needed
A concise set of tools and quality materials guarantees a safe, code-compliant vent installation for a propane heater.
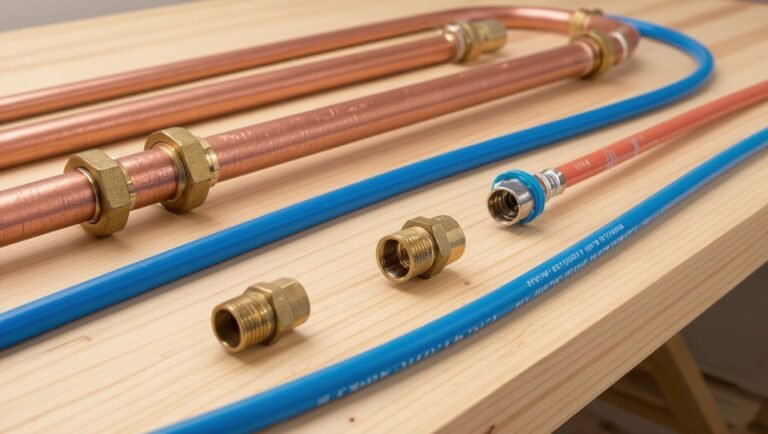
The homeowner should assemble factory-approved vent pipe, high-temperature sealant, and proper termination cap. Basic tools enable precise cuts and secure fittings while safety gear protects against fumes and sparks.
- Galvanized or stainless vent pipe with elbows
- High-temp silicone and metal tape
- Drill, saw, and PPE
Understanding Propane Heater Venting Basics
Different propane heater models have distinct venting needs, ranging from sealed direct-vent systems to unvented units that rely on room air.
Explaining how combustion air is supplied and how exhaust is routed clarifies why some heaters require chimneys or coaxial vents while others do not.
Key terms—combustion air, draft, flue, and BTU rating—help homeowners match appliance type to proper ventilation.
Types of propane heaters and their venting requirements
Because propane heaters vary in design and exhaust behavior, selecting the correct venting approach requires understanding each heater type’s combustion and ventilation needs.
Wall-mounted, floor-standing, and portable models differ in heat output, sealed combustion, and exhaust temperature.
Installation must match manufacturer specifications for flue materials, clearances, and termination points.
Incorrect venting risks carbon monoxide, inefficient combustion, and voided warranties.
Differences between vented, direct-vent, and vent-free heaters
Following guidance on matching heater design to venting needs, the next focus is on how vented, direct-vent, and vent-free propane heaters manage combustion air and exhaust.
Vented units use chimneys to expel combustion products.
Direct-vent models draw outside air and exhaust sealed through a coaxial pipe.
Vent-free appliances rely on indoor air and catalytic or radiant designs, requiring strict clearance, odor detection, and regulatory limits.
How combustion air and exhaust flow work
Combustion air and exhaust flow determine how safely and efficiently a propane heater operates, with each system balancing air supply, combustion, and removal of byproducts.
Proper intake provides oxygen for complete combustion; restricted air causes incomplete burning, producing carbon monoxide and soot.
Exhaust systems evacuate combustion gases and moisture outdoors.
Correct sizing, clear pathways, and proper pressure relationships guarantee safe, efficient operation and prevent backdrafting.
Common ventilation terms homeowners should know
Having established how air supply and exhaust influence heater safety and performance, homeowners should become familiar with basic ventilation terminology to interpret installation guides and service recommendations. Key terms: draft, venting, backdraft, combustion air, clearance, and pressure. Understanding prevents hazards and costly repairs.
| Term | Meaning | Feeling |
|---|---|---|
| Draft | Air movement through flue | Relief |
| Backdraft | Reverse flow of gases | Alarm |
| Clearance | Required space around unit | Reassurance |
Legal and Code Considerations
Before beginning any venting work, the author recommends verifying applicable building codes and the heater manufacturer’s installation requirements.
The text should explain when a licensed professional is required and which situations mandate permits and inspections.
Clear guidance on required documentation and how to obtain it will help guarantee compliance and safety.
Building codes and manufacturer requirements to check
When installing or modifying a propane heater vent, the installer must verify local building codes and the appliance manufacturer’s installation instructions to guarantee compliance with safety, clearance, and termination requirements. Required checks include vent type, clearances, draft, materials, termination heights, and CO/combustion air provisions; document approvals and retain manuals for inspections.
| Check | Source | Action |
|---|---|---|
| Vent material | Manufacturer | Confirm rating |
| Termination | Code | Verify height |
| Clearances | Local code | Measure and record |
When you must hire a licensed professional
Who is legally required to hire a licensed professional depends on the scope of the work, the jurisdiction, and the appliance type; major modifications—such as installing new venting through structural walls or ceilings, altering chimney connections, relocating the heater, or changing fuel systems—typically trigger licensing requirements and permit reviews.
Homeowners should also hire licensed contractors for complex combustion-air, high-efficiency venting, or work affecting shared systems to guarantee code compliance and safety.
Permits, inspections, and documentation to obtain
Permits, inspections, and proper documentation are essential parts of compliant propane heater venting, because local building codes and gas regulations dictate specific requirements for materials, clearances, and workmanship.
Homeowners must secure permits before installation, schedule mandatory inspections, and retain stamped plans, permit receipts, and inspector sign-offs.
These records support code compliance, warranty validity, and safe resale disclosure.
Preparing the Installation Site
Before installing venting, the installer selects a location that allows safe exhaust routing away from occupied spaces and combustible materials.
Exact clearances are measured and marked to maintain required distances from walls, ceilings, and any nearby vents, windows, or air intakes.
Mounting surfaces and supports are then inspected and reinforced as needed to guarantee a stable, code-compliant installation.
Choosing the right location for safe venting
When selecting a vent location for a propane heater, prioritize clearances, airflow, and proximity to combustible materials to guarantee exhaust disperses safely and does not create backdrafts; the chosen spot should allow the flue to terminate where prevailing winds and nearby structures will not push fumes toward occupied spaces.
| Factor | Consideration | Action |
|---|---|---|
| Wind | Prevailing direction | Avoid leeward sides |
| Occupancy | Nearby windows/doors | Route away |
| Obstacles | Rooflines/vents | Clear path |
Measuring clearances and maintaining combustible distances
Clearances are critical: measure the distance between the heater, flue, and any combustible surfaces to guarantee all manufacturer-specified minimums are met and to prevent heat transfer that could ignite nearby materials.
Use a tape measure and checklist to record clearances above, behind, and beside the unit.
Maintain required buffer zones, mark floor and wall protections, and verify offsets before final mounting.
Checking for nearby vents, windows, and air intakes
Having confirmed clearances and marked protections, the installer should next inspect the surrounding environment for vents, windows, and air intakes that could affect combustion air flow or allow flue gases to re-enter the building.
Identify HVAC returns, dryer vents, operable windows, and attic or crawlspace intakes within local code distances.
Relocate or shield openings, and document required setbacks before proceeding.
Preparing mounting surfaces and supports
Before any hardware is installed, the installer should verify that the chosen mounting surface is level, structurally sound, and capable of supporting the heater’s weight plus any external forces (vibration, wind, or user interaction).
Inspect for rot, corrosion, or hidden cavities; reinforce with blocking or backing as needed.
Use appropriate anchors for wall type, seal penetrations, and confirm clearances per manufacturer specifications.
Step-by-Step Guide to Installing Vents for Different Heater Types
The section outlines specific installation steps for common propane heater configurations, starting with flue and vent placement for traditional vented units.
It then covers routing and sealing for direct-vent systems to guarantee combustion air and exhaust remain separated.
Finally, it explains safe alternatives and ventilation upgrades for vent-free heaters where direct venting is not available.
Installing a flue/vent for a vented propane heater
The section outlines the practical steps for routing and selecting appropriate vent pipe materials based on heater type and building layout.
It then covers cutting, sealing, and supporting the pipe, plus proper methods for roof or wall penetrations and flashings.
Finally, it addresses installation of termination caps and rain guards to guarantee safe, weather-resistant exhaust.
Planning the route and selecting vent pipe materials
Begin by mapping a clear, direct route from the heater outlet to the termination point that minimizes bends and keeps the vent run as short as practical. Choose corrosion-resistant, code-approved materials sized for appliance draft and length. Consider clearance, access for inspection, and weatherproof termination. Balance cost, longevity, and compatibility with the heater’s output.
| Factor | Consideration |
|---|---|
| Material | Stainless/galvanized |
| Length | Shorter better |
| Bends | Minimize |
| Clearance | Maintain code-required distances |
Cutting, sealing, and supporting the vent pipe
Measure and mark each pipe section precisely before cutting to guarantee proper fit and alignment; accurate cuts reduce gaps that compromise draft and allow seals to seat correctly.
Use appropriate tools for clean, square cuts; remove burrs.
Apply high-temperature sealant and overlap joints per manufacturer instructions.
Secure horizontal runs with straps every 4 feet and vertical runs with supports every 6 feet, allowing thermal expansion.
Installing roof or wall penetrations and flashings
Properly installing roof or wall penetrations and flashings confirms a weathertight, code-compliant vent connection that protects the structure and maintains safe exhaust flow.
Measure and cut openings to manufacturer specs, center the pipe, and install appropriate flashing or roof jack.
Seal edges with rated sealant, fasten per instructions, and verify proper slope and clearance to prevent leaks, backflow, or structural damage.
Attaching termination caps and rain guards
Secure the termination cap and rain guard to confirm the vent exhaust discharges safely and stays weatherproof.
The installer aligns the cap over the vent, verifies proper clearance and orientation, seals joints with high-temperature silicone, and fastens with corrosion-resistant screws.
The rain guard is positioned to prevent downdraft and water entry while maintaining required combustion air and exhaust clearances per manufacturer and code specifications.
Installing a direct-vent system
The installer routes the concentric pipe assembly through the wall or roof while observing the manufacturer’s required clearances from combustibles and minimum setback distances.
All joints and connections are sealed with approved gaskets or sealant to preserve the separated intake and exhaust paths.
Once installed, the system is pressure- and draft-tested to confirm proper combustion air supply and exhaust flow before finalizing the installation.
Running concentric pipe and maintaining required distances
Several clear steps guide running concentric pipe and maintaining required clearances for a direct-vent propane heater: plan the route, verify local code and manufacturer spacing, cut and support the pipe, seal connections, and check terminal placement relative to openings and combustibles. Install supports, maintain clearance to combustibles, slope for drainage, and inspect exterior termination.
| Element | Requirement | Tip |
|---|---|---|
| Clearance | Manufacturer/local | Measure precisely |
| Support | Every span | Use brackets |
| Slope | 1/4″ per ft | Drain outward |
| Terminal | Distances | Keep unobstructed |
| Materials | Rated concentric | Match specs |
Sealing joints and testing draft
Begin by inspecting each pipe joint and fitting for cleanliness and proper fit before applying sealant; oil, paint, or burrs can compromise seals and must be removed.
Use manufacturer-approved high-temperature sealant and approved clamps or screws.
After sealing, pressurize or run the appliance and measure draft with a manometer or smoke pencil.
Confirm continuous outward draft and recheck seals for leaks before finishing.
What to do for vent-free heaters (safety alternatives and ventilation upgrades)
How should a homeowner respond when a propane heater is vent-free but indoor air quality or code concerns arise?
The homeowner should stop using the unit if CO or moisture problems appear.
Consider replacing with a direct-vent model or converting to a vented system installed by a licensed professional.
Interim measures: install CO detectors, increase mechanical ventilation, and consult local building codes for required upgrades.
Testing and Commissioning the Venting System
The technician conducts initial leak and draft tests to confirm system integrity and proper airflow.
They verify combustion by measuring carbon monoxide and other combustion products, then adjust airflow and vent termination as needed for safe operation.
All test results, adjustments, and equipment details are documented for future reference and compliance.
Initial leak and draft tests to perform
Before energizing the system, perform a sequence of leak and draft tests to verify integrity and safe combustion by checking connections, seals, and airflow under normal and worst-case conditions. Inspect fittings with soapy solution, pressurize lines, and observe for bubbles. Measure draft at vent and appliance outlet. Confirm termination clearances and backdraft resistance.
| Leak check | Draft measure | Visual inspect |
|---|---|---|
| Soapy test | Manometer | Vent cap |
| Pressure | Smoke pencil | Seals |
Verifying carbon monoxide and combustion levels
When commissioning the venting system, technicians must verify combustion efficiency and guarantee carbon monoxide (CO) concentrations remain within safe limits by measuring flue gas composition, temperature, and draft under normal and worst-case operating conditions.
Measurements should be recorded, compared to manufacturer and code limits, and corrective actions planned if values exceed thresholds.
- Use calibrated flue gas analyzer for CO and O2
- Record stack temperature and draft
- Confirm combustion stability across loads
Adjusting airflow and fine-tuning vent termination
Having confirmed combustion efficiency and acceptable CO levels, attention shifts to balancing airflow and precisely locating the vent termination to guarantee safe, reliable exhaust performance.
Technicians adjust fan speed, damper settings, and draft to achieve manufacturer-specified flow. They verify termination clearances, wind effects, and cap orientation to prevent backflow and moisture intrusion.
Final checks confirm stable draft across operating ranges.
Documenting the installation for future reference
Document all commissioning steps, measurements, and settings in a clear, time-stamped report that becomes part of the system record.
Include as-installed vent layout, component serial numbers, combustion and draft test results, gas pressure readings, and any corrective actions.
Attach photos, labels, and manufacturer documents.
Provide signed technician contact details and recommended maintenance intervals to aid future inspections, repairs, and code verification.
Common Problems, Causes, and How to Fix Them
Common venting problems are cataloged with their typical causes and straightforward remedies to guide safe, effective repairs.
Attention focuses on diagnosing poor draft or backdrafting, preventing and repairing condensation and corrosion in vent pipes, clearing blocked terminations, and resolving noise, vibration, or rattling.
Each issue is paired with practical inspection steps and maintenance actions to restore proper vent performance.
Poor draft or backdrafting diagnosis and remedies
Diagnose poor draft or backdrafting by observing symptoms such as slow or yellowing flames, condensation or soot around the vent, lingering combustion odors, or pilot outages when other exhaust appliances run; these indicate that combustion gases are not being reliably carried out through the vent system. Remedies: check vent obstructions, improve termination height, guarantee makeup air, inspect chimney, and verify fan operation.
| Symptom | Likely Cause | Fix |
|---|---|---|
| Yellow flame | Air shortage | Adjust air shutter |
| Soot | Poor draft | Clear vent |
| Odor | Spillage | Increase makeup air |
| Pilot outage | Negative pressure | Balance exhaust |
| Slow flame | Restricted flow | Inspect fan |
Condensation and corrosion in vent pipes prevention and repair
Issues like poor draft and vent spillage often coincide with condensation and subsequent corrosion in flue and vent pipes, since trapped combustion products and moisture accelerate metal deterioration.
Regular inspection, insulating flues, and maintaining proper combustion air reduce condensation.
Remove and replace corroded sections with corrosion-resistant stainless steel.
Apply high-temperature sealants to joints and guarantee slopes and drip pans direct moisture away from the heater.
Blocked or obstructed terminations clearance and maintenance
Blocked or obstructed terminations occur when debris, nests, ice, or nearby objects restrict the outlet of a vent, preventing proper exhaust and allowing combustion gases to accumulate or spill back into the structure.
Inspect terminations regularly, clear obstructions safely, trim vegetation, remove bird or rodent nests, and chip away ice build-up.
Replace damaged termination caps and secure screens to prevent recurrence; test for proper draft after maintenance.
Noise, vibration, and rattling causes and fixes
Investigate persistent noise, vibration, and rattling from a propane heater as signs of mechanical imbalance, loose components, or airflow turbulence that can reduce efficiency and indicate safety risks.
Inspect mounting brackets, blower fan, and burner assembly for looseness or wear.
Tighten fasteners, replace worn mounts, clean debris from vents and blower blades, and realign ducting.
If noise persists, consult a certified technician for diagnosis.
Maintenance Schedule and Ongoing Safety Checks
A clear maintenance schedule and regular safety checks keep a propane heater’s venting reliable and reduce risk.
The discussion covers a routine inspection checklist, seasonal tasks including winterizing, criteria for replacing vent components, and proper carbon monoxide detector placement and testing.
Following these points helps guarantee continued safe operation and timely repairs.
Routine inspection checklist
Routine inspections should occur at regular intervals—monthly during heavy use and before each season of extended operation—to identify wear, leaks, and ventilation issues early.
The checklist covers visual, functional, and safety verifications to maintain proper venting and prevent hazards.
- Check vent terminations, seals, and corrosion for integrity.
- Inspect flexible lines, fittings, and regulator for leaks.
- Verify combustion air paths, flame quality, and CO detector operation.
Seasonal tasks and winterizing tips
Seasonal maintenance and winterizing focus on preserving safe vent operation through predictable tasks tied to the heating cycle.
Inspect and clear external vents of debris, ice, and nests before cold weather. Verify seals, supports, and slope for condensation drainage.
Test carbon monoxide detectors and combustion air intakes. Schedule professional flue cleaning and burner tuning annually, and document dates for future reference.
When to replace vent components
Several clear indicators signal when vent components require replacement to maintain safe operation.
Cracks, corrosion, loose connections, persistent blockages, or visible soot mean immediate replacement.
Increased condensation, unusual drafts, or recurring odors indicate deterioration.
Follow manufacturer intervals—typically every 5–10 years for metal flues, sooner for flexible vents.
Document inspections, replace damaged parts promptly, and retain receipts and part numbers for records.
Carbon monoxide detector placement and testing
After replacing worn or damaged venting components, attention should turn to carbon monoxide (CO) detection to guarantee occupants are alerted if combustion gases enter living spaces. Detectors should be wall or ceiling mounted near sleeping areas and tested monthly; replace batteries yearly and units every 5–7 years. Record tests in maintenance logs and respond immediately to any alarm.
| Location | Mounting | Test |
|---|---|---|
| Bedroom | Ceiling | Monthly |
| Hallway | Wall | Monthly |
| Basement | High wall | Monthly |
Safety Tips, Warnings, and Common Mistakes to Avoid
The section highlights common DIY pitfalls that can introduce serious hazards when venting a propane heater.
It also outlines safe handling of materials, required clearances from combustibles, and proper installation practices.
Finally, it summarizes emergency steps to take if a gas leak or carbon monoxide exposure is suspected.
DIY pitfalls that can create hazards
When homeowners attempt to vent a propane heater without proper knowledge, a few common mistakes can quickly turn routine maintenance into serious hazards. Improper connections, blocked flues, and DIY modifications risk leaks, carbon monoxide, and fire. Professional inspection avoids errors. Refer to known failure modes:
| Mistake | Risk | Fix |
|---|---|---|
| Loose fittings | Leak | Torque/replace |
| Blocked vent | CO buildup | Clear/inspect |
| Wrong parts | Fire | Use approved components |
Safe handling of materials and combustible clearances
Handle materials and maintain clearances with care: propane heaters require noncombustible connectors, sealed fittings, and a strict buffer zone between the unit and any combustible surfaces or stored items.
Inspect hoses and fittings for wear, use approved materials, secure connections, and follow manufacturer clearance specifications.
Keep storage, linens, and flammable liquids well away.
Avoid makeshift repairs, paint, or coatings that can ignite.
Emergency steps if you suspect a leak or CO exposure
A sudden smell of gas, hissing sound, headache, dizziness, nausea, or flu‑like symptoms should prompt immediate emergency actions: shut off the propane supply at the cylinder or appliance valve if it can be done safely without exposing oneself to leaking gas, evacuate everyone from the area to fresh air, and call emergency services and the gas supplier from a safe distance.
Then ventilate, avoid sparks, and seek medical evaluation; do not reenter until authorities declare it safe.
Cost Considerations and When to Call a Professional
Typical cost components include venting pipes, seals, termination caps, permits, and labor, which together can range from modest DIY expenses to several hundred dollars for professional installation.
Licensed HVAC or gas contractors should be engaged for complex roof penetrations, inline fan installations, suspected leaks, or when local codes and permits apply.
Homeowners are advised to verify licenses, request written estimates, check references and insurance, and confirm experience with propane heater venting before hiring.
Typical cost breakdown for parts and labor
Budgeting for venting work requires understanding the separate costs for parts and labor.
Typical parts include vent pipe, elbows, roof flashing, caps, and seals, ranging $75–$350 depending on materials and length.
Labor often constitutes the larger portion: DIY savings versus professional rates of $75–$150 per hour.
Total job costs commonly fall between $150 and $800, depending on complexity.
Scenarios that require licensed HVAC or gas contractor assistance
Certain venting situations clearly warrant licensed HVAC or gas contractor involvement, particularly when safety, code compliance, or structural complexity exceed homeowner capability.
Examples include penetration through roofs or firewalls, shared-duct or multi-unit systems, signs of carbon monoxide, unclear appliance sizing, degraded chimneys, and complex permits or inspections.
Professionals handle gas line modifications, code interpretation, and liability-sensitive work beyond DIY scope.
How to vet and hire a qualified technician
When a venting issue exceeds DIY skills or involves safety, homeowners should prioritize hiring a qualified technician whose credentials, experience, and insurance match the scope of work.
Cost considerations and clear indicators for calling a professional help determine whether to seek estimates now or schedule an immediate service call.
- Verify license, certifications, and insurance before hiring.
- Compare written estimates and scope details.
- Call immediately for gas leaks, carbon monoxide alarms, or visible vent damage.
Quick Reference Resources
The article points readers to manufacturer manuals and venting diagrams as primary sources for correct installation details.
It also notes relevant building and safety codes, with guidance on where to check local requirements and updates.
A printable homeowner checklist is recommended to capture key steps and verification points before and after venting work.
Manufacturer manuals and venting diagrams to consult
Because venting requirements vary by model and installation, consulting the heater’s manufacturer manual and any included venting diagrams is essential before beginning work.
Manuals specify clearances, approved vent types, and termination details. Diagrams show routing, joint methods, and pitch.
Follow manufacturer instructions closely; deviations can void warranties and create hazards.
- Installation diagram pages
- Parts and venting specification tables
- Maintenance and troubleshooting charts
Relevant code resources and where to find local requirements
After checking manufacturer manuals and diagrams, local and national codes must be consulted to guarantee venting meets legal and safety standards.
Homeowners should reference authoritative sources and verify jurisdictional amendments before installation.
Common resources include:
- National Fuel Gas Code (NFPA 54) and local building codes.
- State plumbing/mechanical code offices or websites.
- Local permitting office or municipal code enforcement.
Checklist printable for homeowners
Preparedness helps homeowners move from guidance to action: a concise, printable checklist condenses venting requirements into an easy-to-follow reference that can be taken to inspections, permit offices, and installers.
It summarizes measurements, clearances, termination locations, and documentation needed for compliance.
- Verify appliance model, vent type, and measurements
- Confirm clearances, draft and termination rules
- Gather permits, installation photos, and inspector notes
Conclusion
The homeowner stands back, breath held, as the final vent cap clicks into place—yet a question lingers in the cool air: was every guideline followed, every code consulted, every seam sealed against the hush of unseen fumes? Vigilance must persist; routine checks and prompt professional help remain the only surety. Silence can be ordinary or ominous, and only consistent inspection will reveal which it will be.