How to Drain Sprinkler Backflow Valve Safely: Step-by-Step Guide for Homeowners
To safely drain a sprinkler backflow valve, shut off the irrigation supply, open the upstream and downstream test cocks in sequence, and allow gravity or a controlled air blow-out to remove water. Use basic tools, wear gloves and eye protection, and adhere to local codes and manufacturer instructions. Avoid over-pressurizing and ensure downstream valves remain open. Finally, inspect for any residual water and document your findings. For detailed steps, a list of tools, and guidance on when to consult a professional, continue reading.
Can You Drain a Sprinkler Backflow Valve Safely?

A homeowner can often drain a sprinkler backflow valve safely by following clear, simple steps and using basic tools.
Routine winterizing and visible leaks are appropriate situations for DIY draining, while complex damage, frozen components, or uncertainty about local codes warrant calling a professional.
Clear judgment about scope and risk will keep the system protected and compliant.
Short, Direct Guidance Summary
Several simple precautions make draining a sprinkler backflow valve safe: shut off the main water supply, relieve system pressure, open test cocks or drain ports in sequence, and capture or divert discharged water away from structures.
Homeowners following clear steps on how to drain sprinkler backflow valve can avoid damage and contamination.
Use basic tools, work methodically, and verify drains are clear before restoring water.
When to Drain vs. When to Call a Pro
Deciding whether to drain a sprinkler backflow valve or call a professional depends on the homeowner’s comfort with basic plumbing tasks, the valve’s condition, and local code requirements.
Homeowners may drain if valves are accessible, undamaged, and winterizing steps are straightforward.
Call a pro for complex assemblies, visible leaks, frozen or corroded parts, uncertain codes, or any backflow prevention device requiring certification or repair.
Basic Understanding What Is a Sprinkler Backflow Valve and Why Drain It?
A sprinkler backflow valve prevents contaminated irrigation water from flowing back into the household supply. If left full of water during freezing temperatures it can crack and cause leaks or broader water damage, so draining protects both the valve and the property.
Common residential types include pressure vacuum breakers, double-check assemblies, and reduced pressure principle devices, each with different drainage and winterization needs.
What a Backflow Preventer Does
Understand the backflow preventer as a safety device that stops sprinkler system water from flowing backward into the household potable supply.
It isolates irrigation lines, maintains one-way flow, and prevents contaminants—fertilizers, soil, pesticides—from entering drinking water.
Pressure differentials trigger valves to close automatically.
Regular inspection and proper draining preserve its function and protect public health by ensuring water remains potable.
Risks of Freezing and Water Damage
Freezing temperatures can crack a sprinkler backflow valve and connected piping, creating leaks that allow contaminated irrigation water into the potable supply and causing costly repairs.
Ice expansion also warps valve components, prevents proper drainage, and can trigger ground heave that stresses fittings.
Untreated leaks promote mold, landscape damage, and higher water bills, making winterization and prompt repair essential.
Types of Backflow Devices Common in Residential Systems
Sprinkler backflow devices are mechanical assemblies that prevent irrigation water from flowing backward into a home’s potable supply, and recognizing the common types helps determine appropriate winter-draining steps.
Typical residential units include:
- Double check valve assemblies — two spring-loaded checks for moderate hazard zones.
- Reduced pressure zone (RPZ) — high protection, complex, requires relief valve.
- Pressure vacuum breakers — simple, aboveground, seasonal use only.
Required Tools, Materials, and Safety Precautions
A concise checklist of tools and materials, from wrenches and hoses to replacement seals, should be prepared before beginning the drain procedure.
Appropriate personal protective equipment and clear safety steps minimize injury and prevent system damage.
Finally, confirm local codes, required permits, and utility-marking procedures to guarantee the work is compliant and safe.
Tools and Materials Checklist
Preparation begins with a concise checklist of required tools, materials, and safety items to guarantee the backflow valve can be drained efficiently and without hazard.
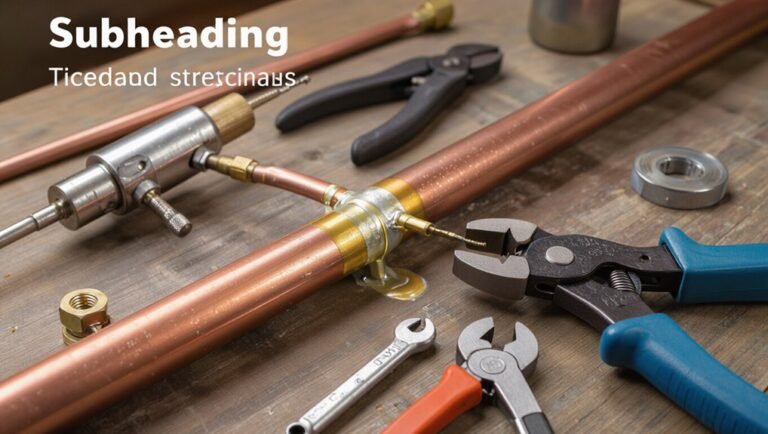
Essential items include a wrench set, bucket or hose for discharge, and drain plugs.
Recommended checklist:
- Adjustable wrench, pliers, and screwdriver.
- Drain hose, bucket, and tubing.
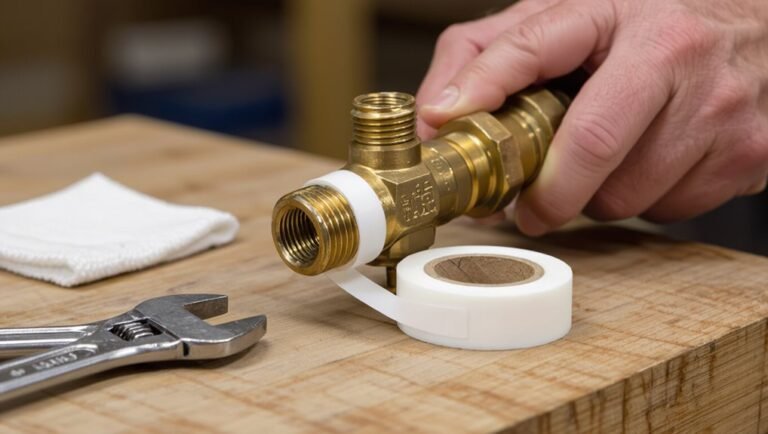
- Replacement washers and pipe tape.
Personal Protective Equipment and Safety Tips
Safety gear and clear procedures are essential when draining a backflow valve to prevent injury and system damage.
Use PPE, follow shutoff steps, and verify pressure reduction before opening components.
Recommended items:
- Gloves, safety glasses, sturdy footwear.
- Pressure gauge, adjustable wrenches, flashlight.
- Drain bucket, towels, pipe caps.
Work methodically, avoid shortcuts, and keep bystanders clear.
Local Codes, Permits, and Utility Considerations
Who requires notification and what permits apply will vary by municipality, so the technician must confirm local codes and utility rules before draining a backflow valve. Check permit requirements, seasonal drainage restrictions, and approved disposal practices. Notify water utilities when isolation or shutdowns affect service. Verify minimum setback and freeze-protection standards. Keep documentation, inspection reports, and contact information for inspectors and utility coordinators.
Quick Preparations Before You Begin
Before starting, the technician locates the backflow assembly and confirms access to all shutoff valves.
They then turn off the main supply or isolate the specific irrigation zone to prevent water flow into the valve.
Finally, system pressure is relieved using a downstream drain or bleed port to guarantee the assembly is safe to service.
Locate Your Backflow Assembly
Although the assembly can be hidden among pipes and landscaping, locating the backflow device is the essential first step: Homeowners should inspect near the main water line, meter, or irrigation manifold, checking valve boxes, concrete lids, and fenced areas.
Identify model, orientation, and access points, note surrounding obstacles, and guarantee clear, safe access for later work. Keep photos and notes for reference.
Turn Off Water Supply and Isolate the Zone
With the backflow assembly located and documented, attention shifts to shutting off the water and isolating the irrigation zone to prevent flow while work proceeds.
Close the main irrigation shutoff or zone valve feeding that backflow. Verify other valves remain closed to avoid cross‑flow.
Tag or mark the closed valve, and confirm no sprinklers or drip lines activate before draining or servicing the backflow.
Relieve System Pressure Safely
Release residual pressure in the irrigation lines by opening a downstream bleed or test cock and a high point drain, allowing air to enter and water to flow out until steady dripping stops.
Confirm all zone valves are closed and the main supply shut.
Wear eye protection, gently loosen fittings to verify no pressure remains, and keep bystanders clear while venting.
Step-by-Step Drainage Procedure
The procedure begins by shutting off the main supply to the sprinkler line and then opening test cocks and bleed valves in the specified sequence to relieve pressure.
Downstream valves are removed or opened to permit complete drainage, with compressed-air blow-out used where appropriate to expel trapped water.
Finally, the assembly is inspected for residual water and the sequence repeated as necessary until dry.
Step 1 Shut Off Main Shutoff Valve to Sprinkler Line
Locate and turn the main shutoff valve for the sprinkler line clockwise until it closes; this isolates the irrigation system from the water supply and prevents backflow during drainage.
Confirm the valve is fully seated by checking nearby fixtures or a pressure gauge. If the valve is stiff, use an appropriate tool carefully to avoid damage.
Note valve type and position for reopening.
Step 2 Open Test Cocks and Bleed Valves in Correct Order
Begin by identifying each test cock and bleed valve on the backflow assembly and adjacent irrigation lines. Then plan a clockwise sequence from the highest-pressure zone toward the lowest so water and trapped air evacuate predictably.
Then proceed methodically:
- Open highest-pressure test cock, vent until flow clears.
- Sequentially open subsequent test cocks clockwise.
- Close in reverse order once air-free and draining complete.
Step 3 Remove or Open Downstream Valves to Allow Full Drainage
Open or remove downstream valves to create an unobstructed path for water to exit the system; this guarantees trapped water in risers, lateral lines, and the backflow body can gravity-drain fully.
After isolating the supply, loosen or remove downstream gate or ball valves and any zone valves.
Verify all outlets remain open until flow stops, then reseal or reinstall components as needed for winterization.
Step 4 Use Blow-Out Method with Compressed Air (When Applicable)
With downstream valves loosened or removed to permit full drainage, the blow-out method using compressed air can be employed to expel remaining water from lateral lines and the backflow assembly when conditions and equipment allow.
A qualified operator connects an air hose to the irrigation main, increases pressure gradually (below pipe rating), pulses lines briefly, and monitors for full evacuation, avoiding sustained high pressure.
Step 5 Inspect for Remaining Water and Repeat if Needed
Verify visually and tactilely for residual water after the blow-out or drainage steps: check low points, unions, test cocks, and the backflow chamber for drips, pooled water, or moisture, and run a short compressed-air pulse or momentary valve activation again on any suspect branch until dry.
Repeat inspection after each corrective pulse. Document stubborn locations, reapply targeted air bursts, and confirm dryness before concluding.
Step 6 Protect, Insulate, or Remove Backflow Device for Winter
Frequently, homeowners must decide whether to protect, insulate, or remove the backflow device before the first hard freeze to prevent freeze damage and maintain code compliance.
Options include installing insulated covers, wrapping with heat tape rated for outdoor plumbing, or removing and storing accessible devices.
Any choice should follow local regulations, preserve test ports and seals, and secure wiring to avoid damage during winter.
Step 7 Restore System and Test in Spring
After insulating or removing the backflow device for winter, the system should be restored and tested as temperatures rise to guarantee functionality and code compliance.
Reinstall or uncover the device, close drain valves, slowly reopen supply, and check for leaks.
Purge air by running zones sequentially, inspect pressure and check valves, and schedule certified backflow testing per local regulations before regular use.
Alternative Methods and When to Use Them
The section compares gravity drainage and compressed-air blowouts, outlining their respective advantages and risks for system types and soil conditions.
It then notes that partial drainage can suffice in mild climates to reduce freeze risk while minimizing disturbance to plants and irrigation components.
Finally, it identifies scenarios—complex systems, limited homeowner tools, or high liability concerns—where professional winterization services are the safer choice.
Gravity Drain vs. Compressed Air Blow-Out Pros and Cons
When choosing between gravity drainage and compressed-air blow‑out for winterizing a sprinkler backflow, the decision hinges on system layout, risk tolerance, and available equipment; gravity drain uses natural slope to empty pipes quietly and safely but may leave low spots partially filled, while blow‑out forces water from lines more completely yet requires correct pressure control and experience to avoid damaging valves, fittings, or the backflow assembly.
| Method | Benefit | Risk |
|---|---|---|
| Gravity | Simple, no tools | Incomplete drain |
| Blow‑out | Thorough clearing | Overpressure damage |
| Hybrid | Targeted use | Requires planning |
Partial Drainage for Mild Climates
In milder climates where freezing is infrequent or brief, partial drainage offers a practical middle ground that reduces labor and equipment needs while protecting the most vulnerable components of a sprinkler backflow assembly.
It involves draining low points, isolating and insulating exposed piping, and leaving minimal residual water. This method suits short cold snaps but requires monitoring and occasional re-draining after unexpected freezes.
Professional Winterization Services When to Hire Out
Why consider a professional for winterizing a backflow assembly? A licensed technician offers expertise, proper tools, and code-compliant methods, reducing freeze, contamination, and damage risk.
Hire when installations are complex, accessible valves are frozen, local regulations demand certified service, or the homeowner lacks confidence.
Professionals provide documentation, pressure testing, and warranty protection that DIY attempts typically cannot match.
Common Problems and Troubleshooting
Common issues that can prevent a backflow valve from draining include stuck or corroded internals, incorrect alignment, and blocked drain paths, each requiring specific corrective steps.
Compressed-air procedures sometimes fail or create hazards when fittings leak, pressure regulators malfunction, or operators omit safety checks.
Leaks and damaged components discovered during drainage should be identified, isolated, and repaired or replaced before restoring system pressure.
Valve Won’t Drain Causes and Fixes
Diagnosing a sprinkler backflow valve that won’t drain begins with isolating likely mechanical and installation issues that prevent proper outlet of water.
Inspect for debris-clogged screens, stuck check or relief discs, misaligned seat seals, frozen or corroded components, and improper piping slope or closed isolation/drain valves.
Repair or replace damaged parts, clear blockages, correct alignment, and guarantee proper valve positioning to restore drainage.
Compressed Air Issues and Safety Failures
Several frequent compressed-air problems and safety failures can compromise backflow valve draining and pose injury risks if not addressed promptly.
Operators may overpressurize lines, use contaminated or oil-laden air, or bypass safety vents, causing valve damage or sudden discharge.
Faulty regulators, worn quick-connects, and absent pressure relief devices increase hazards.
Inspect fittings, verify regulator settings, and follow manufacturer safety procedures before applying air.
Leaks or Damaged Components Found During Drainage
When leaks or damaged components are discovered during drainage, the operator should stop and assess the system to prevent further water loss or worsening damage.
Inspect visible seals, fittings, and valves for cracks or corrosion. Tag defective parts, shut off supply, and drain remaining pressure.
Replace or repair components per manufacturer guidance. If unsure, contact a licensed irrigation professional to avoid contamination or code violations.
Mistakes to Avoid
Common mistakes can turn a routine drain into damage, such as over-pressurizing the assembly with compressed air.
Leaving downstream lines connected risks water hammer and unintended discharge.
Ignoring local codes or manufacturer instructions compromises safety and may void warranties.
Over-Pressurizing with Air
Avoid introducing compressed air into a backflow assembly as a quick fix: over-pressurizing can stress seals, warp valves, and force debris into downstream components.
This practice risks seal failure, misalignment, and internal damage that compromises function and creates leaks.
Proper draining uses gravity and controlled depressurization.
If air is considered, professionals should evaluate pressure limits and employ regulated, inspected equipment to avoid harm.
Forgetting to Isolate Downstream Lines
If downstream lines are not isolated before draining a sprinkler backflow valve, residual water can surge into the system, causing unexpected flooding, equipment damage, or contamination of protected zones.
Technicians should close downstream isolation valves, open drain points, and confirm sections are empty. Neglecting isolation risks soaked landscaping, corroded components, and failed tests; verify isolation visually and with pressure checks before proceeding.
Failing to Follow Local Code or Manufacturer Instructions
After confirming downstream lines are isolated and drained, technicians must also adhere strictly to local codes and the backflow manufacturer’s instructions; ignoring either can invalidate warranties, lead to failed inspections, or create unsafe conditions.
Failure to follow specified winterization, drainage, or component removal steps risks damage, liability, and inspector rejection.
Documentation of compliance protects homeowners and contractors and guarantees safe, code-compliant operation.
Prevention, Maintenance, and Best Practices
The article now turns to prevention and routine care that keep backflow valves reliable and freeze-resistant.
A concise seasonal maintenance checklist, practical insulation or enclosure options, and consistent record-keeping of dates, actions, and test results form the core of effective practices.
Clear schedules and documented history reduce emergency repairs and compliance issues.
Seasonal Maintenance Checklist
A concise seasonal maintenance checklist helps guarantee sprinkler backflow valves remain functional and safe throughout temperature and usage changes.
Inspect for leaks, corrosion, and proper labeling; test operation per local code; document service dates.
Follow a simple three-step routine:
- Visual inspection and leak check.
- Functional test and pressure verification.
- Record keeping and schedule next service.
Insulation and Enclosure Options for Backflow Preventers
Proper insulation and sturdy enclosures protect backflow preventers from freeze damage, physical impact, and tampering while simplifying routine maintenance.
Homeowners should choose insulated covers, heat tape rated for potable systems, or prefabricated insulated boxes with drainage and ventilation.
Secure, lockable enclosures resist vandalism; removable panels allow access for testing and repairs.
Materials must be weatherproof, non-toxic, and installed per local codes and manufacturer guidance.
Record-Keeping: Dates, Actions, and Test Results
Record-keeping for backflow preventers serves as a clear, auditable trail of preventive measures, maintenance actions, and test outcomes.
It should list installation and service dates, performed actions (draining, repairs, winterizing), tester name and license, measured pressures and pass/fail status, and any corrective steps.
Stores can be physical logs or digital files; retained records support compliance, troubleshooting, and warranty claims.
Cost, Time Estimates, and DIY vs. Professional Decision Factors
Typical DIY drainage of a sprinkler backflow valve can take 30–90 minutes depending on accessibility and experience.
Costs range from minimal—basic tools and materials under $50—to several hundred dollars for specialty parts or $150–300+ for a licensed plumber’s service call and labor.
A concise decision checklist weighs time, comfort with plumbing, warranty or code requirements, and signs of complex damage that justify calling a licensed professional.
Typical Time Required for DIY Drainage
A straightforward DIY backflow valve drain usually takes 20–60 minutes for someone with basic tools and a little plumbing experience; the spread depends on valve accessibility, system complexity, and whether zone drains or shutoff isolation are required.
Tasks include locating and opening drain ports, bleeding trapped water, clearing minor blockages, and re-securing caps.
More complex layouts or frozen lines increase time and caution needed.
Estimated Costs for Tools, Materials, and Pro Services
Estimate costs by grouping expenses into tools, materials, and labor so homeowners can compare DIY versus professional routes. Typical tool kit: $30–120; materials (valves, caps, sealant): $10–60; pro service: $75–250 per visit. Time and skill affect choice; low-cost fixes favor DIY, complex repairs or warranty concerns favor hiring licensed help.
| Item | Typical Cost |
|---|---|
| Tools | $30–120 |
| Pro service | $75–250 |
Decision Checklist: When to Call a Licensed Plumber
When should a homeowner call a licensed plumber instead of attempting a DIY fix? A licensed plumber is advised if leaks persist, backflow components are corroded, local codes require certification, or unfamiliar tools/tests are needed.
Consider hourly rates, emergency fees, and permit costs versus DIY time and risk.
Choose professional help for liability, complex diagnostics, or inadequate confidence in repairs.
Appendix: Manufacturer-Specific Notes and Helpful Resources
The appendix compiles sample manufacturer instructions and highlights important variations that can affect safe draining procedures.
It also provides links to local codes, permit requirements, and certification resources to guarantee compliance.
A concise glossary of terms clarifies technical language used elsewhere in the guide.
Sample Manufacturer Instructions and Important Variations
Begin by noting that manufacturers provide specific drain and winterization procedures for their backflow assemblies, and those instructions should take precedence over generic guidance.
Manufacturers often differ by model; owners should consult manuals.
Sample variations include:
- Drain plug location and removal torque.
- Required blow‑out pressure and connector type.
- Seasonal cap or insulation options.
Links to Local Codes, Permits, and Certification Requirements
After reviewing manufacturer-specific drain procedures, readers should consult local plumbing and irrigation codes, permitting offices, and certification bodies to confirm legal and safety obligations.
Provide links to municipal code pages, state plumbing boards, water utility permitting portals, and approved backflow tester lists.
Include contact info for local inspectors, permit application steps, required fees, and certification renewal criteria to verify compliance and proper documentation.
Glossary of Terms
Glossary entries clarify technical terms, symbols, and abbreviations used throughout the appendix and manufacturer notes so readers can interpret procedures, warnings, and permit requirements consistently.
Included are definitions for backflow preventer types, drain and isolation valve, check valve, vacuum breaker, nominal pipe size, pressure ratings, freeze protection, tagging requirements, calibration, and common manufacturer abbreviations.
Cross-references point to diagrams and local code citations.
Conclusion
Homeowners can drain a sprinkler backflow valve safely by following clear steps, using proper tools, and taking basic precautions; the process is straightforward but demands attention to detail. With routine maintenance and winterizing, costly damage is preventable and irrigation systems last far longer than expected—practically forever in anecdote. When unsure, consulting a professional avoids mistakes. Proper care balances time, cost, and confidence for reliable seasonal protection.