How to Check for a Cracked Heat Exchanger: 7 Signs, Tests, and When to Call a Pro
If you suspect a cracked heat exchanger in your furnace, look for these key signs: yellow or flickering flames, soot buildup, rust, increased carbon monoxide alarm activity, uneven heating, reduced performance, and frequent cycling. While you can perform simple checks like visual inspections, flame observation, and a soapy-water leak test, a definitive diagnosis typically requires combustion analysis or a borescope inspection by a certified technician. For safety and accuracy, consult a professional if you notice any of these symptoms. Continue reading for detailed tests, costs, and guidance on when to call an expert.
What a Heat Exchanger Is and Why Cracks Matter
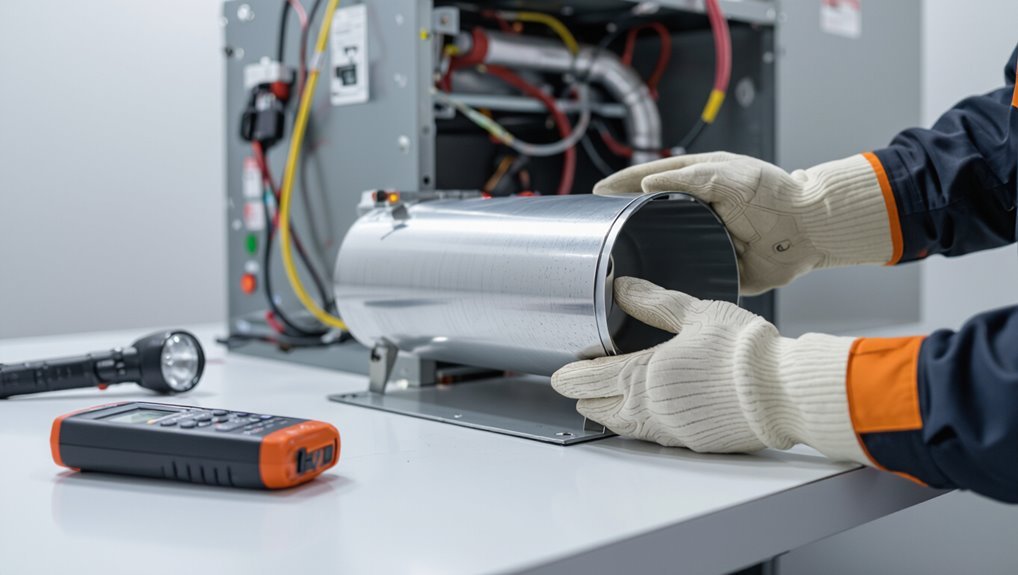
A heat exchanger is the metal chamber in a furnace or HVAC unit where combustion heat is transferred to the air or coolant while combustion gases are kept separate.
Cracks in this component commonly arise from metal fatigue, thermal stress, corrosion, or manufacturing defects. Such breaches can allow combustion gases—including carbon monoxide—to enter the conditioned air, reduce system efficiency, and lead to further equipment damage.
How a heat exchanger works in a furnace or HVAC system
Several core metal passages within a furnace or HVAC system—collectively known as the heat exchanger—transfer combustion heat to the air circulating through the home while keeping combustion gases separate from conditioned air.
It channels hot gases, conducts heat through walls, and vents exhaust safely.
Understanding this operation aids safe inspection routines and informs how to check for cracked heat exchanger before calling a professional.
Common causes of heat exchanger cracks
Understanding how the heat exchanger channels hot combustion gases and separates them from indoor air helps explain why the component can develop cracks over time.
Common causes include thermal stress from repeated heating and cooling cycles, corrosion from moisture and combustion byproducts, metal fatigue, improper manufacturing or welding defects, and physical damage from vibration or impact.
Poor maintenance and blocked airflow accelerate deterioration.
Risks of a cracked heat exchanger (CO poisoning, efficiency loss, system damage)
Because the heat exchanger separates combustion gases from the home’s air, cracks can create immediate and serious hazards: leaking combustion products—including carbon monoxide—can enter living spaces, reducing indoor air quality and posing acute poisoning risks.
Cracks also lower heating efficiency, increase fuel consumption, cause uneven heating, accelerate corrosion, and can lead to furnace component failure or unsafe shutdowns, necessitating prompt inspection and repair.
Quick Checklist: Can You Be Sure Right Now?
A quick checklist helps determine whether visible signs point to a cracked heat exchanger and whether the homeowner should act immediately.
Observable red flags include soot or rust around the burner, yellow pilot flame, and unexplained odors or CO alarm activation.
Before any inspection, the homeowner should turn off the furnace, ventilate the area, and avoid probing internal components without a qualified technician.
Immediate red flags homeowners can spot
How quickly can a homeowner spot signs of a cracked heat exchanger?
Visual cues include soot, rust, or hairline cracks around the furnace cabinet and flue.
Unusual odors (metallic or exhaust), persistent pilot outages, yellow burner flame, and soot-streaked venting are immediate red flags.
Increased carbon monoxide detector activity or unexplained illness symptoms also warrant prompt professional evaluation.
Safety precautions before inspecting
Before anyone attempts a visual inspection, the homeowner should stop the furnace, shut off the gas supply, and disconnect power to prevent ignition or electrical shock.
They must ventilate the area, avoid open flames, and wear gloves and eye protection.
Carbon monoxide detectors should be active and checked.
If corrosion, soot, or strong odors are present, evacuate and contact a licensed HVAC technician immediately.
7 Signs of a Cracked Heat Exchanger
The following signs commonly indicate a cracked or failing heat exchanger and warrant prompt attention. Each symptom affects safety or performance and should trigger further inspection.
Homeowners and technicians should treat any of these observations as a potential warning sign.
- Yellow or flickering pilot light
- Soot or black streaks on the burner or near the heat exchanger
- Unexplained rise in carbon monoxide levels or CO detector alerts
- Rust or corrosion on the heat exchanger surface
- Reduced heating performance and frequent cycling
Yellow or flickering pilot light
What does a yellow or flickering pilot light indicate about a furnace’s condition? A steady blue flame signals proper combustion; yellow or unstable flames suggest incomplete combustion, which can result from improper airflow, burner issues, or cracks allowing combustion gases to mix.
This symptom raises concern for possible heat exchanger compromise and warrants immediate inspection to rule out carbon monoxide risks and structural failure.
Soot or black streaks on burner or near heat exchanger
When soot or black streaks appear on the burner or adjacent to the heat exchanger, they signal incomplete combustion or gas leakage that can indicate a cracked exchanger. Such deposits form where combustion gases escape or burn irregularly, leaving carbon residue.
Technicians view concentrated soot as a reliable visual cue of fissures or faulty seals, prompting detailed inspection and immediate corrective action to prevent worsening damage.
Unexplained increase in carbon monoxide levels or CO detector alerts
If carbon monoxide levels rise unexpectedly or a CO detector sounds without an obvious cause, it can indicate a breach in the heat exchanger allowing combustion gases to mix with the household air.
Persistent or sporadic CO alerts warrant immediate evacuation, ventilating the space and calling emergency services.
A cracked exchanger is a likely culprit; a qualified HVAC technician should perform gas analysis and visual inspection promptly.
Rust or corrosion on the heat exchanger surface
Following unexplained CO alerts and visual inspections for obvious cracks, attention should turn to surface condition: rust or corrosion on the heat exchanger is a common early indicator of metal degradation that can precede or accompany cracking.
Corrosion appears as flaky orange or dark pitting, often near seams or welds. Any visible rust warrants further inspection and prompt professional evaluation to prevent failure and hazardous leaks.
Reduced heating performance and frequent cycling
Noticeable drops in heat output and a furnace that cycles on and off more frequently often signal underlying issues with the heat exchanger.
Reduced efficiency can indicate cracks allowing heat loss or impaired airflow from partial obstruction.
Short cycling stresses components, raises energy use, and prevents adequate home warming.
Persistent performance decline merits inspection by a qualified technician to diagnose and address heat exchanger integrity.
Unusual odors when the system runs
A furnace that begins producing unusual smells when running can indicate more than simple dust burning off; persistent acrid, metallic, or rotten-egg odors may point to combustion gases escaping through a cracked heat exchanger.
Such smells often accompany headaches, nausea, or dizziness in occupants.
Prompt investigation is advised: a professional should perform combustion gas testing and carbon monoxide checks rather than relying solely on scent.
Visible cracks or holes during visual inspection
Direct observation of the heat exchanger can reveal hairline fractures, rusted-through areas, or distinct holes where metal has deteriorated.
Photographic documentation and good lighting help identify thin cracks or pinholes.
Visible breaches often coincide with soot streaks, corrosion, or warped surfaces.
Any observed openings warrant immediate shutdown and professional evaluation, as they indicate combustion gas leakage and compromised safety.
How to Perform Basic Home Tests Safely
The homeowner can begin with simple, cautious checks to identify signs of a cracked heat exchanger before calling a professional.
Emphasis is placed on safe observation, basic leak detection, and using tools to inspect hard-to-see areas without interfering with the appliance.
Any uncertainty or evidence of combustion gas should prompt immediate shutdown and a service call.
- Visual inspection steps and what to look for
- Soapy water leak test for combustion gasses (precautions)
- Flame observation test for combustion irregularities
- Using a mirror or borescope for hard-to-see areas
- When to stop and contact a qualified technician
Visual inspection steps and what to look for
How should one approach a visual inspection for a cracked heat exchanger to maximize safety and accuracy?
One should power down and wait for cool-down, remove access panels, and use a strong flashlight and mirror to inspect seams, welds, and tubes for hairline cracks, rust, soot streaks, or deformation.
Note unusual odors or corrosion; document findings and avoid internal probe manipulation.
Soapy water leak test for combustion gasses (precautions)
Begin by ensuring all power to the appliance is off and the unit has cooled; then mix a mild soap solution and apply it sparingly to accessible joints and fittings where combustion gases might escape.
Observe for steady bubbles indicating leaks. Avoid inhaling fumes, wear eye protection and gloves, ventilate the area, and do not test near open flames.
If bubbles appear, stop and call a qualified technician.
Flame observation test for combustion irregularities
Several simple visual checks can reveal combustion irregularities by observing the burner flame for color, shape, and stability.
The observer notes a steady blue flame as normal; yellow, flickering, lifting, or sooty flames indicate incomplete combustion or airflow issues.
Perform only while equipment is accessible and cold-to-touch controls are safe.
If abnormal flames appear, stop use and contact a qualified HVAC technician immediately.
Using a mirror or borescope for hard-to-see areas
When direct sightlines are blocked, a small mirror or borescope allows inspection of hidden furnace areas without disassembly.
The inspector inserts the tool through access panels or gaps, scanning heat exchanger seams, combustion chamber walls, and flue connections for cracks, soot, or corrosion.
Use a flashlight, record findings, avoid touching components, power down the unit first, and call a technician for suspicious signs.
Professional Diagnostic Tests and Tools
Technicians rely on specialized diagnostics to confirm a cracked heat exchanger and to pinpoint leaks or combustion issues. Below is a quick reference of common professional tests and what they reveal:
| Test/Tool | Purpose/Notes |
|---|---|
| Combustion gas analyzer | Measures CO, CO2, O2; elevated CO or abnormal combustion ratios indicate sealing or heat-exchange problems |
| Pressure/vacuum testing | Pressurizes or evacuates sections to reveal leaks under controlled conditions |
| Dye penetrant & electronic leak detection | Identifies surface cracks and active leaks using dyes or tracer gases |
| Borescope inspection vs. disassembly | Borescope offers minimally invasive visual checks; disassembly gives full access but is more time-consuming and costly |
A licensed technician chooses the appropriate combination of these methods based on symptoms, safety, and the unit’s accessibility.
Combustion gas analysis what it measures and expected results
Although combustion gas analysis requires specialized instruments, it provides precise measurements of flue gas composition and burner performance that directly indicate combustion quality and potential heat exchanger issues.
Technicians measure O2, CO, CO2, stack temperature, and draft to evaluate combustion efficiency and incomplete combustion. Elevated CO, abnormal O2/CO2 ratios, or high stack temperatures suggest combustion problems or leakage pathways warranting further inspection or repair.
Pressure and vacuum testing when technicians use them
Combustion gas readings that hint at leakage or poor airflow often prompt further mechanical verification using pressure and vacuum testing.
Technicians isolate the heat exchanger, apply controlled pressure or vacuum to measure integrity, and monitor for drops indicating leaks or sealed faults.
Results confirm whether cracks communicate with combustion or vent pathways, guiding repair or replacement decisions and ensuring safe operation before returning the system to service.
Dye penetrant and leak detection methods
Inspecting with dye penetrant and leak-detection methods provides a targeted way to reveal hairline cracks and hidden fissures that pressure testing might miss.
Technicians apply fluorescent or visible dye, allow penetration, clean surfaces, then use UV or developer to spot breaches.
Complementary gas or bubble leak detectors detect escaping refrigerant or combustion gases.
Results guide repair decisions and confirm containment integrity.
Borescope inspection vs. disassembly pros and cons
After using dye penetrant and leak-detection methods to pinpoint likely problem areas, technicians must choose between borescope inspection and full disassembly to confirm and evaluate damage.
Borescopes are minimally invasive, quick, and cost-effective but limited by access, field of view, and inability to repair.
Disassembly provides complete visual and measurement access, higher accuracy, and repair opportunity but is time-consuming, costly, and risks assembly errors.
Interpreting Test Results and Severity Levels
Test results should be evaluated to distinguish minor hairline cracks from major structural breaches, as the latter pose immediate safety risks.
The technician should determine whether a detected crack is repairable—often using welding, brazing, or section replacement—or whether common repair methods would be inadequate.
When integrity is compromised beyond safe repair, replacement of the heat exchanger is the only responsible option.
Minor hairline cracks vs. major structural breaches
Distinguishing minor hairline cracks from major structural breaches hinges on observable evidence and measured test results: hairline cracks typically appear as thin, often barely visible fissures that may only show up under dye, pressure decay, or combustion-gas analysis and usually allow limited leakage.
Whereas major breaches present as widened gaps, deformation, or fractures that permit significant gas or fluid escape and indicate imminent failure or unsafe operation.
Small cracks often warrant monitoring; major breaches require immediate shutdown and professional assessment.
When a crack is repairable and common repair methods
Several factors determine whether a heat exchanger crack is repairable, including crack size and location, material type, thermal cycling history, and the results of diagnostic tests such as dye penetrant, pressure decay, and combustion-gas analysis.
Small, accessible surface cracks in ductile materials with minimal corrosion often suit welding, brazing, epoxy injection, or mechanical patching.
Post-repair testing and monitoring guarantee integrity before returning to service.
When replacement is the only safe option
When diagnostic results indicate extensive material loss, through-wall cracking, or multiple active leak paths, replacement becomes the only safe option.
Technicians should document findings, prioritize occupant safety, and cease appliance operation.
Replacement is mandated when corrosion, distortion, or failed welds compromise containment or combustion integrity.
Post-replacement testing and proper ventilation verification guarantee hazards are eliminated and the system meets code and manufacturer standards.
When to Call a Professional Immediately
If test results suggest carbon monoxide, visible cracks, or strong fumes, the system should be shut off and occupants evacuated immediately.
A qualified HVAC professional or certified combustion technician should then be contacted to assess and repair the unit.
The inspection typically includes visual examination, pressure and combustion testing, and a written report with recommended repairs or replacement.
Emergency signs that require shutting off the system
Recognize immediate danger signs and shut the system off at the breaker; if occupants experience dizziness, nausea, headaches, or fainting, evacuate and cut power.
Also power down if soot, persistent pilot outages, unusual gas odors, visible cracks, flames inside the cabinet, or excessive carbon monoxide alarm readings occur.
Contact emergency services and HVAC support once the area is safe.
Choosing the right HVAC professional or certified technician
After powering down and securing the area for any immediate hazards, homeowners should know which situations demand an experienced HVAC professional immediately.
Signs include suspected carbon monoxide exposure, visible furnace damage, unusual combustion odors, persistent pilot or ignition failures, or rapid pressure or flame abnormalities.
Select technicians with NATE certification, EPA Section 608 credentials, liability insurance, clear references, and documented gas appliance experience.
What to expect during a professional inspection
When a homeowner calls for a suspected cracked heat exchanger, a qualified technician will perform a systematic inspection that prioritizes safety and source identification: the technician checks for combustion odors, visual cracks, corrosion, and soot; measures carbon monoxide and flue draft; inspects burners, heat exchanger seams, and pressure switches; documents findings, explains risks, and recommends repair, replacement, or immediate shutdown if CO levels or structural damage are critical.
Cost Estimates and Decision Factors
Typical cost ranges for repairing a cracked heat exchanger versus full replacement are outlined to help weigh immediate expenses against long-term value.
Age and expected remaining lifespan of the furnace are key factors in determining whether repair is economical or replacement is more prudent.
Warranty status, local code requirements, and safety compliance can also affect both cost and the decision to replace rather than repair.
Typical repair vs. replacement cost ranges
Cost considerations for a cracked heat exchanger hinge on the extent of damage, the age and model of the furnace, and local labor rates.
Minor welds or section repairs typically range from $300–$900.
Extensive cracks or inaccessible exchangers push costs toward $1,200–$3,500, often making full replacement more economical.
Always include inspection fees and permits when estimating final expenses.
Lifespan considerations and age-related guidance
Although a cracked heat exchanger can sometimes be repaired, the unit’s age is a primary determinant of whether repair or replacement is the prudent financial choice.
Older furnaces (15+ years) typically justify replacement due to declining efficiency and higher failure risk.
Mid-life units may merit repair if remaining service years and repair cost align; newer systems generally favor repair when feasible.
Warranty, code, and safety compliance implications
After considering age and remaining service life, warranty status, local building codes, and safety regulations become central to the repair-versus-replace decision.
Warranty coverage may limit options or require authorized technicians. Code requirements can mandate replacement for certain cracks or CO risks.
Documentation and permits protect homeowners; noncompliance risks voiding insurance, fines, or liability.
Prioritize certified inspections and contractor-provided compliance paperwork.
Preventive Maintenance to Avoid Future Cracks
Preventive maintenance reduces the risk of heat exchanger cracks by addressing wear factors before they worsen. A focused program should cover inspection frequency, airflow and combustion checks, filter care, and operational habits that minimize stress.
Clear, consistent procedures help extend equipment life and simplify troubleshooting.
- Establish a regular inspection schedule covering visual checks, leak tests, and combustion analysis.
- Verify and balance airflow to prevent hot spots and uneven heating.
- Perform routine filter replacement and duct cleaning to maintain proper circulation.
- Inspect and tune combustion components to guarantee correct fuel/air ratios and stable flame.
- Adopt environmental and operational practices (ventilation, temperature limits, and fuel quality) that reduce corrosion and thermal cycling.
Regular inspection schedule and what to include
When establishing a regular inspection schedule for a heat exchanger, technicians should set fixed intervals based on manufacturer recommendations, operating hours, and environmental conditions to catch early signs of stress or corrosion.
Inspections should document visual checks for cracks, corrosion, and weld integrity; measure material temperatures and pressure differentials; record leakage tests; note vibration or misalignment; and maintain a dated log for trend analysis and corrective actions.
Airflow, combustion, and filter maintenance tips
Maintain ideal airflow, precise combustion, and clean filters to reduce thermal stress and corrosion that can initiate cracks in a heat exchanger.
Ascertain vents and ducts are unobstructed, replace or clean filters per manufacturer recommendations, verify blower operation, and confirm proper fuel-to-air ratio with professional tuning.
Monitor pressure differentials and flame appearance; address deviations promptly to prevent uneven heating and premature metal fatigue.
Environmental and operational practices that extend life
Building on proper airflow, combustion settings, and filter care, a program of environmental and operational practices further prolongs heat exchanger life by minimizing stressors that cause cracking.
Regularly controlling indoor humidity, preventing corrosive fumes near units, stabilizing thermostat setpoints to reduce thermal cycling, scheduling seasonal inspections, and documenting operational anomalies reduce fatigue.
Promptly addressing fuel quality and ventilation issues prevents accelerated deterioration.
Sample Inspection Checklist for Homeowners
A concise checklist helps a homeowner prepare for a safe and effective inspection of a suspected cracked heat exchanger. It should cover basic safety precautions, a few clear visual and simple diagnostic checks to record, and the key information to relay to a technician.
The list below offers five practical items to guide that process.
- Shut off power and gas, confirm adequate ventilation, and use protective gloves and eyewear.
- Inspect for visible cracks, rust, scale buildup, and soot around the heat exchanger and burner area.
- Perform simple tests such as a steady flame check, pilot stability, and a short combustion odor check while noting results.
- Record furnace age, service history, recent symptoms (smells, soot, yellow flame), and any unusual cycling.
- Photograph findings, log dates/times, and prepare a concise summary for the technician.
Pre-inspection safety steps
Before beginning any inspection, the homeowner should secure basic safety measures to reduce risk: shut off power to the furnace at the breaker, close the gas supply valve if applicable, and confirm the area around the unit is well-lit and free of obstructions.
The inspector should wear safety glasses and gloves, verify carbon monoxide detectors function, ventilate the space, and keep a phone nearby to summon help if hazards are discovered.
Step-by-step visual and simple tests to record
With safety measures in place, the inspector can proceed to a systematic visual and basic-functional check that homeowners can record.
Inspect external surfaces for cracks, soot, or warped metal; photograph findings.
Run the furnace briefly, note unusual smells, flames, or cycling.
Check combustion chamber access for corrosion.
Record pilot behavior, burner color, and venting condition.
Timestamp entries and preserve notes for technician review.
Information to provide to a technician for faster diagnosis
When preparing for a technician visit, homeowners should compile a concise, time-stamped checklist of observed symptoms, test results, and photo or video evidence so the technician can prioritize diagnostics and bring appropriate tools or replacement parts.
Include furnace model, age, recent maintenance, error codes, odor descriptions, condensation or soot locations, CO detector readings, flame color, thermostat settings, and whether symptoms are constant or intermittent.
Additional Resources and Reference Tools
The article points readers to recommended CO detectors and monitoring equipment suited for homes with older furnaces.
It also supplies links to manufacturer guidance, applicable codes, and safety agency resources for proper interpretation.
Finally, it outlines when to seek a second opinion and how to document inspection findings for follow-up or professional review.
Recommended CO detectors and monitoring equipment
Because carbon monoxide leaks from a cracked heat exchanger can be odorless and lethal, selecting reliable detectors and monitoring equipment is essential for early warning and ongoing safety.
- Plug-in CO alarm with battery backup for living areas
- Digital CO monitor with peak memory and numeric readout
- Combination smoke/CO units on each level
- Smart Wi‑Fi CO detectors with app alerts
- Portable CO test meters for technicians
Links to manufacturer guidance, codes, and safety agencies
Where should professionals and homeowners turn for authoritative information on cracked heat exchangers?
Refer to primary sources for standards, troubleshooting, and safety protocols:
- Manufacturer installation and service manuals
- National and local building codes (e.g., mechanical codes)
- Occupational Safety and Health Administration (OSHA) guidance
- Consumer Product Safety Commission (CPSC) notices
- American Society of Heating, Refrigerating and Air-Conditioning Engineers (ASHRAE) publications
When to seek a second opinion and how to document findings
When should a second opinion be sought after an initial inspection indicates a possible cracked heat exchanger? A second opinion is advised if diagnoses conflict, test results are inconclusive, safety risks exist, or repair estimates vary considerably.
Document dates, inspector names, methods, findings, photos, and invoices. Maintain copies for warranty, insurance, or regulatory review.
Share records with the second evaluator for consistency.
Conclusion
The investigation into cracked heat exchangers reveals unsettling truths: unseen fractures can quietly jeopardize safety, efficiency, and finances. When homeowners confront mounting clues—odors, soot, fluctuating performance—the theory that a small, hidden defect can escalate into toxic risk proves accurate. This realization compels decisive action: testing, timely professional assessment, and preventive maintenance. Acknowledging vulnerability transforms apprehension into empowerment, motivating responsible care that protects household well‑being and prevents costly, dangerous outcomes.